Introduction
Cinnamon rolls are more than just a delicious treat; they are a beloved staple in many cultures around the world, often associated with warmth, comfort, and home. Originating from ancient times, these sweet rolls have become a cherished part of breakfast and dessert menus, transcending borders and traditions. Whether enjoyed on a cozy winter morning, served at a festive gathering, or simply indulged in as an afternoon snack, cinnamon rolls hold a special place in our hearts and taste buds.
This recipe for The Ultimate Cinnamon Rolls Delight elevates the humble cinnamon roll to new heights, offering a homemade experience that is truly unparalleled. From the rich, buttery dough to the luscious filling and creamy frosting, each bite is a delightful harmony of flavors and textures. What makes this recipe special is not just the taste but also the joy of baking it yourself. The process of mixing, kneading, and rolling dough can be therapeutic, while the aroma of cinnamon wafting through your home is enough to make anyone’s mouth water.
We encourage you to gather your family and friends and embark on this culinary adventure. Baking these cinnamon rolls together can create lasting memories and bring loved ones closer, all while enjoying the sweet rewards of your labor. So, roll up your sleeves, preheat your oven, and let’s dive into the delightful world of homemade cinnamon rolls!
The Allure of Homemade Cinnamon Rolls
Imagine waking up to the warm, intoxicating aroma of cinnamon rolls baking in the oven. The sensory experience of enjoying a freshly baked cinnamon roll is unparalleled. As you pull them out of the oven, the golden-brown swirls glisten with buttery goodness, promising a melt-in-your-mouth experience. The first bite reveals a fluffy, tender texture that contrasts beautifully with the sweet, sticky filling, creating a symphony of flavors that dance on your palate.
While store-bought cinnamon rolls may offer convenience, they often lack the freshness and depth of flavor that homemade versions provide. The effort involved in making cinnamon rolls from scratch is well worth it. From the moment you mix the ingredients to the final drizzle of frosting, you’re crafting something unique and special. Store-bought alternatives can’t replicate the sense of accomplishment that comes from creating a batch of cinnamon rolls in your own kitchen.
Baking is not just about the end product; it’s about the experience. The act of preparing food has the power to evoke memories and create connections. Whether it’s reminiscing about childhood mornings spent in the kitchen with a parent or creating new traditions with your own family, the emotional ties that come with baking are profound. Cinnamon rolls, with their irresistible aroma and comforting taste, are the perfect catalyst for these cherished moments.
Ingredients Breakdown
To create The Ultimate Cinnamon Rolls Delight, it’s essential to understand the roles of each ingredient in the recipe. This knowledge not only helps you appreciate the baking process but also empowers you to make adjustments or substitutions as needed.
Dough
The foundation of a great cinnamon roll is its dough, which consists primarily of flour, yeast, sugar, milk, eggs, and butter.
– Flour: All-purpose flour is typically used in cinnamon roll recipes, providing the necessary structure and chewiness. The gluten in the flour is what gives the dough its elasticity, allowing it to rise beautifully.
– Yeast: Active dry yeast is crucial for leavening the dough. When activated with warm water and sugar, yeast ferments, producing carbon dioxide that causes the dough to rise. This creates the airy, fluffy texture we all love in homemade cinnamon rolls.
– Sugar: Sugar not only sweetens the dough but also helps with browning during baking, contributing to the rolls’ golden appearance.
– Milk: Milk hydrates the dough and adds richness, resulting in a softer texture. You can use whole, low-fat, or even non-dairy milk, depending on your preference.
– Eggs: Eggs enrich the dough, providing moisture and color. They also help bind the ingredients together.
– Butter: Melted butter adds flavor and creates a tender crumb. It also plays a significant role in the filling, ensuring every bite is indulgent.
Filling
The filling is where the magic happens, transforming simple dough into a cinnamon-swirled delight.
– Brown Sugar: Brown sugar is a key ingredient that adds sweetness and enhances the caramel flavor profile. The molasses in brown sugar brings depth, making the filling more complex and flavorful.
– Cinnamon: The star of the show, ground cinnamon, provides the signature flavor that defines cinnamon rolls. Its warm and spicy notes are what make each bite comforting and nostalgic.
– Optional Ingredients: You can elevate your filling by adding finely chopped nuts (like pecans or walnuts), raisins, or even chocolate chips for a decadent twist. These additions add texture and flavor, making your cinnamon rolls uniquely yours.
Frosting
No cinnamon roll would be complete without a generous drizzle of frosting, and cream cheese frosting is the perfect complement.
– Cream Cheese: Cream cheese adds a tangy flavor that balances the sweetness of the rolls. It also gives the frosting a rich and creamy texture.
– Powdered Sugar: Powdered sugar sweetens the frosting and helps achieve a smooth consistency. You can adjust the amount based on your sweetness preference.
– Vanilla Extract: A splash of vanilla extract enhances the overall flavor profile, making the frosting even more irresistible.
– Milk or Cream: A little milk or cream can be added to adjust the frosting’s consistency, ensuring it spreads easily over your warm cinnamon rolls.
Preparing the Dough: The Foundation of Great Cinnamon Rolls
Now that we’ve covered the essential ingredients, it’s time to delve into the process of preparing the dough. This step is crucial, as it sets the stage for your cinnamon rolls’ final texture and flavor.
Activating Yeast
The first step in making the dough is to activate the yeast. This is a critical process that ensures your rolls rise properly.
1. Warm the Liquid: Start by warming your milk to about 110°F (43°C). It should feel warm to the touch but not hot. Too much heat can kill the yeast, while too little will not activate it.
2. Add Sugar: Stir in a teaspoon of sugar into the warm milk. This not only feeds the yeast but also helps it to wake up.
3. Sprinkle the Yeast: Sprinkle the active dry yeast over the warm milk mixture and let it sit for about 5 to 10 minutes until it becomes frothy. This indicates that the yeast is alive and ready to work its magic in your dough.
Measuring Flour Accurately
Accurate measurement of flour is vital for achieving the right dough consistency. Too much flour can lead to dry rolls, while too little can result in a sticky mess.
– Use the Spoon and Level Method: Instead of scooping flour directly from the bag with a measuring cup, use a spoon to fluff the flour in the bag. Then, spoon it into the measuring cup and level it off with a knife. This method provides a more accurate measurement.
– Consider the Environment: Humidity and altitude can affect flour measurements. If you live in a particularly humid area, you may need to reduce the flour slightly to avoid a sticky dough.
Kneading Techniques
Once your ingredients are combined, it’s time to knead the dough. Kneading develops the gluten, which gives the dough structure and elasticity.
1. Kneading by Hand: Turn the dough out onto a lightly floured surface. With floured hands, fold the dough over itself and push it down and away with the heel of your hand. Turn it a quarter turn and repeat. Knead for about 8 to 10 minutes until the dough is smooth and elastic.
2. Kneading with a Mixer: If you have a stand mixer, use the dough hook attachment. Mix on low speed until the dough comes together, then increase to medium speed for about 5 minutes until smooth.
3. Testing for Readiness: To check if your dough is ready, perform the “windowpane test.” Take a small piece of dough and stretch it between your fingers. If it forms a thin, translucent membrane without tearing, it’s ready for the first rise.
The Importance of the First Rise
After kneading, it’s time to let the dough rise. This step allows the yeast to ferment, developing flavor and texture.
1. Shape the Dough: Form the dough into a ball and place it in a lightly greased bowl, turning it to coat all sides with oil.
2. Cover and Rise: Cover the bowl with a clean kitchen towel or plastic wrap to keep it warm and draft-free. Allow it to rise in a warm environment for about 1 to 2 hours, or until it has doubled in size.
3. Understanding Fermentation: During this rise, the yeast consumes the sugars in the dough, producing carbon dioxide. This process not only leavens the dough but also enhances its flavor.
Crafting the Perfect Filling
With the dough ready, it’s time to craft the perfect filling that will transform your rolls into cinnamon-swirled masterpieces.
Mixing the Filling
Creating the filling is simple but requires attention to detail to achieve the ideal balance of flavors.
1. Combine the Ingredients: In a medium bowl, mix together brown sugar and ground cinnamon. The typical ratio is about 1 cup of brown sugar to 2 tablespoons of cinnamon, but feel free to adjust based on your taste preferences.
2. Enhancing Flavors: For an extra layer of flavor, consider adding a pinch of salt, or even a touch of nutmeg or allspice. These spices can enhance the warmth of the cinnamon, making your rolls even more aromatic.
Customizing Your Filling
One of the joys of making cinnamon rolls at home is the ability to customize the filling to your liking.
– Nuts: Chopped pecans or walnuts can add a delightful crunch and nutty flavor. Toast them lightly in a dry skillet before adding them to the filling for enhanced flavor.
– Dried Fruits: Consider incorporating raisins, dried cranberries, or even chopped dried apricots for a fruity twist.
– Chocolate: For chocolate lovers, adding mini chocolate chips to the filling creates a deliciously indulgent variation.
Spreading the Filling Evenly
Once you’ve prepared your filling, it’s time to roll out the dough and spread the mixture.
1. Rolling Out the Dough: After the first rise, turn the dough out onto a lightly floured surface. Roll it into a rectangular shape, about 16×12 inches, ensuring an even thickness.
2. Applying the Filling: Melt a few tablespoons of butter and brush it generously over the rolled-out dough. This not only adds flavor but also helps the filling adhere.
3. Sprinkling the Mixture: Evenly sprinkle the cinnamon-sugar mixture over the buttered dough, leaving a small border around the edges to prevent spillage when rolling.
4. Final Touches: Gently press the filling into the dough with your hands to ensure it sticks, setting the stage for beautifully swirled cinnamon rolls.
As you progress through this recipe, you’ll be treating yourself and your loved ones to a delightful experience that goes beyond just the taste of cinnamon rolls. The process of baking is an opportunity to bond with those around you, creating memorable moments that will last a lifetime. So, enjoy each step, and get ready for a sweet reward!
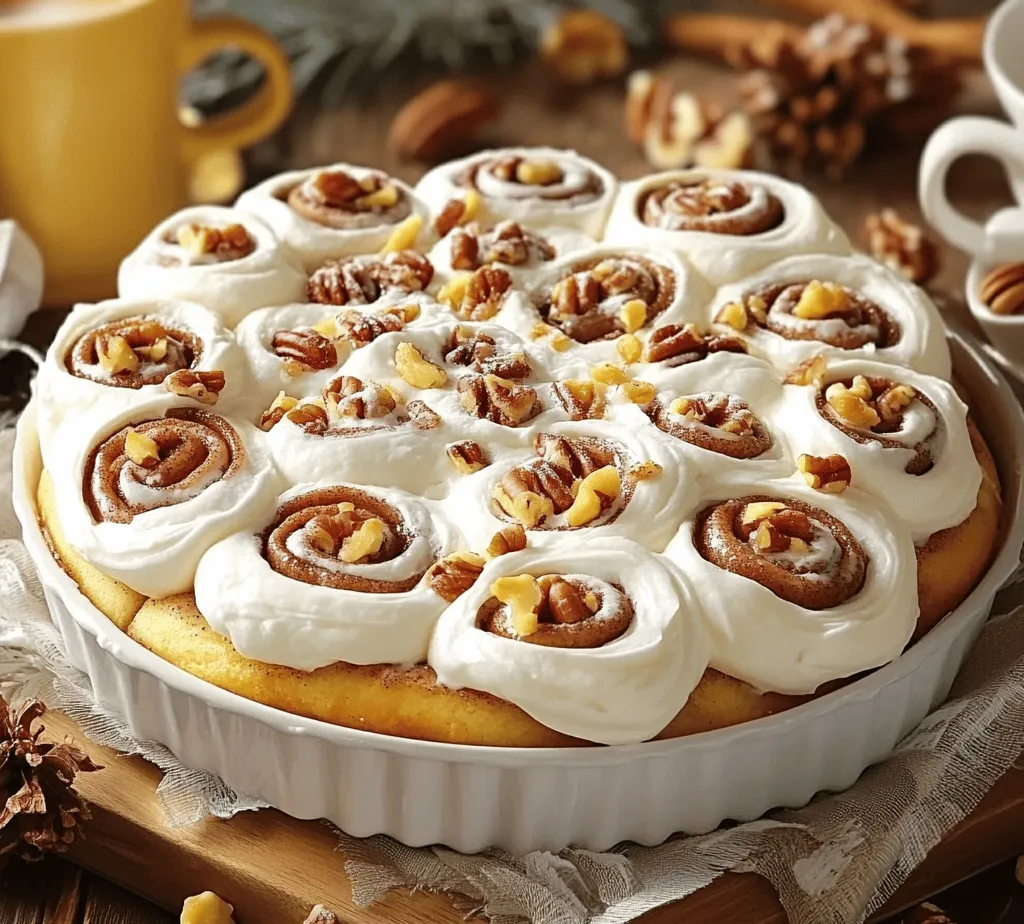
Shaping Your Cinnamon Rolls: Techniques for Success
Rolling Out the Dough: Ideal Thickness and Tips for a Uniform Rectangle
Once your cinnamon roll dough has completed its first rise, it’s time to roll it out. Start by lightly flouring your work surface and your rolling pin to prevent sticking. The goal here is to achieve a uniform rectangle about ¼ inch thick. This thickness is key; if it’s too thin, the rolls may not have the desired fluffiness, while if it’s too thick, you may end up with doughy centers.
To create a uniform rectangle, begin by gently pressing the dough into a flat disc with your hands. Then, using your rolling pin, start rolling from the center outward. Keep turning the dough 90 degrees after each roll to maintain a rectangular shape. If the dough begins to spring back, let it rest for a few minutes to relax the gluten. This will make it easier to roll out further.
The Rolling Process: How to Create Tight Rolls for Better Structure
With your dough rolled into a perfect rectangle, it’s time to apply your cinnamon filling. Spread a generous layer of softened butter over the surface, leaving a small border around the edges. Next, evenly sprinkle your cinnamon sugar mixture across the buttered surface. For added flavor, consider mixing in finely chopped nuts or raisins at this stage.
The next step is crucial: rolling the dough tightly from one long edge. Starting at the edge closest to you, lift the dough gently and begin to roll it away from you, tucking it in as you go. A tight roll is essential as it helps the cinnamon rolls maintain their shape during baking. Once you’ve reached the end of the dough, pinch the seam to seal it. If you want to be extra precise, you can use a bench scraper to slice the edge off before rolling, ensuring a neat finish.
Cutting Techniques: Ensuring Even Slices for Uniform Baking
Now that your dough is rolled, it’s time to cut it into individual rolls. The best way to do this is to use a sharp knife or dental floss (unflavored) for a clean cut. If using a knife, make a gentle sawing motion rather than pressing down hard, which can squish the rolls and affect their rise.
Aim for about 1.5 inches per slice, which will give you the classic cinnamon roll size. After cutting, place the rolls in a greased baking dish, ensuring they’re close together but not squished. This allows them to rise and bake evenly, creating those signature soft edges.
The Second Rise: Building Texture and Flavor
Importance of the Second Rise: How It Affects the Final Texture of the Rolls
The second rise is a critical step in achieving the soft, fluffy texture that everyone loves in cinnamon rolls. This rise allows the yeast to continue fermenting, which not only helps in the development of flavor but also creates air pockets that contribute to a light and airy texture.
During this phase, the rolls should nearly double in size. This usually takes about 30 to 45 minutes. Keep an eye on them; if they’re puffy and have expanded significantly, they’re ready for baking. Be cautious not to rush this step, as under-proofed rolls can lead to a dense final product.
Ideal Conditions for Rising: Temperature and Environment Considerations
For the best results during the second rise, place your rolls in a warm, draft-free environment. An oven preheated to its lowest setting for a few minutes can create an ideal rising area. Once warmed, turn off the oven and place the covered rolls inside. Alternatively, you can let them rise on your countertop, covered with a damp cloth or plastic wrap.
If your kitchen is particularly cold, consider placing the rolls near a warm window or next to a heating vent. Just be sure to monitor them closely, as conditions can vary greatly depending on the season and your home’s heating.
Baking Your Cinnamon Rolls to Perfection
Preheating the Oven: Why It Matters for Optimal Baking
Preheating your oven is an essential step in baking cinnamon rolls. An oven that is not fully preheated can result in uneven baking and undesirable textures in your rolls. Aim for a temperature of 350°F (175°C), which is ideal for achieving that golden-brown color while keeping the center soft and fluffy.
To ensure your oven is at the right temperature, consider investing in an oven thermometer. This small tool can help you avoid common baking pitfalls due to inaccurate oven settings.
Baking Tips: How to Know When Your Rolls Are Perfectly Golden and Cooked Through
When the rolls are done rising, it’s time to bake. Place the baking dish in the preheated oven and set a timer for about 20 to 25 minutes. Keep an eye on the rolls as they bake; they should turn a beautiful golden brown. A good test for doneness is to gently tap the top of a roll; it should sound hollow. Additionally, you can use an instant-read thermometer; the internal temperature should reach around 190°F (88°C) for perfectly cooked rolls.
Understanding Baking Times and Temperature Adjustments Based on Oven Types
Every oven is a little different, so it’s essential to understand how yours behaves. Conventional ovens may require a slight adjustment in temperature or time compared to convection ovens, which tend to bake more quickly and evenly. If using a convection oven, reduce the temperature by about 25°F (about 15°C) and check for doneness a few minutes earlier than suggested.
Creating the Cream Cheese Frosting: A Velvety Finish
Ingredients and Their Roles in the Frosting: Achieving the Right Consistency and Flavor
No cinnamon roll is complete without a luscious cream cheese frosting. To make this delightful topping, you’ll need:
– 8 oz cream cheese, softened
– 1/4 cup unsalted butter, softened
– 2 cups powdered sugar
– 1 teaspoon vanilla extract
– A pinch of salt
The cream cheese adds a tangy richness that balances the sweetness, while the butter contributes to a velvety texture. The powdered sugar sweetens the frosting without making it overly heavy, and the vanilla extract enhances the overall flavor.
Tips for Achieving a Smooth Frosting: Techniques for Mixing and Adjusting Consistency
To achieve a smooth consistency, begin by beating the softened cream cheese and butter together until fluffy. Gradually add the powdered sugar, mixing on low speed to prevent a sugar cloud. Once incorporated, add the vanilla and salt, then increase the speed to medium until you reach a creamy texture.
If your frosting seems too thick, add a teaspoon of milk at a time until you reach your desired consistency. Conversely, if it’s too thin, add more powdered sugar until it thickens up.
Creative Variations for Frosting: Adding Flavors or Decorative Elements
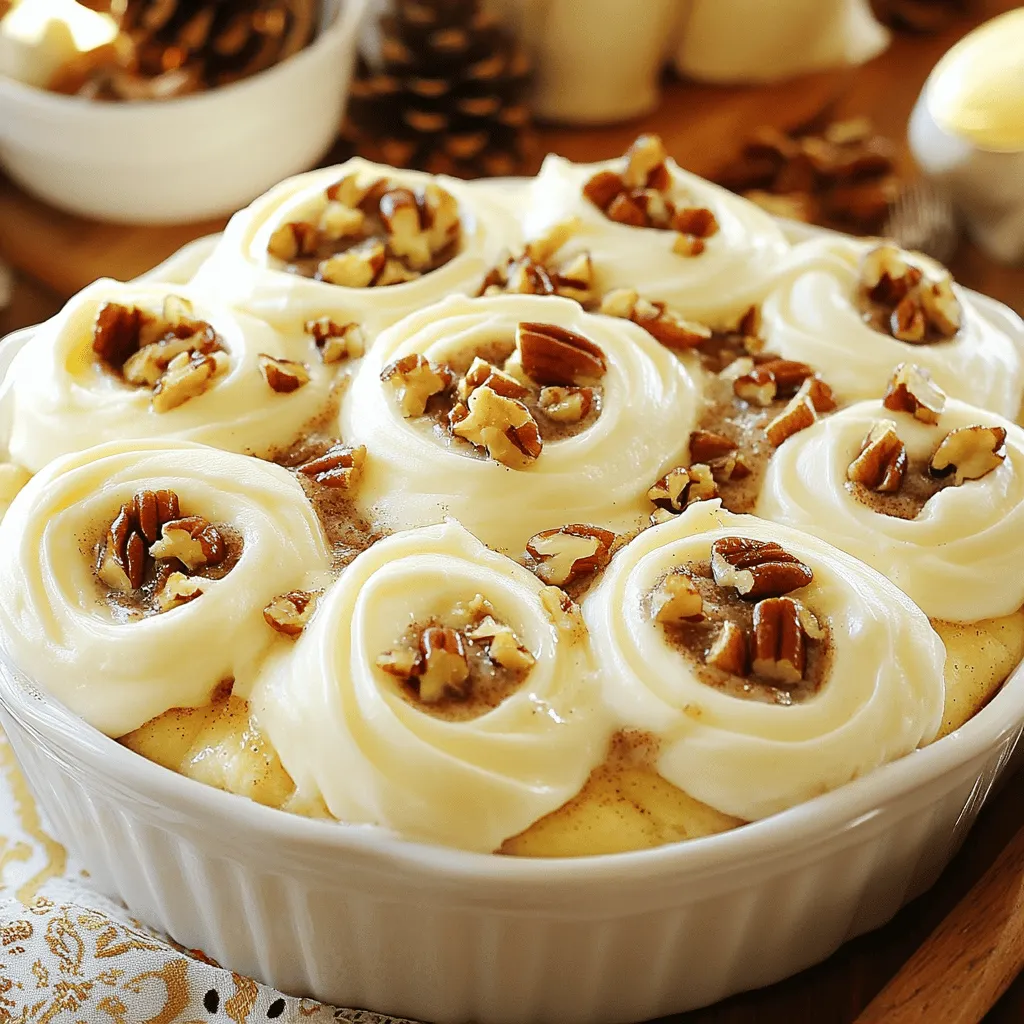
While the classic cream cheese frosting is a favorite, don’t hesitate to get creative! Consider adding a tablespoon of lemon juice or zest for a citrusy twist, or use maple syrup instead of vanilla for a unique flavor profile. For a festive touch, sprinkle some cinnamon or chopped nuts on top of the frosting for added texture and visual appeal.
Serving Suggestions and Pairings
How to Serve Cinnamon Rolls: Warm vs. Room Temperature and Presentation Tips
Cinnamon rolls are best enjoyed warm, right out of the oven. However, they can also be served at room temperature if you’re preparing them ahead of time. To present your rolls beautifully, consider using a large platter or a cake stand, drizzling the cream cheese frosting generously over the top, and garnishing with a sprinkle of cinnamon or nuts.
If you want to elevate your brunch game, serve the rolls alongside fresh fruit, whipped cream, or a drizzle of caramel sauce for an indulgent touch.
Beverage Pairings: Coffee, Tea, and Other Drinks that Complement Cinnamon Rolls
Pair your warm cinnamon rolls with a steaming cup of coffee or tea. The rich flavors of a dark roast coffee complement the sweet and spicy notes of the rolls beautifully. If you prefer tea, opt for an herbal variety like chai, which echoes the warmth of the cinnamon.
For a non-caffeinated option, you might consider serving with a glass of cold milk or a refreshing lemonade to balance the sweetness.
Creative Serving Ideas: Making a Brunch Spread or Dessert Platter
For a special occasion, consider creating a brunch spread with your cinnamon rolls as the star. Include a variety of breakfast items such as scrambled eggs, bacon or sausage, and fresh fruit. You can also present your cinnamon rolls as part of a dessert platter, alongside other treats like brownies or fruit tarts, making it an impressive centerpiece for any gathering.
Conclusion
Making homemade cinnamon rolls is more than just a baking project; it’s a delightful experience that fills your kitchen with warmth and the comforting aroma of cinnamon and sugar. From the initial kneading of the dough to the final frosting, each step is an opportunity to create something truly special.
Baking these rolls not only satisfies your sweet tooth but also brings joy and satisfaction that comes from sharing delicious food with loved ones. Whether you enjoy them during a quiet Sunday morning or celebrate with friends during brunch, cinnamon rolls have a magical way of creating lasting memories.
So gather your ingredients, roll up your sleeves, and embark on this delicious journey. Share your baking experience with family and friends, and relish the joy of creating something homemade. Remember, food is not just about nourishment; it’s about connection, love, and creating cherished moments that last a lifetime.
