Introduction
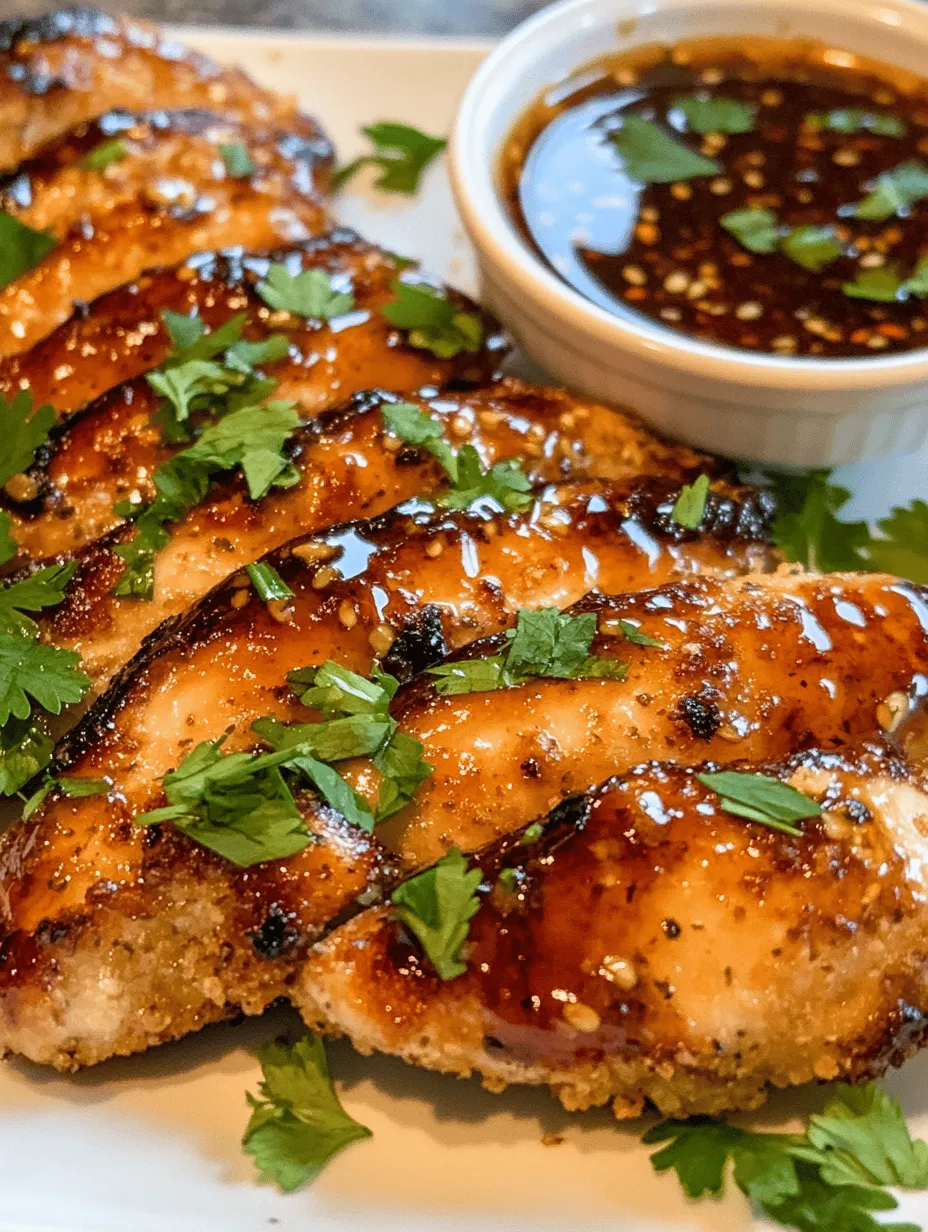
If you’re looking for a dish that perfectly marries flavor and simplicity, look no further than sweet and savory honey garlic chicken tenders. This delightful recipe is not only easy to prepare but also offers a unique blend of tastes that will satisfy your cravings and leave your family asking for seconds. The combination of honey’s natural sweetness and garlic’s robust flavor creates a mouthwatering experience that elevates chicken tenders to a new level.
These chicken tenders are an excellent choice for family meals, gatherings, or even as a delicious party appetizer. Their appeal lies in their ability to cater to both children and adults alike, making them a versatile option for any dining occasion. Plus, they’re perfect for those weeks when you’re short on time yet still want to serve something special.
By incorporating fresh ingredients and a few simple cooking techniques, you can whip up these delectable chicken tenders in no time. Let’s dive deeper into the ingredients that make this dish shine and explore the preparation steps that will guide you to tender, flavorful success.
Understanding the Ingredients
To create the perfect sweet and savory honey garlic chicken tenders, it’s essential to understand the role each ingredient plays in the recipe. Here’s a breakdown:
Chicken Tenders
At the heart of this dish are chicken tenders, which are known for their tenderness and juiciness. Nutritionally, chicken tenders are a lean source of protein, making them an excellent choice for a healthy meal. They are lower in fat compared to other cuts of chicken, which makes them ideal for a dish that requires quick cooking and a crispy exterior. Their mild flavor also allows them to absorb the marinade beautifully, enhancing the overall taste of the dish.
Honey
Honey is the star sweetener in this recipe, providing not only sweetness but also a depth of flavor. Beyond its taste, honey boasts several health benefits. It contains antioxidants and has natural antibacterial properties, making it a healthier alternative to refined sugars. When used in marinades, honey caramelizes beautifully, creating a delightful glaze that adds character to the chicken tenders.
Soy Sauce
Soy sauce serves as a flavor enhancer in this recipe, imparting umami notes that complement the sweetness of the honey. For those looking to reduce sodium intake, low-sodium soy sauce is a fantastic alternative that still delivers a robust flavor without overwhelming saltiness. The soy sauce also helps to tenderize the chicken, making every bite juicy and flavorful.
Garlic
Fresh garlic is a must in this dish. Its pungent aroma and sharp flavor are essential for creating that signature honey garlic taste. Using fresh garlic rather than powdered forms ensures that you get the full, vibrant flavor that enhances the overall profile of the chicken tenders. Garlic is also known for its numerous health benefits, including improved immune function and anti-inflammatory properties.
Fresh Ginger (Optional)
While optional, fresh ginger adds an extra layer of flavor that can elevate your chicken tenders. Its warm, slightly spicy notes pair wonderfully with garlic and honey, adding complexity to the dish. Additionally, ginger is known for its health benefits, including aiding digestion and offering anti-inflammatory effects.
Rice Vinegar
To balance the sweetness of the honey, rice vinegar adds a touch of acidity to the marinade. This acidity not only enhances the flavor but also helps to tenderize the chicken. Rice vinegar has a milder taste compared to other vinegar types, making it an ideal choice that won’t overpower the dish.
Panko Breadcrumbs vs. Traditional Breadcrumbs
When it comes to breading the chicken tenders, panko breadcrumbs are preferred over traditional breadcrumbs for several reasons. Panko is lighter and flakier, resulting in a crispier coating when fried or baked. This texture contrast between the tender chicken and the crunchy breading is what makes these tenders so satisfying to eat.
Role of Eggs and Flour in Breading
The breading process is crucial for achieving that perfect crispy exterior. Eggs serve as the binding agent, helping the breadcrumbs adhere to the chicken. Flour acts as a dry base layer, ensuring that the chicken is completely coated before the egg and panko are applied. This three-step breading process creates a deliciously crispy crust that seals in the juiciness of the chicken.
Preparation Steps for Honey Garlic Chicken Tenders
Preparing the Marinade
The first step in creating your honey garlic chicken tenders is to prepare the marinade. This marinade is not just a flavor enhancer; it is a crucial component that infuses the chicken with rich flavors. Here’s how to prepare it:
1. Gather Your Ingredients: You’ll need honey, soy sauce, minced garlic, grated ginger (if using), and rice vinegar. Measure out each ingredient according to the recipe proportions for accuracy.
2. Mix the Ingredients: In a medium-sized bowl, combine the honey and soy sauce. Whisk together until well blended. Next, add the minced garlic, grated ginger, and rice vinegar, and whisk again until fully incorporated. The marinade should be smooth with a harmonious balance of sweet and savory notes.
3. Taste and Adjust: It’s always a good idea to taste your marinade. You may want to adjust the sweetness by adding more honey or balance the flavors with a bit more soy sauce or vinegar. The key is to find that perfect blend that suits your palate.
Importance of Marinating for Flavor Development
Marinating is a crucial step in this recipe. It allows the chicken to soak up all those delicious flavors, making every bite more enjoyable. The acid in the marinade helps to break down the proteins in the chicken, resulting in a tender texture. Ideally, you should let the chicken marinate for at least 30 minutes, but for the best results, aim for 2-4 hours. For even more flavor, consider marinating it overnight in the refrigerator.
Marinating the Chicken
Once your marinade is ready, it’s time to marinate the chicken tenders:
1. Prepare the Chicken: Trim any excess fat from the chicken tenders and pat them dry with paper towels. This step ensures that the marinade adheres better to the chicken.
2. Combine Chicken and Marinade: Place the chicken tenders into a zip-top bag or a shallow dish. Pour the marinade over the chicken, ensuring that each piece is well-coated. If using a bag, seal it tightly and gently massage the marinade into the chicken.
3. Refrigerate: Allow the chicken to marinate in the refrigerator for the recommended time. If using a bag, remember to turn it occasionally for even marination.
Setting Up for Breading
While the chicken is marinating, it’s important to set up your breading station. An organized workspace can make the process smoother and more efficient. Here’s how to do it:
1. Prepare Your Ingredients: Gather the flour, eggs, and panko breadcrumbs. Place the flour in one shallow dish, crack the eggs into another dish and whisk them until smooth, and pour the panko breadcrumbs into a third dish.
2. Arrange the Dishes: Set up your breading station in a line: flour, eggs, and then panko breadcrumbs. This organization will streamline the breading process and help you work more efficiently.
3. Have a Baking Sheet Ready: Line a baking sheet with parchment paper or a silicone mat to place the breaded chicken tenders once they are ready. This will prevent sticking and make cleanup easier.
Importance of a Well-Organized Breading Station
A well-organized breading station not only makes the process faster but also minimizes mess. When each component is easily accessible, you can focus on achieving the perfect breading without losing momentum. This is particularly important for maintaining the texture of the chicken tenders, as you want to avoid letting them sit too long before cooking.
Description of the Three-Step Breading Process
The three-step breading process is essential for achieving that crispy, golden-brown exterior. Here’s how to do it:
1. Coat in Flour: Take a marinated chicken tender and gently shake off any excess marinade. Dredge it in the flour, ensuring it is fully coated. The flour will create a dry base that helps the egg adhere better.
2. Dip in Egg: Next, dip the floured chicken tender into the whisked eggs, allowing any excess to drip off. This step helps the breadcrumbs stick to the chicken.
3. Press into Panko: Finally, press the chicken tender into the panko breadcrumbs, ensuring it is evenly coated on all sides. Gently press down on the breadcrumbs to help them adhere properly.
Once all your chicken tenders are breaded, they are ready for cooking. This meticulous process ensures that each bite is crunchy and flavorful, making your honey garlic chicken tenders a hit at any meal.
As we move forward in this recipe, we will explore the cooking methods that will bring your sweet and savory honey garlic chicken tenders to life, ensuring they are both delicious and visually appealing. Stay tuned for the next steps in this culinary journey!
Techniques for Achieving the Perfect Crust
To achieve that irresistible crunchy crust on your honey garlic chicken tenders, there are a few techniques you should master. First and foremost, ensuring that your chicken is properly coated with the breadcrumb mixture is crucial. The ideal crust is crispy and golden brown, providing a delightful contrast to the tender chicken inside.
One effective method is to use a three-step breading process: first, dip the chicken tenders into flour, then into a beaten egg, and finally coat them with seasoned breadcrumbs. This layered approach allows for better adhesion of the breadcrumbs, resulting in a thicker, crunchier crust. For added texture, consider using panko breadcrumbs instead of traditional ones. Panko provides a lighter, airier crust that crisps up beautifully when cooked.
Another technique is to allow the breaded tenders to rest for about 10-15 minutes before cooking. Letting them sit helps the breadcrumbs adhere better to the chicken, reducing the risk of them falling off during cooking.
Tips for Ensuring Breadcrumbs Stick Well
To ensure that your breadcrumbs stick well to the chicken tenders, keep the following tips in mind:
1. Pat Dry the Chicken: Before breading, pat the chicken tenders dry with paper towels. Excess moisture can hinder breadcrumb adherence.
2. Use an Egg Wash: An egg wash, made from beaten eggs mixed with a splash of water or milk, helps create a sticky surface for the breadcrumbs to cling to. Make sure to coat the chicken evenly.
3. Season Your Breadcrumbs: Add your favorite spices, such as garlic powder, onion powder, paprika, or Italian seasoning, to the breadcrumbs. This not only enhances flavor but can also help the breadcrumbs stick better due to the moisture in the seasoning.
4. Press Down Firmly: When coating the chicken with breadcrumbs, press down firmly to ensure they adhere well. This might seem simple, but it makes a significant difference in the texture of the crust.
Cooking Method: Air Frying the Chicken Tenders
Air frying is an excellent method for cooking honey garlic chicken tenders, as it allows you to achieve a crispy texture without the need for excessive oil. Here’s how to do it:
Preheating the Air Fryer
Before you start cooking, preheat your air fryer to about 400°F (200°C) for 5-10 minutes. Preheating is crucial as it ensures even cooking and helps the chicken tenders crisp up beautifully from the moment they enter the fryer.
Air Frying Process
1. Arrange the Chicken Tenders: Once preheated, arrange the breaded chicken tenders in a single layer in the air fryer basket. Avoid overcrowding the basket, as this will prevent proper air circulation, resulting in uneven cooking. If you have a lot of tenders, you might need to cook them in batches.
2. Cooking Time and Temperature: Cook the chicken tenders at 400°F (200°C) for approximately 10-12 minutes. Flip the tenders halfway through the cooking time to ensure they brown evenly on both sides.
3. Cooking in Batches: If you’re cooking a large batch, keep the cooked tenders warm in a low oven (around 200°F or 93°C) while the remaining batches finish. This way, all your chicken tenders will be hot when it’s time to serve.
Checking for Doneness
To ensure your chicken tenders are cooked thoroughly, always check their internal temperature. The USDA recommends that chicken be cooked to an internal temperature of 165°F (75°C). A meat thermometer is the most reliable way to check this.
Signs of perfectly cooked chicken tenders include a golden-brown crust and juices that run clear when pierced. If the chicken is still pink or the juices are red, return it to the air fryer for an additional few minutes.
Serving Suggestions
Presentation is key when serving your honey garlic chicken tenders. Here are some tips to create an appealing dish:
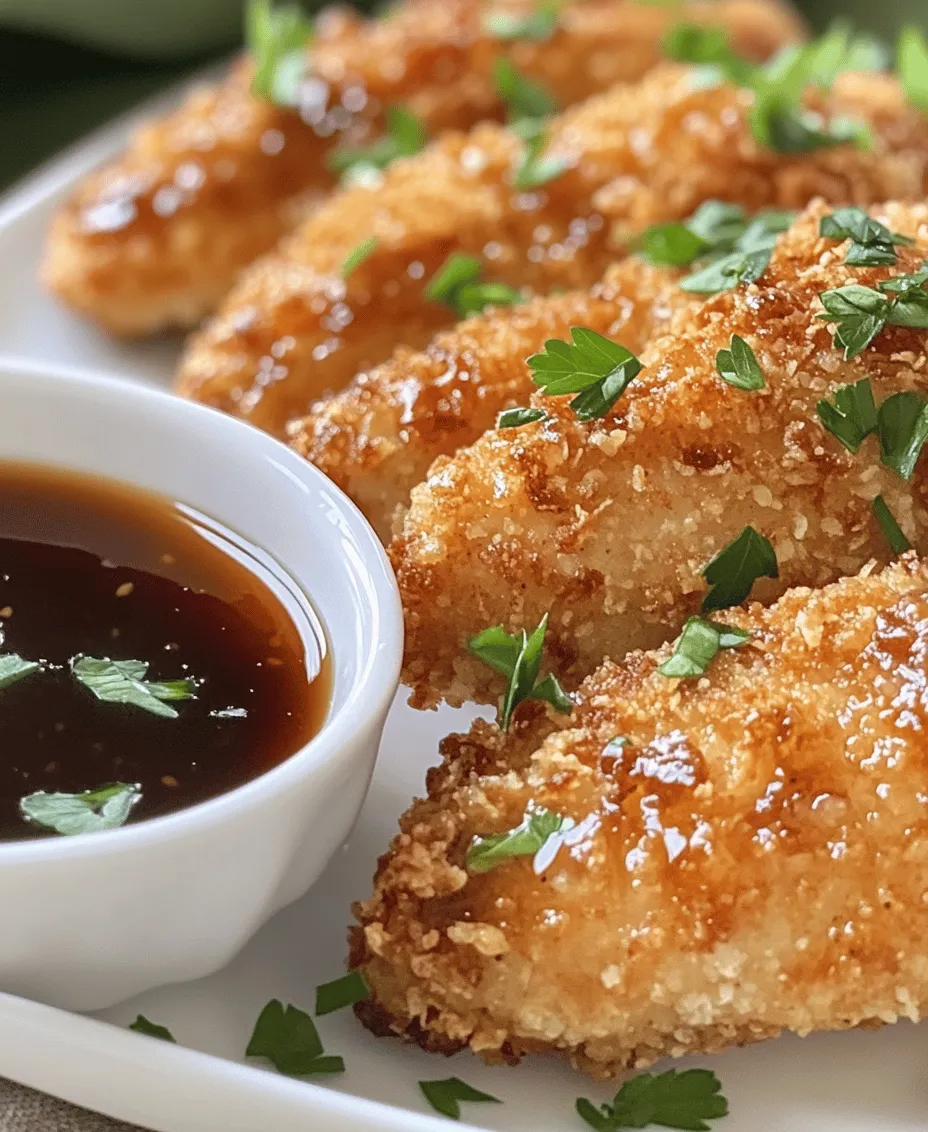
1. Garnish: Consider garnishing your chicken tenders with chopped green onions or sesame seeds for added color and texture.
2. Serving Platter: Arrange the chicken tenders on a large platter, and drizzle some honey garlic sauce over the top for a delicious finish. You can place the sauce in a small bowl alongside the tenders for dipping.
3. Suggested Side Dishes: Honey garlic chicken tenders pair well with a variety of sides. Some popular options include:
– Steamed Broccoli: Adds a healthy, vibrant touch to your meal.
– Coleslaw: A crunchy side that complements the tender chicken.
– Sweet Potato Fries: For a sweet and savory combination.
– Rice or Quinoa: Serve over a bed of fluffy rice or quinoa to soak up the delicious sauce.
4. Dipping Sauces: Besides the honey garlic sauce, consider offering alternative dipping sauces such as BBQ sauce, ranch dressing, or a spicy sriracha mayo for those who like a kick.
Health Benefits of Honey Garlic Chicken Tenders
This dish not only tantalizes the taste buds but also offers several health benefits:
1. Nutritional Analysis: Honey garlic chicken tenders provide a good source of protein from the chicken, which is essential for muscle repair and growth. Depending on your cooking method and ingredients, these tenders can be lower in calories than traditional fried chicken.
2. Comparison with Traditional Fried Chicken Tenders: Unlike conventional fried chicken, which can be high in unhealthy fats and calories due to deep frying, air-fried chicken tenders significantly reduce oil usage, making them a healthier alternative.
3. Low-Sodium Ingredients: By using low-sodium soy sauce in the honey garlic sauce, you can control the sodium content of your dish, making it more heart-healthy.
Variations and Substitutions
One of the best aspects of honey garlic chicken tenders is their versatility. Here are some suggestions for variations and substitutions:
1. Dietary Needs:
– Gluten-Free: Substitute regular breadcrumbs with gluten-free breadcrumbs or crushed gluten-free crackers.
– Low-Carb: For a low-carb version, you can use almond flour or crushed pork rinds as a breading alternative.
2. Alternative Cooking Methods:
– Oven-Baking: Preheat your oven to 425°F (220°C). Place the breaded chicken tenders on a parchment-lined baking sheet and bake for about 15-20 minutes, flipping halfway through, until golden brown and cooked through.
– Pan-Frying: Heat oil in a skillet over medium heat and fry the tenders for about 4-5 minutes on each side until they achieve a golden brown color.
3. Flavor Variations: Experiment with different spices or marinades to customize the flavor of your chicken tenders. For instance, adding cayenne pepper will give them a spicy kick, while herbs like rosemary or thyme can introduce an aromatic element.
Conclusion
Honey garlic chicken tenders are not just a meal; they are a delightful experience that combines the sweet and savory flavors we all love. From the crispy, golden crust to the tender chicken inside, this dish is a hit with both kids and adults alike.
With their versatility, you can easily customize this recipe to suit your dietary needs or preferences, making it a go-to in your weeknight dinner rotation. Whether you serve them as an appetizer, main course, or party snack, these chicken tenders are sure to impress.
So, roll up your sleeves, gather your ingredients, and try making this delicious dish at home. The joy of cooking and sharing meals with loved ones is truly unparalleled, and this recipe is an excellent way to bring everyone together around the table. Enjoy the process, and most importantly, enjoy the delicious results!