Introduction
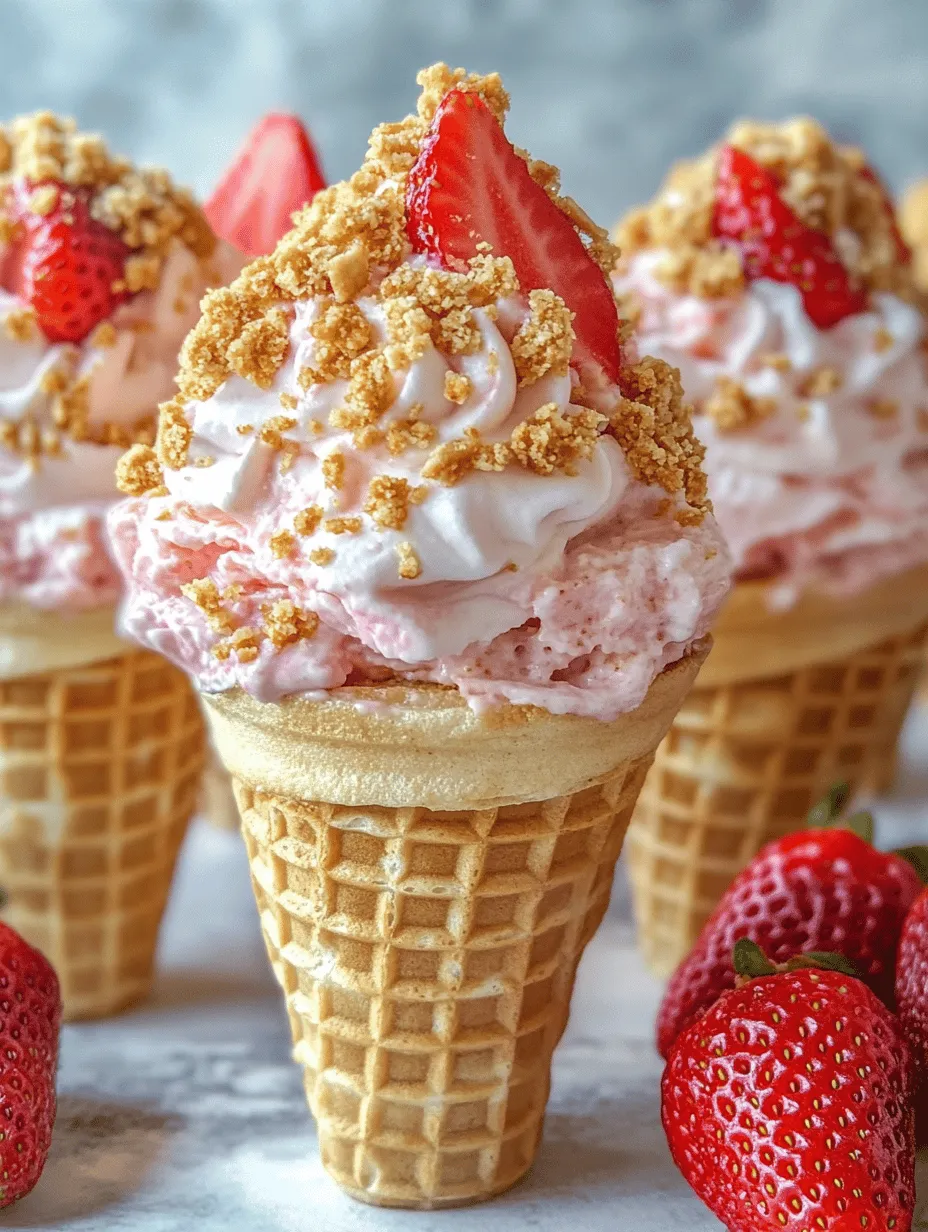
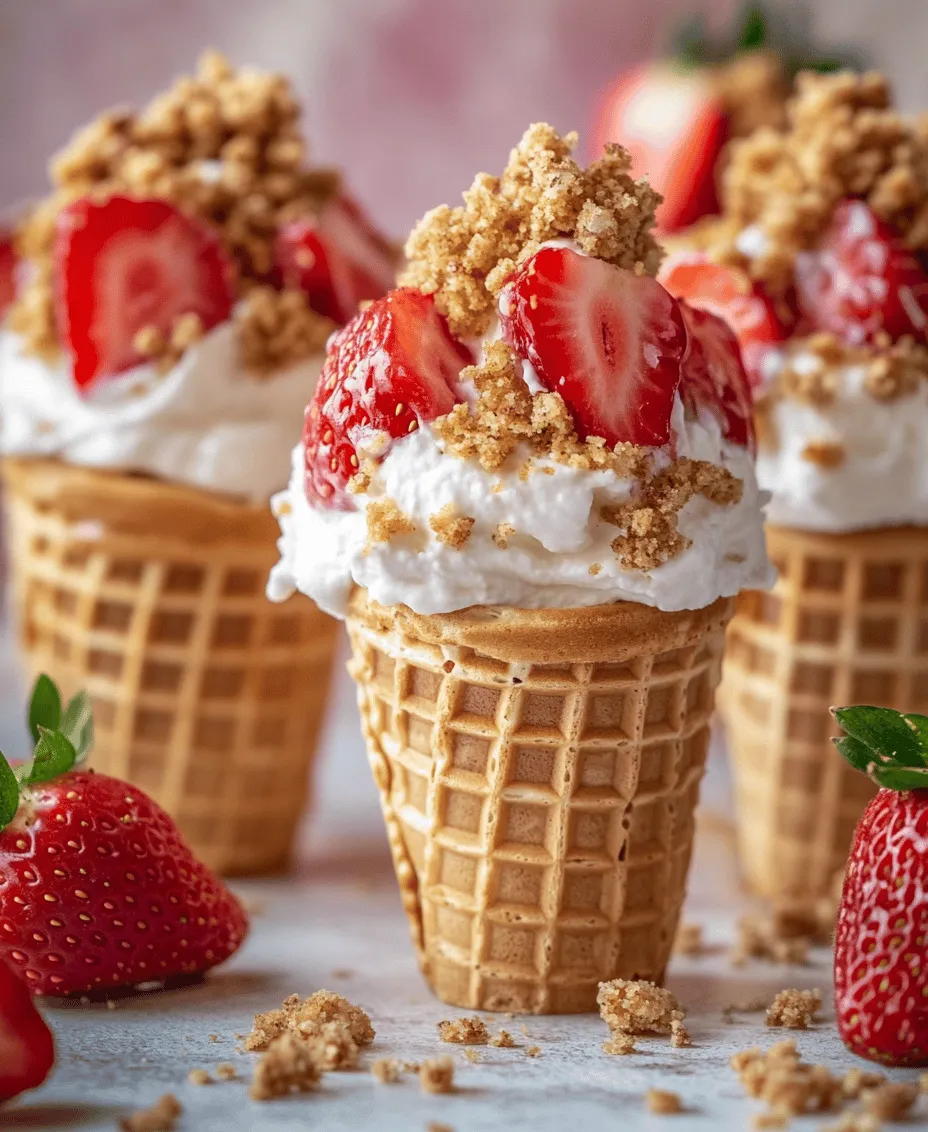
If you’re searching for a delightful dessert that combines the refreshing taste of strawberries with the creamy richness of cheesecake, look no further than Strawberry Crunch Cheesecake Cones. This mouthwatering treat captures the essence of summer in a portable, easy-to-eat form. With layers of succulent strawberries, a luscious cheesecake filling, and a satisfying crunch, these cones are perfect for various occasions, whether it’s a vibrant summer party, a casual picnic in the park, or a fun family gathering.
The appeal of Strawberry Crunch Cheesecake Cones lies in their harmony of flavors and textures. Each bite delivers a burst of fruity freshness from ripe strawberries, the smooth and creamy goodness of cheesecake, and a delightful crunch that adds an exciting contrast. This unique combination makes them a favorite among both children and adults alike. Plus, they are incredibly versatile—feel free to customize the toppings or switch up the fruit to suit your taste.
Understanding the Components of Strawberry Crunch Cheesecake Cones
A successful Strawberry Crunch Cheesecake Cone is composed of three essential layers, each playing a critical role in the overall experience of the dessert. Understanding these components not only elevates the flavor but also enhances the enjoyment of each bite.
1. Strawberry Layer: The fresh strawberry layer is the star of the show, providing natural sweetness and a vibrant color that makes these cones visually appealing. When strawberries are in season, using them fresh can make a significant difference in flavor. This layer also adds moisture and a refreshing tang that balances the richness of the cheesecake filling.
2. Cheesecake Filling: The creamy cheesecake filling is what ties the entire dessert together. Made with cream cheese, heavy whipping cream, and a hint of vanilla extract, this filling is rich and satisfying. The contrast between the creamy filling and the crunchy texture of the topping creates a delightful mouthfeel that keeps you coming back for more.
3. Crunch Topping: No cheesecake cone is complete without a crunchy topping. Made from crushed graham crackers, this layer adds texture and a hint of sweetness that complements the other components perfectly. It’s reminiscent of a traditional cheesecake crust but in a fun, crunchy form.
By carefully balancing these layers, you create a dessert that’s not only delicious but also visually stunning. Each cone becomes a work of art that’s sure to impress your guests.
Ingredients Breakdown
To create Strawberry Crunch Cheesecake Cones, you’ll need a selection of fresh and flavorful ingredients. Here’s a closer look at each component:
Fresh Strawberries
Fresh strawberries are the star ingredient in this recipe. Their natural sweetness and vibrant color are essential for both flavor and presentation. When selecting strawberries, look for ones that are firm, plump, and brightly colored. Avoid any with blemishes or soft spots, as these can indicate overripeness. For the best flavor, try to use strawberries that are in season; they will be sweeter and more aromatic.
Cream Cheese
Cream cheese is the primary ingredient in the cheesecake filling and provides that signature creamy texture. When choosing cream cheese, opt for full-fat versions for the richest flavor. Softening the cream cheese before mixing is crucial—this ensures a smooth filling without lumps.
Heavy Whipping Cream
Heavy whipping cream adds volume and lightness to the cheesecake filling. When whipped, it transforms from a liquid into airy peaks, contributing to the fluffy texture of the final product. For the best results, use chilled heavy cream, as it whips better at lower temperatures.
Sugar
Sugar is essential for sweetening both the strawberry layer and the cheesecake filling. Adjust the amount to your taste, especially if your strawberries are particularly sweet or tart.
Vanilla Extract
A splash of vanilla extract enhances the flavor of the cheesecake filling, adding a warm, aromatic note that pairs beautifully with the creaminess of the cheese. Opt for pure vanilla extract for the best flavor.
Graham Crackers
Crushed graham crackers form the crunchy topping that adds texture to the dessert. They provide a sweet, slightly nutty flavor that complements the other layers. You can also experiment with flavored graham crackers or even cookies for a unique twist.
Waffle Cones
Waffle cones serve as the vessel for your Strawberry Crunch Cheesecake Cones. They not only hold the layers together but also contribute a delightful crunch and a hint of sweetness. Choose high-quality waffle cones for the best texture. If you’re feeling adventurous, you can even dip the cones in chocolate for an extra layer of flavor.
Optional Garnishes
To elevate your cheesecake cones, consider adding optional garnishes such as whipped cream, chocolate drizzle, or additional fresh strawberries. These not only enhance the visual appeal but also add extra flavor and texture to your dessert.
Preparing the Strawberry Layer
The first step in crafting your Strawberry Crunch Cheesecake Cones involves preparing the strawberry layer. This layer is vital for the overall flavor profile and sets the tone for the dessert. Here’s a step-by-step guide on how to prepare it:
1. Select Your Strawberries: Start by choosing ripe, fresh strawberries. As previously mentioned, look for strawberries that are firm and bright red. Rinse them gently under cold water to remove any dirt or impurities.
2. Hull and Chop: Remove the green tops (hulling) from the strawberries and chop them into small pieces. Aim for uniform sizes to ensure even distribution in your dessert.
3. Macerate: In a mixing bowl, combine the chopped strawberries with sugar and a squeeze of lemon juice. The sugar will draw out the natural juices from the strawberries, creating a syrupy mixture, while the lemon juice adds a touch of acidity that enhances the strawberries’ flavor. Allow this mixture to sit for at least 15-20 minutes. This process is known as macerating, and it’s crucial for developing the flavor of the strawberries.
4. Taste and Adjust: After macerating, taste the strawberries. Depending on their sweetness, you may want to add a little more sugar or lemon juice to achieve the desired flavor profile.
By following these steps, you’ll create a delicious strawberry layer that perfectly balances the richness of the cheesecake filling.
Creating the Cheesecake Filling
Once your strawberry layer is ready, it’s time to prepare the cheesecake filling. This step is where the magic happens, as you blend together rich ingredients to create a creamy, dreamy filling. Here’s how to make it:
1. Beat the Cream Cheese: In a mixing bowl, add the softened cream cheese and beat it with an electric mixer until smooth and creamy. This step is crucial—if the cream cheese isn’t softened enough, you’ll end up with lumps in your filling.
2. Add Sugar and Vanilla: Gradually mix in the sugar and vanilla extract, continuing to beat until well combined. The mixture should be smooth and fluffy at this stage.
3. Whip the Cream: In a separate bowl, pour in the chilled heavy whipping cream. Using a clean mixer, whip the cream until stiff peaks form. This means that the cream should stand up on its own without collapsing. Be careful not to over-whip, as this can lead to a grainy texture.
4. Fold Together: Gently fold the whipped cream into the cream cheese mixture. Use a spatula to incorporate the cream without deflating it—this is key to achieving a light and airy cheesecake filling.
5. Taste and Adjust: Before proceeding, taste the cheesecake filling. You can add more sugar or vanilla if desired to enhance the flavor further.
By following these steps, you’ll create a luscious cheesecake filling that’s the perfect complement to your strawberry layer.
Making the Crunch Topping
The final component to create your Strawberry Crunch Cheesecake Cones is the crunch topping. This layer adds texture and a satisfying crunch that contrasts beautifully with the creamy filling. Here’s how to make it:
1. Crush the Graham Crackers: Start with a package of graham crackers. You can crush them by placing them in a zip-top bag and using a rolling pin, or by pulsing them in a food processor until they reach a fine crumb consistency.
2. Combine with Sugar and Butter: In a bowl, combine the crushed graham crackers with sugar and melted butter. The butter helps bind the crumbs together while adding richness. Mix until all the crumbs are coated and the mixture resembles wet sand.
3. Taste: Just like with the other layers, it’s important to taste the crunch topping. Adjust the sweetness by adding more sugar if needed.
4. Set Aside: Once your topping is mixed, set it aside while you assemble your cones.
These steps will help you create a crunchy topping that adds the perfect finishing touch to your Strawberry Crunch Cheesecake Cones.
By now, you have all the components ready to assemble your delicious dessert. Each layer has been thoughtfully prepared to provide a delightful balance of flavors and textures, making your Strawberry Crunch Cheesecake Cones a truly irresistible treat. Stay tuned for the next part, where we will guide you through the assembly process!
Step-by-Step Guide to Preparing the Crunch Topping
To begin, let’s focus on the delightful crunch topping that brings texture and flavor to our Strawberry Crunch Cheesecake Cones. The crunch topping is essential for adding a satisfying contrast to the creamy cheesecake filling.
Ingredients for Crunch Topping:
– 1 cup of crushed graham crackers or cookies (like Oreos or vanilla wafers)
– 1/4 cup of melted butter
– 1/4 cup of sugar
– 1/2 teaspoon of vanilla extract
– A pinch of salt
Instructions:
1. Combine Ingredients: In a medium mixing bowl, combine the crushed graham crackers or cookies with the melted butter, sugar, vanilla extract, and salt. Mix until all the crumbs are evenly coated and the mixture resembles wet sand.
2. Achieve the Right Texture: The key to a perfect crunch topping is achieving a texture that is both crumbly and cohesive. To do this, ensure that there are no dry bits of crumbs left. If the mixture feels too dry, add a small amount of melted butter until the desired texture is reached. Conversely, if it is too wet, add a bit more crushed cookies.
3. Bake the Mixture: Preheat your oven to 350°F (175°C). Spread the mixture evenly on a baking sheet lined with parchment paper. Bake for about 8-10 minutes, or until the topping is lightly golden and fragrant. Allow it to cool completely before using it in your cones.
Suggestions for Variations in the Crunch Topping:
– Cookies Variation: Instead of graham crackers, try using crushed chocolate cookies for a richer flavor, or even gingersnaps for a spiced twist.
– Nutty Crunch: Incorporate finely chopped nuts such as almonds or pecans into the mixture for an added layer of flavor and crunch.
– Coconut Twist: Add a sprinkle of shredded coconut to the topping for a tropical flair.
Assembling the Cheesecake Cones
Now that you have your cheesecake filling and crunch topping ready, it’s time to assemble the cones. Layering is crucial for both flavor and visual appeal, so let’s go through the process step by step.
Instructions for Assembling:
1. Prepare Your Cones: Start with your choice of cones. Ice cream cones, waffle cones, or even cookie cups work great. Ensure they are clean and dry.
2. Layering the Ingredients: Begin by adding a spoonful of the cheesecake filling into the bottom of the cone. Use a piping bag fitted with a large round tip for a neat application.
3. Add Crunch Topping: Sprinkle a layer of the crunch topping over the cheesecake filling. This layer not only adds texture but also serves as a barrier that keeps the filling in place.
4. Repeat the Layers: Continue layering with more cheesecake filling followed by another layer of crunch topping until you reach the top of the cone. Aim for three to four layers for the best balance of flavors and textures.
5. Piping Techniques: For aesthetics, you can pipe the cheesecake filling in a swirl pattern on top of the cones. This gives a beautiful finish and makes the cones look more inviting.
6. Final Touch: Top off each cone with a dollop of whipped cream and a sprinkle of additional crunch topping for an elegant presentation.
Chilling and Serving the Cones
Chilling is a crucial step before serving your Strawberry Crunch Cheesecake Cones. It enhances the flavors and allows the layers to meld beautifully.
Why Chilling is Necessary:
Chilling the assembled cones helps to set the cheesecake filling, making it firm and easier to eat. It also allows the flavors to develop, resulting in a more delicious dessert.
Tips for Storage:
– Short-term Storage: If you plan to serve them within a few hours, simply keep the cones in the fridge. Cover them loosely with plastic wrap to prevent them from drying out.
– Long-term Storage: For longer storage, it’s best to keep the filling and crunch topping separate from the cones until you are ready to serve. This will prevent the cones from becoming soggy.
Serving Suggestions:
– Pairing Beverages: These cones pair wonderfully with a variety of beverages. Consider serving them alongside a refreshing iced tea, lemonade, or a glass of sparkling water to complement the sweetness of the dessert.
– Presentation: For an eye-catching display, serve the cones in a tall glass or a decorative stand, allowing guests to easily grab their dessert.
Nutritional Information
When indulging in a delicious dessert like Strawberry Crunch Cheesecake Cones, it’s important to be mindful of nutritional aspects.
Overview of Nutritional Aspects:
– Calories: Each cone can vary in calorie count depending on the ingredients used, but on average, they contain around 300-400 calories per serving.
– Portion Control: Enjoying these cones in moderation is key. They make for a delightful treat during special occasions or gatherings.
– Fresh Ingredients: The use of fresh strawberries not only enhances flavor but also adds nutritional benefits, including vitamins and antioxidants.
Variations and Customizations
One of the joys of making Strawberry Crunch Cheesecake Cones is the ability to customize the recipe according to your preferences.
Ideas for Customizing the Recipe:
– Fruits: Feel free to swap out strawberries for other seasonal fruits like blueberries, raspberries, or peaches. Each fruit brings its unique flavor profile to the dessert.
– Gluten-Free Options: To cater to gluten-free diets, use gluten-free cookies for the crunch topping and gluten-free cones. Almond flour or coconut flour can also be used as a base for the cheesecake filling.
– Flavoring the Cheesecake: You can enhance the cheesecake filling by adding flavor extracts such as chocolate, lemon, or almond. A touch of cocoa powder can create a delightful chocolate cheesecake variation.
Different Types of Cones or Serving Dishes:
– Cone Alternatives: Experiment with different types of cones, such as chocolate-dipped cones or edible cookie cups for a fun twist.
– Serving Dishes: If you prefer a more elegant presentation, consider serving the cheesecake filling in small dessert glasses layered with crunch topping, allowing for easier serving and less mess.
Conclusion
Creating Strawberry Crunch Cheesecake Cones is not only a delightful culinary experience but also a fantastic way to celebrate gatherings with friends and family. The fun of making these cones lies in the layering, the choice of ingredients, and the customization options that allow everyone to enjoy their perfect dessert.
We encourage you to experiment with the recipe, try out different fruit combinations, and share your delicious creations with your loved ones. Homemade desserts like these not only satisfy sweet cravings but also bring people together, creating lasting memories around the table. Enjoy the joy of baking, and may your Strawberry Crunch Cheesecake Cones become a favorite treat for years to come!
