Introduction
There’s something undeniably enchanting about the aroma of freshly baked cinnamon rolls wafting through your kitchen. The warm, sweet scent mingling with hints of buttery goodness can transform any ordinary day into a special occasion. Homemade cinnamon rolls are a beloved treat, cherished not just for their delightful taste but also for the nostalgia they often evoke. From family gatherings to cozy Sunday mornings, these soft, pillowy rolls have a way of bringing people together, making every bite a shared experience.
This one-hour cinnamon roll recipe is a game-changer for those who crave the satisfaction of homemade baking without spending the entire day in the kitchen. Unlike traditional recipes that require hours of rising and waiting, this version speeds up the process, allowing you to enjoy delicious cinnamon rolls in just about an hour. The secret lies in the use of instant yeast, which acts quickly, giving you that light and fluffy texture without the long wait.
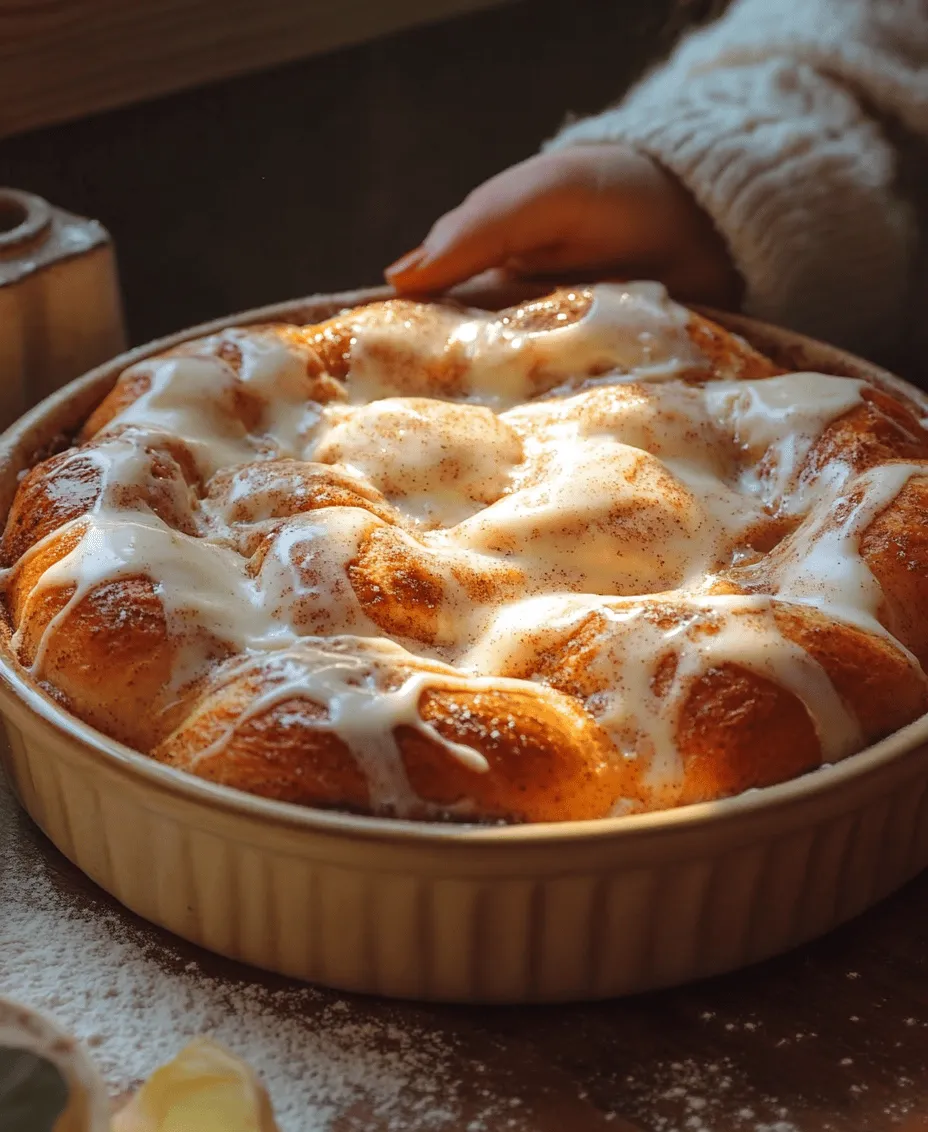
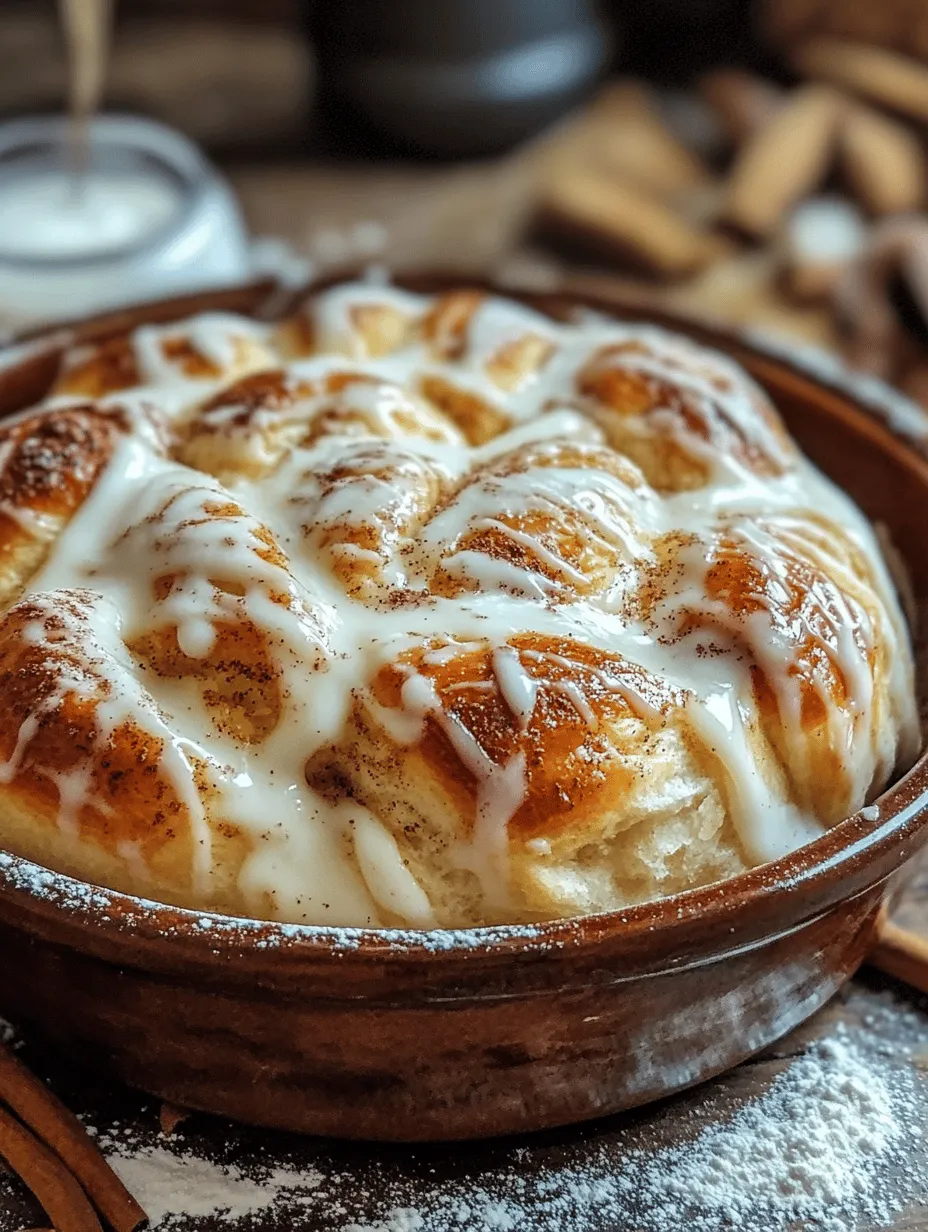
These scrumptious rolls are not just quick to make; they are also incredibly versatile. Whether you are preparing them for a festive brunch, a casual get-together, or simply treating yourself, the sensory experience of pulling apart a warm cinnamon roll, gooey with cinnamon-sugar filling and slathered in a creamy glaze, is hard to resist. Each bite offers a perfect balance of sweetness and spice, making them a beloved favorite among both young and old.
In this article, we will guide you through the essential ingredients that make these cinnamon rolls so special, as well as provide detailed, step-by-step instructions to ensure your success in the kitchen. Let’s dive into the world of cinnamon rolls that are sure to impress!
Understanding the Ingredients
To create the perfect cinnamon rolls, it’s essential to understand the role each ingredient plays in the recipe. Here’s a comprehensive breakdown of the key components that contribute to the flavor, texture, and overall delight of your rolls.
All-Purpose Flour
The backbone of any great cinnamon roll is all-purpose flour. This versatile ingredient provides the necessary structure for the dough. When flour is combined with liquid, it forms gluten, which gives the dough its elasticity and chewiness. For this recipe, using all-purpose flour strikes the perfect balance between softness and strength, ensuring that your rolls rise beautifully and maintain a tender texture.
Instant Yeast
One of the stars of this recipe is instant yeast, which is specifically designed to work quickly. Unlike active dry yeast, instant yeast can be added directly to the dry ingredients without needing to be activated in warm water first. This not only saves time but also ensures a more consistent rise. The yeast ferments the sugars in the dough, producing carbon dioxide that causes the dough to rise, resulting in light and fluffy rolls.
Granulated Sugar vs. Brown Sugar
Sugar is crucial in our cinnamon roll recipe, not just for sweetness but also for moisture and flavor. Granulated sugar helps to tenderize the dough, giving it a soft texture. Meanwhile, brown sugar adds a depth of flavor due to its molasses content, which brings that rich, caramel-like sweetness that pairs so well with cinnamon. For the filling, a combination of both sugars will yield the best results, providing a perfect balance of flavor and texture.
Ground Cinnamon
Cinnamon is the star flavor in these rolls, and it’s no surprise why. Its warm, fragrant aroma and sweet-spicy taste make it irresistible. Beyond its delicious flavor, cinnamon also has several health benefits, including anti-inflammatory properties and the ability to help regulate blood sugar levels. Using high-quality ground cinnamon ensures that your rolls are not only flavorful but also packed with the comforting essence that we all love.
Butter and Milk
Butter and milk are integral components that contribute to the richness and moisture of the dough. Butter adds a luxurious flavor and helps create a tender crumb, while milk hydrates the flour and activates the yeast. The combination of these ingredients results in a soft, fluffy texture that melts in your mouth. For an extra touch of decadence, consider using whole milk or even buttermilk for added richness.
Optional Ingredients: Raisins and Nuts
While the classic cinnamon roll is delicious on its own, you can customize your rolls by adding optional ingredients such as raisins or nuts. Raisins offer a chewy texture and a touch of natural sweetness, while nuts such as pecans or walnuts add a delightful crunch. These additions can elevate your cinnamon rolls, giving them a unique twist that suits your taste.
Step-by-Step Instructions for Perfect Cinnamon Rolls
Now that we’ve covered the essential ingredients, let’s move on to the step-by-step process for making your scrumptious one-hour cinnamon rolls. Each step is designed to ensure that you achieve the best results, so follow along carefully!
Preparing the Dough
The first step in creating your cinnamon rolls is preparing the dough. This process begins with mixing the dry ingredients.
1. Mixing Dry Ingredients: In a large mixing bowl, combine 4 cups of all-purpose flour, 1/4 cup of granulated sugar, 2 teaspoons of instant yeast, and 1 teaspoon of salt. Whisk the ingredients together until well blended. It’s essential to ensure that the yeast and salt are evenly distributed. Salt can inhibit yeast activity if it comes into direct contact, so mixing it well helps avoid any issues.
2. Combining Wet Ingredients: In a separate bowl, melt 1/4 cup of unsalted butter and allow it to cool slightly. Then, add 1 cup of warm milk (ideally around 110°F or 43°C) and 1 large egg. The temperature of the milk is crucial as it needs to be warm enough to activate the yeast but not so hot that it kills it. Whisk the mixture until it’s well combined.
3. Mixing the Dough: Gradually pour the wet ingredients into the dry ingredients, stirring with a wooden spoon or spatula until a shaggy dough forms. You may find that the dough is slightly sticky, which is normal. If it feels too wet, you can add a little more flour, but be careful not to overdo it; adding too much flour can lead to dense rolls.
Kneading Techniques
Once your dough has come together, it’s time to knead it. Kneading is a vital step that develops the gluten structure, giving your rolls their desired texture.
1. Kneading the Dough: Turn the dough out onto a lightly floured surface. With clean hands, begin to knead the dough by folding it over and pushing it down with the heel of your hand. Rotate the dough a quarter turn and repeat the process. Continue kneading for about 5-7 minutes until the dough is smooth and elastic. It should spring back when you poke it gently with your finger.
2. Allowing the Dough to Rise: Once kneaded, shape the dough into a ball and place it in a greased bowl, turning it to coat in the oil. Cover the bowl with a clean kitchen towel or plastic wrap, and set it in a warm, draft-free area to rise for about 20 minutes. The dough should double in size during this time, which will create a light and airy texture in your rolls.
As the dough rises, the kitchen will begin to fill with the rich aroma of yeasty goodness, setting the stage for the deliciousness to come. Stay tuned as we continue with the next steps, where you’ll learn how to roll, fill, and bake your cinnamon rolls to perfection!

Factors Affecting the Rising Process and How to Create an Ideal Environment
The rising process is crucial for achieving fluffy and light cinnamon rolls. Several factors can significantly influence how well your dough rises. Temperature, humidity, and time are the three key components that play a role in yeast activation.
1. Temperature: Yeast thrives in a warm environment. Ideally, the room temperature should be between 75°F and 85°F (24°C to 29°C). If your kitchen is cooler, you can create a warm environment by preheating your oven to the lowest setting for a few minutes, then turning it off and placing the dough inside with the door slightly ajar. Alternatively, a sunny spot in your kitchen can also work wonders.
2. Humidity: Yeast loves moisture. If your kitchen is dry, consider placing a bowl of hot water in the oven with the dough to increase humidity. This will promote a better rise.
3. Time: Be patient! Allowing the dough to rise for the right amount of time is essential. The first rise should typically last about one hour, but it can take longer in cooler environments. The second rise usually takes about 30 minutes. Always look for the dough to double in size to ensure it has risen adequately.
Crafting the Filling
Preparing the Cinnamon-Sugar Mixture
The filling is the heart of your cinnamon rolls, and creating the perfect cinnamon-sugar mixture is crucial. For a delicious filling, combine:
– 1 cup of packed brown sugar
– 2 tablespoons of ground cinnamon
– 1/4 cup of softened unsalted butter
In a medium bowl, mix the brown sugar and cinnamon thoroughly. The combination of these two ingredients creates a sweet, spicy blend that enhances the overall flavor of your rolls. Ensure the butter is soft enough to spread easily but not melted, as this will help the mixture adhere to the dough without making it too soggy.
Importance of Cinnamon and Brown Sugar Blend for Flavor Depth
Cinnamon adds warmth and spice, while brown sugar brings a rich, molasses-like sweetness that complements the cinnamon beautifully. The moisture from the brown sugar also helps create a gooey texture once baked, making each bite of your cinnamon roll a delightful experience. If you want to take it a step further, consider adding a pinch of nutmeg or allspice to the mixture for an extra layer of flavor.
Shaping the Rolls
Tips on Rolling the Dough Uniformly and Techniques for Tight Rolls
Once your dough has risen, it’s time to shape it into beautiful rolls. Start by turning the dough out onto a lightly floured surface. Use a rolling pin to roll the dough into a rectangle about 1/4 inch thick. To maintain an even thickness, roll from the center outwards, turning the dough occasionally.
After spreading your cinnamon-sugar mixture evenly over the dough, begin rolling it tightly from the long side, ensuring each layer is snug. A tight roll is crucial for achieving those perfectly swirled cinnamon rolls. The tighter the roll, the better the layers will hold together during baking.
Creative Ways to Incorporate Optional Ingredients Like Raisins or Nuts
For added texture and flavor, consider incorporating ingredients such as raisins, chopped pecans, or walnuts into your filling. Simply sprinkle them over the cinnamon-sugar mixture before rolling. This will introduce delightful flavors and a slight crunch that elevates your rolls to the next level.
The Second Rise: Importance and Techniques
After shaping the rolls, it’s essential to let them rise again. This second rise, often referred to as “proofing,” allows the rolls to expand and develop a light, airy texture. During this stage, the yeast continues to ferment, producing carbon dioxide, which creates air pockets in the dough.
Let the shaped rolls rest in a warm, draft-free area for about 30 minutes or until they have doubled in size. To check if they are ready, gently press a finger into the dough; if it springs back slowly, it’s time to bake. If it springs back quickly, give it a little more time.
Baking to Perfection
Optimal Baking Temperature and Time for Golden-Brown Rolls
Preheat your oven to 375°F (190°C) to achieve perfectly golden-brown cinnamon rolls. Bake them for approximately 20-25 minutes, but keep an eye on them as baking times can vary based on your oven.
Visual Cues for Doneness and How to Avoid Overbaking
The rolls are done when they are golden brown on top and slightly firm to the touch. If you notice the edges browning too quickly, you can cover the rolls loosely with aluminum foil to prevent burning while allowing the centers to cook through. Avoid overbaking, as this can lead to dry rolls.
Creating the Icing
Simple Yet Effective Recipe for the Icing
While the cinnamon rolls are baking, it’s time to prepare the icing that will take your rolls to the next level. For the icing, you will need:
– 1 cup of powdered sugar
– 2 tablespoons of milk (adjust for desired consistency)
– 1/2 teaspoon of vanilla extract
In a small bowl, whisk together the powdered sugar, milk, and vanilla extract until smooth. If the icing is too thick, add a little more milk, one teaspoon at a time, until you reach your desired consistency. The icing should be pourable but not too runny.
The Role of Icing in Enhancing Flavor and Presentation
The icing is the finishing touch that brings everything together. It adds a touch of sweetness and creaminess that balances the spiced filling. Drizzling the icing over warm cinnamon rolls creates a beautiful presentation and offers a delicious contrast to the warm, fluffy rolls.
Glazing and Serving Suggestions
Best Practices for Glazing the Rolls and Achieving an Even Coat
Once your cinnamon rolls are out of the oven, let them cool for about 5-10 minutes before glazing. This will prevent the icing from melting away. Using a spoon or a piping bag, drizzle the icing generously over the rolls, ensuring to cover them evenly. If you want a thicker coat, feel free to apply a second layer after the first has set slightly.
Ideas for Serving: Pairing with Coffee, Tea, or as a Breakfast Treat
Cinnamon rolls are incredibly versatile and can be enjoyed at any time of the day. Serve them warm straight from the oven for a delightful breakfast treat, or pair them with a cup of coffee or tea for an afternoon snack. For a more festive approach, consider adding fresh fruits like strawberries or blueberries on the side for a vibrant touch.
Nutritional Overview
Breakdown of Nutritional Information Per Roll
While cinnamon rolls are a delightful indulgence, it’s essential to be mindful of portion sizes. On average, one cinnamon roll contains approximately:
– Calories: 300-400
– Total Fat: 12g
– Saturated Fat: 7g
– Carbohydrates: 50g
– Sugar: 20g
– Protein: 4g
Discussion on Balance and Moderation in Enjoying Sweet Treats
Enjoying sweet treats like cinnamon rolls is all about balance and moderation. While they are certainly delicious, consider enjoying them as an occasional indulgence rather than a daily staple. Sharing them with family and friends can also make the experience more enjoyable while fostering a sense of community around baking.
Conclusion
Making homemade cinnamon rolls can be a joyful and satisfying experience that fills your kitchen with delightful aromas and warm memories. The combination of soft, fluffy dough and a gooey cinnamon-sugar filling is simply unbeatable. Whether enjoyed for breakfast, as a snack, or as a dessert, these rolls are bound to please everyone at the table.
Encourage your family and friends to join you in the baking process, turning the preparation into a cherished activity that can be shared and celebrated. Baking together not only enhances the joy of creating something delicious but also strengthens bonds and creates lasting memories. So roll up your sleeves, gather your loved ones, and embark on this culinary adventure—your scrumptious one-hour cinnamon rolls await!


