Introduction
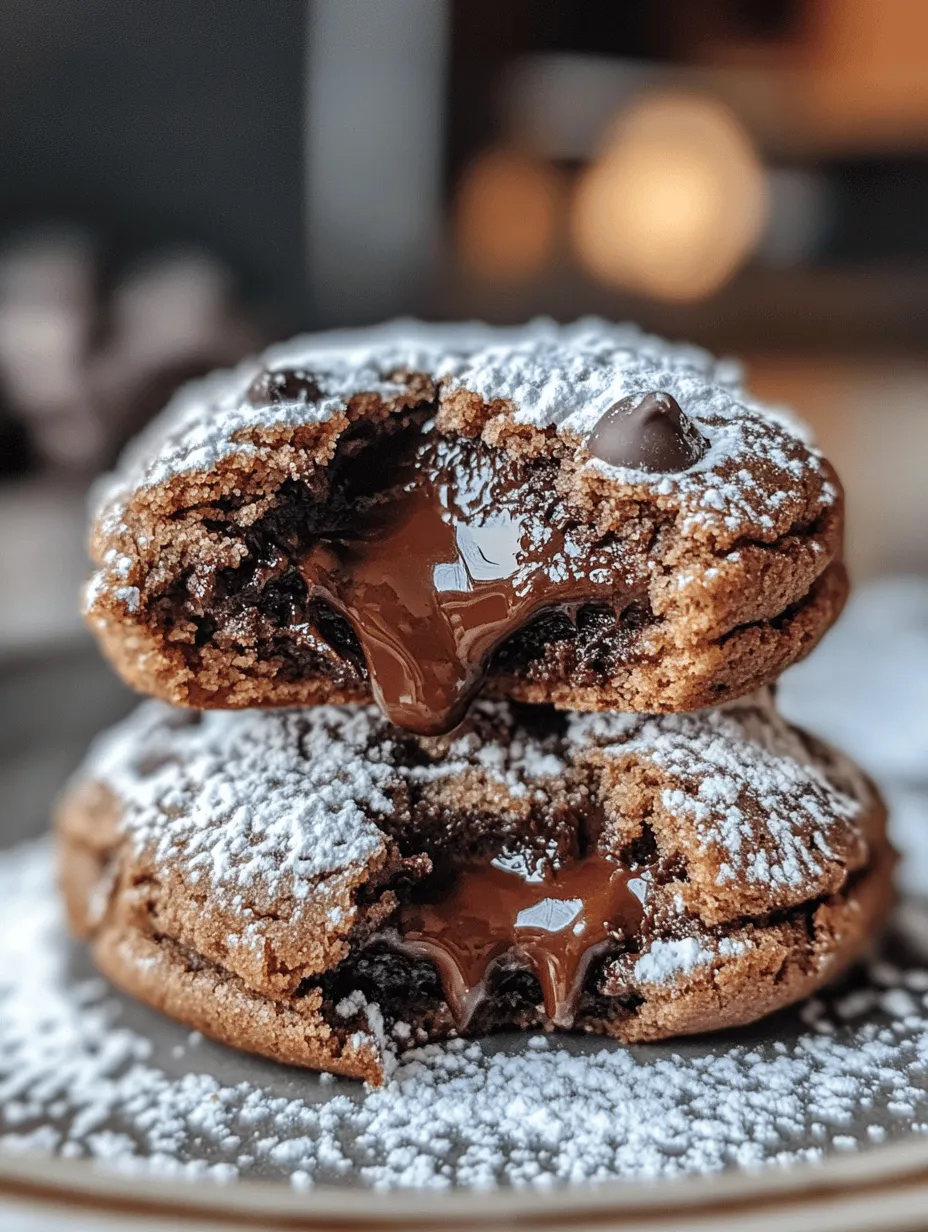
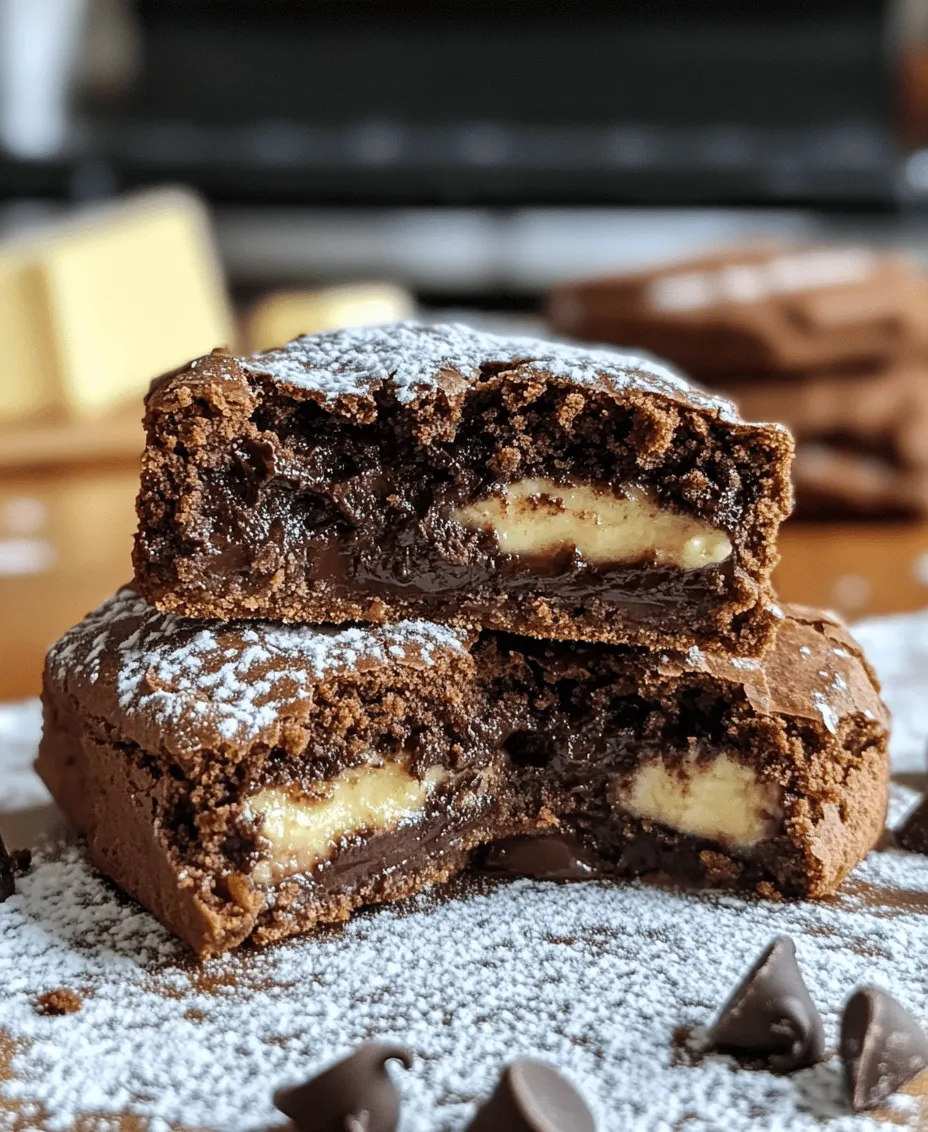
There’s something undeniably captivating about the combination of warm, gooey chocolate and a chewy cookie exterior. Chocolate lava cookies, specifically the molten lava brownie cookies, take this irresistible appeal to the next level, creating a delightful experience that chocolate lovers simply can’t resist. Imagine biting into a perfectly baked cookie, only to discover a molten chocolate center that oozes out, creating a sweet, rich explosion of flavor.
These cookies offer the best of both worlds: the satisfying chewiness of a brownie on the outside, paired with a decadent, molten chocolate core that melts in your mouth. They are not just a dessert; they are an experience that can transform an ordinary day into something special. Whether you’re celebrating a birthday, hosting a dinner party, or simply treating yourself after a long week, these chocolate lava brownie cookies are sure to impress.
Homemade treats like these play a significant role in creating memorable moments. The aroma of freshly baked cookies wafting through your home can evoke nostalgia and warmth, inviting family and friends to gather around and share in the joy of indulgence. With this recipe, you’ll not only create a delicious dessert but also craft moments that linger long after the last crumb is gone.
Understanding Chocolate Lava Brownie Cookies
Chocolate lava brownie cookies are a delightful treat that has gained immense popularity in recent years. This dessert is a perfect marriage of two beloved sweets: the classic brownie and the irresistible molten lava cake. The concept of a dessert that combines the richness of brownies with a gooey chocolate center is simply genius, and it has captured the hearts (and taste buds) of many.
The origins of molten lava cake can be traced back to the 1980s, when it was created by renowned French chef Jean-Georges Vongerichten. Its success led to a culinary trend that inspired countless variations, including the cookie version we adore today. This evolution into cookie form allows for a portable, easy-to-make dessert that retains all the delightful qualities of its cake counterpart.
Chocolate lovers are particularly fond of this recipe because it caters to their cravings in the most satisfying way possible. The contrast between the soft, chewy texture of the cookie and the rich, molten chocolate center creates a flavor experience that is both comforting and indulgent. Each bite is a reminder of why chocolate is often considered the ultimate comfort food.
Ingredients Breakdown
To create these heavenly chocolate lava brownie cookies, it’s essential to understand the role each ingredient plays in the overall flavor and texture of the final product. Here’s a breakdown of the key ingredients that will help you achieve cookie perfection:
– Semi-Sweet Chocolate Chips: These are the backbone of the cookie’s flavor, providing richness and depth. The semi-sweet variety strikes the perfect balance between sweetness and chocolate intensity, ensuring that the cookies are not overly sugary.
– Unsalted Butter: Butter is crucial for achieving the right texture and moisture in cookies. Unsalted butter allows you to control the salt content in your recipe while enhancing the overall flavor and richness of the dough.
– Granulated Sugar: Sugar is not just for sweetness; it also plays a vital role in creating structure. The granulated sugar helps the cookies spread and contributes to their chewy texture.
– Eggs: Eggs act as a binding agent, holding the ingredients together while adding richness to the cookie dough. They also help to create a tender texture.
– Pure Vanilla Extract: A splash of vanilla elevates the flavor profile, bringing all the ingredients together harmoniously. Pure vanilla extract adds a warm, aromatic essence that enhances the chocolate flavor.
– All-Purpose Flour: Flour provides the structure for the cookies. It is the base that holds everything together and gives the cookies their shape.
– Salt and Baking Powder: A pinch of salt is essential for balancing sweetness and enhancing the overall flavor of the cookies. Meanwhile, baking powder helps the cookies rise, contributing to a delightful texture.
– Dark Chocolate Chunks: The star of the show, dark chocolate chunks are what create the molten center. As the cookies bake, these chunks melt, resulting in that gooey, chocolatey goodness that is the hallmark of lava cookies.
– Optional Ingredients: For a beautiful presentation, you may wish to sprinkle powdered sugar on top of the cookies before serving. This not only adds a touch of elegance but also a hint of extra sweetness.
Step-by-Step Instructions
Now that you’re familiar with the ingredients and their roles, it’s time to dive into the baking process. Follow these detailed instructions to create your own batch of molten delight chocolate lava brownie cookies:
1. Preheat the Oven: Start by preheating your oven to 350°F (175°C). This ensures that the cookies bake evenly and achieve the perfect texture.
2. Prepare the Baking Sheet: Line a baking sheet with parchment paper or a silicone baking mat. This helps prevent the cookies from sticking and makes cleanup much easier.
3. Melt the Chocolate and Butter: In a medium-sized bowl, combine the semi-sweet chocolate chips and unsalted butter. You can melt them together in the microwave in 30-second intervals, stirring in between, until smooth and fully melted. Alternatively, you can use a double boiler on the stovetop for this step. Allow the chocolate mixture to cool slightly.
4. Mix the Sugar and Eggs: In a separate large mixing bowl, whisk together the granulated sugar and eggs until well combined. You want the mixture to be light and fluffy, which will help create a tender cookie.
5. Add Vanilla: Stir in the pure vanilla extract to the sugar and egg mixture, ensuring it is evenly distributed.
6. Combine the Chocolate Mixture: Pour the slightly cooled chocolate and butter mixture into the sugar and egg bowl. Stir until everything is combined and smooth.
7. Incorporate the Dry Ingredients: In another bowl, whisk together the all-purpose flour, salt, and baking powder. Gradually add the dry ingredients to the wet mixture, stirring gently until just combined. Be careful not to overmix, as this can lead to tough cookies.
8. Fold in the Dark Chocolate Chunks: Finally, gently fold in the dark chocolate chunks, ensuring they are evenly distributed throughout the cookie dough.
By following these initial steps, you’ve set the foundation for your chocolate lava brownie cookies. In the next part, we will delve into the final baking instructions, tips for achieving the perfect molten center, and some creative serving suggestions to enhance your dessert experience. Stay tuned for more delicious details!
Melting Chocolate and Butter: Tips for Achieving a Smooth Mixture
To create the perfect Chocolate Lava Brownie Cookies, the first step involves melting chocolate and butter together. This is a crucial process that lays the foundation for the rich, fudgy texture of the cookies. Here are some tips to achieve a smooth mixture without any clumps:
1. Choose Quality Ingredients: Start with high-quality dark chocolate and unsalted butter. The flavor of your cookies will be directly influenced by the quality of these ingredients.
2. Use the Double Boiler Method: Place a heatproof bowl over a pot of simmering water. Ensure that the bowl doesn’t touch the water, as direct heat can burn the chocolate. Stir the chocolate and butter frequently until they melt together smoothly.
3. Microwave Method: Alternatively, you can melt the chocolate and butter in the microwave. Use a microwave-safe bowl and heat in 20-30 second intervals, stirring in between to prevent scorching.
4. Avoid Overheating: Be careful not to overheat the mixture, as this can cause the chocolate to seize. Remove the melted mixture from heat as soon as it has just combined smoothly.
Mixing Wet Ingredients: Importance of Whisking for Texture
Once your chocolate and butter are melted and combined, the next step is to whisk in the sugar, eggs, and vanilla extract. This step is critical for achieving the right texture for your brownies.
– Whisking Techniques: Use a hand whisk or an electric mixer on low speed to combine the wet ingredients. Whisking introduces air into the mixture, which is essential for a light and airy texture. Aim for a glossy finish when the mixture is fully combined.
– Incorporate Air: Whisking not only blends your ingredients but also helps to dissolve the sugar, giving your cookies a smoother mouthfeel. Ensure that the eggs are at room temperature to mix more easily.
Incorporating Dry Ingredients: How to Avoid Overmixing
With the wet ingredients ready, it’s time to add the dry ingredients. This includes all-purpose flour, cocoa powder, baking powder, and a pinch of salt. However, it’s important to handle this step with care to avoid overmixing.
1. Sift Dry Ingredients: Sift the dry ingredients together before adding them to the wet mixture. This helps to break up any clumps and ensures an even distribution of the cocoa powder and baking powder.
2. Gentle Folding Method: When combining the dry ingredients with the wet mixture, use a spatula to gently fold them together. Stop mixing as soon as there are no visible flour streaks. Overmixing can lead to tough cookies, so aim for a slightly lumpy batter.
Shaping the Cookies: Techniques for Uniformity and Sealing the Chocolate Filling
Once you have your batter ready, it’s time to shape the cookies. Achieving uniform cookies will ensure even baking and a consistent molten center.
1. Use a Cookie Scoop: For uniformity, use a cookie scoop to portion the dough. This ensures that each cookie is the same size, allowing for even baking.
2. Sealing the Chocolate Filling: To create the molten center, scoop a small amount of dough into your palm, flatten it slightly, and place a piece of chocolate or a spoonful of chocolate ganache in the center. Enclose the chocolate with the dough and roll it into a ball. This sealing technique ensures that the chocolate remains hidden until the cookie is baked.
Baking Time and Temperature: Achieving the Perfect Molten Center
Baking these cookies requires precision to achieve that signature molten center. Here’s what you need to know:
1. Preheat the Oven: Ensure your oven is preheated to 350°F (175°C). This temperature is optimal for achieving a crispy exterior while keeping the inside gooey.
2. Baking Time: Bake the cookies for about 10-12 minutes. Keep a close eye on them—overbaking can lead to a dry cookie with no molten center. The edges should look set while the center remains soft.
Cooling Tips to Maintain the Gooey Texture
After removing the cookies from the oven, it’s essential to know how to cool them properly to maintain that desirable gooey texture.
– Let Them Cool on the Baking Sheet: Allow the cookies to cool on the baking sheet for about 5 minutes. This helps them set while still retaining heat, allowing the center to stay molten.
– Transfer with Care: Use a spatula to transfer the cookies to a wire rack. Be gentle, as the centers may still be quite soft.
The Science Behind the Molten Center
Understanding the science behind the baking process can help you achieve the perfect Chocolate Lava Brownie Cookies.
– Baking Temperature Effects: Baking at the right temperature is essential. If the oven is too hot, the cookies will bake too quickly, resulting in a solid center. Conversely, too low of a temperature may prevent them from setting properly.
– Dark Chocolate’s Role: Dark chocolate not only contributes to the flavor but also plays a significant role in creating the lava effect. Its lower sugar content allows it to melt beautifully, creating that gooey center that everyone loves.
– Perfect Timing: Achieving the perfect gooey center is all about timing. The cookies should be removed from the oven when the edges are set but the center is still soft. This ensures that the heat from the cookie continues to cook the center without solidifying it.
Serving Suggestions
Now that you have perfectly baked Chocolate Lava Brownie Cookies, it’s time to enjoy them! Here are some delicious serving suggestions:
1. Warm with Ice Cream: Serve the cookies warm, allowing the molten center to flow out, paired with a scoop of vanilla or chocolate ice cream for a delightful contrast in temperature and texture.
2. Fresh Fruit: Consider serving with fresh strawberries or raspberries to cut through the richness of the chocolate and add a refreshing touch.
3. Coffee Pairing: Pair these cookies with a cup of rich coffee or espresso. The bitterness of the coffee complements the sweetness of the chocolate, enhancing the overall flavor experience.
4. Presentation Tips: Dust the cookies with powdered sugar right before serving for an elegant touch. This not only enhances the appearance but also adds a slight sweetness that balances the rich chocolate.
Storage and Reheating Tips
If you have leftover cookies (though they’re unlikely to last long!), here are some best practices for storing and reheating them:
– Storing Leftovers: Place the cookies in an airtight container at room temperature. They can be stored for up to 3 days. For longer storage, consider placing them in the refrigerator, but be mindful that this may affect the texture.
– Reheating: To restore the molten effect, preheat the oven to 350°F (175°C) and place the cookies on a baking sheet. Heat for about 5-7 minutes until warm and gooey again. Alternatively, you can microwave them for about 15-20 seconds, but be careful not to overdo it, as this can make them tough.
Nutritional Information
While indulging in Chocolate Lava Brownie Cookies is a treat, it’s good to be aware of the nutritional aspects:
– Nutritional Overview: Each cookie roughly contains about 200 calories, with a balance of carbohydrates, fats, and proteins. The exact nutritional values may vary based on the specific ingredients used.
– Balance of Indulgence and Moderation: These cookies are rich and decadent, so enjoy them as an occasional treat rather than a daily indulgence. Pairing them with fresh fruit or a light dessert can help balance your overall dessert experience.
Conclusion
Baking Chocolate Lava Brownie Cookies is not just about creating a delightful dessert; it’s about the joy of sharing delicious treats with family and friends. The combination of a crispy exterior and a molten chocolate center creates a memorable treat that is sure to impress.
With this recipe, you can indulge in a dessert that captures the essence of chocolate in its most luxurious form. Whether you’re hosting a gathering or simply treating yourself, these cookies are a fantastic choice.
We encourage you to try this recipe and experience the joy of baking! And if you’re looking for more chocolate-inspired creations, explore our collection of chocolate recipes that promise to take your culinary adventures even further. Happy baking!
