Introduction
For many, Little Debbie products evoke a sense of nostalgia and comfort, bringing back cherished childhood memories and simple pleasures. These delightful snack cakes have been a staple in American households since their introduction in 1960, with each offering a unique flavor and texture that has made them beloved by all ages. From the classic Swiss Rolls to the iconic Zebra Cakes, Little Debbie treats are synonymous with sweetness and joy.
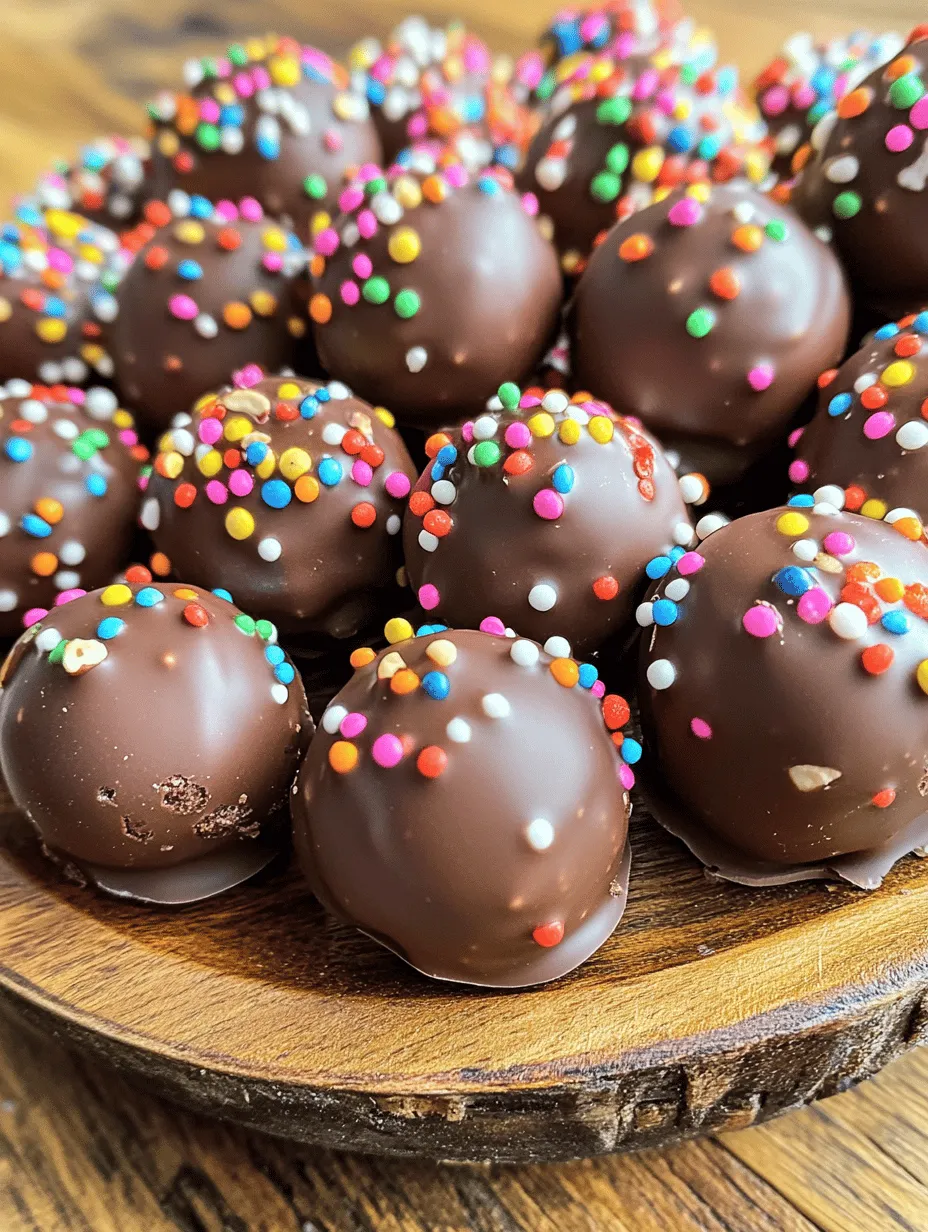
In the world of desserts, cake balls have emerged as a fun and versatile option that allows for creativity and personalization. These bite-sized morsels are not only easy to make but also perfect for any occasion, whether it’s a birthday celebration, a holiday gathering, or just an everyday treat. Little Debbie Cake Balls combine the familiar flavors of your favorite snack cakes with a creamy, rich filling, creating a delightful dessert that is as enjoyable to make as it is to eat.
Making Little Debbie Cake Balls is a simple process that requires minimal ingredients and time, allowing you to indulge in the sweet experience without the hassle of complicated baking techniques. The joy of crafting these cake balls lies in their adaptability, enabling you to experiment with various flavors and toppings to suit your taste. In this article, we will explore the ingredients, the step-by-step process, and some creative ideas to elevate your Little Debbie Cake Balls to the next level.
Understanding the Ingredients
Overview of Little Debbie Snack Cakes
At the heart of this recipe are the iconic Little Debbie snack cakes. These treats come in an impressive variety of flavors, each with its own unique taste and texture. Some of the most popular options include Swiss Rolls, which feature a rich chocolate cake rolled around a creamy filling; Zebra Cakes, with their delightful vanilla cake layered with frosting and drizzled with chocolate; and Honey Buns, which offer a sweet and sticky cinnamon-infused experience.
Each of these Little Debbie cakes presents a different flavor profile that can be transformed into cake balls. The versatility of these snack cakes means you can mix and match flavors to create your ultimate dessert experience. Whether you prefer the rich chocolate goodness of Swiss Rolls or the light, fluffy nature of Zebra Cakes, there’s a Little Debbie cake that can be turned into a delicious cake ball.
Importance of Cream Cheese in the Recipe
One of the key ingredients in Little Debbie Cake Balls is cream cheese. This ingredient plays a crucial role in achieving the perfect texture and flavor for your cake balls. Cream cheese adds a rich creaminess that offsets the sweetness of the cakes, resulting in a balanced flavor profile. Its smooth texture allows for easy mixing and helps bind the crumbled cake together, creating a cohesive dough-like consistency.
When selecting cream cheese for your recipe, it’s essential to use softened cream cheese. Softened cream cheese blends more easily with the crumbled cake, ensuring a uniform mixture without lumps. This step is vital for achieving that delightful cake ball texture that melts in your mouth.
Choosing the Right Chocolate
The chocolate coating is another critical component of Little Debbie Cake Balls. For a classic and sweet flavor, milk chocolate chips are often the go-to choice. Milk chocolate provides a creamy, rich layer that complements the sweetness of the cake balls beautifully. However, if you prefer a slightly more intense flavor, consider using dark chocolate chips. Dark chocolate offers a richer taste and can balance out the sweetness of the cake and cream cheese.
White chocolate is also an excellent option for those who enjoy a sweeter, creamier coating. You can even combine different types of chocolate for a unique look and flavor. The choice of chocolate not only affects the taste but also the visual appeal of the cake balls, so feel free to experiment with different types to find your perfect combination.
Optional Ingredients and Their Impact
Besides the essential ingredients, several optional additions can enhance the flavor and presentation of your Little Debbie Cake Balls. One such ingredient is vanilla extract, which can elevate the overall taste by adding a warm, aromatic note. A splash of vanilla extract can make a significant difference in flavor, so don’t skip this step.
Additionally, consider incorporating other flavorings or toppings to personalize your cake balls. Sprinkles, crushed nuts, or even shredded coconut can add texture and visual interest to your finished dessert. Decorating your cake balls with colorful sprinkles or drizzling them with melted chocolate can transform them into a festive treat suitable for any celebration.
Step-by-Step Instructions for Making Little Debbie Cake Balls
Crumbling the Cakes
The first step in creating your Little Debbie Cake Balls is to crumble the cakes. This process is crucial for achieving the right consistency and ensuring that your cake balls hold together. Start by selecting your favorite Little Debbie snack cakes; you can use one flavor or mix different flavors for a unique combination.
To crumble the cakes effectively, it’s often helpful to freeze them for about 30 minutes before starting. Freezing makes the cakes firmer and easier to handle, preventing them from becoming too mushy during the crumbling process. Once the cakes are chilled, remove them from the freezer and break them into smaller pieces. You can use your hands to crumble the cakes into fine crumbs or place them in a food processor for a quicker method. If using a food processor, pulse gently to achieve a fine crumb without turning it into powder.
Mixing with Cream Cheese
After crumbling the cakes, it’s time to mix in the cream cheese. Make sure your cream cheese is softened to room temperature for easy blending. In a large mixing bowl, combine the crumbled cake with the softened cream cheese. Using a spatula or your hands, mix the two ingredients together until fully combined. The goal is to achieve a dough-like consistency that holds together when pressed.
As you mix, ensure there are no dry clumps of cake or lumps of cream cheese remaining. If the mixture feels too dry, you can add a little more cream cheese to achieve the desired consistency. Conversely, if the mixture is too wet, try adding more crumbled cake until it reaches the perfect balance.
Shaping the Cake Balls
Once your cake and cream cheese mixture is well combined, it’s time to shape the cake balls. Take a small portion of the mixture and roll it into a ball about one inch in diameter. You can use a cookie scoop or your hands for this step. This process is straightforward, but you can also get creative by making different sizes or shapes, depending on your preference.
As you shape each ball, place them on a baking sheet lined with parchment paper. This will prevent them from sticking and make it easier to transfer them to the refrigerator later. Once you have shaped all of the cake balls, refrigerate them for about 30 minutes. Chilling the cake balls will help them firm up, making it easier to coat them in chocolate later on.
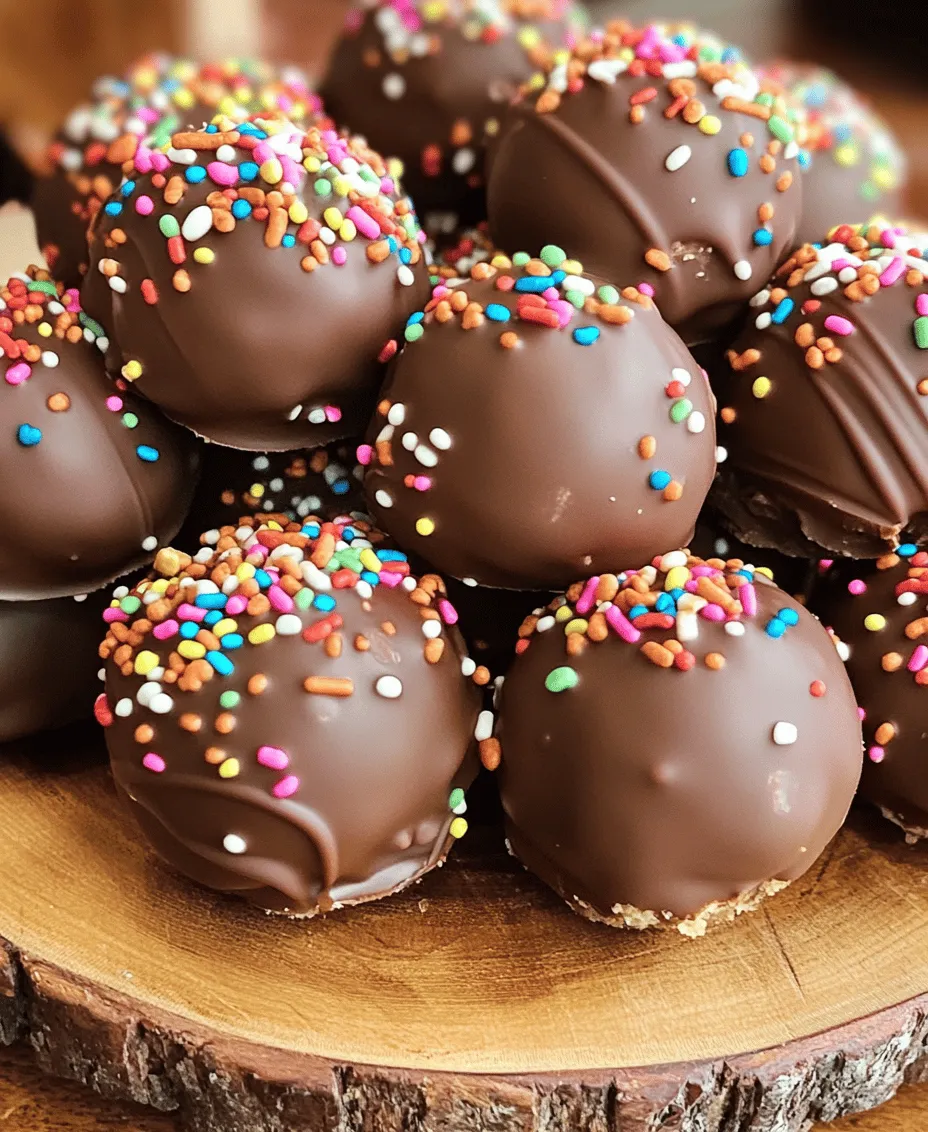
Ideal Size for Uniformity and Presentation
When crafting Little Debbie Cake Balls, achieving a uniform size is crucial for both presentation and even coating. Aim for each cake ball to be approximately 1 inch in diameter. This size is bite-sized, making it perfect for popping into your mouth while also allowing for a beautiful display when arranged on a platter. Using a cookie scoop can help ensure that each ball is the same size, creating an aesthetically pleasing batch that looks as good as it tastes.
Tips for Rolling Without Sticking
One of the challenges when rolling cake balls is ensuring they don’t stick to your hands. Here are a few tips to make this process smoother:
1. Chill the Mixture: After combining your cake crumbs and frosting, chill the mixture for about 30 minutes. This will firm up the dough, making it easier to handle.
2. Moisten Your Hands: Lightly dampen your hands with water or cooking spray before rolling. This can prevent the mixture from sticking to your skin.
3. Use Gloves: If you prefer, wearing disposable gloves can help keep the mixture from sticking while also making cleanup easier.
Chilling Process
Chilling your cake balls is an essential step in ensuring they maintain their shape and texture. Once you have rolled your cake mixture into balls, place them on a baking sheet lined with parchment paper.
Why Chilling is Essential for Texture and Ease of Dipping
Chilling serves multiple purposes. First, it firms up the cake balls, making them less likely to crumble during the dipping process. Second, it helps the flavors meld together, resulting in a richer taste. Lastly, a chilled cake ball is easier to dip into melted chocolate without losing its form.
Recommended Chilling Times for Best Results
For optimal results, chill the rolled cake balls in the refrigerator for at least 30 minutes. If time allows, consider chilling them for up to 2 hours. This longer chilling period helps ensure that the cake balls are perfectly set and ready for the chocolate coating.
Melting the Chocolate
Melting chocolate is a delicate process that can significantly influence the final texture and appearance of your Little Debbie Cake Balls.
Safe Melting Methods (Microwave vs. Double Boiler)
You can use either the microwave or a double boiler to melt your chocolate. Here’s how to do both safely:
– Microwave Method: Place your chocolate in a microwave-safe bowl. Heat in short bursts of 15-30 seconds, stirring between each interval. This prevents scorching and ensures an even melt.
– Double Boiler Method: Fill a saucepan with a few inches of water and bring it to a simmer. Place a heatproof bowl on top, ensuring it doesn’t touch the water. Add your chocolate to the bowl and stir until melted.
Tips for Achieving a Smooth Chocolate Consistency
To achieve a silky, smooth chocolate coating, consider these tips:
1. Use Quality Chocolate: High-quality chocolate melts better and provides a more luxurious finish.
2. Add a Fat: Adding a small amount of shortening or coconut oil can help create a smoother consistency and improve the flow of the chocolate.
3. Avoid Moisture: Ensure all your utensils and bowls are completely dry, as any water can cause the chocolate to seize.
Dipping and Decorating
Once your chocolate is melted, it’s time to dip your chilled cake balls.
Techniques for an Even Chocolate Coating
To dip your cake balls evenly in chocolate, follow these steps:
1. Use a Fork or Dipping Tool: This allows you to coat the cake ball without getting your hands messy.
2. Tap Off Excess: After dipping, gently tap the fork against the bowl’s edge to let excess chocolate drip off.
3. Place on Parchment: Carefully place the dipped balls back on the parchment paper to set.
Creative Decoration Ideas for Personalizing Cake Balls
Elevate the appearance of your Little Debbie Cake Balls with these decoration ideas:
– Sprinkles: Add colorful sprinkles immediately after dipping for a fun look.
– Drizzles: Use a contrasting chocolate color to drizzle over the top for a decorative touch.
– Nuts: Roll the balls in finely chopped nuts or coconut flakes before the chocolate sets for added texture.
Setting the Chocolate
After decorating, it’s essential to let the chocolate harden properly.
The Importance of Letting Chocolate Harden Properly
Allowing the chocolate to set not only provides that satisfying crunchy shell but also enhances the overall flavor by allowing the chocolate to meld with the cake ball.
Best Practices for Storage Once Set
Once the chocolate has hardened, store the cake balls in an airtight container. They can be kept at room temperature for up to a week or refrigerated for up to two weeks. If you are stacking them, place parchment paper between layers to avoid sticking.
Serving Suggestions and Pairings
Little Debbie Cake Balls are versatile treats that can be enjoyed in many settings.
Ideas for Serving Little Debbie Cake Balls at Parties and Gatherings
These cake balls make excellent party treats. Arrange them on a decorative platter or tiered cake stand for a stunning display. They are perfect for birthdays, holidays, or any festive occasion.
Beverage Pairings that Complement the Sweetness
Pair your Little Debbie Cake Balls with beverages that balance their sweetness:
– Coffee: The rich flavor of coffee complements the sweet chocolate and cake.
– Milk: A classic pairing that enhances the nostalgic flavor of the cake balls.
– Dessert Wines: For adult gatherings, consider sweet dessert wines that echo the flavors of the cake.
Creative Ways to Present Cake Balls for Special Occasions
For special occasions, consider these presentation ideas:
– Individual Wrapping: Wrap each cake ball in colorful foil or treat bags for party favors.
– Themed Decorations: Use decorations that match the event’s theme, such as festive sprinkles or colored chocolate.
Nutritional Information
Understanding the nutritional aspect of your treats is essential.
Overview of Serving Size and Calories per Cake Ball
Each Little Debbie Cake Ball is roughly 100 calories, depending on the specific ingredients and chocolate used. A serving size of two balls is typically satisfying for most.
Discuss Potential Dietary Considerations or Modifications
For those with dietary restrictions, consider these modifications:
– Gluten-Free Options: Use gluten-free cake mix and frosting to accommodate gluten sensitivities.
– Dairy-Free Variants: Substitute traditional chocolate with dairy-free chocolate for vegan adaptations.
Conclusion
Creating Little Debbie Cake Balls at home is not only a fun activity but also a rewarding way to indulge in a nostalgic treat. The joy of making these cake balls lies in the creativity they allow—experiment with flavors, decorations, and presentations to make them uniquely yours. Whether you’re sharing them with friends and family at a gathering or enjoying them as a personal treat, the satisfaction of crafting these delightful bites is sure to bring smiles. Embrace this opportunity to explore your culinary creativity while enjoying the delicious outcome of your efforts!
