Introduction
Little Caesars Crazy Puffs have captured the hearts and taste buds of pizza lovers everywhere. These delightful, stuffed dough balls bring an irresistible combination of flavors and textures that leave you craving more. Whether enjoyed as a savory snack, a side dish, or even an appetizer at gatherings, Crazy Puffs stand out for their delicious filling and easy preparation.
What makes Crazy Puffs especially appealing is their versatility. You can customize them with a variety of toppings and fillings to suit your dietary preferences. Whether you’re a meat lover, vegetarian, or looking for gluten-free options, Crazy Puffs can be adapted to meet your needs. With just a few simple ingredients and a little creativity, you can elevate your snacking game and impress your friends and family.
Understanding Crazy Puffs: A Culinary Delight
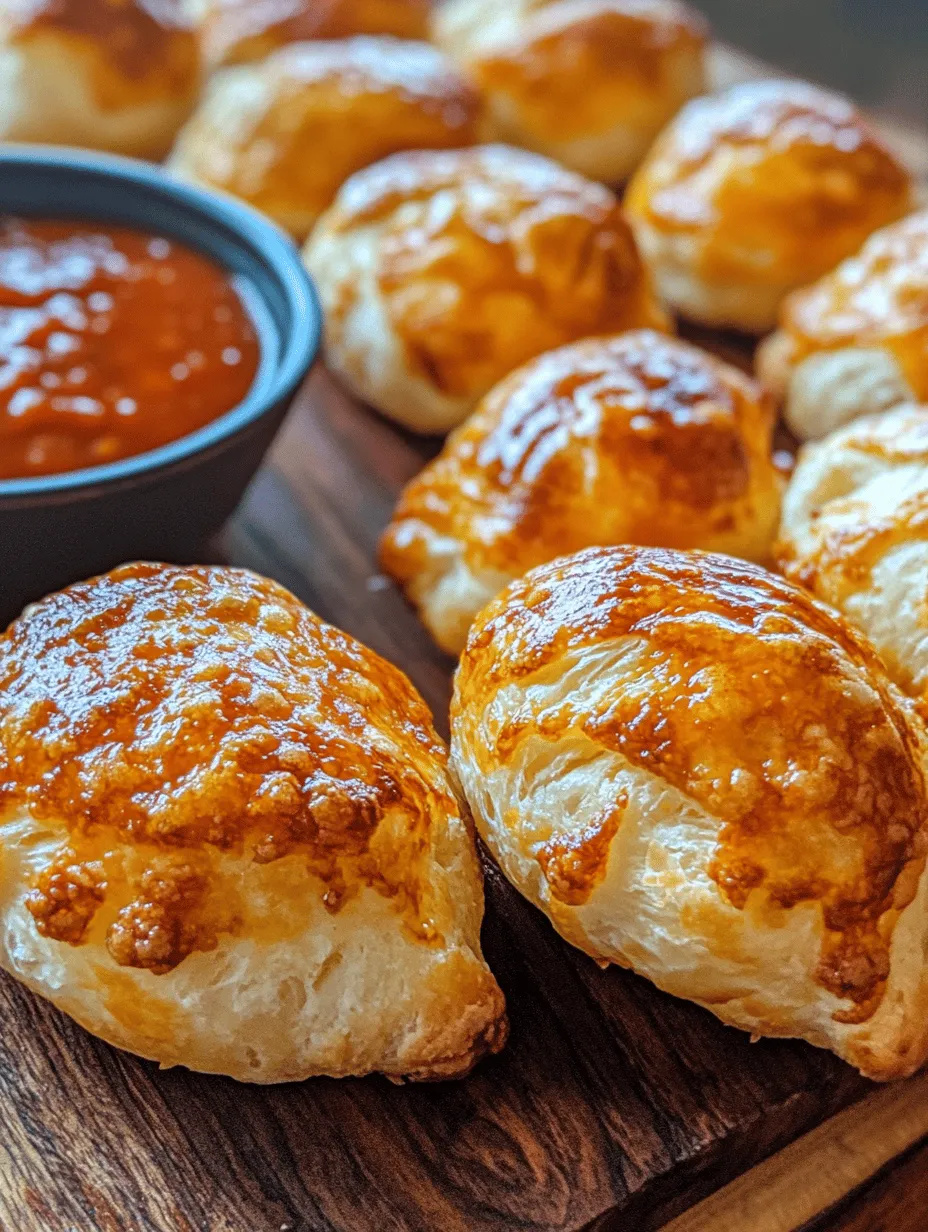
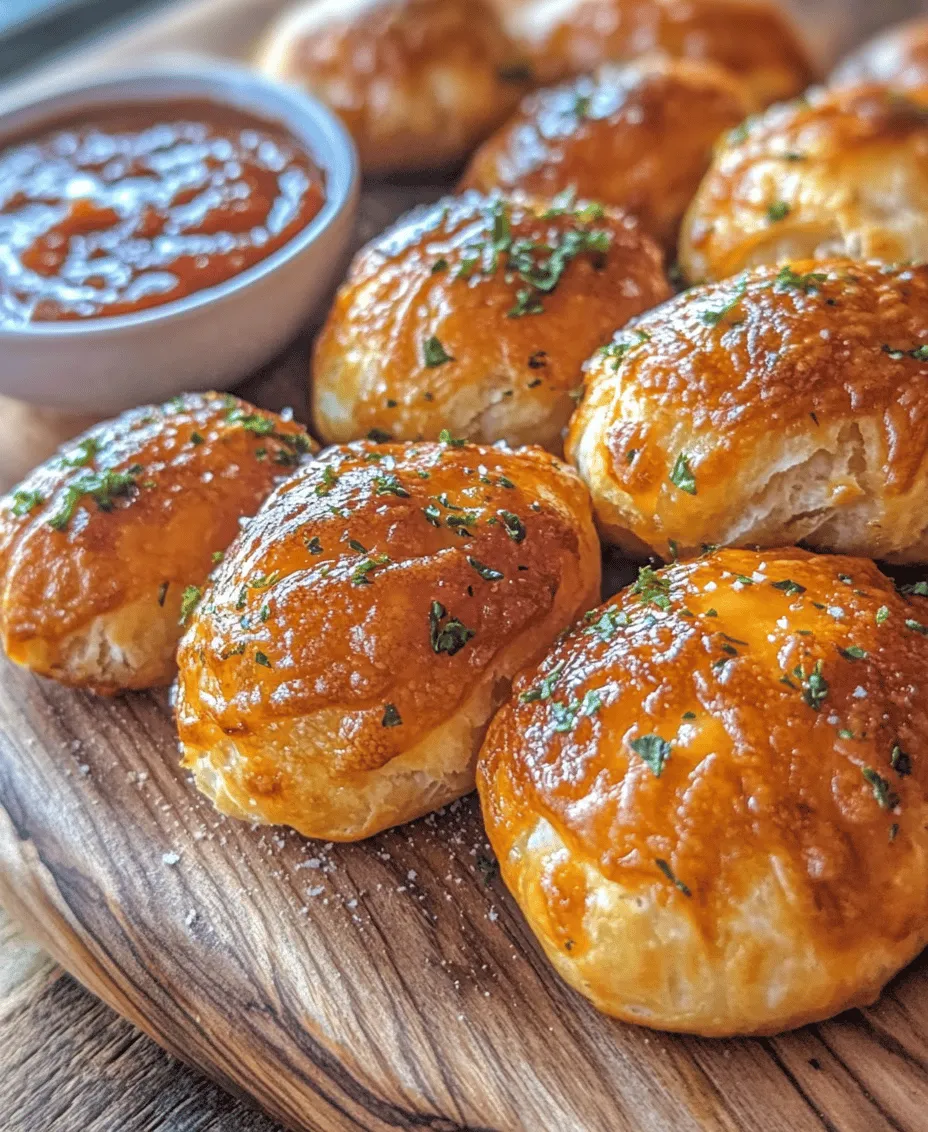
Crazy Puffs are a delightful representation of comfort food. These baked or fried dough balls are typically filled with gooey cheese and savory toppings like pepperoni, making them a beloved choice for many. The crispy outer layer gives way to a soft and cheesy center, creating a mouthwatering experience with every bite.
The concept of stuffed dough is not unique to Crazy Puffs; numerous cultures boast similar recipes. From Italian calzones and Spanish empanadas to Eastern European pierogi, the idea of encasing delicious fillings in dough has a long history across the globe. Each variation showcases unique ingredients and flavors, reflecting the culinary traditions of its region. Crazy Puffs, however, have carved out their niche in American fast food, particularly through the popular Little Caesars brand, making them a household name.
The history of stuffed dough recipes can be traced back centuries. Many cultures have embraced the art of wrapping dough around various fillings, often using readily available ingredients. These innovations have allowed families to create hearty meals that are both satisfying and economical. Crazy Puffs continue this legacy by providing a modern twist on a classic culinary technique, making them perfect for anyone looking to enjoy a comforting snack.
Ingredients Breakdown: What You Need for Crazy Puffs
To create your own Little Caesars Crazy Puffs, you’ll need to gather a few essential ingredients. Each component plays a crucial role in achieving the perfect flavor and texture. Here’s a detailed breakdown of what you’ll need:
– Warm Water: This ingredient is vital for activating the yeast. The water should be warm but not hot—ideally around 110°F (43°C)—to ensure optimal yeast activity without killing it.
– Active Dry Yeast: The key to achieving the perfect rise in your dough, active dry yeast ferments the sugars, producing carbon dioxide bubbles that make the dough light and airy.
– Sugar: A small amount of sugar enhances the flavor of the Crazy Puffs while also feeding the yeast, further aiding in the fermentation process.
– All-Purpose Flour: This is the foundation of your dough. All-purpose flour provides the right balance of protein and gluten, resulting in a soft yet sturdy texture. If you’re looking for a gluten-free alternative, consider using a gluten-free all-purpose flour blend.
– Salt: Salt enhances the overall flavor of the dough and strengthens the gluten structure, which is essential for a chewy texture.
– Olive Oil: Adding richness and moisture to the dough, olive oil contributes to a tender crumb and helps keep the Crazy Puffs from drying out.
– Shredded Mozzarella Cheese: The star filling of your Crazy Puffs, mozzarella cheese offers excellent melting properties and a mild flavor that pairs well with other ingredients.
– Pepperoni Slices: A classic topping option that adds a savory kick, pepperoni can be substituted with other meats, vegetables, or even plant-based alternatives for those with dietary restrictions.
– Egg (for egg wash): This ingredient is brushed on the dough before baking to provide a beautiful golden finish.
– Garlic Powder and Italian Seasoning: Flavor enhancers that add depth and authenticity to your Crazy Puffs, these spices are essential for achieving that classic Italian taste.
– Marinara Sauce: A suggested dipping option, marinara sauce complements the flavors of the Crazy Puffs perfectly. You can also experiment with other dipping sauces, such as ranch or garlic butter.
Step-by-Step Instructions for Perfect Crazy Puffs
Activating the Yeast
The first step in creating your Crazy Puffs is to activate the yeast. Proper activation is crucial for achieving the perfect rise and texture in your dough. Here’s how to do it:
1. Measure the Warm Water: Begin by measuring out the required amount of warm water. Ensure that it is within the ideal temperature range of 100°F to 110°F (37°C to 43°C). If you don’t have a thermometer, test the water with your wrist; it should feel warm but not hot.
2. Add Sugar and Yeast: Pour the warm water into a mixing bowl and add the sugar. Gently stir to dissolve the sugar, then sprinkle the active dry yeast evenly over the surface of the water. Let it sit for about 5 to 10 minutes. During this time, the yeast will begin to bubble and foam, indicating that it is activated and ready to use.
3. Check for Foaming: After the resting period, check for a frothy layer on top of the water. If you see bubbles and the mixture has expanded, your yeast is active and can be used in the dough. If not, you may need to start over with new yeast and ensure the water temperature is correct.
By carefully following these activation steps, you will set the foundation for your Crazy Puffs. As we move forward, the next steps will guide you through mixing the ingredients and forming the dough, leading you closer to creating these delicious bites. Stay tuned for the continuation of this exciting recipe!
Making the Dough: Techniques for Mixing and Achieving the Right Texture
To create perfect Little Caesars Crazy Puffs, mastering the dough is essential. Start by gathering your ingredients: all-purpose flour, yeast, sugar, salt, warm water, and olive oil. In a large mixing bowl, combine the flour, sugar, and salt. In a separate bowl, dissolve the yeast in warm water (about 110°F) and let it sit for 5 to 10 minutes until it becomes frothy. This step ensures that the yeast is active, which is crucial for the dough’s rise.
Once the yeast mixture is ready, create a well in the center of the dry ingredients and pour the yeast mixture and olive oil into it. Using a wooden spoon or your hands, mix the ingredients until they come together into a shaggy dough. At this point, the dough should be slightly sticky but not overly wet. If it’s too sticky, gradually add more flour, a tablespoon at a time, until you achieve a manageable texture.
Kneading the Dough: Tips on How to Knead Effectively for Elasticity
Kneading is a critical step that develops gluten, giving your dough its elasticity and strength. Transfer the dough onto a floured surface and begin kneading. Fold the dough in half, then push it down and away from you with the heel of your hand. Rotate the dough a quarter turn and repeat this process. Knead for about 8 to 10 minutes until the dough is smooth and elastic, bouncing back when poked.
If the dough sticks to your hands or the surface, sprinkle a bit of flour as needed, but avoid adding too much to keep the dough tender. You can also perform the “windowpane test” to check if your dough is adequately kneaded; stretch a small piece of the dough between your fingers. If it forms a thin, translucent membrane without tearing, you’re good to go!
The First Rise: Best Practices for Proofing Dough, Including Temperature Considerations
Once kneaded, shape the dough into a ball and place it in a lightly oiled bowl, turning it to coat with oil. Cover the bowl with a clean kitchen towel or plastic wrap to prevent drafts. Allow the dough to rise in a warm, draft-free area until it doubles in size—this usually takes about 1 to 1.5 hours. An ideal temperature for proofing is around 75°F to 80°F. If your kitchen is cool, you can create a warm environment by preheating your oven to the lowest setting for a few minutes, then turning it off and placing the dough inside.
Preparing the Filling: Creative Ideas for Different Fillings and Combinations
While the dough rises, it’s time to prepare your filling. The classic Crazy Puffs are filled with pepperoni and mozzarella, but feel free to get creative. Here are a few filling ideas to tantalize your taste buds:
1. Cheesy Spinach and Ricotta: Combine fresh spinach, ricotta cheese, and mozzarella for a creamy, flavorful filling.
2. Buffalo Chicken: Shredded chicken mixed with buffalo sauce and cream cheese creates a spicy, tangy filling.
3. Mushroom and Garlic: Sautéed mushrooms with garlic and herbs can add an earthy flavor.
4. Mediterranean Veggie: A mix of feta, olives, sun-dried tomatoes, and fresh herbs for a fresh, vibrant taste.
Mix your chosen filling ingredients in a bowl and set aside until you are ready to assemble your Crazy Puffs.
Shaping the Crazy Puffs: Techniques for Ensuring a Proper Seal and Shape
Once the dough has risen, punch it down to release air and turn it onto a floured surface. Divide the dough into equal portions, about the size of a golf ball. Roll each piece into a circle, roughly 4-5 inches in diameter. Take a tablespoon of your prepared filling and place it in the center of each circle.
To shape the Crazy Puffs, fold the dough over the filling, creating a half-moon shape. Pinch the edges together firmly to seal, ensuring no filling escapes during baking. For an extra secure seal, you can crimp the edges with a fork. Place the shaped Crazy Puffs on a parchment-lined baking sheet, allowing enough space between each to ensure they don’t stick together.
Preparing for Baking: Importance of Egg Wash and Oven Preheating for Optimal Results
Before baking, preheat your oven to 375°F (190°C). To achieve a beautiful golden-brown finish, brush each Crazy Puff with an egg wash made from one beaten egg mixed with a tablespoon of water. This step not only enhances the color but also adds a slight sheen to the finished product.
Baking: Ideal Temperature and Time for Achieving the Perfect Golden-Brown Finish
Bake the Crazy Puffs in the preheated oven for 20-25 minutes or until they are golden brown and puffed up. Keep an eye on them in the last few minutes to prevent over-baking. The aroma of baking dough and melted cheese will fill your kitchen, indicating that your Crazy Puffs are nearly ready!
Serving Suggestions: Ideas for Presentation and Additional Dipping Sauces
Once baked, remove the Crazy Puffs from the oven and let them cool for a few minutes. For an appealing presentation, arrange them on a serving platter and garnish with fresh herbs like parsley or basil. Serve with a variety of dipping sauces to elevate the experience. Here are a few ideas:
– Marinara Sauce: A classic pairing that complements the flavors of the Crazy Puffs.
– Ranch Dressing: A creamy dip that adds a cool contrast.
– Buffalo Sauce: For those who love extra heat, this sauce is a perfect match.
– Garlic Aioli: A flavorful, garlicky sauce for a gourmet touch.
Tips for Customizing Your Crazy Puffs
Suggestions for Various Fillings Beyond Pepperoni and Mozzarella
While pepperoni and mozzarella may be the traditional filling, don’t be afraid to explore other combinations! Consider using:
– BBQ Chicken: Swap out pepperoni for BBQ chicken, mixing it with cheddar cheese and red onion for a zesty twist.
– Caprese Style: Fresh mozzarella, basil, and sun-dried tomatoes create a refreshing filling that’s perfect for summer.
Vegetarian and Vegan Alternatives for the Recipe
For a vegetarian option, consider using a mix of sautéed vegetables and cheeses. For a vegan adaptation, substitute the cheese with cashew cheese or a dairy-free alternative and use a plant-based egg wash (like almond milk mixed with a bit of turmeric for color).
How to Incorporate Seasonal Ingredients into the Filling
Seasonal ingredients can add freshness and variety to your Crazy Puffs. In the spring, consider using asparagus and goat cheese; in the fall, try roasted pumpkin with sage. Always be on the lookout for local produce that can enhance your filling.
Storing and Reheating Crazy Puffs
Best Practices for Storing Leftover Crazy Puffs to Maintain Freshness
If you have any leftover Crazy Puffs, store them in an airtight container in the refrigerator for up to three days. To maintain their freshness, you can also freeze them. Place the cooled Crazy Puffs in a single layer on a baking sheet and freeze until solid, then transfer to a freezer-safe bag or container.
Techniques for Reheating to Restore Crispiness Without Drying Out
To reheat, preheat your oven to 350°F (175°C). Place the Crazy Puffs on a baking sheet and cover them loosely with aluminum foil to prevent over-browning. Heat for about 10-15 minutes or until warmed through. This method helps retain their crispy exterior while ensuring the inside remains moist.
Nutritional Information
For those interested in the nutritional content of Crazy Puffs, each serving roughly contains:
– Calories: 250
– Protein: 10g
– Carbohydrates: 30g
– Fat: 10g
To make the recipe healthier, consider using whole wheat flour instead of all-purpose flour or reducing the amount of cheese. You can also load up the filling with vegetables to increase the fiber content.
Conclusion
Making Little Caesars Crazy Puffs at home is not just about creating a delicious snack; it’s an opportunity for culinary creativity and family fun. The joy of kneading the dough, shaping the puffs, and exploring different fillings allows you to personalize this treat to suit your tastes. Whether you choose classic pepperoni or try a new vegetable medley, these Crazy Puffs are sure to impress your family and friends.
Experimenting with various fillings and dipping sauces can transform this simple recipe into an array of delightful appetizers, making them perfect for parties, game nights, or as a comforting snack. Embrace the versatility of Crazy Puffs and enjoy the satisfaction of creating something special in your own kitchen.
