Introduction
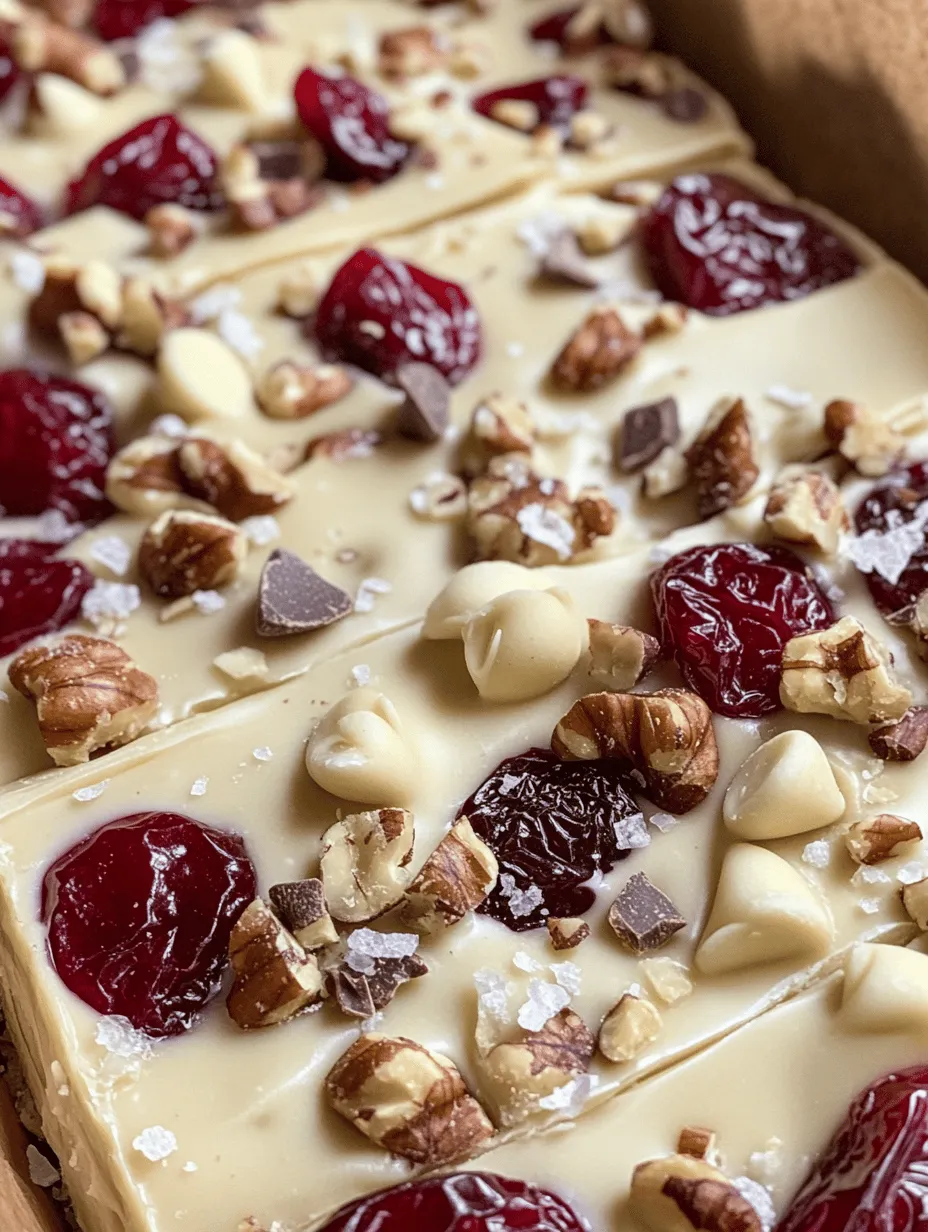
Fudge—a beloved dessert that has captured the hearts of many with its rich, creamy texture and sweet, indulgent flavor. This treat is not just a simple candy; it is a versatile dessert that can be customized in countless ways, making it a favorite for both casual gatherings and festive celebrations. Among the many variations of this classic sweet, the white chocolate cherry fudge stands out as a delightful blend of creamy sweetness and fruity tartness, creating a symphony of flavors that is hard to resist.
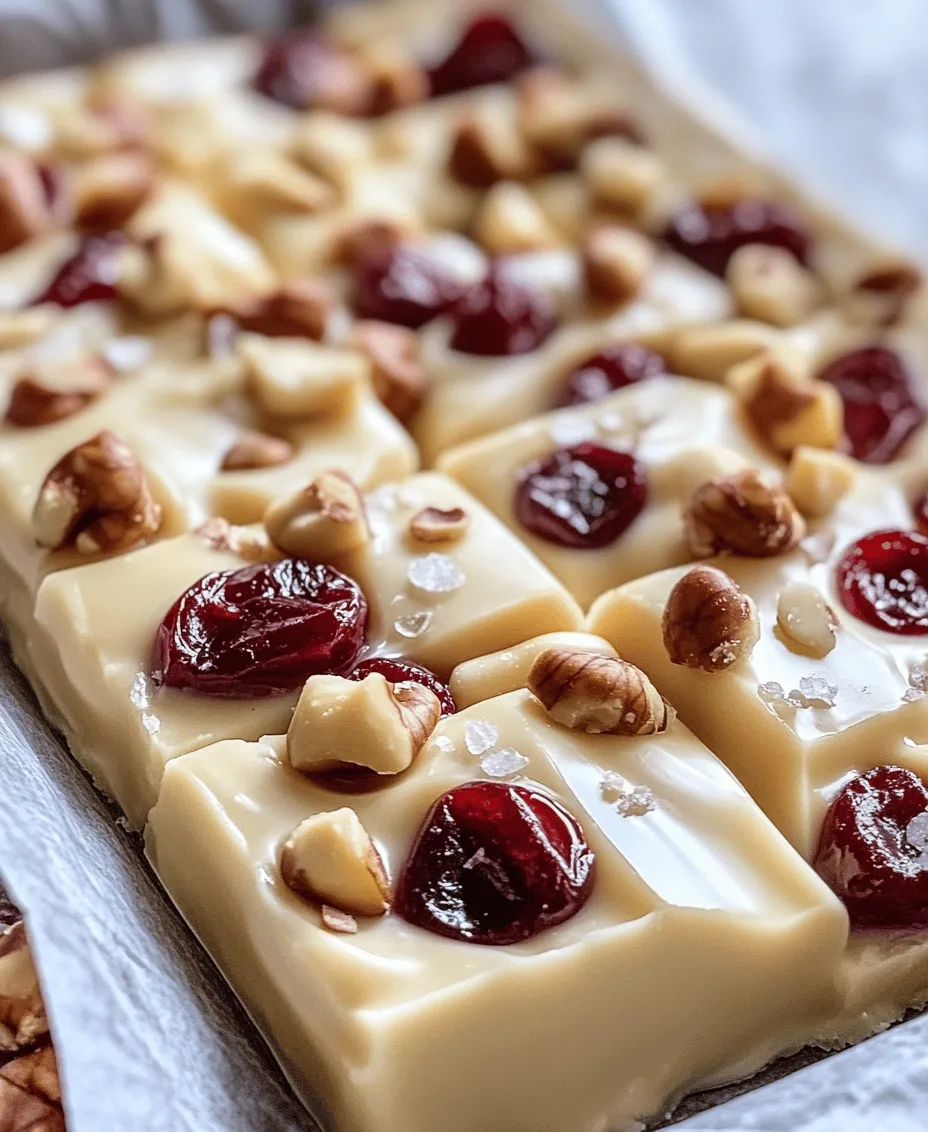
Imagine biting into a piece of silky white chocolate fudge, only to be met with the luscious tartness of cherries that perfectly complements the sweetness of the chocolate. This irresistible combination makes white chocolate cherry fudge an ideal choice for special occasions, holiday gatherings, or simply as a decadent treat to enjoy at home. Not only is it delicious, but this fudge is also incredibly easy to make, allowing you to impress family and friends with minimal effort.
Homemade fudge has a unique appeal that store-bought varieties simply cannot match. The process of making fudge from scratch offers a sense of satisfaction and creativity, allowing you to control the ingredients and customize them to your liking. Whether you are preparing a batch for a festive celebration or just for a cozy night in, making white chocolate cherry fudge will surely become a cherished tradition in your kitchen.
Understanding the Ingredients
To create the perfect white chocolate cherry fudge, it’s essential to understand the key ingredients that contribute to its flavor and texture. Each component plays a vital role, ensuring that the final product is not only delicious but also has the right consistency. Let’s explore the main ingredients that make this fudge an irresistible treat.
White Chocolate Chips
At the heart of the white chocolate cherry fudge are white chocolate chips. Unlike their dark and milk chocolate counterparts, which contain cocoa solids, white chocolate is made from cocoa butter, sugar, and milk solids. This gives it a creamy texture and a sweet flavor that pairs beautifully with tart cherries. When melted, white chocolate creates a smooth and luxurious base for the fudge, making it rich and satisfying. It’s important to choose high-quality white chocolate chips for the best results, as they will impact the overall flavor and consistency of the fudge.
Sweetened Condensed Milk
Another key ingredient in this fudge recipe is sweetened condensed milk. This thick, sweet milk serves as both a sweetener and a binder, helping to hold the fudge together while adding an extra layer of sweetness. The creamy texture of sweetened condensed milk contributes to the smoothness of the fudge, ensuring that each bite melts in your mouth. It’s a staple in many fudge recipes due to its convenience and ability to enhance the overall flavor profile.
Dried Cherries
Dried cherries are the star of this fudge, adding a delightful burst of tartness that balances the sweetness of the white chocolate. These chewy morsels infuse the fudge with a fruity flavor that is both refreshing and satisfying. Nutritionally, dried cherries are rich in antioxidants and provide a good source of vitamins and minerals, making them a healthier addition to this indulgent treat. When incorporating dried cherries, be sure to chop them into smaller pieces to distribute their flavor evenly throughout the fudge.
Nuts (Walnuts or Pecans)
While nuts are optional, adding walnuts or pecans can enhance the overall texture and flavor of the fudge. The crunchiness of the nuts contrasts beautifully with the smoothness of the fudge, creating a delightful eating experience. Additionally, nuts are packed with healthy fats and protein, making them a nutritious complement to the sweet ingredients. If you choose to include nuts in your fudge, lightly toasting them beforehand can enhance their flavor, providing a richer taste.
Sea Salt
Though it may seem counterintuitive to include salt in a sweet recipe, a pinch of sea salt plays a vital role in enhancing the overall flavor of the fudge. Salt has the ability to balance sweetness, making each bite more complex and enjoyable. By adding just a small amount of sea salt, you can elevate the taste of the fudge, allowing the flavors of the white chocolate and cherries to shine through.
Overview of Equipment Needed
To prepare this delightful white chocolate cherry fudge, you will need a few essential pieces of equipment:
– Baking Dish: A 9×9-inch baking dish is ideal for setting the fudge. It’s important to have a dish that is not too large, as this will affect the thickness of the fudge.
– Parchment Paper: Lining the baking dish with parchment paper will make it easy to remove the fudge once it has set.
– Microwave-Safe Bowl: This is necessary for melting the white chocolate chips.
– Spatula or Wooden Spoon: You’ll need a spatula or wooden spoon for stirring the chocolate and combining the ingredients.
– Sharp Knife: A sharp knife is essential for cutting the fudge into neat squares once it has cooled and set.
With a clear understanding of the ingredients and the necessary equipment, you are well on your way to creating a batch of irresistible white chocolate cherry fudge. Now, let’s dive into the step-by-step instructions for making this delicious treat.
Step-by-Step Instructions for Making White Chocolate Cherry Fudge
Preparing the Pan
Before you begin mixing your ingredients, it’s crucial to prepare your baking dish properly. Start by lining your 9×9-inch baking dish with parchment paper. This step is essential for easy removal of the fudge once it’s set. To do this, cut a piece of parchment paper that is slightly larger than the bottom of the dish, allowing the edges to hang over the sides. This will create “handles” that make it easier to lift the fudge out once it’s ready. Additionally, lightly grease the parchment paper with a small amount of cooking spray or butter to prevent sticking.
Melting the Chocolate
Now it’s time to melt the white chocolate chips and sweetened condensed milk together. Place the white chocolate chips in a microwave-safe bowl and add the sweetened condensed milk. Heat the mixture in the microwave in 30-second intervals, stirring well after each interval to prevent scorching. It’s important to use low heat during this process, as white chocolate can burn easily. Aim for a smooth consistency—if there are still lumps after several intervals, continue heating in short bursts while stirring until fully melted.
Tips for Achieving a Smooth Chocolate Mixture
Achieving a smooth chocolate mixture is key to the success of your fudge. Here are some tips to ensure that your fudge has the perfect texture:
– Stir Constantly: As you melt the chocolate, make sure to stir continuously. This will help distribute the heat evenly and prevent any hot spots that could lead to scorching.
– Use a Heatproof Bowl: Opt for a glass or ceramic bowl, as these materials retain heat well and help melt the chocolate evenly.
– Avoid Water: Ensure that no water comes into contact with the chocolate, as even a small amount can cause it to seize up and become unusable.
Adding Flavors
Once your chocolate mixture is smooth and creamy, it’s time to add the flavor enhancers. Stir in a teaspoon of vanilla extract, which will elevate the overall flavor of the fudge. The warmth of the vanilla will complement the sweetness of the white chocolate and the tartness of the cherries, creating a well-rounded flavor profile.
Next, carefully fold in the dried cherries and any optional nuts you’ve chosen to include. Make sure to mix them evenly throughout the chocolate mixture, ensuring that each piece of fudge will have a delightful burst of cherry flavor.
As a final touch, sprinkle a pinch of sea salt into the mixture. This will help to balance the sweetness and enhance the overall flavor of the fudge. Stir until all ingredients are well combined, and the mixture is evenly distributed.
With these initial steps completed, you are well on your way to creating a batch of delicious white chocolate cherry fudge that is sure to impress. In the next part of this article, we will continue with the remaining steps and offer tips for achieving the best results with your fudge. Stay tuned for more delicious details!
Incorporating the Cherries and Nuts
Once your white chocolate mixture is silky smooth, it’s time to incorporate the cherries and nuts. This step is crucial to ensure that every bite of fudge is infused with the delicious flavors and textures of the added ingredients.
Techniques for Gently Folding in Ingredients
To avoid deflating the fluffy texture you’ve worked to achieve, use a gentle folding technique. Begin by adding the chopped cherries and nuts to the bowl with the melted chocolate mixture. Using a spatula, carefully cut through the mixture and lift it from the bottom, folding it over the top. Rotate the bowl as you go to ensure even distribution without overmixing. This technique helps maintain the airiness of the fudge while ensuring that every piece is filled with the delightful bursts of cherries and crunch from the nuts.
Variations with Different Dried Fruits or Nut Types
Feel free to experiment with different combinations of dried fruits and nuts to suit your taste. Dried cranberries, apricots, or even candied orange peel can be excellent substitutes for cherries, adding a unique flavor profile. Similarly, consider using walnuts, pecans, or almond slivers instead of traditional nuts to enhance the fudge’s texture and taste. Each variation can introduce a new twist to your fudge, making it a versatile treat for any occasion.
Transferring to the Pan
Once your mixture is well-combined, it’s time to transfer it to the prepared pan.
How to Evenly Distribute the Fudge Mixture for Uniform Slicing
Use your spatula to scrape the fudge mixture into the lined pan. Start from one corner and work your way to the opposite side, spreading the mixture evenly across the pan. To achieve a uniform surface, gently press down on the fudge with the spatula to eliminate air pockets and create an even layer. For a smoother finish, you can also use the back of a spoon to spread it evenly. Ensuring an even distribution will make slicing the fudge into squares much more manageable once it has set.
Chilling the Fudge
Refrigeration is a crucial step in the fudge-making process.
Importance of Refrigeration Time and How It Affects the Texture
Place the pan in the refrigerator and allow the fudge to chill for at least four hours, or preferably overnight. This chilling time allows the fudge to set properly, resulting in a firm yet creamy texture that’s easy to slice. If you try to cut the fudge too early, it may be too soft and sticky, making it difficult to achieve clean edges. Proper refrigeration also enhances the flavors, allowing the cherries and nuts to meld beautifully with the white chocolate.
Slicing and Serving
Once your fudge has set, it’s time for the fun part: slicing and serving!
Best Practices for Cutting Fudge into Squares
To slice the fudge, remove it from the pan by lifting the parchment paper. Place it on a clean cutting board and use a sharp knife for the best results. To achieve neat squares, score the fudge into squares before cutting all the way through. Wipe the knife with a damp cloth between cuts to prevent the fudge from sticking to the blade, ensuring clean, professional-looking pieces.
Presentation Ideas for Serving Fudge at Gatherings
For serving, arrange the fudge squares on a decorative platter or cake stand. You can elevate the presentation by adding fresh cherries and sprigs of mint for a pop of color. Wrapping individual pieces in decorative foil or parchment paper can also make for charming party favors or gifts. Consider displaying your fudge alongside other treats for a delightful dessert table, making it a standout among your homemade confections.
Nutritional Information
Understanding the nutritional profile of your fudge can be helpful for health-conscious bakers.
Breakdown of Calories, Fats, Sugars, and Other Nutritional Aspects Per Serving
Each square of white chocolate cherry fudge typically contains about 150 calories, with around 9 grams of fat, 18 grams of sugar, and 1 gram of protein. While rich in flavor, it’s essential to enjoy this treat in moderation. The exact nutritional values can vary based on the specific brands and types of ingredients used, so it’s advisable to calculate based on your specific recipe.
Discussion on Dietary Considerations
For those with dietary restrictions, this fudge is inherently gluten-free and can be adapted to fit vegetarian diets. If you’re looking for lower-sugar options, consider using sugar-free white chocolate or reducing the amount of cherries. Additionally, for vegan alternatives, substitute the white chocolate with a dairy-free chocolate option and ensure that any nuts or mix-ins are free from animal products.
Creative Variations and Flavor Combinations
To keep your fudge exciting, consider various creative variations and flavor combinations.
Alternative Ingredients for Those with Dietary Restrictions
If you’re catering to different dietary needs, think about using alternative ingredients. For a vegan version, opt for plant-based white chocolate. To make it nut-free, you could replace the nuts with seeds like sunflower or pumpkin seeds, which also add a delightful crunch and are safe for those with nut allergies.
Exploring Other Flavor Pairings
The beauty of fudge lies in its versatility. Dark chocolate pairs wonderfully with cherries, offering a rich contrast to the sweetness of the fudge. You might also consider adding fresh raspberries or coconut flakes for a tropical twist. Spices, such as cinnamon or a hint of sea salt, can elevate the fudge flavor, creating a unique and memorable treat.
Suggestions for Adding Spices or Extracts to Elevate the Fudge Flavor
Enhancing the fudge with extracts can also be a delightful way to introduce new flavors. A splash of almond or vanilla extract can deepen the overall flavor profile, while a pinch of espresso powder can provide a coffee kick. Experimenting with spices like nutmeg or cardamom can create exciting variations that surprise your taste buds.
The History and Popularity of Fudge
Fudge has a rich history that dates back to the 19th century.
A Brief History of Fudge as a Dessert
Originating in the United States, fudge was first made in the early 1880s and is believed to have been created by accident when a batch of caramels failed. The resulting soft, sweet candy quickly gained popularity, especially among college students who made it in dorm rooms. Over the years, fudge has evolved, with countless variations emerging to suit various tastes.
Its Cultural Significance and Variations Across Different Regions
Fudge holds a special place in American culture, particularly as a popular treat at fairs, holidays, and family gatherings. Different regions have developed their own signature flavors and styles, from the classic peanut butter fudge in the Midwest to the rich chocolate varieties found in New England. Today, fudge is enjoyed worldwide, with each culture adding its unique spin on this beloved dessert.
Conclusion
The irresistible white chocolate cherry fudge is a delightful treat that combines simplicity with rich flavors. Its creamy texture, paired with the tartness of cherries and the crunch of nuts, creates a perfect balance that is hard to resist. This recipe is not only easy to follow but also allows for endless customization, making it suitable for various dietary preferences and occasions.
We encourage you to try your hand at making this delicious fudge at home. Whether for a special gathering, as a thoughtful gift, or simply as a sweet indulgence for yourself, this white chocolate cherry fudge is sure to impress. Enjoy the satisfaction of creating a delightful homemade treat that brings joy to both you and those you share it with. Happy cooking!