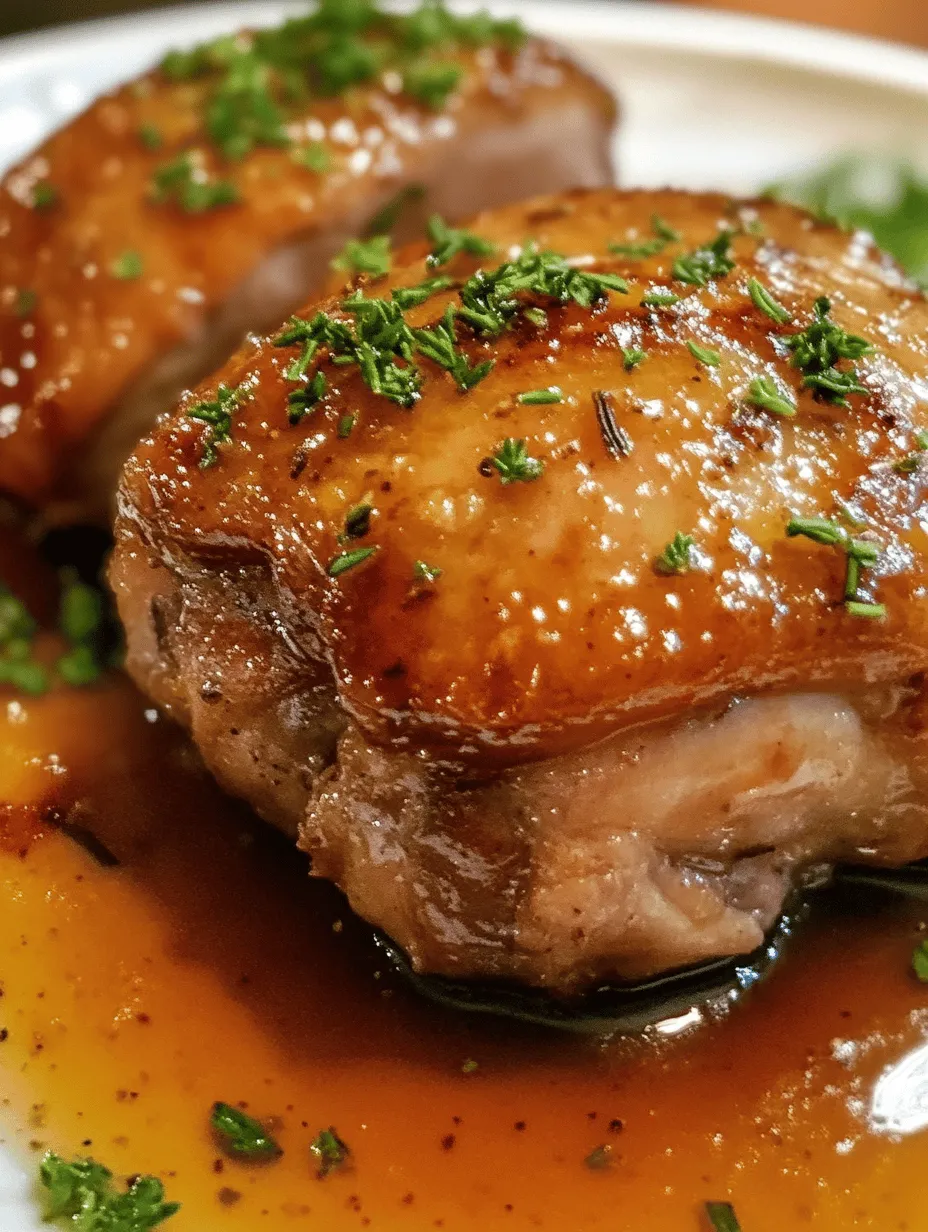
In the world of home cooking, few dishes can rival the simplicity and elegance of Honey-Balsamic Glazed Chicken Thighs. This recipe combines the rich flavors of balsamic vinegar and sweet honey, creating a perfect balance that elevates succulent chicken thighs into a culinary masterpiece. The allure of this dish lies in its ability to transform a humble ingredient into a vibrant centerpiece, making it ideal for a family dinner or an elegant gathering with friends. The glossy glaze and the tantalizing aroma that fills your kitchen as it cooks are bound to impress anyone who sits at your table.
Honey-Balsamic Glazed Chicken Thighs not only deliver an explosion of flavor but also present a beautiful visual appeal. With their golden-brown sheen and appetizing aroma, these glazed chicken thighs are sure to captivate the senses. In this article, we will delve into the details of this delightful recipe, exploring each step, the cooking techniques involved, and tips for making it your own. Whether you’re a novice home cook or a seasoned chef, this dish is approachable and rewarding, making it a staple in your culinary repertoire.
Understanding the Key Ingredients
To fully appreciate the deliciousness of Honey-Balsamic Glazed Chicken Thighs, it’s essential to understand the key ingredients that make this dish stand out. Each element plays a crucial role, contributing to the overall flavor, texture, and nutritional benefits of the dish.
The Role of Chicken Thighs in Cooking
Chicken thighs are a popular choice for many home cooks, and for good reason. They are not only flavorful but also boast several nutritional benefits. Rich in protein, chicken thighs provide essential amino acids necessary for muscle building and repair. Additionally, they contain valuable vitamins and minerals such as niacin, phosphorus, and vitamin B6, which support various bodily functions, including metabolism and immune health.
When it comes to this particular recipe, using bone-in, skin-on chicken thighs is highly recommended. The skin adds a layer of richness and moisture, while the bones contribute to the savory flavor of the dish. As the chicken cooks, the fat from the skin renders down, creating a luscious texture that contrasts beautifully with the sweet and tangy glaze. The result is an incredibly juicy and flavorful piece of chicken that melts in your mouth.
The Flavor Profile of Balsamic Vinegar
Balsamic vinegar, with its complex and robust flavor, plays a pivotal role in this recipe. Originating from Italy, traditional balsamic vinegar is made from the concentrated juice of freshly crushed grapes, which is then aged in wooden barrels. This aging process imparts a deep complexity and sweetness that sets balsamic vinegar apart from other types of vinegar.
There are various types of balsamic vinegar available, ranging from traditional to commercial varieties. Traditional balsamic vinegar is often thick and syrupy with a rich flavor, while commercial versions tend to be lighter and more acidic. For this recipe, a good quality balsamic vinegar will enhance the glaze, providing both acidity to cut through the richness of the chicken and a natural sweetness that complements the honey.
The impact of balsamic vinegar on the dish is significant. It not only adds depth and a tangy brightness but also helps to create a beautiful glaze when combined with honey. The balance of sweet and tangy is what makes this dish so appealing, transforming simple chicken thighs into an extraordinary meal.
Sweetness of Honey: More Than Just a Sweetener
Honey is the secret weapon in our glaze, bringing a touch of natural sweetness that perfectly balances the acidity of balsamic vinegar. Beyond its delicious flavor, honey offers numerous health benefits, including antibacterial properties and antioxidant effects. These attributes make honey not only a tasty addition but also a nutritious one.
In the context of this recipe, honey interacts beautifully with the other flavors in the glaze. As it cooks, it caramelizes and thickens, creating a glossy finish that clings to the chicken thighs. This caramelization process enhances the overall flavor, adding a depth that is both comforting and satisfying. Furthermore, honey helps to retain moisture in the chicken, resulting in a tender and juicy final dish.
Preparation Steps for Honey-Balsamic Glazed Chicken Thighs
Now that we have a solid understanding of the key ingredients, it’s time to dive into the preparation steps for Honey-Balsamic Glazed Chicken Thighs. Following these steps will ensure that you achieve the best flavor and texture possible.
Marinade Preparation
The first step in creating the perfect Honey-Balsamic Glazed Chicken Thighs is to prepare the marinade. The marinade is a blend of balsamic vinegar, honey, garlic, olive oil, and various herbs and spices. Each ingredient serves a specific purpose:
– Balsamic Vinegar: Provides acidity and tanginess, acting as a tenderizer and flavor booster.
– Honey: Adds sweetness and helps create a beautiful glaze.
– Garlic: Infuses the chicken with aromatic flavor and depth.
– Olive Oil: Adds richness and helps in browning the chicken during cooking.
– Herbs and Spices: Depending on your preference, you may include thyme, rosemary, salt, and pepper for added flavor.
To prepare the marinade, simply whisk together all the ingredients in a bowl until well combined. Adjust the ratios to suit your taste; for example, if you prefer a sweeter glaze, feel free to add more honey. This is your chance to customize the flavor profile to your liking.
Marinating the Chicken
Once the marinade is ready, it’s time to marinate the chicken. Marinating is a crucial step in developing flavor and tenderness in the meat. The acid from the balsamic vinegar helps to break down proteins, resulting in a more tender chicken thigh.
To marinate the chicken, place the chicken thighs in a large resealable plastic bag or a shallow dish. Pour the marinade over the chicken, ensuring that each piece is generously coated. Seal the bag or cover the dish and refrigerate for at least 30 minutes, though longer marination (up to 8 hours or overnight) will yield even better results. This allows ample time for the flavors to penetrate the chicken, resulting in a more flavorful dish.
When marinating, it’s essential to consider a few best practices:
– Use a Non-Reactive Container: Avoid using aluminum containers for marinating, as the acid can react with the metal and affect the flavor. Glass, stainless steel, or food-safe plastic are preferred options.
– Keep it Chilled: Always marinate in the refrigerator to prevent bacterial growth.
– Discard Leftover Marinade: If you plan to use the marinade as a sauce later, set aside a portion before adding the raw chicken to avoid cross-contamination.
Cooking Techniques: Searing and Baking
After marinating, the cooking process begins. This recipe incorporates two essential cooking techniques: searing and baking. Together, they create a perfect balance of crispy skin and juicy meat.
Preheating the Cooking Surface
Before you start cooking, preheating your cooking surface is crucial. Whether you choose to sear the chicken on the stovetop or roast it in the oven, preheating helps to achieve a nice sear on the chicken thighs. This step is vital for developing flavor through the Maillard reaction, which occurs when proteins and sugars in the meat caramelize upon heating.
If you’re using a skillet or frying pan, set it over medium-high heat and allow it to heat up for a few minutes. If you’re using an oven, preheat it to 400°F (200°C) to ensure that it’s hot enough to create that desired crispy texture.
Searing the Chicken
Searing is a key step in this recipe, as it creates a delicious crust on the chicken thighs. Follow these step-by-step instructions to achieve perfectly seared chicken:
1. Remove the Chicken from the Marinade: Take the marinated chicken thighs out of the refrigerator and let them come to room temperature for about 15-20 minutes. This ensures even cooking.
2. Heat the Pan: Add a tablespoon of olive oil to your preheated skillet, ensuring it coats the bottom evenly. The oil should shimmer but not smoke.
3. Place the Chicken in the Pan: Carefully add the chicken thighs, skin side down, to the hot skillet. Avoid overcrowding the pan; if necessary, sear in batches to maintain a proper temperature.
4. Sear Without Moving: Allow the chicken to sear undisturbed for about 5-7 minutes, or until the skin is golden brown and crispy. This is important for developing that beautiful crust.
5. Manage the Heat: If you notice the pan getting too hot and the oil begins to smoke, reduce the heat to medium. This will help prevent burning while still achieving a crispy skin.
By mastering the art of searing, you set the stage for a delicious Honey-Balsamic Glazed Chicken Thighs that everyone will love. Once the chicken is perfectly seared, it will be ready to finish cooking in the oven, where the flavors will deepen and the chicken will become tender and irresistible.
As we continue through the recipe, we will explore the remaining steps to complete this delectable dish, including the baking process and how to make the glaze shine. Stay tuned for the next part, where we’ll take our Honey-Balsamic Glazed Chicken Thighs from sear to serving!
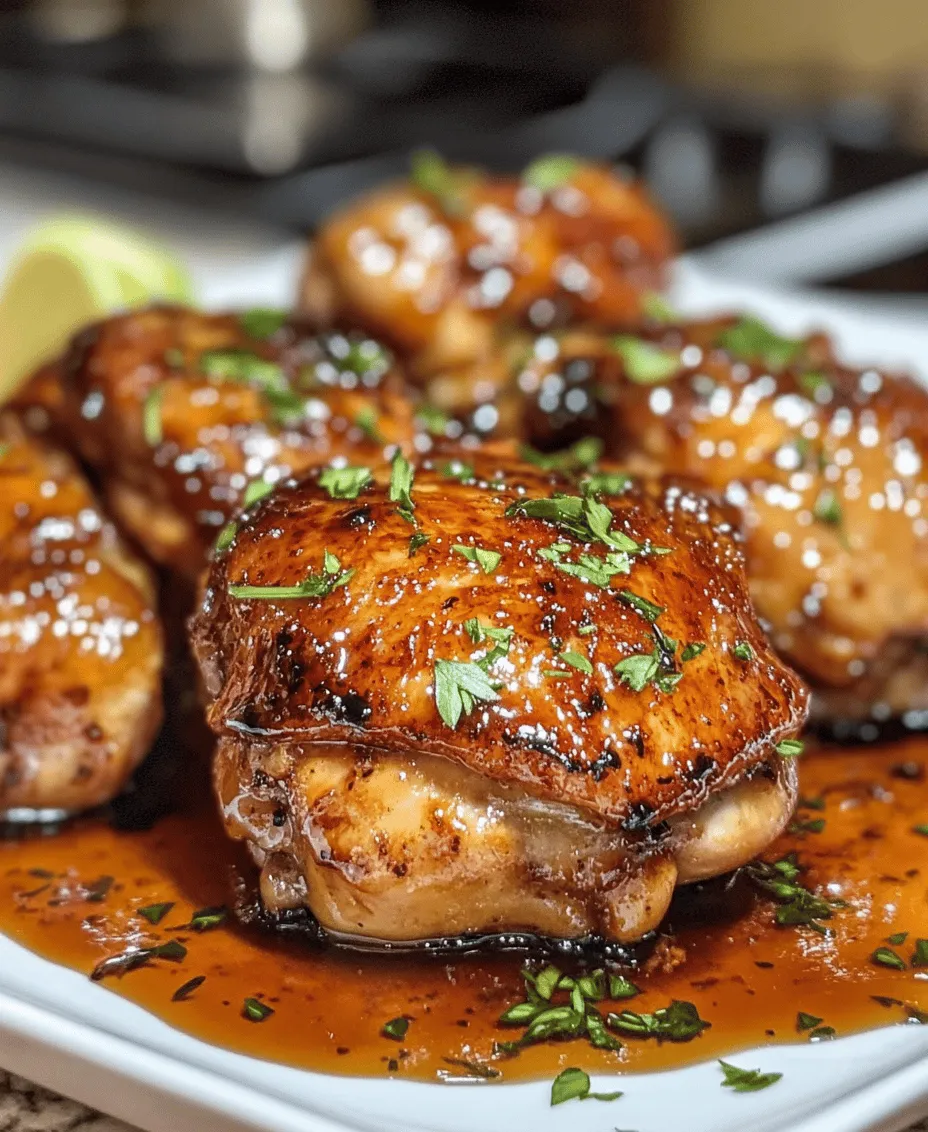
Glazing the Chicken
To achieve the perfect Honey-Balsamic Glazed Chicken Thighs, applying the glaze correctly is essential. Start by ensuring that your chicken thighs are cooked through before glazing. This allows the glaze to adhere more effectively and enhances the overall flavor.
How to Properly Apply the Glaze for Maximum Flavor: Begin by removing the chicken from the heat source once it reaches an internal temperature of 165°F (75°C). Using a brush or a spoon, generously coat each thigh with the honey-balsamic glaze. Be sure to cover all sides for an even distribution of flavors. For added depth, consider applying a second layer of glaze during the last few minutes of cooking. This not only intensifies the flavor but also creates a more pronounced caramelized crust.
The Science Behind the Caramelization of the Glaze: When the glaze is applied to the chicken and exposed to heat, the sugars in the honey and balsamic vinegar caramelize. This process not only darkens the glaze but also develops complex flavors that make each bite irresistible. Caramelization occurs at temperatures above 320°F (160°C), so keep an eye on the chicken to prevent burning while still allowing for that beautiful, golden brown finish.
Cooking Methods: Oven vs. Stovetop
Both oven and stovetop cooking methods have their advantages, and knowing how to use each can elevate your dish in different ways.
Baking the Chicken in the Oven
Detailed Instructions for Oven Cooking: Preheat your oven to 425°F (220°C). Line a baking sheet with parchment paper or foil for easy cleanup. Place the glazed chicken thighs on the prepared baking sheet, ensuring they are spaced apart for even heat circulation. Bake for 25-30 minutes, or until the chicken is cooked through and the glaze is bubbly. For an extra crispy skin, broil for the last 2-3 minutes, watching closely to avoid burning.
Benefits of Using the Oven for Even Cooking: Baking chicken in the oven provides a consistent temperature that cooks the meat evenly, reducing the risk of drying out. This method also allows for the glaze to set perfectly, creating that desirable sticky texture that enhances the dish’s overall appeal.
Cooking on the Stovetop
How to Adapt the Recipe for Stovetop Cooking: If you prefer to cook on the stovetop, heat a large skillet over medium-high heat and add a little olive oil. Once hot, place the chicken thighs in the skillet, skin side down. Sear them for about 5-7 minutes until the skin is crispy and golden brown. Flip the chicken over, reduce the heat to medium, and brush the glaze over the top. Cover the skillet with a lid to allow the chicken to cook through, about 15-20 minutes, depending on the thickness.
Techniques for Reducing the Sauce Effectively: After the chicken is cooked, remove it from the skillet and keep it warm. Increase the heat to medium-high and allow the remaining glaze in the pan to simmer. Stir occasionally until it thickens and reduces by half, which usually takes about 3-5 minutes. This concentrated glaze can then be drizzled over the chicken just before serving for an extra punch of flavor.
Finishing Touches and Presentation
Once your chicken is cooked to perfection, it’s time to focus on the finishing touches that will elevate your dish.
Resting the Chicken
Importance of Resting Meat After Cooking: After removing the chicken from the heat, let it rest on a cutting board for about 5-10 minutes. This resting period is crucial as it allows the juices to redistribute throughout the meat, ensuring each bite is tender and moist.
How Resting Affects Flavor and Texture: If you cut into the chicken immediately, the juices will run out, leading to a dry texture. Resting your chicken not only enhances its flavor but also improves its overall presentation, making it look more appetizing when plated.
Garnishing for Visual Appeal
Suggestions for Garnishes Beyond Parsley: While parsley is a classic choice, consider garnishing with fresh herbs like basil, thyme, or chives for a pop of color and added flavor. Thinly sliced green onions or a sprinkle of sesame seeds can also provide a delightful contrast to the rich glaze.
Importance of Presentation in Home Cooking: Beautifully presented food not only entices the eyes but also enhances the overall dining experience. Take a moment to arrange the chicken on a platter, drizzle with any remaining glaze, and finish with your chosen garnishes. A colorful side salad or roasted vegetables can complement the dish and make your table visually appealing.
Serving Suggestions and Pairing Ideas
To create a well-rounded meal, consider what sides and beverages will pair beautifully with your Honey-Balsamic Glazed Chicken Thighs.
Ideal Side Dishes to Accompany Chicken Thighs
Suggestions for Complementary Flavors: A variety of side dishes can enhance the flavors of the chicken. Consider serving it alongside creamy mashed potatoes, which provide a rich contrast to the tangy glaze. Roasted seasonal vegetables, such as Brussels sprouts, carrots, or zucchini, can add both color and nutrition.
Ideas for Balancing the Meal Nutritionally: For a lighter option, a fresh garden salad with mixed greens, cherry tomatoes, and a light vinaigrette can offer a refreshing balance to the richness of the chicken. Quinoa or brown rice can also serve as excellent bases that absorb the delicious sauce while providing whole grains.
Wine and Beverage Pairings
Recommended Wines to Enhance the Dining Experience: A well-chosen wine can elevate your meal. Pair your Honey-Balsamic Glazed Chicken Thighs with a fruity Pinot Noir or a crisp Sauvignon Blanc. The acidity of these wines complements the sweetness of the glaze while balancing the dish’s richness.
Non-Alcoholic Options That Complement the Flavors: If you prefer non-alcoholic beverages, consider serving sparkling water with a squeeze of lemon or a ginger ale to add a hint of spice. A homemade iced tea infused with herbs like mint or basil can also be refreshing and sophisticated.
Conclusion
Honey-Balsamic Glazed Chicken Thighs are not only a feast for the taste buds but also a visually appealing dish that can elevate any dinner table. By mastering the preparation and cooking techniques outlined in this article, home cooks can confidently create a meal that is both satisfying and memorable. The harmonious blend of flavors, along with the tender juiciness of the chicken, makes this recipe a perfect addition to your culinary repertoire. Whether for a special occasion or a weeknight dinner, this dish is sure to become a favorite for all who taste it.
With thoughtful preparation, attention to detail, and a focus on presentation, your Honey-Balsamic Glazed Chicken Thighs will impress your family and friends. Enjoy the process of cooking, savor the delightful flavors, and create cherished memories around the dinner table.
