Introduction
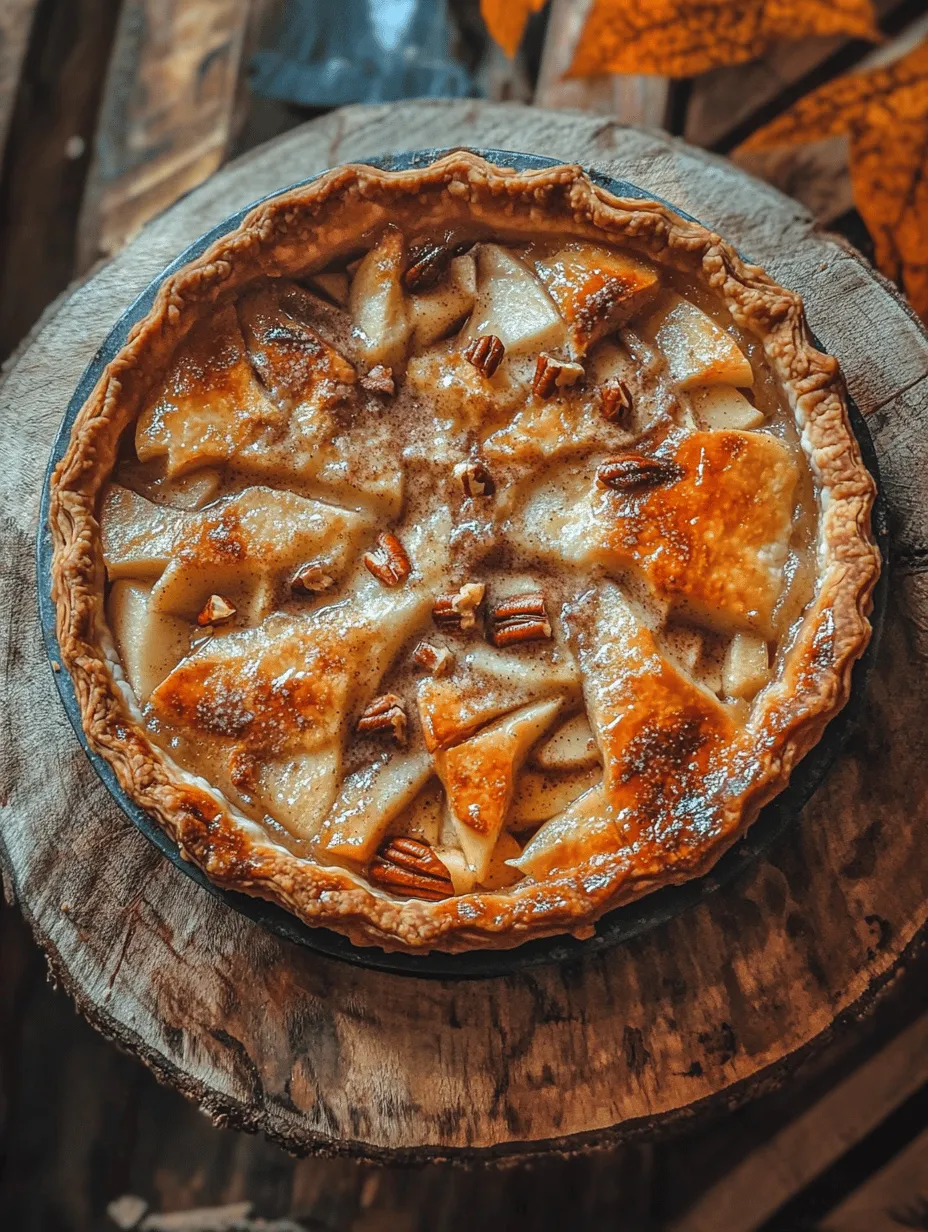
Hillbilly Pie is more than just a dessert; it’s a warm embrace on a chilly evening, a sweet reminder of family gatherings, and a delicious slice of tradition that brings people together. Rooted deeply in Appalachian culture, this pie represents the heart of home cooking, where simple ingredients are transformed into something extraordinary. With its unique blend of sweet and tart flavors, Hillbilly Pie is a versatile dessert that can be enjoyed in every season, whether served warm with a scoop of vanilla ice cream in the summer or as a cozy treat during the fall and winter months.
The allure of Hillbilly Pie lies in its comforting nature. As families gather around the table to share stories and laughter, this pie becomes a centerpiece, evoking nostalgia and warmth. Its simplicity makes it an approachable recipe for even novice bakers, while its depth of flavor ensures it delights the palates of all who partake.
Understanding Hillbilly Pie
Historical Context of Hillbilly Pie
Hillbilly Pie, often regarded as a traditional Appalachian dessert, has its roots in the rustic kitchens of the mountainous regions of the eastern United States. Its history reflects the resourcefulness of those living in these areas, who often relied on locally sourced ingredients to create hearty meals. The term “hillbilly” itself emerged in the early 20th century as a colloquial term for rural residents, often characterized by their self-sufficiency and connection to the land.
The origins of Hillbilly Pie can be traced back to the late 1800s when families would gather in the fall to harvest apples. During this time, various apple varieties were plentiful, and home cooks began experimenting with pie recipes that could showcase these fruits. Over the years, Hillbilly Pie has evolved, incorporating different ingredients and techniques, yet it has maintained its status as a beloved staple in Appalachian cuisine.
The Flavor Profile
The flavor profile of Hillbilly Pie is a delightful balance of sweet and tart, making it a standout choice for dessert. At its core, the pie features a combination of apples that provide a wonderful depth of flavor. The choice of apples is crucial; tart varieties like Granny Smith complement sweeter options like Honeycrisp or Fuji, creating a complex taste that is both refreshing and comforting.
The warmth of spices such as cinnamon and nutmeg adds another layer of flavor, invoking memories of freshly baked goods. This aromatic blend enhances the overall experience of enjoying the pie, making it a favorite among those who appreciate the comforting scents of home cooking.
Ingredients Breakdown
Detailed List of Required Ingredients
To make a delightful Hillbilly Pie, you will need the following ingredients:
– Apples: A mix of tart and sweet apples (e.g., Granny Smith, Honeycrisp, Fuji)
– Granulated Sugar: For sweetness
– Brown Sugar: Adds a rich depth of flavor
– Lemon Juice: To preserve the apple color and enhance the tartness
– Cinnamon: For warmth and spice
– Nutmeg: Adds a hint of earthiness
– Flour: For thickening the filling
– Butter: Richness and flavor
– Pie Crust: Either homemade or store-bought
– Optional: Pecans or walnuts for added crunch
Role of Each Ingredient in Flavor and Texture
Each ingredient in Hillbilly Pie plays a vital role in achieving its signature taste and texture. The apples are the star of the show, and their combination of sweetness and tartness is what makes the pie so enjoyable. Sugar helps to mellow the tartness of the apples, while brown sugar introduces a caramel-like richness.
Lemon juice is essential, not only for its flavor but also for preventing the apples from browning too quickly, ensuring a vibrant appearance. The spices, cinnamon, and nutmeg, are what elevate the pie from a simple apple dessert to a comforting classic, providing warmth and depth.
Butter is key in the pie crust, contributing to its flakiness and rich flavor. The flour thickens the filling, ensuring it holds together when sliced. Adding nuts like pecans or walnuts can introduce a delightful crunch, making each bite more satisfying and providing a contrast to the tender apples.
Preparing the Pie
Step-by-Step Guide to Preparation
Preheating the Oven
The first step in preparing Hillbilly Pie is to preheat your oven to 425°F (220°C). Proper temperature control is crucial for achieving a perfectly baked pie with a golden brown crust. Preheating allows the oven to reach the desired temperature, ensuring that the pie cooks evenly and the crust becomes flaky and crisp.
Preparing the Apple Filling
Next, it’s time to prepare the apple filling. Start by washing and peeling your apples. For the best flavor, use a mix of tart and sweet varieties. Once peeled, core the apples and slice them evenly to ensure consistent cooking. Aim for slices that are about 1/4 inch thick; this thickness allows the apples to soften without becoming mushy during baking.
In a large mixing bowl, combine the sliced apples with granulated sugar, brown sugar, lemon juice, cinnamon, nutmeg, and flour. Toss the apples gently to ensure they are evenly coated with the mixture. The lemon juice will not only enhance the flavor but also keep the apples from browning, while the flour will thicken the juices released during baking, creating a luscious filling.
Assembling the Pie
Once your filling is ready, it’s time to assemble the pie. If you’re using a store-bought crust, follow the package instructions. For a homemade crust, roll out your dough on a floured surface to fit your pie dish. Carefully place the bottom crust into the pie dish, ensuring it fits snugly without stretching.
Pour the apple filling into the crust, ensuring an even distribution of apples. If you’re adding nuts for extra texture, sprinkle them over the filling before placing the top crust.
When placing the top crust, you can either create a full cover or opt for a lattice design for a classic look. If using a full crust, make sure to cut slits in the top to allow steam to escape during baking. Brush the top crust with melted butter and sprinkle a little sugar for a golden finish.
The importance of lemon juice cannot be overstated; it not only preserves the color of the apples but also enhances their natural sweetness and tartness, providing a well-rounded flavor to the overall pie.
With the pie assembled, it’s ready for the oven!
Baking the Pie
After assembling, place your pie in the preheated oven. Baking is where the magic happens, transforming the raw ingredients into a deliciously aromatic dessert. Bake at 425°F (220°C) for the first 15 minutes to help set the crust, then reduce the temperature to 350°F (175°C) and continue baking for an additional 30-40 minutes until the apples are tender, and the crust is golden brown.
During the baking process, keep an eye on the pie. If the crust edges begin to brown too quickly, cover them with strips of aluminum foil to prevent burning. The aroma of the spices and baking apples will fill your kitchen, inviting family and friends to gather around in anticipation of a delightful dessert.
As your Hillbilly Pie bakes, take a moment to relish the warmth of the kitchen, the comforting scents wafting through the air, and the excitement of sharing a slice of this cherished recipe.
Stay tuned for the next part of this article, where we’ll explore tips for perfecting your Hillbilly Pie and answer some common questions to enhance your baking experience.
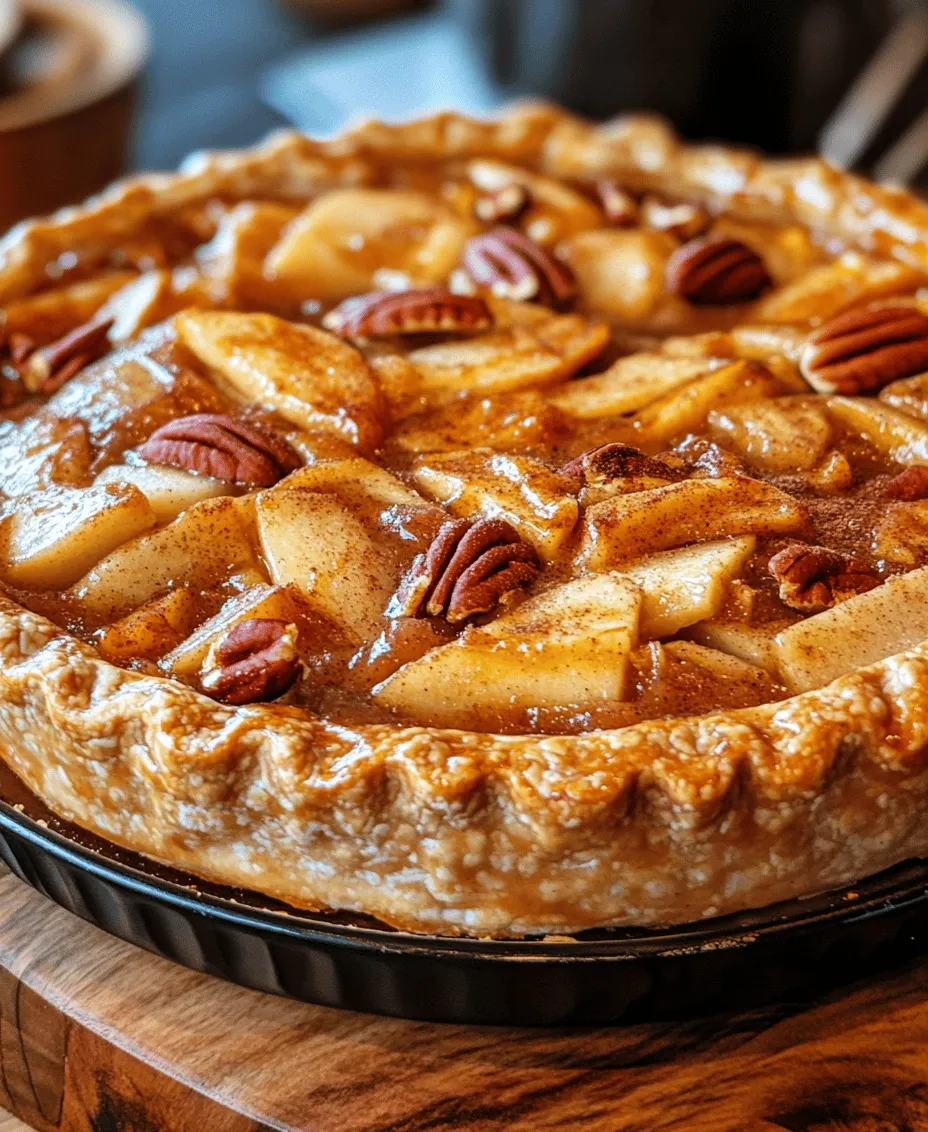
Detailed Baking Instructions for Hillbilly Pie
Baking a perfect Hillbilly Pie requires precision and patience. Start with the preparation of your pie crust and filling. If you haven’t already made your dough, prepare it by combining flour, salt, and butter until the mixture resembles coarse crumbs. Gradually add ice water until the dough holds together. Roll the dough into a circle and place it in a pie dish, ensuring to leave a slight overhang.
1. Preheat the Oven: Begin by preheating your oven to 425°F (220°C). This high temperature is crucial as it helps to set the crust quickly, preventing it from becoming soggy.
2. Prepare the Filling: While the oven heats up, peel and slice your apples. Aim for a mix of tart and sweet varieties, such as Granny Smith and Honeycrisp, for a balanced flavor. Toss the apple slices with sugar, cinnamon, nutmeg, and a dash of lemon juice in a mixing bowl. This combination infuses the apples with flavor while helping to reduce excess moisture.
3. Assemble the Pie: Pour the apple mixture into the prepared crust, ensuring the apples are evenly distributed. Dot the top with butter for added richness. Carefully fold the overhanging crust over the filling, creating a rustic edge. If desired, you can flute the edges for a more decorative look.
4. Initial Baking: Place the pie in the preheated oven and bake for 15 minutes. This initial high temperature is vital for achieving a crisp crust, as it helps to set the bottom layer before reducing the temperature.
5. Adjust Baking Temperature: After the first 15 minutes, reduce the oven temperature to 350°F (175°C) and continue baking for an additional 30 to 40 minutes. This lower temperature allows the apples to cook through without burning the crust.
6. Visual Cues for Doneness: Keep an eye on the pie during the last stages of baking. The crust should turn a golden brown, and you can check the apples by gently poking them with a fork. They should be tender but not mushy, indicating that they are perfectly cooked.
7. Check for Ideal Color and Tenderness: The ideal Hillbilly Pie will have a beautifully golden crust, with the apples peeking through slightly. The filling should bubble, signaling that the juices are cooking down and thickening, which is a sign that your pie is ready to come out of the oven.
Cooling and Serving Suggestions
Once your Hillbilly Pie has reached the desired doneness, it’s essential to let it cool. Cooling is a critical step that allows the filling to set properly. If you slice into the pie too soon, the filling may ooze out, making it difficult to serve and enjoy.
1. Importance of Cooling: Allow the pie to cool for at least two hours at room temperature. This time allows the sugars to settle, creating a cohesive filling that holds its shape when sliced. The flavors also meld together, enhancing the overall taste.
2. Serving Options: Hillbilly Pie can be served warm or at room temperature, depending on your preference. For an extra touch of indulgence, consider serving it with a scoop of vanilla ice cream or a dollop of whipped cream. The creamy textures complement the pie’s warm spices and sweet apples beautifully.
3. Accompaniments: For those who enjoy a bit of crunch, a sprinkle of chopped nuts such as walnuts or pecans can enhance the flavor profile. You might also consider drizzling caramel sauce over the top for an additional layer of sweetness.
4. Presentation Ideas: When hosting a gathering, presentation matters! Serve slices of Hillbilly Pie on rustic wooden plates or elegant dessert dishes, garnished with a sprig of mint or a cinnamon stick. This adds a touch of charm and elevates the overall dining experience.
Nutritional Information
Understanding the nutritional content of your homemade Hillbilly Pie can help you enjoy it mindfully. A standard serving (one slice) contains approximately:
– Calories: 250-300, depending on the specific ingredients used and portion size.
– Fat: 12-15 grams, mainly from the butter in the crust and filling.
– Carbohydrates: 35-40 grams, largely from the apples and sugar.
– Protein: 2-3 grams, primarily from the flour and apples.
While Hillbilly Pie is undoubtedly indulgent, it offers nutritional benefits as well. Apples provide dietary fiber, vitamin C, and various antioxidants, contributing to a balanced dessert option. When enjoyed in moderation, it can fit into a healthy diet.
Cultural Variations and Modern Twists
Hillbilly Pie has deep roots in American culinary traditions, and its variations can be found across different regions. Each area brings its unique twist to this classic dish, often based on local apple varieties and cultural preferences.
1. Regional Variations: In the Midwest, you might find Hillbilly Pie made with a blend of tart and sweet local apples, while Southern versions may incorporate additional spices like allspice for a warmer flavor.
2. Unique Ingredients: Some modern takes on the Hillbilly Pie include the addition of caramel sauce or nuts, which can add richness and texture. Consider experimenting with nuts like pecans or almonds for added crunch and flavor.
3. Dietary Preferences: For those with dietary restrictions, there are plenty of adaptations available. A gluten-free crust can be made using almond flour or gluten-free all-purpose flour. Additionally, vegan alternatives such as coconut oil or vegan butter can replace traditional butter, and a flax egg can be used to bind the crust.
4. Apple Varieties: Different regions boast unique apple varieties that can significantly affect the pie’s taste. For instance, using local heirloom apples can introduce new flavors and textures that elevate your Hillbilly Pie.
Conclusion
The charm of Hillbilly Pie lies not just in its delightful taste but also in its connection to home cooking traditions. This rustic dessert is a celebration of simple ingredients brought together to create something heartwarming and delicious.
As you embark on your baking journey, remember that the joy of making Hillbilly Pie is as much about the process as it is about the final product. Gather your loved ones, share stories, and create cherished memories over this delightful pie. Whether you stick to the classic recipe or explore modern twists, the satisfaction of enjoying a slice of homemade Hillbilly Pie is unparalleled.
So, roll up your sleeves, preheat that oven, and get ready to indulge in a slice of nostalgia—your kitchen will thank you, and your loved ones will appreciate the effort. Happy baking!
