Introduction
There’s something truly magical about the aroma of freshly baked dinner rolls wafting through your kitchen. Homemade dinner rolls are a warm, comforting addition to any meal, transforming even the simplest of dinners into a feast. Their fluffy texture and slight crispness on the outside make them irresistible. But when you elevate these rolls with a luscious garlic butter finish, they become an unforgettable experience.
Garlic butter is more than just a condiment; it serves as a flavor enhancer that infuses the rolls with a fragrant richness, making each bite a delightful explosion of taste. The combination of the soft, pillowy interior of the roll paired with the savory, buttery garlic mixture is a match made in culinary heaven. Whether served alongside a hearty soup, a roasted meat dish, or simply enjoyed on their own, these garlic butter dinner rolls are sure to impress your family and friends.
What makes this recipe even more appealing is its simplicity. With just a few basic ingredients and straightforward steps, you can bake a batch of these delightful rolls in no time. The joy of baking at home not only fills your kitchen with tempting smells but also provides a deep sense of satisfaction. So, roll up your sleeves and get ready to embark on a delicious journey to create these garlic butter dinner rolls from scratch!
Understanding the Ingredients
To create perfect garlic butter dinner rolls, it’s essential to understand the role each ingredient plays in the final product. Here’s a breakdown of the key components that contribute to the flavor and texture of these delightful rolls:
Active Dry Yeast
Active dry yeast is the cornerstone of any bread-making process. It is a living organism that ferments and produces carbon dioxide, which causes the dough to rise. This rise is crucial for achieving the light and airy texture that we associate with perfect dinner rolls. Always check the expiration date on your yeast package to ensure its potency, as stale yeast can hinder your dough from rising properly.
Warm Water and Milk
Both warm water and milk are vital for activating the yeast and enriching the dough. The warmth of the liquids helps to awaken the dormant yeast, leading to fermentation. Milk adds richness and moisture to the rolls, enhancing their flavor and creating a tender crumb. Using a combination of both water and milk in the dough results in rolls that are not only soft but also slightly sweet and buttery in taste.
Granulated Sugar
Sugar serves multiple purposes in this recipe. Not only does it contribute sweetness to the rolls, balancing the savory notes of the garlic butter, but it also aids in the activation of the yeast. When yeast is fed sugar, it produces more carbon dioxide, which helps the dough rise. The sugar caramelizes during baking, giving the rolls a beautiful golden color and a slight crust.
Unsalted Butter
Butter is responsible for adding richness and moisture to the rolls. Unsalted butter allows you to control the amount of salt in the recipe, which is important for balancing flavors. When melted and brushed over the rolls before serving, it creates a glossy finish and enhances the overall flavor profile.
All-Purpose Flour
All-purpose flour is the foundation of the rolls. It provides structure and body to the dough. The protein content in all-purpose flour plays a crucial role in gluten development, which gives the rolls their chewy texture. For the best results, measure your flour accurately — too much flour can lead to dense rolls, while too little can make them too sticky.
Garlic
As the star ingredient, garlic brings a pungent and aromatic flavor to the rolls. Fresh garlic, when minced and combined with melted butter, infuses the rolls with its savory essence. You can adjust the amount of garlic to suit your taste, whether you prefer a mild hint or a bold garlic punch.
Optional Ingredients
While the basic recipe is delicious on its own, you can easily customize it with optional ingredients. Adding herbs like parsley or rosemary can enhance the flavor profile, while shredded cheese can provide a delightful cheesy twist. Feel free to experiment with different spices or toppings to make the recipe your own.
Step-by-Step Preparation
Now that we’ve covered the ingredients, let’s dive into the step-by-step preparation of these delectable garlic butter dinner rolls. Each step is designed to ensure that your rolls turn out perfectly every time, with a fluffy interior and a golden brown crust.
Activating the Yeast
The first step in making garlic butter dinner rolls is activating the yeast. This is a crucial process that ensures your rolls rise properly. In a small bowl, combine warm water (about 110°F or 43°C) with a teaspoon of granulated sugar. Sprinkle the active dry yeast over the top and let it sit for about 5 to 10 minutes. You should see the yeast foam and bubble, indicating that it is active and ready to use.
Mixing Wet Ingredients
In a large mixing bowl, combine the warm milk and melted unsalted butter. Allow the mixture to cool slightly before adding the activated yeast. This prevents the heat from killing the yeast. Mix in the remaining sugar and a pinch of salt until well combined. These wet ingredients form the rich base for your dough.
Combining Dry Ingredients
In a separate bowl, whisk together the all-purpose flour and a pinch of salt. Gradually add the dry mixture to the wet ingredients, stirring with a wooden spoon or spatula until a rough dough begins to form. It’s important to mix until there are no dry patches of flour but be careful not to overmix, as this can lead to tough rolls.
Kneading the Dough
Once the dough has come together, transfer it onto a lightly floured surface. Kneading is essential for developing gluten, which gives the rolls their structure. To knead, fold the dough over itself, then push it down and away with the heel of your hand. Rotate the dough a quarter turn and repeat the process for about 8-10 minutes until the dough is smooth and elastic. If the dough is too sticky, sprinkle a little more flour as needed, but avoid adding too much.
The First Rise
After kneading, place the dough in a lightly greased bowl, covering it with a clean kitchen towel or plastic wrap. This first rise is where the dough will double in size as the yeast ferments. Find a warm, draft-free area for the dough to rest, allowing it to rise for about 1 to 1.5 hours. You’ll know it’s ready when it has doubled in size and springs back gently when poked.
Crafting the Garlic Butter
While the dough is rising, it’s time to prepare the garlic butter that will elevate your dinner rolls to the next level. Start by gathering the following ingredients:
– 1/2 cup unsalted butter, melted
– 4-6 cloves of fresh garlic, minced (adjust to taste)
– A pinch of salt
– Fresh parsley, chopped (optional for garnish)
In a small bowl, combine the melted butter with the minced garlic and salt. Allow the mixture to sit for a few minutes to let the flavors meld together. This garlic butter will be brushed on the rolls just before serving, creating a mouthwatering finish that complements the soft, fluffy texture of the rolls.
By following these detailed steps, you’ll be on your way to creating the most delicious garlic butter dinner rolls that will become a staple in your home. The combination of freshly baked rolls and aromatic garlic butter is sure to please everyone around your dinner table. Stay tuned for the next part, where we will delve into shaping the rolls, the second rise, and the baking process!
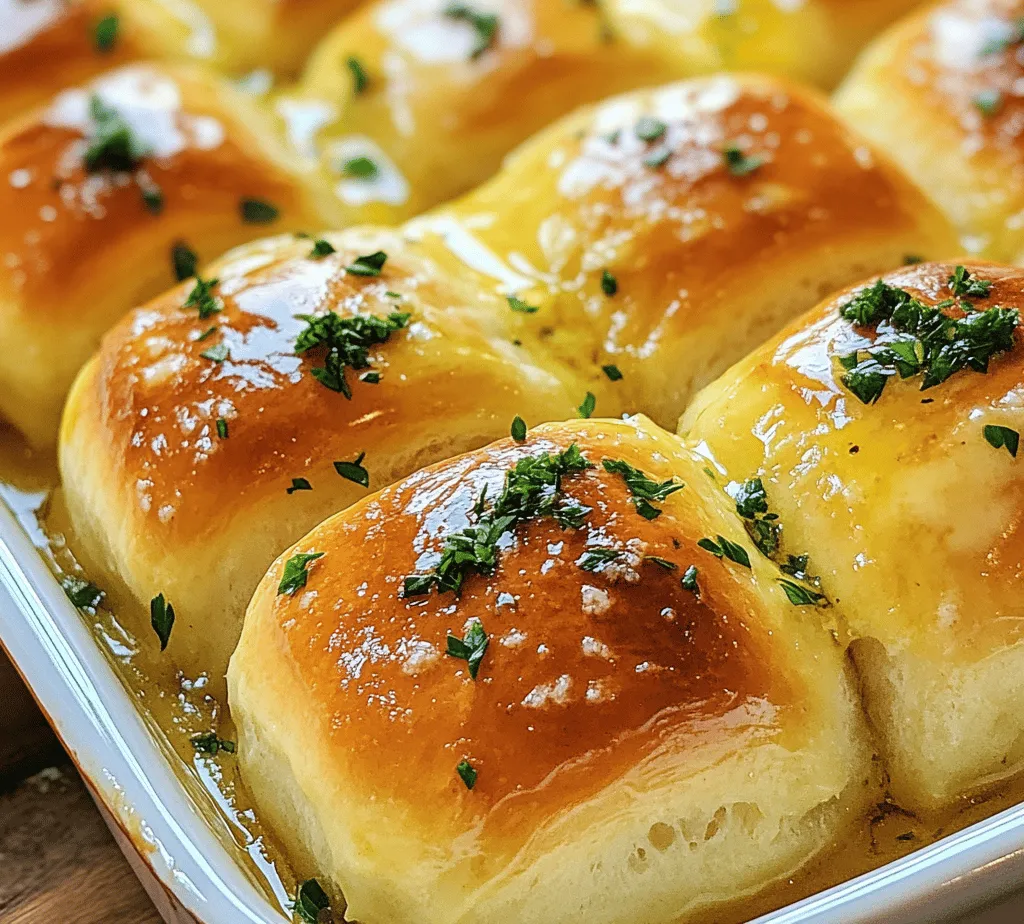
Cooking Method for the Perfect Infusion of Garlic Flavor
To create the ultimate garlic butter dinner rolls, the first step lies in infusing the butter with garlic. Begin by melting unsalted butter in a small saucepan over low heat. Add freshly minced garlic, allowing it to simmer gently. This technique helps to release the essential oils and flavors from the garlic without burning it. It’s essential to keep the heat low, as high temperatures can lead to a bitter taste. Allow this mixture to infuse for about 5-7 minutes, stirring occasionally. The result will be a rich, aromatic garlic butter that will elevate your rolls to the next level.
You can also enhance the flavor profile by incorporating optional seasonings during this infusion process. A pinch of salt and a sprinkle of dried herbs such as oregano or thyme can add depth to the garlic butter without overpowering the delicate flavor of the rolls. If you enjoy a hint of heat, consider adding a dash of red pepper flakes. Additionally, for cheese lovers, incorporating grated Parmesan or Pecorino Romano cheese into the garlic butter provides a savory, umami punch that pairs beautifully with the rolls.
Shaping and Second Rise of the Rolls
Once your dough has risen and doubled in size, it’s time to shape your dinner rolls. Start by lightly flouring your work surface to prevent sticking. Gently punch down the dough to remove excess air, then divide it into equal portions. A bench scraper can be handy for this task, ensuring uniform pieces for consistent baking. Aim for about 12 pieces, each weighing approximately 2 ounces.
To shape the rolls, take each piece of dough and flatten it slightly with your hands. Fold the edges toward the center, creating a smooth top. Then, flip the dough ball over so the seam side is down, and gently roll it against the surface to create a tight ball. This technique helps to create tension on the surface of the dough, which is crucial for a beautifully domed roll.
The second rise is a critical step that should not be overlooked. Once shaped, place the rolls into a greased baking dish, ensuring they are close together but not touching. Cover the dish with a clean kitchen towel or plastic wrap and let them rise in a warm environment for about 30-45 minutes, or until they have puffed up significantly. This second rise allows for an airy texture and ensures that the rolls will be fluffy and light once baked.
Baking the Rolls
Preheating your oven is vital for achieving even cooking and the perfect crust on your rolls. Set your oven to 375°F (190°C) at least 20-30 minutes before baking to ensure it reaches the desired temperature. An adequately preheated oven creates a burst of steam that helps the rolls rise quickly and develop a golden brown exterior.
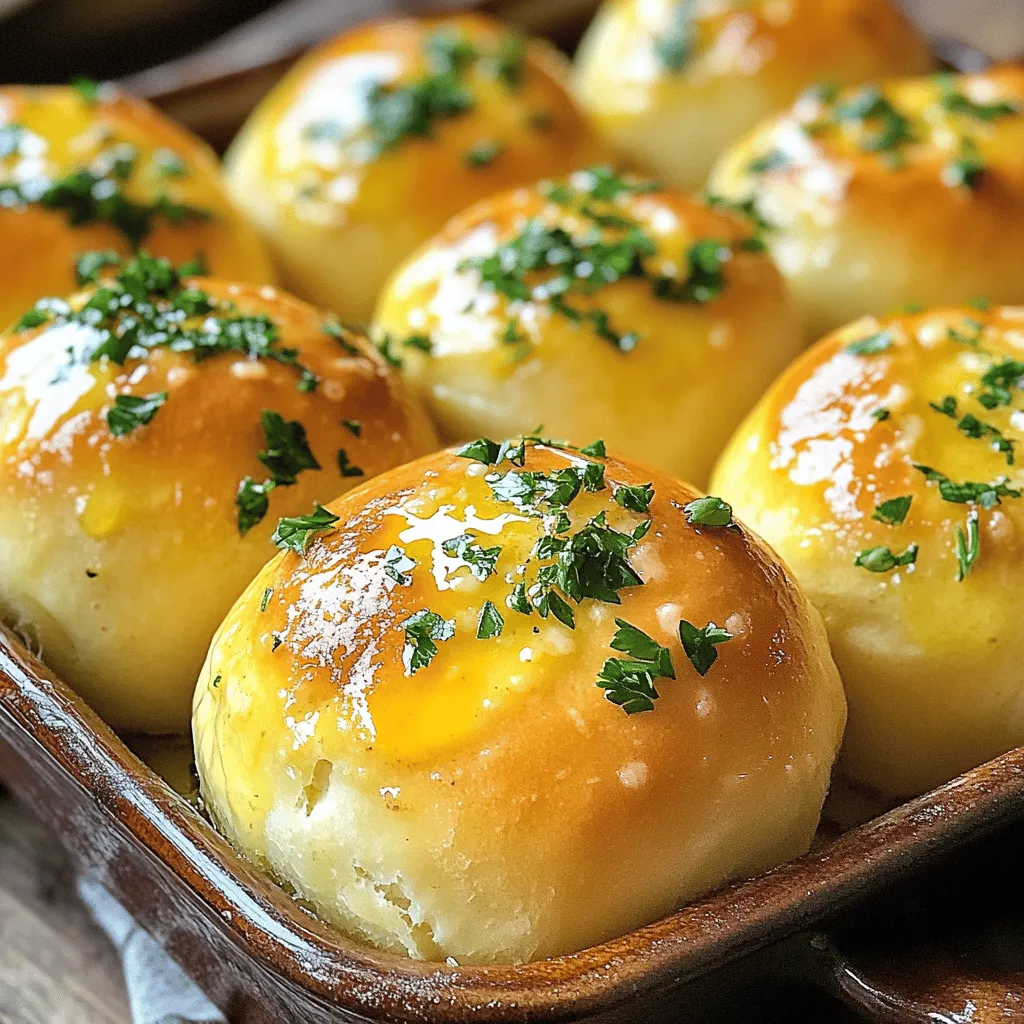
Before placing the rolls in the oven, brush the tops with a generous amount of the infused garlic butter you prepared earlier. This step not only enhances the flavor but also gives the rolls a beautiful, glossy appearance as they bake. The garlic butter seeps into the dough, infusing it with flavor while also creating a delightful crust.
Bake the rolls in the preheated oven for about 18-22 minutes, or until they are golden brown and sound hollow when tapped on the bottom. Keep an eye on them during the last few minutes of baking to avoid over-browning. The perfect garlic butter dinner rolls should have a crispy exterior and a soft, pillowy interior.
Finishing Touches
Once you’ve removed the rolls from the oven, it’s time to apply the finishing touches. Brush the freshly baked rolls with any remaining garlic butter, allowing it to soak into the warm bread. This step intensifies the garlic flavor and adds an irresistible sheen.
For a pop of color and freshness, garnish the rolls with freshly chopped parsley. This not only enhances visual appeal but also adds a refreshing flavor that complements the rich garlic butter. A sprinkle of sea salt can also elevate the taste, balancing the flavors beautifully.
To enjoy these rolls at their best, serve them warm straight from the oven. They are perfect for dipping in soups, spreading with butter, or simply enjoying on their own. If you want to take your dining experience up a notch, consider pairing them with a side of marinara sauce or a creamy dip.
Storage and Reheating
If you find yourself with leftover rolls (though it’s hard to imagine!), storing them properly is essential to maintain their freshness. Allow the rolls to cool completely before placing them in an airtight container or a resealable plastic bag. Store them at room temperature for up to two days. For longer storage, you can freeze them. Wrap each roll in plastic wrap, then place them in a freezer-safe bag. They can be frozen for up to three months.
When you’re ready to enjoy your leftover rolls, reheating them is crucial for restoring their delightful texture. For the best results, preheat your oven to 350°F (175°C) and place the rolls on a baking sheet. Cover them loosely with aluminum foil to prevent over-browning. Heat for about 10-15 minutes until warmed through. Alternatively, you can microwave them briefly for about 20-30 seconds, but be cautious not to overdo it, as this can lead to dry rolls.
Versatile Serving Suggestions
Garlic butter dinner rolls are incredibly versatile and can be paired with an array of meals. They are a perfect accompaniment to hearty soups, stews, or salads, making them a fantastic addition to any dinner table. Serve them alongside classic dishes such as spaghetti and meatballs, roasted chicken, or grilled steaks. Their savory flavor complements various cuisines, enhancing your dining experience without overshadowing the main dish.
Additionally, these rolls can serve as a creative base for sandwiches. Slice them in half and fill them with your favorite ingredients, such as roasted vegetables, deli meats, or cheeses. For a unique twist, transform them into sliders by adding pulled pork or BBQ chicken. The possibilities are endless, ensuring that no leftover roll goes uneaten.
Conclusion
Making garlic butter dinner rolls at home is a rewarding experience that fills your kitchen with mouthwatering aromas and brings joy to your dining table. The satisfaction of pulling warm, fluffy rolls from the oven, enhanced with rich garlic butter, is truly unmatched. The process allows you to experiment with flavors and variations, whether by adding herbs, cheese, or even roasted garlic for extra depth.
Encouragement lies in the joy of sharing these homemade rolls with family and friends, creating cherished memories over delicious food. The warmth of homemade bread fosters connection and comfort, making every meal feel special. So, gather your ingredients, roll up your sleeves, and embark on the delightful journey of baking your garlic butter dinner rolls. Enjoy the process as much as the final product, and let your creativity shine through in each delectable bite.
