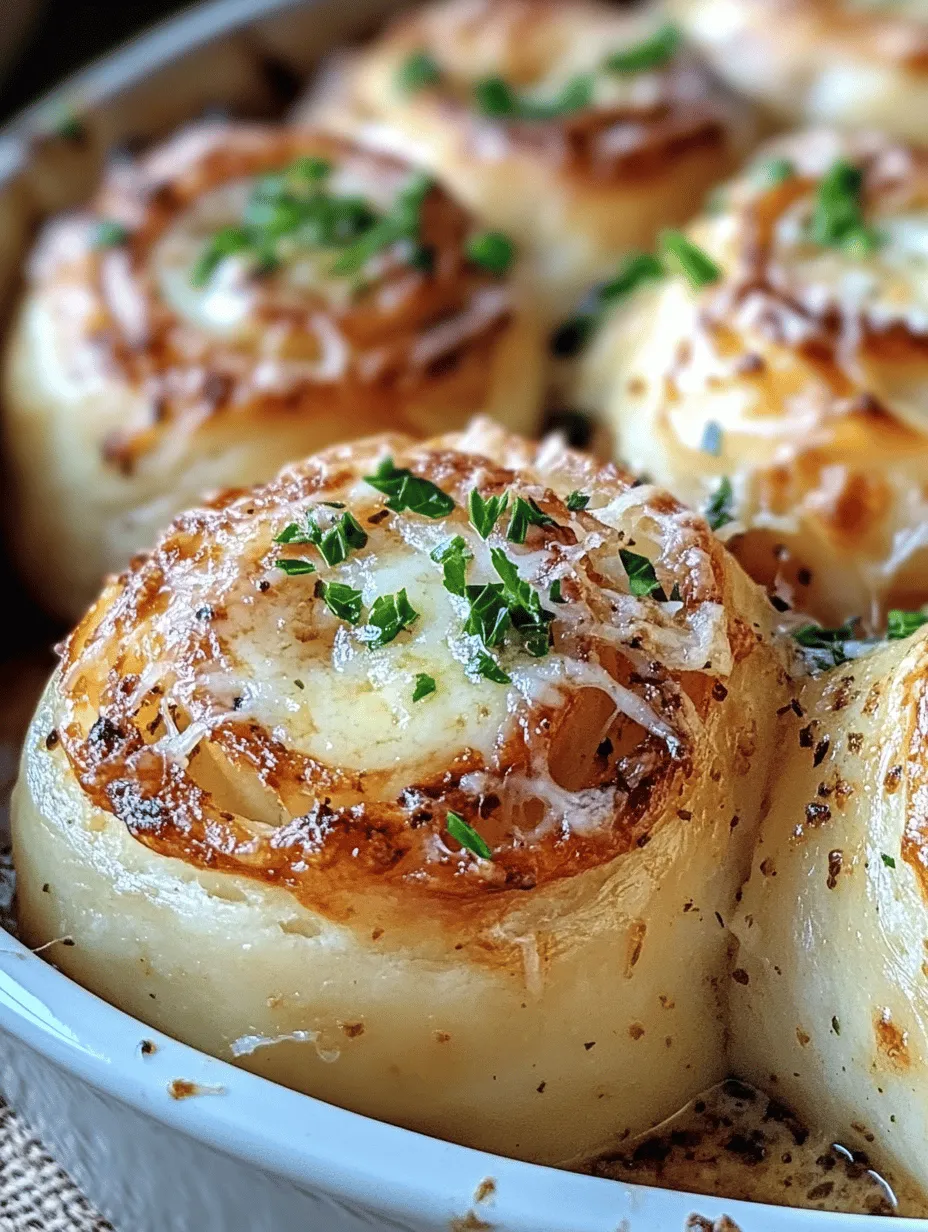
Introduction to Garlic Butter Bliss Rolls
The aroma of freshly baked bread wafting through your kitchen is an experience that can elevate any moment. There’s something undeniably comforting about homemade rolls, especially when they’re infused with the rich flavors of garlic and butter. Garlic Butter Bliss Rolls are the perfect embodiment of this comforting culinary experience. These rolls are not just a side dish; they are a warm hug for your taste buds, bringing a touch of indulgence to any meal or occasion.
Baking from scratch is a satisfying endeavor that connects us to our food in a deeper way. Whether you’re preparing a family dinner, hosting a festive gathering, or simply treating yourself after a long day, these rolls are sure to impress. The combination of fluffy dough with a heavenly garlic butter glaze creates an irresistible blend that is hard to resist. As we delve into this recipe, you’ll discover not only the joy of making these blissful rolls but also the science and artistry behind them that ensures they turn out perfectly every time.
Understanding the Ingredients
To create the perfect Garlic Butter Bliss Rolls, it’s essential to understand the role of each ingredient in this delightful recipe. Here’s a closer look at the key components that come together to form these delicious rolls:
All-Purpose Flour
All-purpose flour serves as the backbone of the rolls, providing structure and stability. This versatile flour contains a moderate amount of protein, which is necessary for gluten formation. Gluten is what gives bread its chewy texture and helps the rolls rise. Using high-quality all-purpose flour will ensure that your rolls are light and airy.
Active Dry Yeast
At the heart of every great bread is yeast, a living organism that acts as the leavening agent. Active dry yeast is the most commonly used type in home baking and is responsible for giving the rolls their airy texture. When activated, yeast ferments the sugars in the dough, producing carbon dioxide gas that causes the dough to rise. This is what transforms a dense mixture into soft, fluffy rolls.
Warm Milk
Warm milk plays a crucial role in baking by activating the yeast. The warmth helps to awaken the dormant yeast cells, allowing them to multiply and create those delightful bubbles in your dough. Additionally, the milk enriches the dough, contributing to a tender crumb and enhancing the overall flavor of the rolls.
Unsalted Butter
Butter is a key ingredient that adds richness and flavor to both the dough and the garlic butter glaze. Unsalted butter is preferred in baking because it allows you to control the salt levels in your recipe. The fat in butter not only enriches the rolls but also helps to create a tender texture, making each bite melt in your mouth.
Sugar and Salt
Sugar is not just for sweetness; it also helps to balance the flavors in the rolls. It provides food for the yeast, promoting fermentation and aiding in browning during baking. On the other hand, salt is essential for enhancing the overall taste of the bread. It strengthens the gluten structure and helps to regulate yeast activity, ensuring a well-risen roll with a delightful flavor.
Fresh Garlic and Parsley
The star of the show, fresh garlic adds a robust, aromatic flavor that complements the richness of the butter beautifully. When mixed into the garlic butter glaze, it infuses the rolls with a savory depth that is simply irresistible. Parsley adds a touch of freshness and color, making the rolls not only delicious but visually appealing as well.
Parmesan Cheese
For an extra layer of flavor, grated Parmesan cheese is sprinkled on top of the rolls before baking. This savory topping adds a delightful crunch and an umami kick that pairs perfectly with the garlic butter, making each bite even more enjoyable.
The Science Behind the Dough
Understanding the science of bread-making is key to achieving the best results when making Garlic Butter Bliss Rolls. Here’s a closer look at the critical processes involved in transforming a simple mixture of ingredients into fluffy, golden rolls.
Yeast Activation
The first step in making these rolls is to activate the yeast. This process is essential for ensuring that the yeast is alive and ready to work its magic. To activate the yeast, warm milk is combined with sugar and the yeast itself. The warmth of the milk awakens the dormant yeast, causing it to bubble and foam. This visible reaction is a sure sign that your yeast is alive and ready to help your dough rise. If the yeast does not bubble, it may be old or inactive, and it’s best to start over with fresh yeast.
Kneading
Once the ingredients are mixed, kneading comes into play. This critical step develops gluten, the protein that provides structure and elasticity to the dough. Kneading involves folding and stretching the dough, which helps to align the gluten strands and create a strong network. This process is vital for ensuring that your rolls have the perfect texture. Kneading by hand typically takes about 8-10 minutes; however, you can also use a stand mixer fitted with a dough hook for about 5 minutes.
Rising
After kneading, the dough needs to rise, allowing it to double in size. This rising process, known as fermentation, is when the yeast produces carbon dioxide, causing the dough to expand. It’s important to let the dough rise in a warm, draft-free environment to achieve the best results. This first rise typically takes about 1 to 2 hours, depending on the temperature of your kitchen. Proper rising is crucial: if the dough does not rise adequately, the rolls will be dense rather than light and fluffy.
Step-by-Step Instructions
Now that you have a solid understanding of the ingredients and the science behind the dough, let’s dive into the step-by-step instructions for making Garlic Butter Bliss Rolls. Follow these detailed steps to ensure your rolls turn out perfectly every time.
Activating the Yeast
1. Warm the Milk: Start by gently heating the milk until it’s warm but not boiling (about 110°F or 43°C). A good way to test the temperature is to dip your finger into the milk; it should feel warm, not hot.
2. Combine Ingredients: In a mixing bowl, combine the warm milk, sugar, and active dry yeast. Stir gently to mix. Let this mixture sit for about 5-10 minutes until it becomes frothy and bubbly. This indicates that the yeast is activated and ready to work.
Making the Dough
3. Mix the Dry Ingredients: In a separate large bowl, whisk together the all-purpose flour and salt. This helps to evenly distribute the salt throughout the flour.
4. Combine Wet and Dry Ingredients: Once the yeast is activated, add the melted unsalted butter and the yeast mixture to the dry ingredients. Mix with a wooden spoon or spatula until the dough starts to come together.
Kneading and First Rise
5. Knead the Dough: Turn the dough out onto a lightly floured surface. Knead the dough for about 8-10 minutes, until it is smooth and elastic. If the dough is too sticky, add a little more flour, but be careful not to add too much, as this can make the rolls dense.
6. First Rise: Lightly grease a large bowl and place the kneaded dough inside, turning it to coat with oil. Cover the bowl with a clean kitchen towel or plastic wrap, and let it rise in a warm place until it has doubled in size, about 1 to 2 hours.
Preparing the Garlic Butter Mixture
7. Make the Garlic Butter: While the dough rises, prepare the garlic butter mixture. In a small saucepan over low heat, melt the remaining unsalted butter. Once melted, add minced fresh garlic and chopped parsley to the butter, stirring until fragrant (about 1-2 minutes). Remove from heat and set aside.
By following these initial steps, you’ll set the stage for the creation of the most delightful Garlic Butter Bliss Rolls. The combination of aromatic garlic, rich butter, and fluffy dough will soon fill your kitchen with enticing scents, making the wait all the more worthwhile. In the next section, we will continue with the remaining steps to shape, rise, and bake these delectable rolls, ensuring they turn out perfectly golden and utterly irresistible.
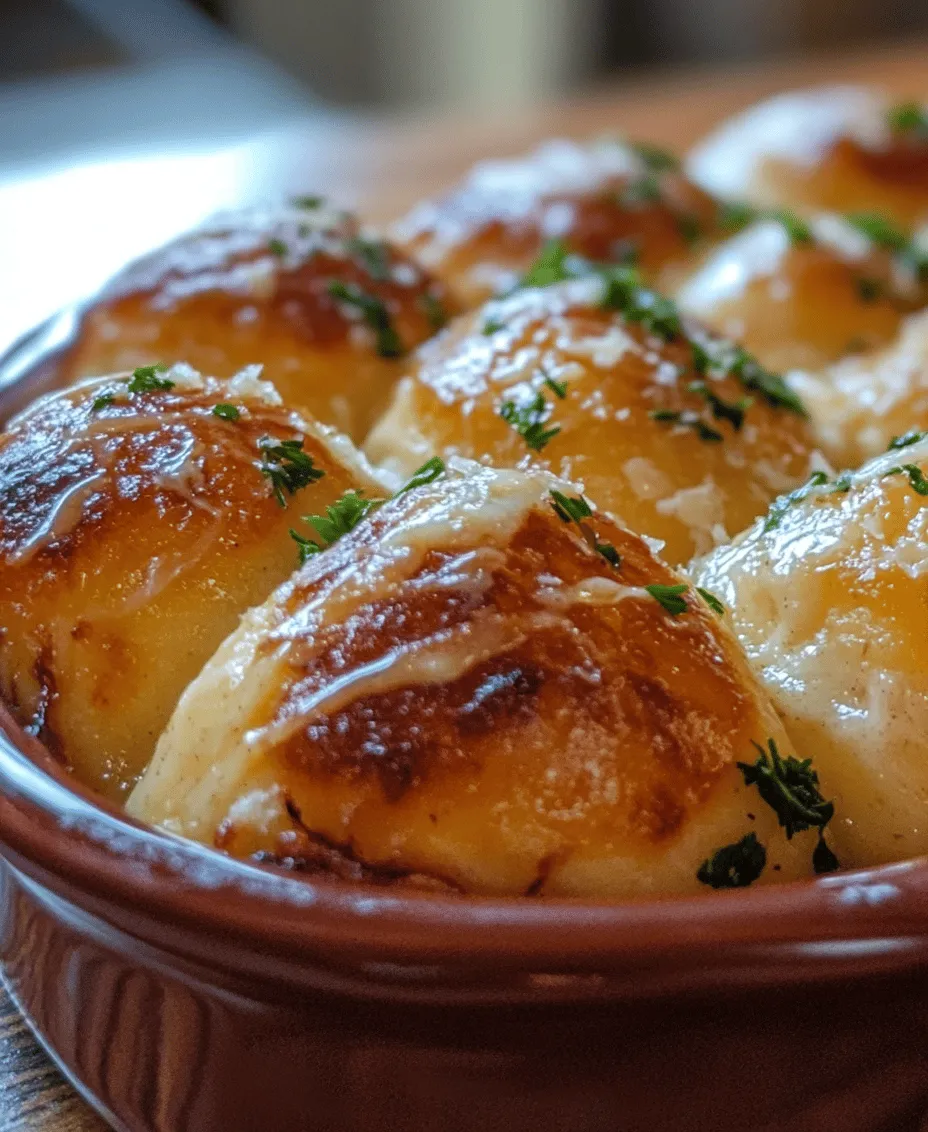
Shaping the Rolls
Once you have completed the dough preparation, it’s time to shape your Garlic Butter Bliss Rolls. This step is crucial for ensuring that your rolls are uniform in size, which helps them bake evenly. Start by dividing the dough into equal portions; a kitchen scale can help you achieve precise measurements, ideally around 2 to 3 ounces each.
To shape the rolls, lightly flour your work surface to prevent sticking. Take one piece of dough and gently stretch it into a round shape using your hands. Then, fold the edges of the dough into the center, pinching them together to create a tight ball. Flip the dough seam-side down and roll it gently against the surface with your palm to form a smooth top. This technique helps build surface tension, which is vital for achieving a fluffy texture once baked.
Arrange the shaped rolls in a greased baking dish, leaving enough space between them to allow for expansion during the second rise. This shaping method will not only make your rolls look beautiful but also ensure they have a delightful texture when they come out of the oven.
Second Rise
The second rise, also known as proofing, is an essential step in the bread-making process. After shaping your rolls, cover the baking dish with a clean kitchen towel and let them rise in a warm, draft-free area for about 30 to 45 minutes. This rise allows the gluten in the dough to relax and gives the yeast more time to work, resulting in rolls that are light, airy, and full of flavor.
During this time, the rolls will puff up significantly, roughly doubling in size. This step is crucial; skipping or shortening it can lead to dense rolls that lack the desired fluffiness. If your kitchen is cool, you might consider placing the rolls in an oven that has been preheated to its lowest setting and then turned off, creating a cozy environment for them to rise.
Baking the Rolls to Perfection
Preheating the Oven
Before your rolls complete their second rise, it’s important to preheat your oven to 375°F (190°C). Preheating ensures that the rolls bake evenly from the moment they enter the oven, allowing for a beautifully browned crust and a fluffy interior. An adequately preheated oven also helps achieve that coveted oven spring, where the rolls expand rapidly as they begin to bake.
Topping the Rolls
For the finishing touch, you can elevate the flavor and appearance of your Garlic Butter Bliss Rolls with a delightful topping. In a small bowl, combine melted butter with minced garlic and chopped fresh parsley, mixing well. Once the rolls have completed their second rise, brush this aromatic mixture generously over the tops of each roll. This step not only adds a rich, buttery flavor but also creates a beautiful golden hue during baking.
For an additional crunch and flavor, you can sprinkle a bit of sea salt or freshly cracked black pepper over the rolls before placing them in the oven. This enhances the overall taste and makes each bite irresistible.
Baking Time and Temperature
Place the baking dish in the preheated oven and bake the rolls for approximately 20-25 minutes, or until they are golden brown and sound hollow when tapped on the bottom. Keep an eye on them during the last few minutes to prevent over-baking, which can lead to dryness. If you have an instant-read thermometer, the internal temperature of the rolls should reach about 190°F (88°C) for the perfect bake.
Once baked, remove the rolls from the oven and allow them to cool slightly in the pan before transferring them to a wire rack. This cooling period helps maintain their texture and prevents the bottoms from becoming soggy.
Serving Suggestions
Garlic Butter Bliss Rolls are incredibly versatile and can be enjoyed in several delightful ways. Here are some serving suggestions to make the most of these mouthwatering rolls:
Pairing with Meals
These rolls are an exquisite addition to a variety of meals. Their rich garlic flavor pairs beautifully with soups, stews, and salads. For an elegant dinner, serve them alongside a creamy tomato basil soup or a hearty minestrone. They can also complement grilled meats, pasta dishes, or roasted vegetables, making them a perfect sidekick for any culinary creation.
Enjoying as a Snack
Beyond mealtime, Garlic Butter Bliss Rolls make for a fantastic snack on their own. Warm and fresh from the oven, they are a treat that can be enjoyed at any time of day. Serve them with a selection of dips such as marinara sauce, creamy ranch, or a homemade garlic dip for an indulgent snack experience.
Presentation Tips
When hosting gatherings or special occasions, presentation can elevate the experience. Arrange the rolls in a beautiful breadbasket lined with a cloth napkin to keep them warm. You can also garnish them with additional herbs or sprinkle some grated Parmesan cheese on top for an extra touch of elegance. Consider serving them with butter or a flavored oil for dipping, turning your Garlic Butter Bliss Rolls into a star attraction at your table.
Storage and Reheating
To keep your Garlic Butter Bliss Rolls fresh and delicious, proper storage is key.
Storage Methods
If you have leftovers (which is unlikely!), allow the rolls to cool completely before storing them. Place them in an airtight container or a resealable plastic bag. They can be kept at room temperature for up to two days. For longer storage, consider refrigerating them, where they can last for up to a week. If you want to extend their shelf life even further, you can freeze the rolls. Place them in a freezer-safe bag, ensuring to remove as much air as possible. They can be frozen for up to three months.
Reheating Techniques
To enjoy your Garlic Butter Bliss Rolls again, reheating is essential for restoring their original texture. For the best results, use the oven. Preheat it to 350°F (175°C), then wrap the rolls in aluminum foil to prevent them from drying out. Bake for about 10-15 minutes, or until they are warmed through. If you’re short on time, you can use a microwave but be cautious. Heat them in short intervals of 10-15 seconds to avoid making them tough.
Nutritional Information
Understanding the nutritional profile of Garlic Butter Bliss Rolls can help you enjoy them mindfully.
Caloric Breakdown
On average, each roll contains approximately 150-200 calories, depending on the size and the amount of butter used. This makes them a relatively indulgent treat, so consider portion control if you’re watching your caloric intake.
Nutritional Benefits
The ingredients in Garlic Butter Bliss Rolls come with their own benefits. For instance, garlic is known for its immune-boosting properties and is rich in antioxidants. Parsley, often used as a garnish, is high in vitamins A, C, and K, making these rolls not just delicious but also a bit nutritious.
Conclusion: The Joy of Baking Homemade Rolls
Baking Garlic Butter Bliss Rolls at home is a delightful experience that transcends mere cooking. The process of mixing, kneading, shaping, and baking allows for creativity, and the aroma that fills your kitchen is nothing short of heavenly. These rolls are more than just a side dish; they have the power to bring friends and family together, creating lasting memories around the dining table.
Whether you serve them fresh out of the oven or enjoy them as leftovers, the joy of homemade rolls is unmatched. So roll up your sleeves, embrace the art of baking, and treat yourself and your loved ones to the comforting goodness of Garlic Butter Bliss Rolls. You’ll find that this simple recipe can add a touch of warmth and love to any meal, making it a cherished staple in your culinary repertoire.
