Introduction
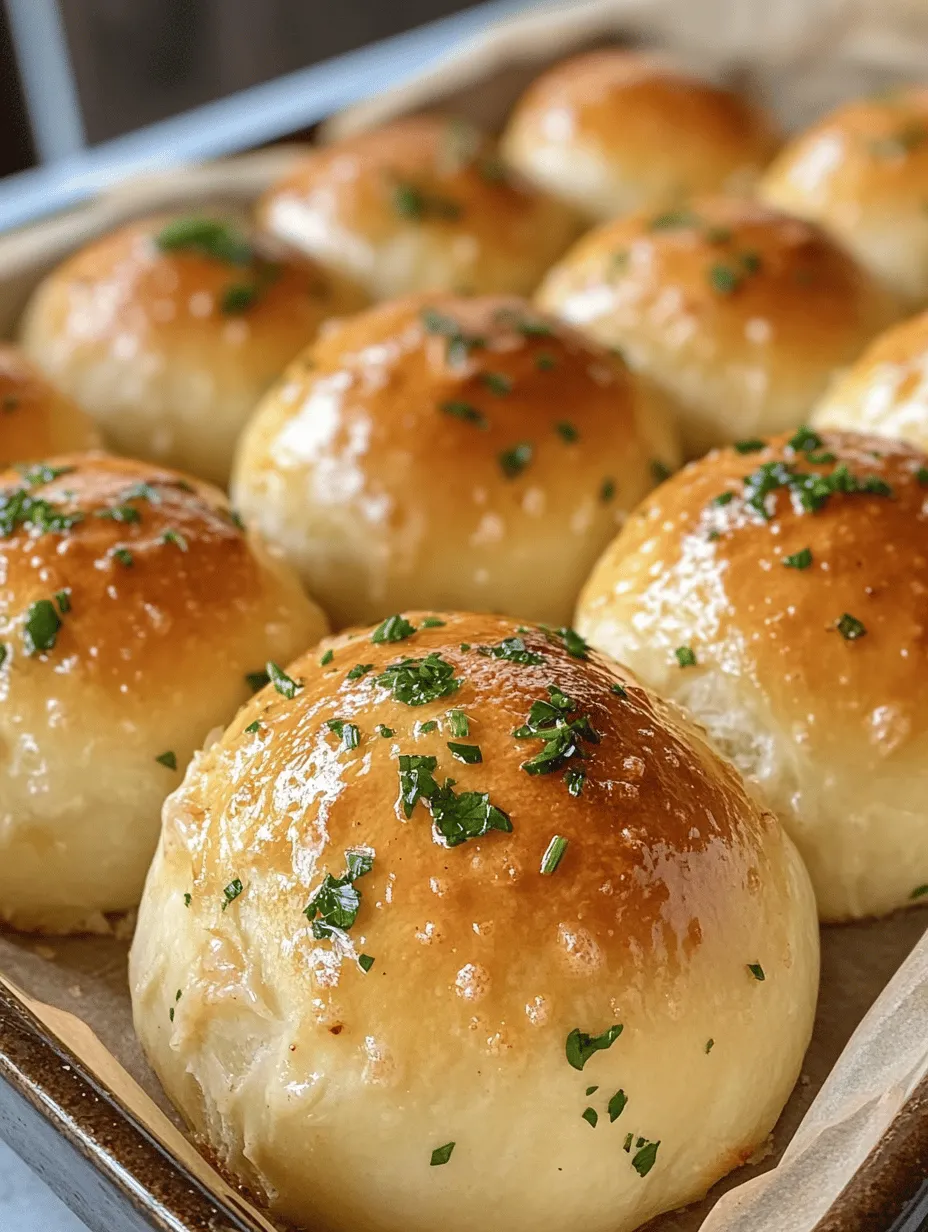
Homemade bread rolls have become a beloved staple in many kitchens around the world, offering a comforting and warm addition to any meal. There’s something incredibly satisfying about the aroma of freshly baked bread wafting through your home, inviting everyone to gather around the table. Among the various types of bread rolls, garlic butter bread rolls stand out for their irresistible flavor and aroma, making them a favorite among families and friends alike. The rich, savory garlic butter not only enhances the taste but also elevates the overall experience of enjoying fresh-baked bread.
In this article, we will take you through our delicious garlic butter bread rolls recipe, which is sure to become a regular on your dining table. This recipe is not only straightforward but also includes unique features, such as the perfect blend of fresh garlic and creamy butter that seeps into every bite of the roll. Along with being delectable, these rolls are incredibly versatile; they can be served alongside soups, salads, or main dishes, or enjoyed on their own as a delightful snack. Prepare to dive into baking these rolls, as we guide you through each step to ensure your success.
The Joy of Baking Bread Rolls at Home
Baking bread rolls at home is an experience that goes beyond mere cooking; it’s a therapeutic process that allows you to connect with your food. The joy of kneading the dough, watching it rise, and then finally pulling a tray of golden-brown rolls from the oven is truly unmatched. Each step in the process provides a sense of accomplishment and satisfaction that you can’t replicate by simply purchasing bread from the store. Not to mention, homemade bread rolls often taste far superior to their store-bought counterparts.
One of the many advantages of baking your bread rolls is their incredible versatility. These rolls can be served warm with a spread of butter, used to mop up hearty gravies, or even transformed into sliders for your favorite fillings. The possibilities are endless, making them suitable for any occasion, from casual family dinners to festive gatherings. Additionally, using fresh ingredients is vital in achieving the best possible flavor. The quality of your flour, yeast, and especially your garlic and butter can make all the difference in the final result.
Ingredients Breakdown
To create the perfect garlic butter bread rolls, you will need a selection of key ingredients that work harmoniously together to produce a delicious outcome. Here’s a breakdown of each main ingredient and their role in this recipe:
– All-Purpose Flour: This is the foundation of your bread rolls. All-purpose flour provides the necessary structure and elasticity needed to create soft and fluffy rolls. While bread flour can also be used for an even chewier texture, all-purpose flour is versatile and yields excellent results.
– Active Dry Yeast: Yeast is the critical ingredient that allows the dough to rise. When activated properly, it ferments the sugars in the flour, producing carbon dioxide that creates air pockets and gives the rolls their light and airy texture.
– Warm Water: The yeast needs warmth to activate, which is why warm water (around 100°F to 110°F) is used. This temperature also helps hydrate the flour, making it easier to form a dough.
– Sugar: A small amount of sugar is added to the dough to feed the yeast, promoting fermentation. It also contributes a slight sweetness to balance the flavors in the rolls.
– Salt: Essential for flavor, salt not only enhances the taste but also strengthens the gluten structure in the dough, leading to a better rise and texture.
– Unsalted Butter: Using unsalted butter allows you to control the salt levels in your recipe. The butter adds richness and flavor to the rolls, making them more indulgent.
– Garlic: Fresh garlic is the star of the show in this recipe. It provides a bold flavor that complements the buttery richness of the rolls. You can adjust the amount of garlic to suit your taste preferences.
– Parsley (optional): Fresh parsley can be added for a pop of color and freshness, enhancing the overall flavor profile of the garlic butter.
Using high-quality ingredients is crucial to the success of this recipe. Fresh garlic and unsalted butter are essential for delivering the rich, savory taste that defines these rolls. When you invest in quality ingredients, you’ll be rewarded with a final product that is delightful to the senses.
Step-by-Step Instructions for Garlic Butter Bread Rolls
Now that we’ve covered the ingredients, let’s delve into the step-by-step process to create these delicious garlic butter bread rolls. Each step is designed to ensure that you achieve the best possible results.
Activating the Yeast
The first step in making your garlic butter bread rolls is activating the yeast. This process is vital to ensure that your bread rises properly. Begin by measuring out warm water into a bowl. The water should be warm to the touch but not too hot, ideally around 100°F to 110°F. If the water is too hot, it can kill the yeast, and if it’s too cold, the yeast won’t activate.
Once you have the water at the right temperature, add in the sugar and stir to dissolve. Next, sprinkle the active dry yeast over the surface of the water and allow it to sit undisturbed for about 5-10 minutes. During this time, the yeast will become frothy and bubbly, signaling that it is active and ready to use.
Creating the Dough
With your yeast activated, it’s time to create the dough. In a large mixing bowl or a stand mixer fitted with a dough hook, combine the all-purpose flour and salt. Mix these dry ingredients together to ensure the salt is evenly distributed.
Once mixed, create a well in the center of the flour mixture and pour in the activated yeast mixture along with the melted unsalted butter. Begin to mix the ingredients together until a shaggy dough starts to form. If you’re using a stand mixer, mix on low speed until the ingredients come together.
Kneading the Dough
Kneading is an essential step in bread-making, as it helps develop the gluten structure, giving your rolls their desirable texture. If you’re kneading by hand, transfer the dough onto a lightly floured surface.
Begin kneading the dough by folding it over itself and pushing it down with the palms of your hands. Rotate the dough a quarter turn and repeat this process for about 8-10 minutes. The dough should become smooth and elastic. If you’re using a stand mixer, continue mixing on medium speed for about 5-7 minutes until the dough is smooth and pulls away from the sides of the bowl.
First Rise
Once kneaded, shape the dough into a ball and place it in a greased bowl, turning the dough so that it is coated in oil. Cover the bowl with a clean kitchen towel or plastic wrap and place it in a warm, draft-free area to rise. This first rise typically takes about 1 to 2 hours, or until the dough has doubled in size. Look for the dough to have grown significantly in volume, indicating that the yeast has worked its magic.
Preparing the Garlic Butter
While the dough is rising, you can prepare the garlic butter that will elevate your rolls to the next level. In a small saucepan over low heat, melt the unsalted butter. Once melted, add in minced fresh garlic and a pinch of salt. Allow the garlic to gently simmer in the butter for about 1-2 minutes, just until fragrant. Be careful not to let the garlic brown, as this can impart a bitter flavor.
If you’d like, you can also stir in some finely chopped fresh parsley at this stage for added freshness and color. Set the garlic butter aside to cool slightly before using it to brush on the rolls before and after baking.
—
With these initial steps complete, you’ve laid the groundwork for creating delightful garlic butter bread rolls. The process of making these rolls is not only rewarding but also allows you to enjoy the delightful aroma of baking bread in your home. Stay tuned for the next part of this article, where we will guide you through shaping the rolls, their second rise, and the final baking process that will result in golden, fluffy rolls bursting with savory garlic butter goodness.
Shaping the Rolls
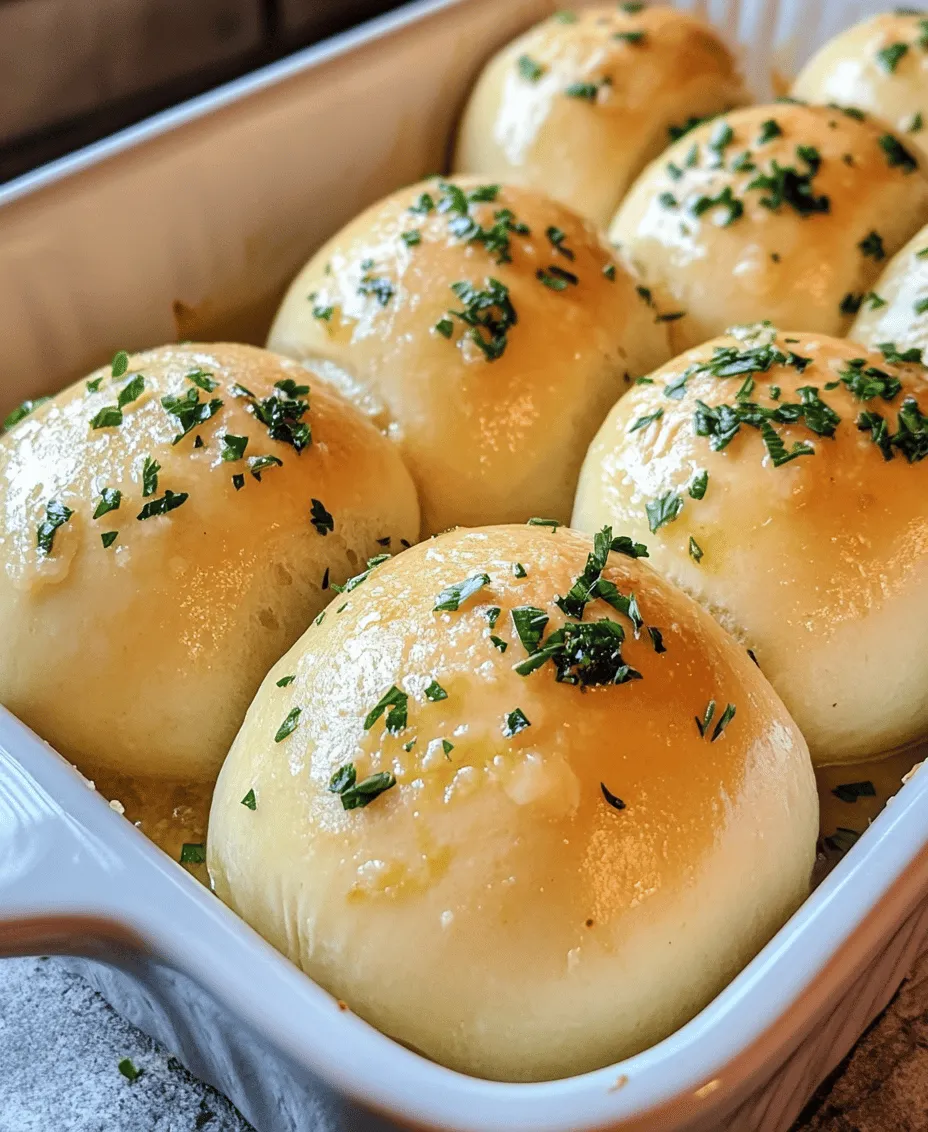
Shaping your garlic butter bread rolls properly is essential for achieving a uniform and appealing presentation. To start, divide your dough into equal portions, typically about 2-3 ounces each, depending on your preferred roll size. A kitchen scale can be very helpful in ensuring uniformity, especially if you are making a larger batch.
Once your dough is divided, you will want to shape each piece into a ball. To do this, take a piece of dough and flatten it slightly with your palm. Then, fold the edges towards the center, pinching them together to form a seam. Flip the dough over so that the seam is on the bottom and roll it gently between your palms to create a smooth, round shape. This technique not only helps in achieving uniform rolls but also creates surface tension, which will help the rolls rise nicely during the second rise and maintain their shape during baking.
Second Rise
The second rise is a crucial step in the bread-making process that should not be overlooked. After shaping your rolls, place them on a greased or parchment-lined baking sheet, ensuring they are spaced apart to allow for expansion. Cover the rolls with a clean kitchen towel or plastic wrap to prevent them from drying out. Let them rise in a warm, draft-free environment for about 30 to 45 minutes, or until they have doubled in size.
This rise is essential for achieving the fluffy texture characteristic of perfect bread rolls. During this time, the yeast continues to work, producing carbon dioxide that creates air pockets in the dough. These air pockets are what give bread its light and airy texture. Skipping this step will result in denser rolls that lack the desired fluffiness.
Preheating the Oven
Preheating your oven is a vital step that prepares the baking environment for your rolls. Set your oven to 375°F (190°C) while your rolls are undergoing their second rise. Preheating allows the temperature to stabilize, ensuring that the rolls start baking immediately upon placement in the oven. This immediate heat helps to form a crust on the outside while keeping the inside soft and tender.
It’s important to note that placing your rolls in an unheated oven can lead to uneven baking and an undesirable texture. For optimal results, allow your oven to reach the desired temperature fully before placing the rolls inside.
Applying Garlic Butter
The garlic butter is what elevates these bread rolls to new heights of deliciousness, so even distribution is key. To make your garlic butter, melt unsalted butter in a saucepan and add minced garlic, allowing it to infuse for a few minutes. You can also add a pinch of salt and fresh parsley or other herbs for added flavor.
Once your rolls have risen and your oven is preheated, it’s time to apply the garlic butter. Using a pastry brush, generously coat the tops of each roll with the melted garlic butter. Make sure to get into any crevices and cover the sides as well. This not only enhances flavor but also helps to achieve a beautiful golden-brown color during baking. Reserve a little garlic butter for brushing on the rolls once they are out of the oven for an extra burst of flavor.
Baking
When it comes to baking your garlic butter bread rolls, the visual cues are just as important as the timing. Place the rolls in the preheated oven and bake them for about 15 to 20 minutes or until they are golden brown on top. During the last few minutes of baking, keep an eye on them to prevent over-browning.
To check for doneness, gently tap the bottom of a roll; it should sound hollow. If you have a thermometer, you can check the internal temperature, which should read around 190°F (88°C) when fully baked. Once done, remove the rolls from the oven and brush them with any remaining garlic butter for added flavor and shine.
Tips for Perfect Garlic Butter Bread Rolls
Achieving the perfect garlic butter bread rolls requires attention to detail and a few essential tips.
1. Common Mistakes to Avoid: One common mistake is not allowing enough time for the dough to rise. Be patient and ensure your rolls have doubled in size during the second rise. Additionally, avoid adding too much flour while kneading; this can lead to dry rolls. If your dough feels sticky, oil your hands instead of adding more flour.
2. Adjustments for Different Altitudes and Climates: If you live at a high altitude, you may need to adjust your yeast quantity, as dough rises faster in such conditions. Similarly, in humid climates, you may require less liquid in your dough. Always keep an eye on your dough’s texture and adjust accordingly.
3. Suggestions for Variations: Feel free to get creative with your rolls! Consider adding shredded cheese, such as cheddar or mozzarella, to the dough for cheesy garlic rolls. You can also incorporate herbs like rosemary or thyme into the dough for an aromatic twist. For a spicy kick, try adding crushed red pepper flakes to the garlic butter.
Serving Suggestions
Garlic butter bread rolls are incredibly versatile and pair wonderfully with many dishes. Here are some great pairing options:
– Soups and Stews: These rolls are the perfect accompaniment to hearty soups, such as minestrone, tomato basil, or chicken noodle. Their buttery flavor complements the rich taste of the broth beautifully.
– Salads: Serve your rolls alongside a fresh garden salad or a classic Caesar salad, offering a delightful contrast between the crunchy greens and the soft, buttery rolls.
– Grilled Meats: Whether you’re having grilled chicken, steak, or pork, these rolls make a fantastic side, perfect for soaking up any sauces or juices.
– Creative Uses: If you happen to have leftover rolls, don’t let them go to waste! Transform them into croutons for your salads by cutting them into cubes, tossing them with olive oil, and baking until crispy. Alternatively, you can make a delicious bread pudding by cubing the rolls and mixing them with a custard mixture for a sweet dessert.
Nutritional Information
Understanding the nutritional value of your garlic butter bread rolls can help you enjoy them responsibly. Each roll typically contains around 150 calories, with a breakdown of the macronutrients as follows:
– Carbohydrates: 25g
– Protein: 3g
– Fat: 6g
While these rolls are indulgent, you can make healthier adjustments. Consider substituting some of the all-purpose flour with whole wheat flour for added fiber and nutrients. Additionally, using olive oil instead of butter or reducing the butter quantity can lighten the rolls without sacrificing flavor.
Practicing portion control is also important. Instead of serving a large roll, consider cutting them in half for smaller servings, especially if you’re serving them alongside a hearty meal.
Conclusion
In summary, making delicious garlic butter bread rolls at home is a rewarding experience that can elevate any meal. From the careful shaping of the dough to the importance of the second rise, each step plays a crucial role in achieving that soft, fluffy texture we all love.
The application of garlic butter adds a mouthwatering flavor, while the baking process ensures a beautiful golden-brown finish. With the tips and variations provided, you can personalize this recipe to suit your taste and impress your family and friends.
Whether you serve them alongside your favorite soup, salad, or grilled dish, these rolls are sure to be a hit. We encourage you to try your hand at this recipe, experiment with different flavors, and enjoy the delightful process of baking. Happy baking!
