Introduction
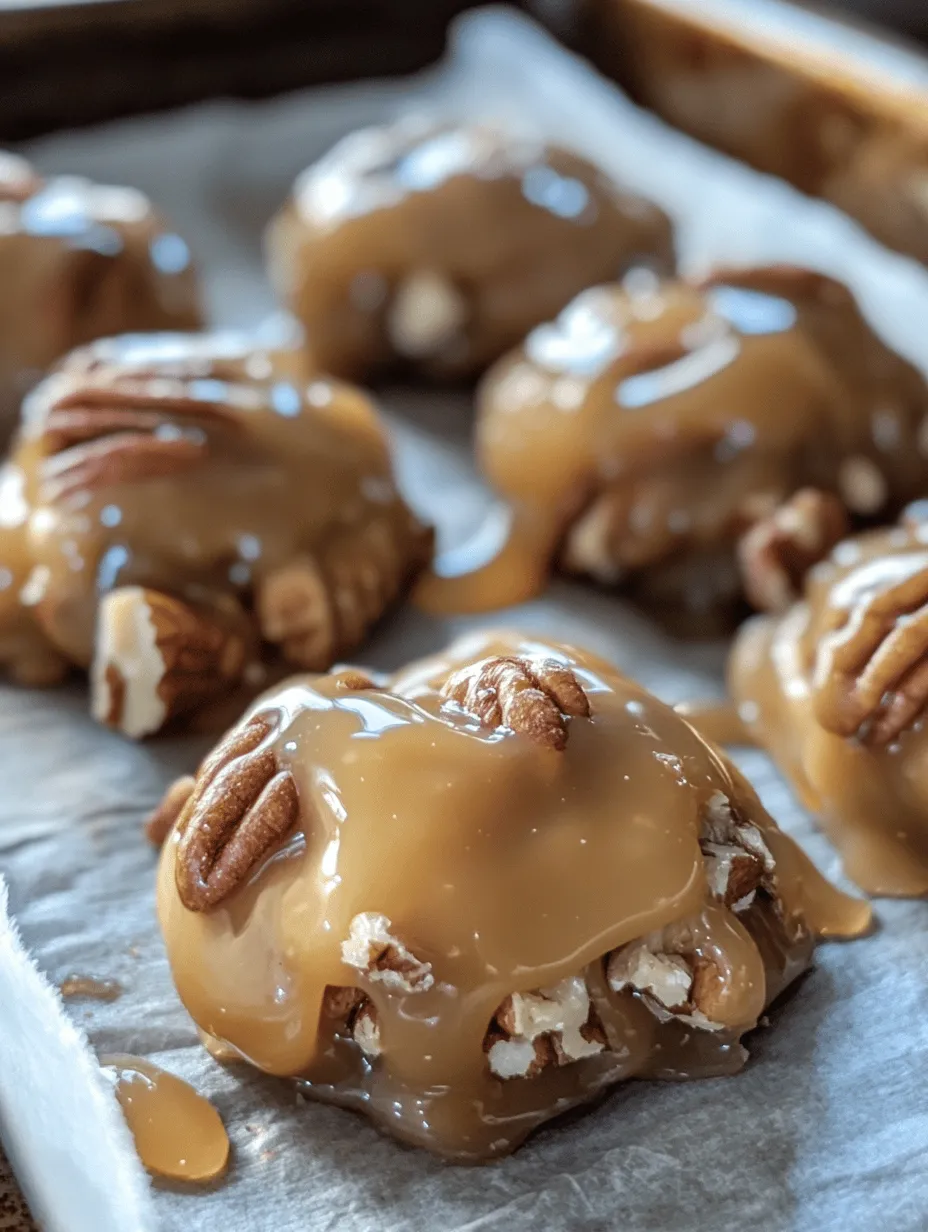
Pralines are a beloved confectionery treat that have delighted taste buds for generations. With their rich, nutty flavors and creamy textures, these sweet morsels hold a special place in the hearts of dessert enthusiasts around the world. Among the various types of pralines, the decadent vanilla pecan pralines stand out for their perfect blend of flavors and textures. Imagine biting into a soft, buttery confection that melts in your mouth, revealing crunchy pecans and a hint of vanilla that lingers long after the last bite. This delightful combination makes these pralines not just a sweet treat but an experience to savor.
What makes vanilla pecan pralines truly irresistible is the harmonious balance of ingredients that come together to create a confection that is both luxurious and comforting. Whether enjoyed as a special dessert, a homemade gift, or a delightful addition to any festive gathering, these pralines are sure to impress. With the right techniques and a little patience, you can create this decadent treat from the comfort of your own kitchen.
The History of Pralines
The history of pralines is as rich and complex as the confections themselves. Originating in France in the 17th century, pralines were initially made with sugar-coated almonds. The name “praline” is believed to have been derived from the surname of a French diplomat, César de Plessis-Praslin, who popularized the treat. In its early days, the praline was a luxury item, enjoyed by the elite and often crafted by skilled confectioners.
As the recipe traveled across the Atlantic, it evolved into what we now recognize as Southern American pralines. These variations incorporated local ingredients and flavors, leading to the creation of the pecan praline, which remains a staple in Southern cuisine. The warm, caramel-like sweetness of the pralines became a beloved treat among diverse communities, symbolizing hospitality and celebration.
Culturally, pralines hold significant importance, particularly in New Orleans, where they are often associated with the city’s vibrant culinary scene. Here, pralines are more than just candy; they represent a blend of French, African, and Creole influences. The tradition of making pralines has been passed down through generations, often made at home for special occasions or sold by local candy makers. This enduring legacy highlights the cultural significance of pralines within Southern American cuisine, making them a cherished treat that brings people together.
Understanding the Ingredients
To create the perfect vanilla pecan pralines, it’s essential to understand the key ingredients that contribute to their unique flavor and texture. Each component plays a vital role in crafting this decadent confection:
– Granulated Sugar:
The foundation of pralines, granulated sugar is crucial for achieving the right sweetness and texture. When cooked, sugar melts and caramelizes, forming the base for the rich syrup that coats the pecans. The precise temperature at which the sugar is cooked affects the final texture of the pralines, making this ingredient essential for success.
– Brown Sugar:
This ingredient adds a depth of flavor and moisture to the pralines. The molasses content in brown sugar contributes a rich, caramel-like taste that complements the nuttiness of the pecans. Using a combination of granulated and brown sugar enhances the overall complexity of the pralines, making each bite more satisfying.
– Heavy Cream:
The addition of heavy cream is what creates the luxurious, creamy texture of the pralines. As it combines with the sugars during cooking, it helps to create a smooth, velvety mixture that coats the pecans and contributes to the overall indulgence of the treat.
– Unsalted Butter:
Using unsalted butter is key to maintaining control over the flavor profile of the pralines. Salted butter can introduce unwanted saltiness, which could overshadow the delicate sweetness of the confection. Unsalted butter adds richness without compromising the balance of flavors.
– Pecan Halves:
The star of this recipe, pecan halves provide a delightful crunch and a distinct nutty flavor. They are not only delicious but also packed with nutritional benefits, including healthy fats, protein, and essential vitamins and minerals. The choice of high-quality pecans will significantly enhance the overall taste of the pralines.
– Pure Vanilla Extract:
Vanilla extract elevates the flavor of the pralines, adding a warm, aromatic quality that perfectly complements the sweetness. Using pure vanilla extract rather than imitation enhances the overall depth of flavor, making the pralines truly decadent.
– Salt:
A small amount of salt may seem counterintuitive in a sweet treat, but it plays a crucial role in balancing the sweetness of the sugars. Salt enhances the flavor profile, ensuring that the pralines are well-rounded and not overly sweet.
– Baking Soda (Optional):
While not always necessary, a pinch of baking soda can be added to the mixture to enhance the texture of the pralines. It helps to create a lighter, airy consistency, making the pralines even more enjoyable.
Step-by-Step Guide to Making Vanilla Pecan Pralines
Before diving into the cooking process, it’s essential to gather your ingredients and prepare your kitchen. Making pralines requires careful attention to detail, as the cooking temperature and timing are crucial for achieving the desired results. Here’s a comprehensive guide to help you navigate the process:
Preparation Tips and Necessary Tools
1. Gather Your Ingredients: Ensure you have all the necessary ingredients on hand before you begin. This includes granulated sugar, brown sugar, heavy cream, unsalted butter, pecan halves, pure vanilla extract, salt, and optional baking soda.
2. Prepare Your Workspace: Clear a large, flat surface where you can place the pralines once they are cooked. A marble countertop or a baking sheet lined with parchment paper works well.
3. Tools Required:
– A heavy-bottomed saucepan: This will help to distribute heat evenly and prevent the sugar from burning.
– A candy thermometer: Essential for monitoring the temperature of the sugar mixture to ensure it reaches the correct consistency.
– A wooden spoon or silicone spatula: Useful for stirring the mixture as it cooks.
– Baking sheets or parchment paper: To place the pralines on to cool and set.
4. Prep the Pecan Halves: If your pecans are raw, consider toasting them lightly in a dry skillet for a few minutes over medium heat. This enhances their flavor and adds an extra layer of nuttiness to the pralines.
Detailed Instructions for Each Step of the Cooking Process
1. Combine the Sugars and Cream: In a heavy-bottomed saucepan, combine the granulated sugar, brown sugar, and heavy cream. Stir gently to blend the ingredients together.
2. Heat the Mixture: Place the saucepan over medium heat. Stir the mixture until the sugar has completely dissolved. Be careful not to let the mixture boil at this stage.
3. Monitor the Temperature: Once the sugar has dissolved, allow the mixture to come to a gentle boil without stirring. Attach a candy thermometer to the side of the saucepan, ensuring it does not touch the bottom of the pan, as this can give an inaccurate reading. You want to cook the mixture until it reaches the soft-ball stage, approximately 234°F to 240°F (112°C to 115°C).
4. Add Butter and Vanilla: Once the mixture reaches the desired temperature, remove it from heat. Immediately add the unsalted butter, pure vanilla extract, and salt. Stir gently until the butter has melted and the mixture is smooth.
5. Incorporate the Pecan Halves: Carefully fold in the toasted pecan halves until they are evenly coated with the sugar mixture. This will ensure that every praline is packed with nutty flavor.
6. Cool and Shape the Pralines: Using a spoon, drop spoonfuls of the mixture onto the prepared baking sheets or parchment paper. Allow them to cool and set at room temperature. The pralines will firm up as they cool, creating a delightful chewy texture.
As you embark on this sweet journey of making decadent vanilla pecan pralines, follow each step carefully to ensure success. In the next part of this article, we’ll delve deeper into tips for achieving the best results and addressing common questions about this beloved confection. Stay tuned for more delicious insights!
Combining Sugars and Cream: Achieving a Smooth Mixture
To begin the process of creating your decadent vanilla pecan pralines, it’s crucial to combine the sugars and cream correctly. Start by measuring out your light brown sugar, granulated sugar, and heavy cream in a medium saucepan. It’s essential to stir the mixture slowly and consistently over medium heat until the sugars dissolve completely. This ensures a smooth and homogenous mixture, which will result in a better texture for your pralines.
As the mixture heats, keep an eye on it to prevent burning. Stirring continuously not only helps in dissolving the sugars but also prevents the mixture from sticking to the bottom of the pan. If you have a candy thermometer, this is an excellent time to use it. The goal is to bring the mixture to a gentle boil, which will help it reach the ideal cooking temperature later on.
Cooking to Soft Ball Stage: Importance of Temperature Control
One of the critical steps in making pralines is cooking the mixture to the soft ball stage, which is between 234°F to 240°F (112°C to 115°C). This temperature is vital because it determines the final texture of your pralines. If the mixture is undercooked, the pralines will be too soft and won’t hold their shape. Conversely, if overcooked, they will become hard and brittle.
Monitor the temperature closely with your candy thermometer and avoid stirring once the mixture reaches a boil. This helps to prevent crystallization, which can ruin your pralines. Instead, gently swirl the pan occasionally to ensure even cooking. Once you reach the soft ball stage, remove the saucepan from the heat immediately to stop the cooking process.
Incorporating Pecans and Flavorings: Ensuring Even Distribution
After cooking the mixture to the soft ball stage, it’s time to add the pecans and flavorings. Be sure to have your toasted pecans ready, as they add a lovely crunch and nutty flavor that complements the sweet caramel. Quickly stir in the pecans, vanilla extract, and a pinch of salt into the hot sugar mixture.
Using a spatula or wooden spoon, mix thoroughly to ensure the pecans are evenly coated with the caramel. This step is essential as it guarantees that every bite of your praline is packed with flavor and texture. Be mindful that the mixture may be very hot, so handle with care to avoid burns.
Cooling and Shaping the Pralines: Techniques for Perfect Drops
Once your pecan-caramel mixture is well combined, you’ll need to cool it slightly before shaping it into pralines. Let the mixture sit for about 5 to 10 minutes, allowing it to thicken slightly. This will help the pralines hold their shape better when you drop them onto your prepared baking sheet.
Using a spoon or a small ice cream scoop, drop spoonfuls of the mixture onto the parchment paper. For perfectly shaped pralines, you can also use a silicone mold if you prefer a more uniform look. Ensure there is enough space between each drop, as they will spread a bit as they cool. Allow the pralines to sit at room temperature until they are fully set, which typically takes about 30 minutes.
Tips for Perfecting Your Pralines
– Common Pitfalls to Avoid When Making Pralines: One of the main issues that can arise when making pralines is sugar crystallization. To avoid this, make sure to wash down the sides of the saucepan with a pastry brush dipped in water while the sugar mixture is cooking. Additionally, don’t stir the mixture once it reaches a boil.
– How to Tell When the Mixture Has Reached the Right Consistency: You can test the consistency by dropping a small amount of the mixture into a bowl of cold water. If it forms a soft ball that holds its shape but is pliable, you’ve reached the soft ball stage.
– Adjusting for Different Textures: How to Use Baking Soda Properly: If you prefer a slightly softer texture, you can add a pinch of baking soda to the mixture right before incorporating the pecans. Baking soda helps to create a more fudge-like consistency, while still maintaining the characteristic crunch from the nuts.
Serving Suggestions
– Ideas for Presenting Pralines as Gifts or at Gatherings: Pralines make excellent gifts and can be presented beautifully. Consider placing them in decorative boxes or tins, lined with wax paper for a rustic touch. Add a ribbon for a personal flair. They also shine as a sweet treat on dessert tables at parties and celebrations.
– Pairing with Beverages: Best Drinks to Accompany Pralines: Pralines pair wonderfully with coffee, especially a rich, dark roast or a creamy latte. For those who prefer tea, a robust black tea or herbal chai can complement the sweetness of the pralines. If you’re looking for something more festive, a glass of dessert wine or a sweet sparkling wine can elevate the experience.
– Creative Uses: Incorporating Pralines into Other Desserts: Beyond enjoying them on their own, pralines can enhance other desserts. Crushed pralines make a fantastic topping for ice cream sundaes or can be mixed into brownie batter for a delightful twist. They can also be added to cheesecakes or used as a garnish for creamy desserts like panna cotta.
Storage and Shelf Life
– Best Practices for Storing Pralines to Maintain Freshness: To keep your pralines fresh, store them in an airtight container at room temperature. Avoid refrigerating them, as this can change their texture. If they are properly sealed, they can last several weeks.
– Understanding the Shelf Life of Homemade Pralines: Homemade pralines typically have a shelf life of about two to three weeks when stored correctly. Over time, they may lose some of their crunch but should still be enjoyable.
– Tips for Freezing Pralines if Desired: If you want to store pralines for an extended period, they can be frozen. Place them in a single layer on a baking sheet and freeze until solid. Once frozen, transfer them to a freezer-safe container or bag, separating layers with parchment paper. They can be stored in the freezer for up to three months. Just allow them to thaw at room temperature before enjoying.
Nutritional Information
– Breakdown of Calories and Nutritional Content per Praline: Each praline contains approximately 100 calories, primarily from sugars and fats. Depending on the size and amount of pecans used, the nutritional content can vary slightly.
– Health Considerations and Modifications for Dietary Preferences: While pralines are a sweet treat, those watching their sugar intake can consider using sugar substitutes or experimenting with lower-sugar recipes. For a dairy-free version, try using coconut cream or a dairy-free milk alternative. Keep in mind that these substitutions may alter the texture and flavor slightly.
Conclusion
Making decadent vanilla pecan pralines is not just about creating a delicious treat; it’s an experience that brings joy and satisfaction. Whether you’re preparing them for a special occasion or simply indulging yourself, these homemade confections capture the essence of sweetness and nostalgia. We encourage you to try this recipe and share the delightful results with friends and family.
The timeless appeal of pralines lies in their rich flavor and crunchy texture, making them a cherished addition to any celebration. Enjoy the process, savor the results, and carry on the tradition of homemade confections that warm the heart and sweeten the soul.