Introduction
As the holiday season approaches, families around the world engage in cherished traditions that often involve gathering in the kitchen to bake delicious treats. The aroma of freshly baked goods wafting through the house creates a warm, inviting atmosphere, filled with anticipation and joy. Among the multitude of festive recipes, Christmas cookies hold a special place, uniting loved ones in the spirit of celebration. One such delightful recipe that captures both the essence of the holidays and the joy of baking is the Christmas Swirl Butter Cookies.
These colorful, festive cookies are not only visually appealing, but they also embody the flavors and warmth of the season. Their buttery texture and delightful sweetness make them a favorite among both children and adults. Moreover, the simplicity of the recipe makes it accessible for bakers of all skill levels, whether you are a seasoned pro or a novice in the kitchen. With just a handful of ingredients, you can create a tray full of these delightful treats that will surely bring smiles to your friends and family.
The Allure of Christmas Cookies
Cookies have long been a staple of Christmas celebrations around the globe. Their cultural significance extends beyond mere indulgence; they represent the spirit of giving and sharing. During the holiday season, it is common for families to bake large batches of cookies not only for their own enjoyment but also to share with friends, neighbors, and community members. The act of gifting cookies can foster connections, create lasting memories, and spread joy among loved ones.
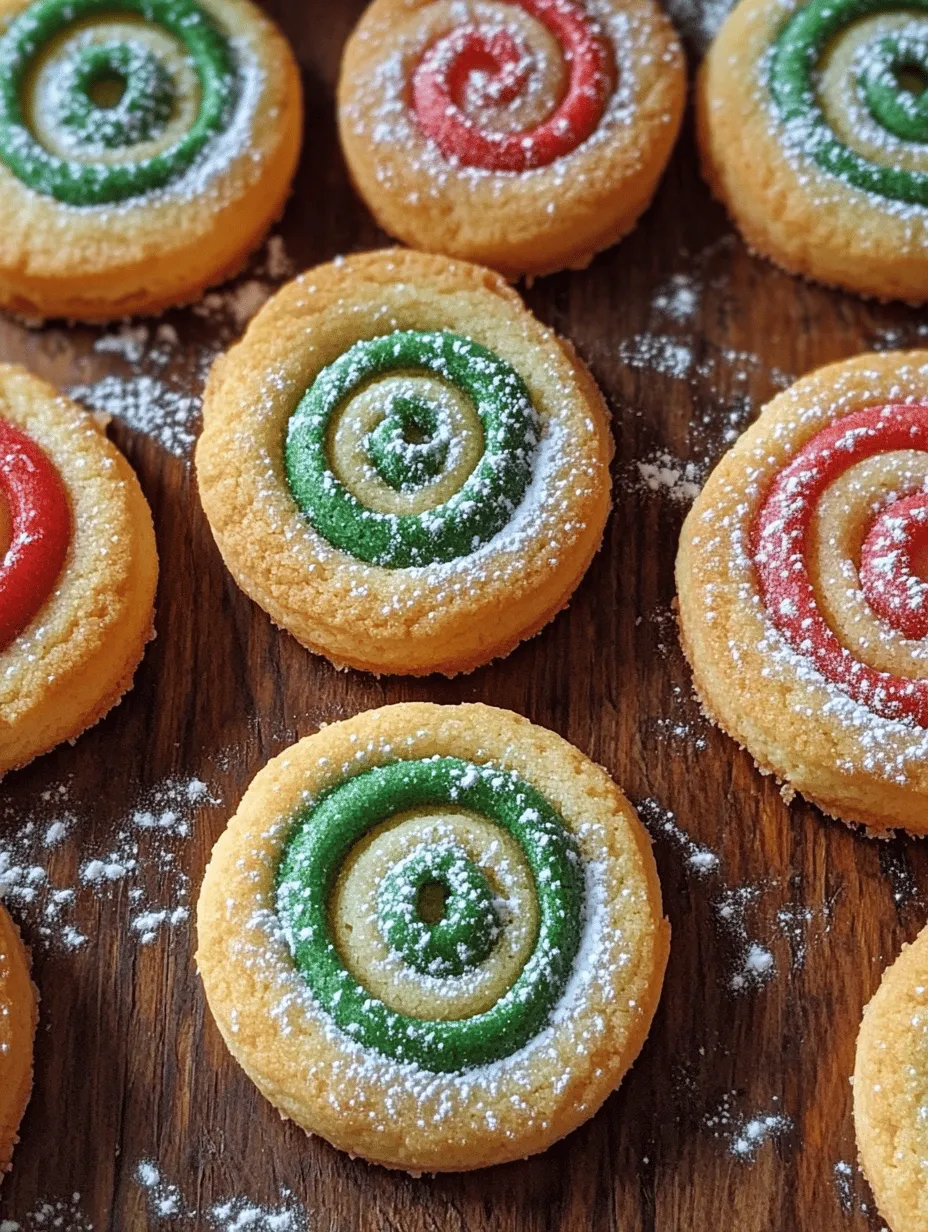
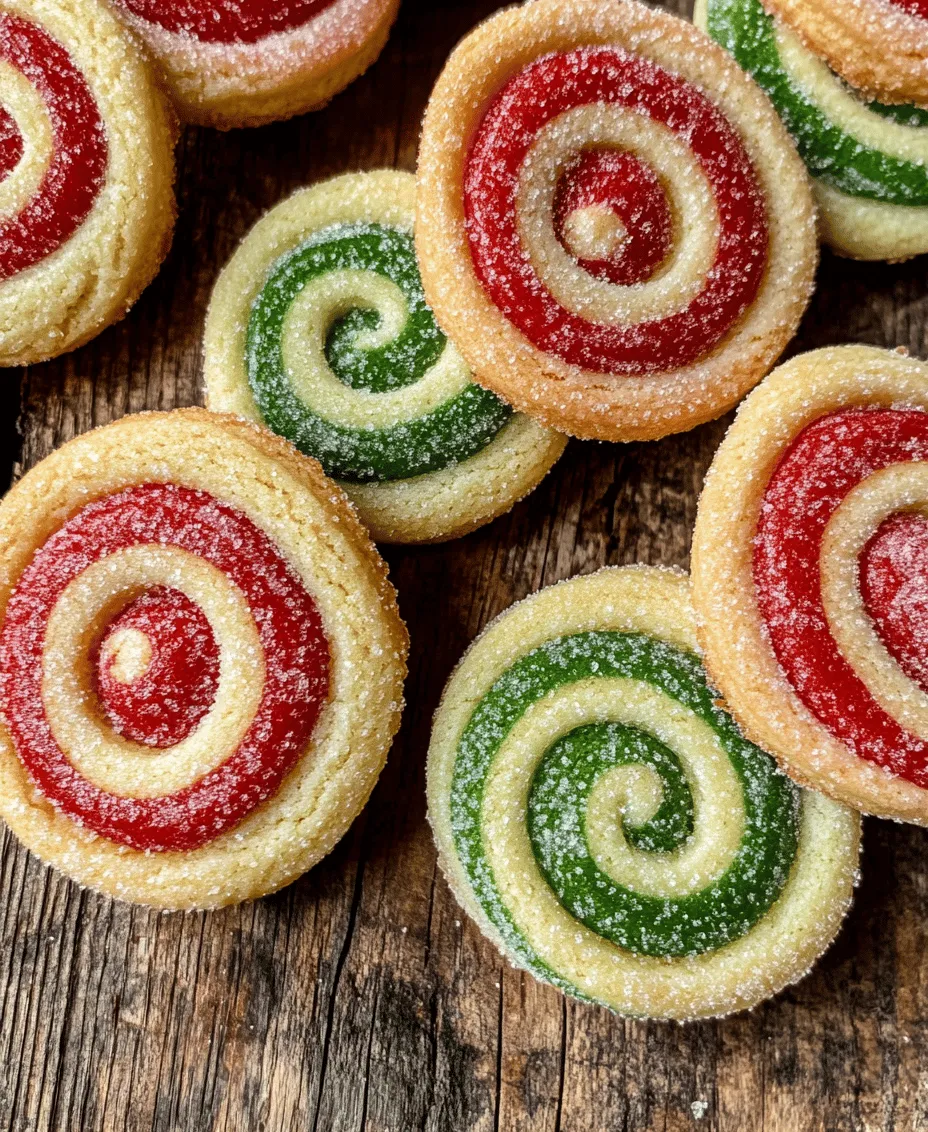
From classic gingerbread men to melt-in-your-mouth shortbread, each cookie variety holds its own charm. However, the Christmas Swirl Butter Cookies stand out with their vibrant colors and marbled design. These eye-catching treats are perfect for holiday parties, cookie exchanges, or simply as a sweet snack while decorating the Christmas tree. The unique swirl pattern not only makes them visually striking but also allows for endless creativity in terms of color combinations and presentation.
Baking cookies during the holidays is more than just a culinary activity; it is a time-honored tradition that brings families together. Whether you are baking alongside your children, reminiscing with your parents, or creating new memories with friends, these moments spent in the kitchen are what the season is all about. So, roll up your sleeves and prepare to embark on a festive baking adventure with the Christmas Swirl Butter Cookies!
Understanding the Ingredients
To craft the perfect Christmas Swirl Butter Cookies, it’s essential to understand the role each ingredient plays in the recipe. Here’s a detailed analysis of the key components that create these delightful treats:
Unsalted Butter
Unsalted butter is the star of this cookie recipe, providing the rich and creamy base that defines the texture of butter cookies. Using softened butter is crucial, as it allows for easier creaming with the sugar. This process aerates the mixture, resulting in cookies that are light and tender. Unsalted butter also gives you complete control over the salt content of your cookies, ensuring that they are perfectly balanced in flavor.
Granulated Sugar
Granulated sugar is vital in achieving the sweetness and structure of the cookies. It not only contributes to the overall flavor but also affects the texture. When creamed with butter, sugar helps create air pockets that contribute to the cookie’s lightness. Additionally, the sugar caramelizes during baking, lending a beautiful golden hue to the edges of the cookies.
Egg
The egg plays a significant role in adding moisture and binding the ingredients together. This crucial component helps create a cohesive dough that holds its shape when baked. The proteins in the egg also contribute to the cookie’s structure, making them less crumbly and more enjoyable to eat.
Vanilla Extract
A splash of vanilla extract elevates the flavor profile of the cookies, adding depth and warmth to each bite. Vanilla is a classic flavor that pairs beautifully with the buttery base, enhancing the overall taste experience. Opting for pure vanilla extract, if possible, will yield the best flavor.
All-Purpose Flour
The foundation of any cookie recipe, all-purpose flour provides the structure needed to hold the cookies together. It absorbs moisture and helps create the desired texture. Be sure to measure the flour accurately, as too much can lead to dry cookies, while too little can result in a dough that doesn’t hold its shape.
Baking Powder
Baking powder is a leavening agent that contributes to the cookies’ light and fluffy texture. It releases carbon dioxide when activated by moisture and heat, causing the cookies to rise. The right amount of baking powder ensures that your cookies are neither too dense nor too airy.
Salt
A pinch of salt enhances the flavors of the cookies, balancing the sweetness and bringing out the taste of the other ingredients. Salt is a vital component in baking, as it amplifies flavors and adds a subtle depth to the overall profile of the cookies.
Gel Food Coloring
To achieve the festive swirl effect, gel food coloring is used to tint portions of the dough. This vibrant addition allows you to create visually stunning cookies without altering the taste. Gel food coloring is preferred over liquid coloring, as it provides more intense colors without adding excess moisture to the dough.
Powdered Sugar (Optional)
While not necessary for the cookie itself, a dusting of powdered sugar can add a beautiful finishing touch to the cookies, enhancing their festive appeal. The light sweetness of powdered sugar pairs perfectly with the buttery flavor of the cookies, making them even more indulgent.
Step-by-Step Instructions for Christmas Swirl Butter Cookies
Now that we’ve covered the ingredients, let’s dive into the preparation process for these delightful Christmas Swirl Butter Cookies. Follow these detailed steps to ensure your cookies turn out perfectly every time:
Step 1: Creaming Butter and Sugar
Begin by gathering your ingredients and preheating your oven to 350°F (175°C). In a large mixing bowl, add the softened unsalted butter and granulated sugar. Using a hand mixer or stand mixer, beat the butter and sugar together on medium speed until the mixture is light and fluffy. This process typically takes about 2-3 minutes. Proper creaming is essential, as it incorporates air into the mixture, resulting in a tender texture.
Step 2: Incorporating Egg and Vanilla
Once your butter and sugar are well combined, add in the egg and vanilla extract. Continue to mix on medium speed until these ingredients are fully incorporated. Scrape down the sides of the bowl as needed to ensure that everything is evenly mixed. The batter should appear smooth and creamy at this point, with no lumps remaining.
Step 3: Adding Dry Ingredients
In a separate bowl, whisk together the all-purpose flour, baking powder, and salt. Gradually add this dry mixture to the wet ingredients, mixing on low speed until just combined. Be careful not to overmix, as this can lead to tough cookies. The dough should be soft and slightly sticky, but still manageable.
Step 4: Dividing and Coloring the Dough
Once the dough is prepared, divide it into two equal portions. In one of the portions, add a few drops of gel food coloring and mix until the color is evenly distributed. You can choose any festive colors you like—traditional red and green, or even a more creative palette! Make sure to wear gloves or use a spatula to avoid staining your hands with the food coloring.
Step 5: Swirling the Dough
To create the iconic swirl effect, roll out both portions of dough into logs, approximately 1-2 inches in diameter. Place the two logs side by side and gently press them together. Use your hands to roll them back and forth, creating a marble effect as the colors blend together. Be careful not to overmix; you want to maintain distinct swirls of color for visual appeal.
Step 6: Chilling the Dough
Wrap the swirled dough logs in plastic wrap and refrigerate for at least 30 minutes. Chilling the dough is crucial, as it helps the cookies maintain their shape during baking and enhances the flavors. While the dough chills, you can take this time to prepare your baking sheets by lining them with parchment paper.
By following these detailed steps, you’ll be well on your way to creating beautiful and delicious Christmas Swirl Butter Cookies that will surely be a hit during the holiday season. The next part of this recipe will guide you through the final steps of baking and decorating these festive treats, ensuring that your cookie creations are as delightful to behold as they are to taste. Stay tuned for more festive baking adventures!
Mixing Dry Ingredients: Importance of Proper Blending
When preparing your Christmas Swirl Butter Cookies, the first essential step involves mixing your dry ingredients. This typically includes all-purpose flour, baking powder, and a pinch of salt. Proper blending is crucial as it ensures an even distribution of the leavening agent (baking powder) and the salt throughout the flour. This step is not just a minor detail; failing to mix these ingredients thoroughly can lead to inconsistent cookie texture and flavor.
To achieve the best results, use a whisk or a fine sieve to blend your dry ingredients together in a bowl. This aeration will help prevent clumps and create a lighter dough, leading to cookies that are soft and tender. Once well combined, set aside your dry mixture, and prepare for the next exciting step: coloring the dough.
Coloring the Dough: Techniques for Achieving Vibrant, Uniform Colors
Creating beautifully swirled Christmas cookies relies heavily on the coloring of your dough. For vibrant and uniform colors, consider using gel food coloring over liquid food coloring. Gel colors are more concentrated and will not alter the dough’s consistency as much, allowing for a more vibrant hue without adding unnecessary moisture.
To incorporate the colors, divide your dough into parts based on the number of colors you wish to create. Start with a small amount of gel coloring, adding it gradually until you reach your desired shade. Use clean hands or a spatula to knead the color into the dough, ensuring it is evenly distributed. For a more marbled effect, take two different colored doughs, roll them into logs, and twist them together gently. This technique will create beautiful swirls once baked.
Shaping and Chilling the Dough: Importance of Refrigeration for Texture
Once your dough is colored and shaped, it’s crucial to chill it before baking. Chilling the dough allows the butter to solidify again after mixing, which helps the cookies maintain their shape and not spread too much while baking. This step is especially important for cut-out cookies or cookies that need to hold intricate designs.
To chill the dough, wrap it tightly in plastic wrap and refrigerate for at least 30 minutes. If you’re short on time, even a 15-minute chill can help, but longer is better. When you remove the dough from the fridge, it should be firm yet pliable. If the dough feels too hard, let it sit at room temperature for a few minutes until it’s easier to work with.
Baking Tips: Ensuring Even Browning and Perfect Texture
Baking your Christmas Swirl Butter Cookies to perfection requires attention to detail. Start by preheating your oven to 350°F (175°C). Using parchment paper on your baking sheets can help prevent sticking and promote even cooking.
When placing your cookies on the baking sheet, ensure they are spaced adequately apart, about 2 inches. This spacing is vital because cookies will spread slightly while baking, and you want to avoid them merging into one another.
To ensure even browning, rotate the baking sheets halfway through the baking time. This is particularly important if your oven tends to have hot spots. Bake the cookies for 10-12 minutes or until they are just set and the edges are lightly golden. The centers may look slightly underbaked, but they will firm up as they cool, giving you that perfect chewy texture.
Cooling and Dusting: Enhancing Presentation
Once baked, remove the cookies from the oven and let them sit on the baking sheet for 5 minutes. This short resting period allows them to firm up a bit more before transferring them to a wire rack for complete cooling.
After the cookies have cooled, you can enhance their festive appearance with a light dusting of powdered sugar. This not only adds a lovely visual touch but also a delightful sweetness. For an even more festive presentation, consider drizzling melted white chocolate or using edible glitter to give your cookies that holiday sparkle.
Baking Techniques and Tips
Using an Electric Mixer for Consistent Results: An electric mixer is your best friend when it comes to baking cookies. It ensures that your butter and sugar are creamed properly, which creates a light and airy base for your cookies. The right mixing speed and time will guarantee that the ingredients are thoroughly combined without overworking the flour.
Temperature of Butter and Eggs: For optimal mixing, make sure your butter is at room temperature, which aids in creating a fluffy texture. Similarly, using eggs at room temperature will help them incorporate better into the mixture, leading to a smoother dough.
Common Mistakes to Avoid: One of the most common mistakes in cookie baking is overmixing the dough after adding flour. This can lead to tough cookies. Mix just until the flour is combined, and avoid overworking the dough. Additionally, do not skip the chilling step, as it is vital for maintaining the cookies’ shape.
Ensuring Cookies Retain Their Shape: To prevent your cookies from spreading too much during baking, ensure that your dough is adequately chilled, and consider using a cookie scoop to maintain uniform size. If you notice that your dough is still spreading after baking, try increasing the flour slightly in future batches.
Creative Variations of Christmas Swirl Butter Cookies
The versatility of Christmas Swirl Butter Cookies allows for endless creativity. For different holidays or occasions, consider exploring alternative color combinations. Pastel shades can be perfect for spring, while vibrant colors work well for summer celebrations.
Adding flavors like almond extract or citrus zest can elevate the taste of your cookies. A hint of almond can add depth, while lemon or orange zest provides a refreshing brightness. Additionally, consider incorporating mix-ins like chocolate chips, chopped nuts, or dried fruit for added texture and flavor. These variations not only enhance the taste but can also make your cookies stand out during the holiday festivities.
The Perfect Pairings for Christmas Swirl Butter Cookies
When it comes to serving your Christmas Swirl Butter Cookies, the right beverage can enhance the experience. Pair these delightful treats with a steaming cup of hot chocolate, a rich coffee, or a soothing tea. The sweetness of the cookies complements the warmth of these beverages, creating a cozy treat for your holiday gatherings.
For a festive platter, consider serving your cookies alongside other holiday treats such as peppermint bark, gingerbread men, or snowball cookies. This variety will create an inviting display that encourages everyone to indulge in the holiday spirit.
Storing and Freezing Christmas Swirl Butter Cookies
To maintain the freshness of your Christmas Swirl Butter Cookies, proper storage is essential. Keep the cookies in an airtight container at room temperature for up to a week. If you want to keep them longer, consider freezing them.
To freeze the cookies, allow them to cool completely, then layer them in an airtight container separated by parchment paper. They can be stored in the freezer for up to three months. When you’re ready to enjoy them, simply thaw the cookies in the fridge overnight or at room temperature for a few hours. If you prefer a freshly baked taste, pop them in a preheated oven at 350°F (175°C) for a few minutes to refresh.
Conclusion
Baking Christmas Swirl Butter Cookies is not just about creating delicious treats; it’s about embracing the joy and spirit of the holiday season. Each step, from mixing the ingredients to decorating the finished cookies, fosters a connection with tradition and creativity.
As you bake and share these delightful cookies with family and friends, you’ll create cherished memories that last a lifetime. Encourage your loved ones to join in the fun, share stories, and enjoy the process together. This festive season, let the warmth of baking and the sweetness of sharing inspire you to create your own holiday traditions. Whether you stick to the classic recipe or explore your creative variations, these cookies are sure to bring joy and deliciousness to your holiday celebrations. Happy baking!