Introduction
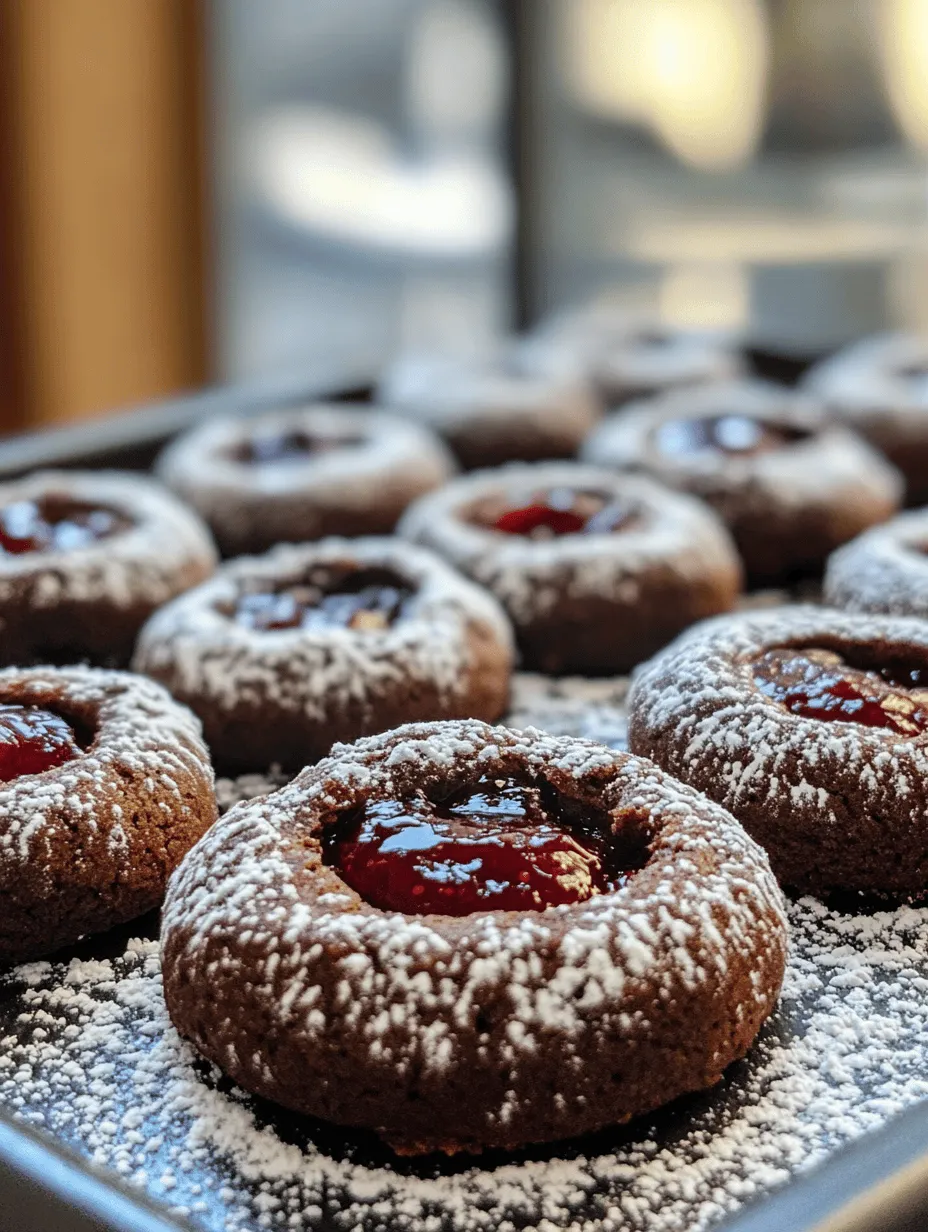
There’s something truly enchanting about the smell of freshly baked cookies wafting through the kitchen. Among the myriad of cookie varieties that grace our homes, chocolate thumbprint cookies hold a special place in many hearts. These delightful treats are not only visually appealing but also offer a perfect blend of rich chocolate flavor and a burst of fruit preserves in each bite. Whether you’re celebrating a special occasion or simply indulging in a cozy afternoon snack, homemade cookies create cherished moments that linger long after the last crumb has been savored.
In this article, we will explore the irresistible charm of chocolate thumbprint cookies, delving into their origins, unique characteristics, and the essential ingredients that make them a favorite among cookie lovers. We will also guide you through the initial steps of making these delectable delights, ensuring that you have all the tools necessary for baking success.
The Allure of Chocolate Thumbprint Cookies
Cookies have a rich history, with variations existing in cultures around the world. Among these, thumbprint cookies have emerged as a delightful classic, characterized by their distinctive indentation that can be filled with an assortment of sweet fillings. Traditionally made with a simple dough, these cookies are ideal for personalizing with your favorite jams, creams, or chocolate.
The origins of thumbprint cookies can be traced back to European bakers who created these sweet morsels to showcase seasonal fruits. Their unique “thumbprint” design was not just a charming touch; it also served a practical purpose, allowing the filling to nestle perfectly within the cookie’s embrace. Over time, this beloved recipe has evolved into countless variations, with chocolate thumbprint cookies taking center stage for their decadent twist.
What sets chocolate thumbprint cookies apart from other cookie varieties is their rich, chocolatey base that pairs beautifully with fruit preserves. The combination of dark cocoa and a sweet, tangy filling creates a harmonious balance that tantalizes the taste buds. Whether you prefer raspberry, apricot, or even a rich chocolate ganache, these cookies promise to elevate any gathering or personal treat.
Ingredients Breakdown
To make the best chocolate thumbprint cookies, it’s essential to understand the roles of each ingredient in the recipe. Let’s take a closer look at the key components that contribute to their delightful flavor and texture:
– Unsalted Butter: The foundation of any great cookie, unsalted butter provides richness and a tender texture. It’s crucial to allow the butter to soften at room temperature before creaming it with sugar, as this process incorporates air into the dough, leading to a lighter cookie.
– Granulated and Brown Sugar: A combination of granulated and brown sugar adds depth to the sweetness. Granulated sugar contributes to the cookie’s structure, while brown sugar, with its molasses content, provides moisture and a hint of caramel flavor.
– Eggs: Eggs serve as a binding agent, helping to hold the cookie together while also providing moisture. The leavening properties of eggs contribute to the cookie’s rise and texture, making them soft and chewy.
– Vanilla Extract: A splash of vanilla extract enhances the overall flavor profile of the cookies, imparting warmth and depth that complements the chocolate.
– All-Purpose Flour and Cocoa Powder: These two ingredients are the backbone of the cookie, providing structure and flavor. All-purpose flour gives the dough its form, while cocoa powder adds the rich chocolate flavor that defines this recipe.
– Baking Powder and Salt: The leavening agent, baking powder, ensures the cookies rise properly during baking, while a pinch of salt enhances the sweetness and balances the flavors.
– Chocolate Chips and Fruit Preserves: The optional chocolate chips can be added to the dough for an extra burst of chocolate flavor, while fruit preserves provide a sweet and tangy filling that contrasts beautifully with the chocolate cookie base.
Step-by-Step Instructions for Perfect Cookies
Before diving into the baking process, it’s crucial to prepare your workspace and gather all necessary ingredients. This preparation not only makes the process smoother but also ensures that you don’t miss any key elements.
Preheat the Oven
The first step in your cookie-making journey is to preheat your oven to 350°F (175°C). Preheating is an essential step that sets the stage for baking success. An adequately heated oven ensures even cooking and helps achieve that perfect texture—soft on the inside and slightly crisp on the outside.
Make the Dough
Once your oven is preheated, it’s time to make the cookie dough. Start by creaming the softened unsalted butter and both types of sugar in a mixing bowl. Using an electric mixer, beat the mixture on medium speed until it becomes light and fluffy, which typically takes about 2-3 minutes. This creaming process is crucial, as it incorporates air into the dough, leading to a lighter cookie.
Next, add the eggs, one at a time, mixing well after each addition. This step not only binds the ingredients together but also introduces moisture into the dough. Don’t forget to scrape down the sides of the bowl to ensure everything is evenly mixed. After the eggs are fully incorporated, add the vanilla extract and mix until combined.
In a separate bowl, whisk together the all-purpose flour, cocoa powder, baking powder, and salt. Gradually add this dry mixture to the wet ingredients, mixing on low speed until just combined. Be careful not to overmix, as this can lead to tough cookies.
Once the dough is fully combined, you can fold in the chocolate chips if you choose to add them. The chocolate chips will melt slightly during baking, providing pockets of gooey chocolate goodness that enhance the overall experience of the cookies.
Now that your dough is ready, we’ll move on to the next steps of shaping the cookies and preparing them for the oven. Stay tuned for the continuation of this delicious chocolate thumbprint cookie adventure!

Combine Dry Ingredients: Achieving the Right Consistency
To create the perfect chocolate thumbprint cookies, the first step in the cookie-making process after preparing your wet ingredients is to combine the dry ingredients. This stage is critical because it ensures that the leavening agents, cocoa powder, flour, and any other dry ingredients are evenly distributed throughout the dough.
Start by sifting together all-purpose flour, unsweetened cocoa powder, baking soda, and a pinch of salt in a separate bowl. Sifting not only helps eliminate lumps in the cocoa powder and flour but also aerates the mixture, giving your cookies a lighter texture. Aim for a soft, well-mixed dough that isn’t too crumbly or too sticky. The consistency should be pliable enough to hold its shape when formed into balls but firm enough to maintain the thumbprint indentation without collapsing.
Chill the Dough: Why Chilling Matters for Cookie Texture
Once your dry ingredients are combined, it’s essential to chill the dough before baking. Chilling the dough for at least 30 minutes in the refrigerator is more than just a recommendation; it’s a crucial step that affects the final texture of your cookies.
Chilling helps solidify the fats in the dough, which results in cookies that spread less during baking. This means your thumbprint cookies will retain their beautiful shape and have a chewier texture. Furthermore, resting the dough allows the flour to fully hydrate, leading to a more cohesive and flavorful cookie.
Shape the Cookies: Techniques for Uniformity and Aesthetics
When the dough is adequately chilled, it’s time to shape the cookies. Use a cookie scoop or your hands to form uniform balls of dough, about 1 to 1.5 inches in diameter. For consistent cookies, using a scoop ensures that each portion is the same size, which leads to even baking.
Place the dough balls on a parchment-lined baking sheet, leaving enough space between them to allow for slight expansion during baking. Aim for about 2 inches apart to prevent them from merging. For a more polished presentation, you can roll the cookie dough balls in granulated sugar before placing them on the baking sheet, which adds a sweet crunch to the outside.
Create Thumbprints: Tips for Achieving the Perfect Indent
Now comes the fun part—creating the thumbprint indentations in your cookies. To achieve the perfect thumbprint, use your thumb or the back of a measuring spoon to press down gently into the center of each dough ball. Be careful not to press all the way through; you want a well-defined indentation that will hold the filling.
If the dough sticks to your thumb, lightly flour it or dip it in powdered sugar to prevent sticking. Alternatively, using the back of a rounded measuring spoon can give you a more uniform shape while keeping your fingers clean.
Add Chocolate and Preserves: Flavor Pairing Suggestions
Once you’ve made the thumbprint indents, it’s time to fill them with deliciousness. You can use a variety of fillings to enhance your chocolate thumbprint cookies, including chocolate ganache, Nutella, peanut butter, or your favorite fruit preserves like raspberry or apricot.