Introduction
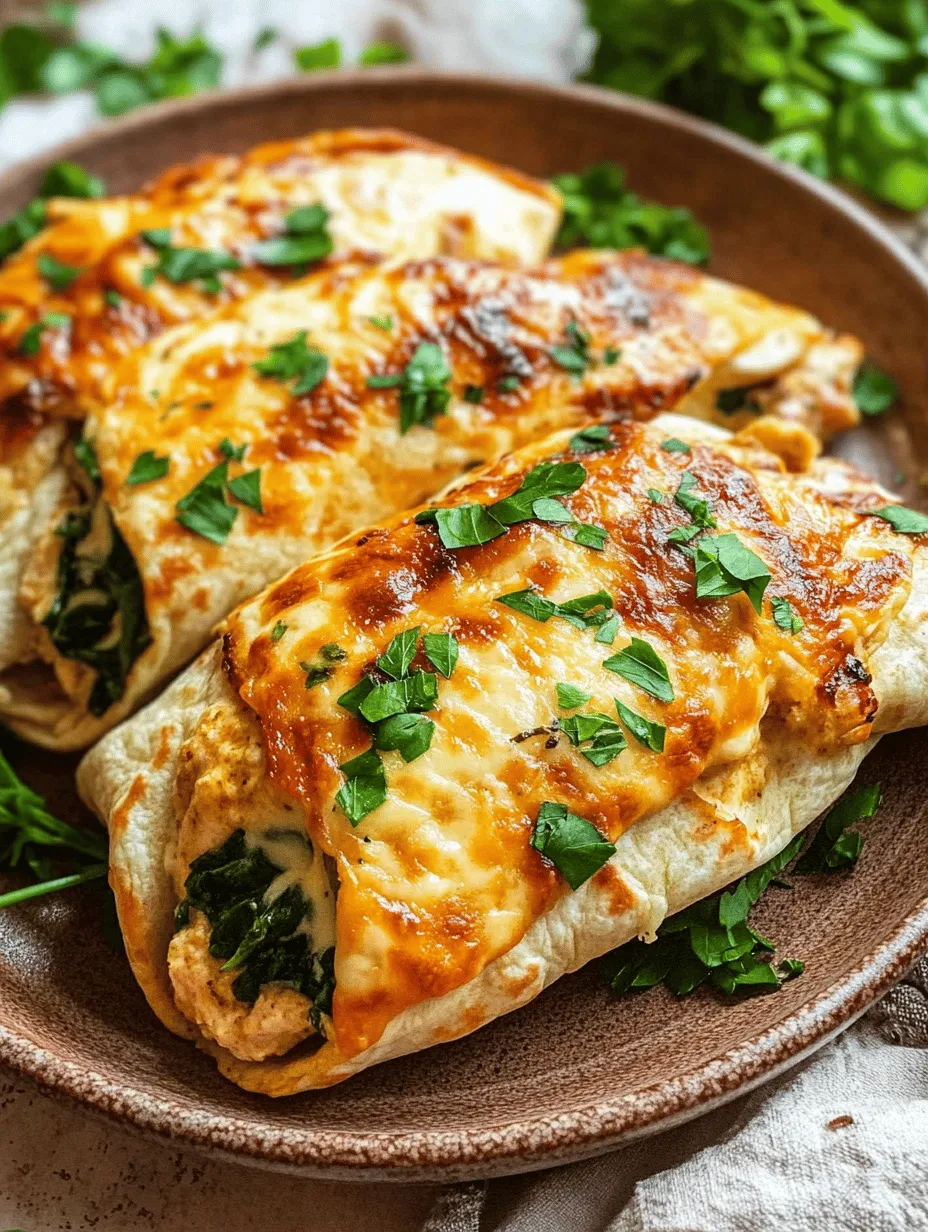
In the world of quick and satisfying meals, cheesy garlic chicken wraps stand out as a deliciously easy option that combines savory flavors with creamy textures. This recipe is perfect for busy weeknights or a satisfying lunch that will leave you craving more. With tender, shredded chicken enveloped in a cheesy filling, all wrapped up in a warm tortilla, these wraps are not just a meal; they are a comforting experience.
The appeal of cheesy garlic chicken wraps lies not only in their incredible taste but also in their versatility. They can be customized with various ingredients to suit individual preferences, making them a favorite for families and gatherings alike. Whether you are looking for a hearty snack for game day or a quick dinner option, these wraps have you covered. In this article, we will explore the ingredients, preparation steps, and variations of cheesy garlic chicken wraps, ensuring you have all the information you need to create this culinary delight.
Understanding the Ingredients
The Main Ingredients
A deep dive into the ingredients used in cheesy garlic chicken wraps will not only enhance your cooking skills but will also help you appreciate the flavors that come together in this recipe. Here’s what you’ll need:
1. Cooked Chicken: The backbone of this recipe is the chicken, and using shredded chicken offers several benefits. Not only is it a versatile ingredient that can be prepared in advance, but it also absorbs flavors beautifully, ensuring each bite is packed with taste. You can use leftover rotisserie chicken, boiled chicken breasts, or even grilled chicken to create a tender filling that is both convenient and delicious.
2. Cheese Selection: For cheesy garlic chicken wraps, the choice of cheese is crucial. Mozzarella cheese brings a delightful stretch and gooeyness, while cream cheese adds a rich, creamy texture that binds the filling together. This combination creates a mouthwatering filling that melts in your mouth, making every bite an indulgent experience. Feel free to experiment with other cheese varieties, such as cheddar or pepper jack, to add a different flavor profile.
3. Garlic: Fresh garlic is a staple in many savory dishes, and it plays a prominent role in the flavor of these wraps. The aromatic qualities of garlic enhance the overall taste and add a warming depth to the filling. Using both fresh minced garlic and garlic powder ensures a robust garlic flavor that isn’t overpowering, making it appealing to garlic lovers and those who enjoy subtle flavors alike.
4. Seasonings: A well-balanced blend of seasonings is essential to elevate the taste of your cheesy garlic chicken wraps. Italian seasoning provides an aromatic herbaceous quality, while red pepper flakes introduce a gentle heat that complements the creamy filling. This combination of flavors creates a delicious balance that will make your wraps irresistible.
Essential Cooking Tools and Equipment
Before diving into the preparation of your cheesy garlic chicken wraps, it’s important to ensure you have the right tools at your disposal. Here are the basic tools you will need:
– Mixing Bowl: A large mixing bowl is essential for combining all the filling ingredients. Choose one that’s easy to handle and big enough to accommodate all your ingredients without spilling.
– Fork or Whisk: You’ll need a fork or whisk to mix the chicken and cheese filling thoroughly. This will help break down any lumps of cream cheese and ensure an even distribution of flavors.
– Measuring Cups and Spoons: Precise measurements are key to achieving the perfect balance of flavors. Make sure you have measuring cups and spoons handy for accurate ingredient quantities.
– Tortilla Press or Rolling Pin (optional): If you choose to make your own tortillas, a tortilla press or a rolling pin will come in handy. However, store-bought tortillas work just as well for this recipe.
– Baking Sheet: If you prefer to bake your wraps for a crispy finish, a baking sheet lined with parchment paper will be necessary.
– Skillet or Grill Pan: For those who want to toast the wraps, a skillet or grill pan will allow you to achieve a golden and crispy exterior while keeping the filling warm and gooey.
Preparation Steps
Now that you understand the key ingredients and have gathered your cooking tools, it’s time to dive into the preparation of your cheesy garlic chicken wraps. Follow these comprehensive steps to create a delicious filling and wrap it all up.
Creating the Filling
1. Mixing Ingredients: Start by shredding your cooked chicken into bite-sized pieces. If you’re using store-bought rotisserie chicken, simply pull the meat off the bones and shred it with your hands or a fork. In your mixing bowl, combine the shredded chicken, mozzarella cheese, and cream cheese. Use a fork or whisk to blend the ingredients until they are well incorporated. This mixture should be creamy and slightly chunky, providing a delightful texture in each bite.
2. Adding Garlic: Incorporate minced garlic into the mixture. Fresh garlic will give your filling an aromatic punch. If you prefer a milder garlic flavor, you can adjust the quantity according to your taste. Next, sprinkle in some garlic powder for an added layer of flavor. This combination will ensure that each bite of the wrap is infused with the deliciousness of garlic.
3. Seasoning for Flavor: Once your base ingredients are mixed, it’s time to season the filling. Add Italian seasoning and red pepper flakes, starting with a teaspoon of each. Stir the mixture well and take a moment to taste it. This is a crucial step—flavor preferences vary widely, so feel free to adjust the seasonings as needed. If you enjoy a bit of heat, you can add more red pepper flakes. If you prefer a more herbaceous flavor, increase the Italian seasoning. The goal is to create a filling that is bursting with flavor, so don’t hesitate to taste and modify until it suits your palate perfectly.
With your filling prepared, you’re now ready to assemble your cheesy garlic chicken wraps. The next steps involve wrapping and cooking your creation to achieve the perfect cheesy, gooey goodness. Stay tuned for more detailed instructions on assembling, cooking, and enjoying these delectable wraps!
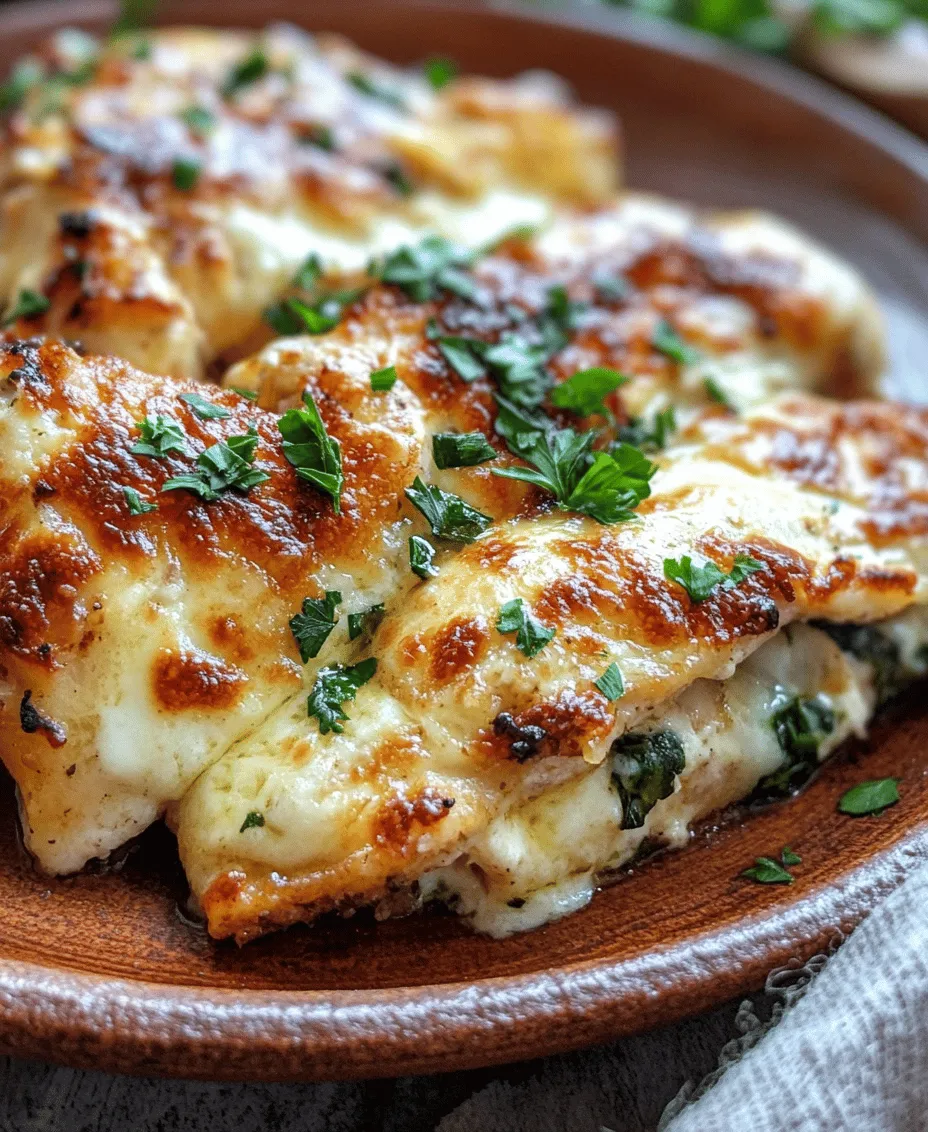
Warming the Tortillas
Importance of Warm Tortillas
Warming tortillas is a crucial step in achieving the perfect cheesy garlic chicken wrap. When tortillas are warmed, they become more pliable and less likely to crack or tear, which is essential for wrapping. A warm tortilla also enhances the overall texture, making each bite more enjoyable. Cold tortillas can lead to a frustrating wrapping experience, resulting in a messy meal rather than a neatly packed wrap. Thus, taking the time to warm your tortillas ensures a satisfying and cohesive wrap that holds all the delicious fillings together.
Techniques for Heating
There are several effective methods to warm tortillas without drying them out. Here are two simple techniques:
1. Skillet Method:
– Preheat a non-stick skillet over medium heat.
– Place one tortilla in the skillet and heat for about 30 seconds on one side until you see small bubbles forming.
– Flip the tortilla and heat for an additional 15-30 seconds. The goal is to make it warm and pliable, not crispy.
– Remove the tortilla and wrap it in a clean kitchen towel to keep it warm while you repeat the process with the remaining tortillas.
2. Microwave Method:
– Stack up to three tortillas on a microwave-safe plate.
– Cover the stack with a damp paper towel to retain moisture.
– Microwave on high for about 30-45 seconds. If they are still cold, continue microwaving in 10-second intervals until warmed.
– Ensure you don’t overheat them, as this can make them tough.
By using either of these methods, you’ll have perfectly warmed tortillas ready for wrapping.
Assembling the Wraps
Folding Techniques
When it comes to assembling your cheesy garlic chicken wraps, proper folding is key to preventing any filling from spilling out. Here’s how to fold them effectively:
1. Position the Filling: Place your warm tortilla on a flat surface. Spoon a generous but manageable amount of the cheesy garlic chicken filling into the center of the tortilla, leaving about 2 inches of space on the sides.
2. Fold the Sides: Start by folding the sides of the tortilla inward over the filling. This creates a barrier that helps contain the filling.
3. Roll it Up: Next, grab the bottom edge of the tortilla and fold it over the filling. Tuck it in tightly as you roll upwards towards the top edge. Ensure that the filling is secure as you roll.
4. Seal the Wrap: Once you reach the top edge, you can either leave it as is or brush a little olive oil or water on the edge to help seal it shut.
Proportions
For optimal balance and ease of wrapping, you’ll want to use about 1/2 to 3/4 cup of filling per tortilla, depending on its size. This amount allows you to enjoy a hearty wrap without overwhelming the tortilla, ensuring a delightful experience with every bite. Adjust the filling quantity based on your personal preference, but make sure not to overstuff, as it will make wrapping difficult.
Cooking the Wraps
Achieving the Perfect Crisp
Cooking the wraps allows them to develop a beautiful golden crust while ensuring the inside remains warm and cheesy. Here’s how to do it:
1. Preheat Your Pan: Use the same non-stick skillet you used for warming the tortillas. Heat it over medium heat.
2. Add Oil: Drizzle a small amount of olive oil into the pan—about 1-2 teaspoons should suffice. Allow the oil to heat for a few seconds until shimmering.
3. Cook the Wraps: Place the folded wraps seam-side down in the skillet. Cook for about 3-4 minutes on one side until golden brown, then carefully flip and cook for an additional 3-4 minutes on the other side. Adjust the heat if the wraps are browning too quickly.
This method will give you a satisfying crunch while keeping the inside gooey and delicious.
Managing Oil Use
To achieve a golden finish without excess greasiness, it’s essential to manage your oil use carefully. A little olive oil goes a long way, so use just enough to coat the bottom of the pan lightly. If you find that your wraps are absorbing too much oil, consider using a spray bottle to mist the pan or opt for a non-stick cooking spray. This way, you can control the amount of oil while still achieving that perfect crisp.
Serving Suggestions
Presentation
Presentation can elevate your cheesy garlic chicken wraps from simple to stunning. Here are a few creative ways to plate your wraps:
– On a Wooden Board: Slice the wraps in half diagonally and arrange them on a rustic wooden serving board. Add fresh herbs like parsley or cilantro for a pop of color.
– With a Side Salad: Serve your wraps alongside a colorful salad of mixed greens, cherry tomatoes, and avocado for a fresh contrast.
– Garnish with Cheese: Sprinkle some extra shredded cheese or crumbled feta over the top before serving for a visually appealing touch.
Dipping Sauces
A delicious dipping sauce can enhance your cheesy garlic chicken wraps. Here are a few popular options:
– Creamy Ranch: A tangy ranch dressing pairs well with the rich flavors of the wraps.
– Spicy Sriracha Mayo: Mix mayonnaise with sriracha for a spicy kick that balances the cheesy filling.
– Guacamole: Creamy guacamole adds a refreshing element that complements the wraps beautifully.
– Pico de Gallo: Fresh tomato salsa can add brightness and acidity, cutting through the richness of the wraps.
These sauces will not only enhance the flavor but also add a fun element to your meal.
Nutritional Information
The cheesy garlic chicken wrap is not just indulgent; it can also be nutritious. Here’s a quick overview of the nutritional benefits of the ingredients used:
– Chicken: A great source of lean protein, chicken helps build and repair tissues, making it an essential component of a balanced diet. It also provides essential vitamins such as B6 and niacin.
– Cheese: While rich in calories, cheese is also a source of calcium and protein. Opting for lower-fat cheese varieties can help reduce calorie intake while still enjoying the creamy texture.
– Tortillas: Whole wheat or corn tortillas offer fiber, which aids in digestion and helps keep you fuller for longer. They are also lower in calories compared to traditional bread.
– Vegetables: Adding vegetables such as spinach or bell peppers boosts the nutritional profile with vitamins, minerals, and antioxidants.
By being mindful of your ingredient choices, you can enjoy a delicious meal that satisfies your cravings while providing nutritional benefits.
Variations of Cheesy Garlic Chicken Wraps
To cater to different dietary preferences, you can easily adapt the cheesy garlic chicken wraps recipe. Here are some variations to consider:
– Vegetarian Version: Substitute the chicken with grilled vegetables like zucchini, bell peppers, and mushrooms. For added protein, include black beans or chickpeas.
– Gluten-Free Option: Use gluten-free tortillas made from rice or corn. Ensure that all other ingredients, including sauces and seasonings, are certified gluten-free.
– Spicy Twist: For those who love heat, add jalapeños or red pepper flakes to the filling. You can also use pepper jack cheese for an extra kick.
– Herbed Chicken: Incorporate fresh herbs like cilantro or basil into your chicken mixture for added flavor.
These variations allow you to personalize the recipe according to your taste preferences or dietary restrictions.
Conclusion
Cheesy garlic chicken wraps are a delightful fusion of flavors and textures that can easily become a go-to recipe in your kitchen. By understanding the ingredients, following the preparation steps, and exploring variations, you can customize this dish to suit your taste and dietary needs. Whether enjoyed as a quick weeknight dinner or a laid-back lunch, these wraps promise to satisfy your cravings while delivering a burst of cheesy goodness. Enjoy your culinary journey with this simple yet delectable recipe, and savor every bite of your homemade cheesy garlic chicken wraps.
