Introduction
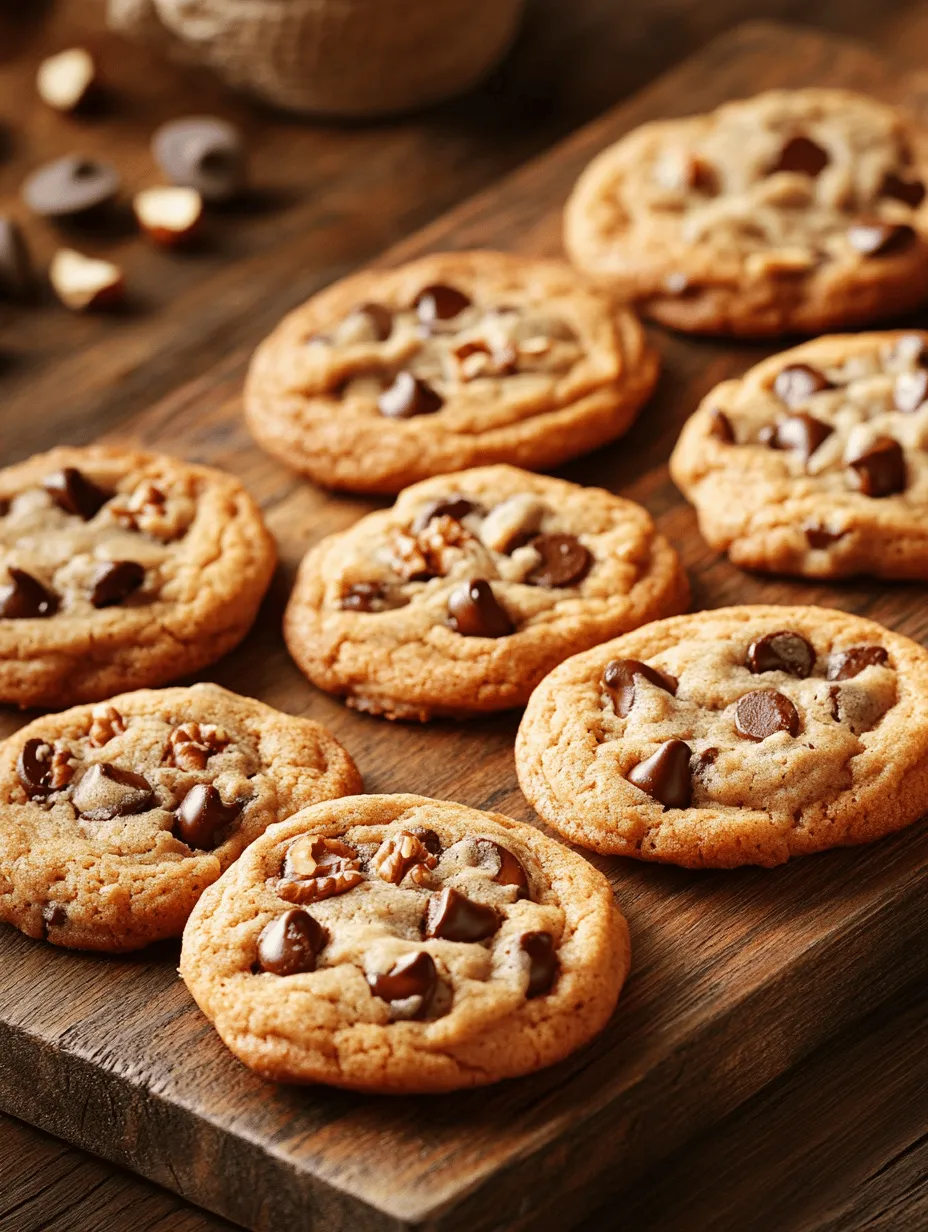
Chocolate chip cookies are an enduring favorite, cherished for their comforting texture and rich flavors. They evoke nostalgia, warm memories of childhood baking sessions, and the delightful aroma wafting through the house. While the traditional chocolate chip cookie recipe is beloved in its own right, there’s a way to elevate this classic treat into something truly extraordinary: the addition of brown butter.
Brown butter, with its rich, nutty flavor and alluring aroma, transforms the cookie experience. It adds depth and complexity, making every bite a heavenly indulgence. The warm, caramelized notes from the browned butter pair exquisitely with the sweetness of chocolate chips, creating a symphony of flavors that dance on the palate. This recipe for Brown Butter Chocolate Chip Cookies invites you to take a simple cookie recipe and imbue it with a twist that is sure to impress both family and friends alike.
This approachable recipe will guide you through each step, ensuring that even novice bakers can achieve cookie perfection. Whether you’re looking to impress at a gathering or simply craving a delicious homemade treat, these brown butter chocolate chip cookies will not disappoint.
Understanding Brown Butter
Before diving into the recipe, it’s essential to understand what brown butter is and how it works its magic in baking. Brown butter, or “beurre noisette” in French, is made by gently cooking unsalted butter until the milk solids turn golden brown, resulting in a rich, nutty flavor. This process involves a careful heating technique that caramelizes the natural sugars in the butter and enhances its taste profile.
The Science Behind Browning Butter
The transformation of regular butter into brown butter is rooted in science, particularly the Maillard reaction. This complex chemical reaction occurs between amino acids and reducing sugars when exposed to heat, resulting in the browning of foods and the development of new flavors. As the butter cooks, the milk solids settle at the bottom of the pan and begin to toast, which not only changes the color but also enriches the flavor, creating a warm, nutty aroma that is irresistible.
Incorporating brown butter into chocolate chip cookies enhances the overall taste, adding a layer of depth that traditional cookies simply do not have. The nuttiness from the browned butter complements the sweetness of the sugars and chocolate, creating a more sophisticated flavor profile. By the time these cookies are ready to enjoy, the unique taste of brown butter will have elevated them from a simple dessert to a gourmet delight.
Key Ingredients in Brown Butter Chocolate Chip Cookies
To achieve the perfect Brown Butter Chocolate Chip Cookies, it’s important to use high-quality ingredients that each play a crucial role in the final product. Below is an overview of the essential ingredients you will need, along with their functions in the baking process.
Unsalted Butter
Using unsalted butter is important in baking because it allows you to control the amount of salt in your recipe. Unsalted butter is fresher than salted varieties and provides a clean flavor that lets the other ingredients shine. In this recipe, butter undergoes the browning process, which will enhance its flavor, contributing to the cookies’ overall richness.
Sugars
In chocolate chip cookies, both brown sugar and granulated sugar are essential. Brown sugar adds moisture due to its molasses content, resulting in a chewier texture, while granulated sugar contributes to the spread of the cookie and adds crispness. The combination of these two sugars creates a delightful contrast, balancing chewiness and crispness in each bite.
Eggs
Eggs play a vital role in the texture of cookies. Whole eggs provide moisture and richness, while the yolks add fat, contributing to a tender crumb. In this recipe, the eggs will help bind the ingredients together and promote a soft, chewy cookie.
Vanilla Extract
Vanilla extract is a key ingredient in chocolate chip cookies, enhancing the overall flavor profile. Its warm, sweet notes complement the chocolate and the nuttiness of the brown butter, creating a harmonious blend of flavors.
Flour
Flour is the backbone of any cookie recipe, providing structure and stability. All-purpose flour is typically used, and its protein content helps form gluten, which gives the cookies their shape and texture.
Baking Soda and Salt
Baking soda acts as a leavening agent, giving the cookies lift and helping them spread during baking. Meanwhile, salt is essential for balancing sweetness and enhancing flavor, making it a crucial component in this recipe.
Chocolate Chips and Nuts
Chocolate chips are the star of the show in chocolate chip cookies, and you can customize the recipe to your liking. Semi-sweet chocolate chips are a classic choice, but feel free to experiment with dark chocolate, milk chocolate, or even white chocolate. Additionally, adding nuts like walnuts or pecans can introduce a pleasing crunch and extra flavor.
Step-by-Step Instructions for Brown Butter Chocolate Chip Cookies
Now that we’ve covered the ingredients, let’s dive into the step-by-step process for making Brown Butter Chocolate Chip Cookies. Follow these instructions carefully to ensure that your cookies turn out perfectly every time.
Step 1: Browning the Butter
The first step to achieving the rich flavor of brown butter chocolate chip cookies is to brown the butter properly. Here’s how to do it:
1. Choose your pan: Use a light-colored, heavy-bottomed saucepan. A lighter pan helps you monitor the color of the butter as it browns.
2. Melt the butter: Place the unsalted butter in the saucepan over medium heat. Allow it to melt completely.
3. Watch for color changes: As the butter melts, it will begin to foam. Keep stirring it gently with a wooden spoon or a spatula. After a few minutes, you will notice the butter starting to change color from yellow to golden brown.
4. Smell the aroma: Pay attention to the aroma; it should shift from the typical buttery scent to a nutty, caramel-like fragrance. This indicates that the milk solids are toasting.
5. Remove from heat: Once the butter has turned a deep golden brown, and you can see brown specks forming at the bottom of the pan, remove it from heat immediately to prevent burning. The total browning process should take about 5-7 minutes, depending on your stove and the quantity of butter.
6. Cool it down: Transfer the browned butter to a mixing bowl and let it cool slightly. You want it to be warm but not hot when you combine it with the sugars in the next steps.
By mastering the browning technique, you will set a solid foundation for the rich flavors that define your Brown Butter Chocolate Chip Cookies. Next, we will proceed to mix the ingredients and transform this luscious brown butter into delicious cookies.
—
This introduction and initial guidance set the stage for a delightful baking experience. Stay tuned for the continuation of the recipe, where we’ll delve into the mixing process and finish creating these mouthwatering cookies.
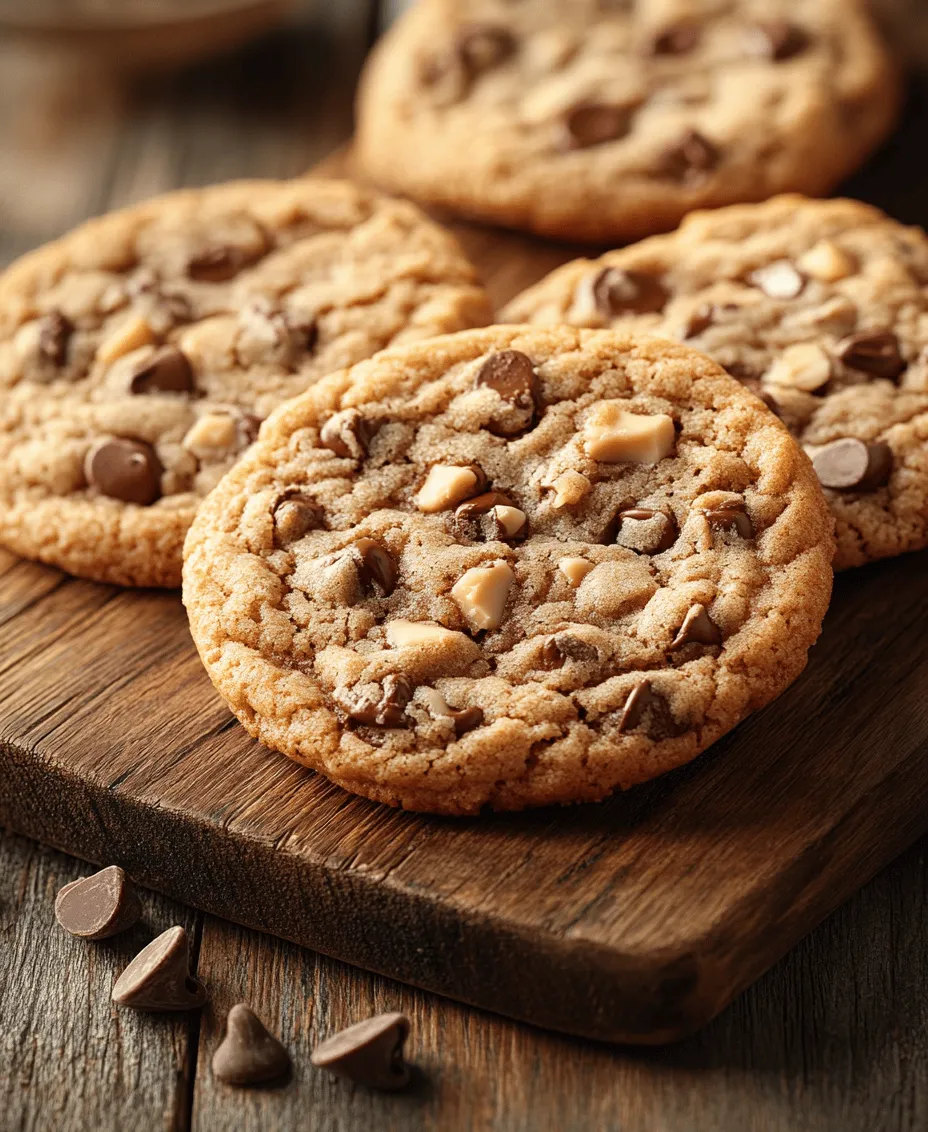
Mixing Sugars and Eggs: Tips for Achieving a Smooth Mixture
To create the perfect brown butter chocolate chip cookies, the first step involves mixing your sugars with eggs. The combination of brown sugar and granulated sugar contributes to both the flavor and texture of the cookies. Start by adding the cooled brown butter to a mixing bowl, followed by the sugars. Using an electric mixer or a whisk, blend the mixture until it becomes light and fluffy. This process incorporates air, which is crucial for achieving a tender cookie.
When adding the eggs, it’s essential to mix them in one at a time. This allows each egg to fully incorporate before the next is added, ensuring a smooth and homogenous mixture. An important tip is to make sure your eggs are at room temperature; this helps them emulsify better with the sugars and fat, creating a velvety texture.
Combining Dry Ingredients: Importance of Not Overmixing
In a separate bowl, whisk together your dry ingredients: all-purpose flour, baking soda, and a pinch of salt. The salt enhances the flavors, while the baking soda acts as a leavening agent, helping the cookies rise as they bake. Once these are combined, gradually add your dry mixture to the wet ingredients.
Here lies a critical point in the cookie-making process: do not overmix. Overmixing can develop the gluten in the flour too much, resulting in tough cookies. Mix until just combined; a few streaks of flour are fine. The goal is to have a cohesive dough without any visible dry ingredients.
Incorporating Chocolate Chips and Nuts: How to Fold Ingredients Without Deflating the Dough
Next, it’s time to fold in your chocolate chips and any optional nuts. Use a spatula or wooden spoon to gently mix these ingredients into the dough. The folding technique is key here: make sure to lift the dough from the bottom and fold it over the chocolate chips and nuts rather than stirring vigorously. This method preserves the air you’ve incorporated, keeping your cookies tender and light.
Feel free to experiment with chocolate types; semi-sweet chocolate chips are classic, but dark chocolate, milk chocolate, or even white chocolate can add unique flavors. If you enjoy a bit of crunch, consider adding chopped nuts like walnuts or pecans, which complement the rich flavor of the brown butter perfectly.
Chilling the Dough: Reasons for Chilling and How It Affects Texture and Flavor
Once your dough is mixed, it’s time to chill it. This step is often overlooked but is crucial for achieving that perfect cookie texture. Chilling the dough for at least 30 minutes allows the flavors to meld and the fat in the butter to solidify. As the dough chills, the flour fully hydrates, which helps in developing a chewy texture.
Additionally, chilling affects how the cookies spread during baking. If you bake the dough immediately after mixing, the cookies tend to spread too much, resulting in thin, crispy edges. By chilling the dough, you’ll get thicker, chewier cookies with a perfectly balanced texture.
Baking: Tips for Achieving Ideal Cookie Texture and Doneness
Preheat your oven to 350°F (175°C) while your dough chills. Line a baking sheet with parchment paper, which helps prevent sticking and promotes even baking. Once your dough is chilled, use a cookie scoop or tablespoon to portion out the dough onto the prepared baking sheet, leaving enough space between each cookie to allow for spreading.
For optimal baking, place the cookies in the center of the oven. Bake them for 10-12 minutes, keeping a close eye in the last few minutes. The cookies should be golden brown around the edges but still soft in the center; they will continue to cook slightly after being removed from the oven due to residual heat.
Cooling: Importance of Cooling on a Wire Rack for the Best Final Result
After baking, allow the cookies to cool on the baking sheet for about 5 minutes. This brief resting period allows them to set, making them easier to transfer without breaking. After that, use a spatula to carefully move the cookies to a wire rack. Cooling them on a rack prevents steam from building up underneath, which can lead to soggy bottoms. This step ensures that your cookies maintain their ideal texture—crispy on the outside and chewy on the inside.
The Science of Cookie Baking
Understanding the science behind cookie baking can elevate your baking skills. Each ingredient plays a crucial role in the final product, and knowing how they interact can help you troubleshoot any issues.
Explanation of How Different Ingredients Interact During Baking
Flour provides structure, while fats (like butter) contribute to tenderness and flavor. Sugars not only sweeten but also affect the spread and color of the cookies through caramelization. Eggs provide moisture and act as a binder, helping to hold everything together. Each ingredient’s function is interdependent, and adjusting one can impact the overall outcome.
The Role of Temperature in Cookie Baking and How It Affects Spread and Texture
Temperature plays a significant role in cookie baking. Cold dough will spread less during baking, resulting in thicker cookies, while warm dough spreads more, creating thinner cookies. Additionally, the temperature of the oven must be consistent; fluctuations can lead to uneven baking.
Importance of Resting Dough and Its Impact on Flavor Development
Resting the dough not only helps with texture but also allows the flavors to deepen. As the dough sits, the flour absorbs moisture, and the flavors meld, resulting in a more complex and delicious cookie.
Variations and Customizations
One of the great things about brown butter chocolate chip cookies is their versatility. You can customize them to suit your taste preferences or dietary needs.
Suggestions for Alternative Mix-Ins
Experimenting with different mix-ins can lead to delightful variations of this classic cookie. Consider adding white chocolate chips, dried cranberries, or even toffee bits for an extra layer of flavor. You can also try using different types of nuts or even coconut flakes for a tropical twist.
Gluten-Free Options: Substituting Flour with Gluten-Free Alternatives
For those who are gluten-sensitive, substituting regular flour with a gluten-free blend is a viable option. Look for a high-quality gluten-free all-purpose flour that contains xanthan gum to help mimic the structure that gluten provides. Keep in mind that the texture may vary slightly, but the delicious flavor will remain.
Vegan Adaptations: Replacing Butter and Eggs with Plant-Based Alternatives
If you’re looking for a vegan version of these cookies, you can replace the butter with coconut oil or vegan butter. For the eggs, a common substitute is a flaxseed egg (1 tablespoon of ground flaxseed mixed with 2.5 tablespoons of water, allowed to sit until gelatinous). This will help bind everything together while keeping the cookies plant-based.
Serving and Storing Brown Butter Chocolate Chip Cookies
Once your cookies have cooled, it’s time to enjoy them!
Best Practices for Serving Cookies Warm or at Room Temperature
For the ultimate experience, serve your cookies warm. You can microwave them for a few seconds to reheat them gently, allowing the chocolate to melt slightly for a gooey texture. Alternatively, they are also delicious at room temperature—perfect for sharing with friends and family.
Storing Cookies for Freshness: Tips for Airtight Containers and Freezing
To keep your cookies fresh, store them in an airtight container at room temperature. They will stay soft for several days, but if you want to keep them longer, consider freezing them. Place the cookies in a single layer on a baking sheet to freeze initially. Once frozen, transfer them to a freezer-safe bag or container. They can be enjoyed later by letting them thaw at room temperature or warming them up in the microwave.
Ideas for Pairing Cookies with Beverages
These brown butter chocolate chip cookies pair beautifully with a variety of beverages. A cold glass of milk is a classic choice, enhancing the cookie’s richness. For coffee lovers, a warm cup of brewed coffee or espresso complements the cookies’ sweetness perfectly. If you prefer tea, a robust black tea or a creamy chai can also be delightful.
Conclusion
Brown butter chocolate chip cookies are a timeless treat that brings joy to any occasion. The unique nutty flavor of brown butter combined with the gooey chocolate chips creates a cookie experience that is truly special. By following the steps and tips outlined in this recipe, you can achieve cookies that are perfectly chewy, flavorful, and incredibly satisfying.
Whether you’re baking for a special event or simply indulging yourself, these cookies are sure to impress. Embrace the baking process, experiment with variations, and enjoy the delightful results. Homemade cookies have a special place in our hearts and our kitchens, offering comfort and pleasure in every bite. So gather your ingredients, get baking, and relish the joy of creating something deliciously homemade.
