Introduction to Biscoff Bliss Cake
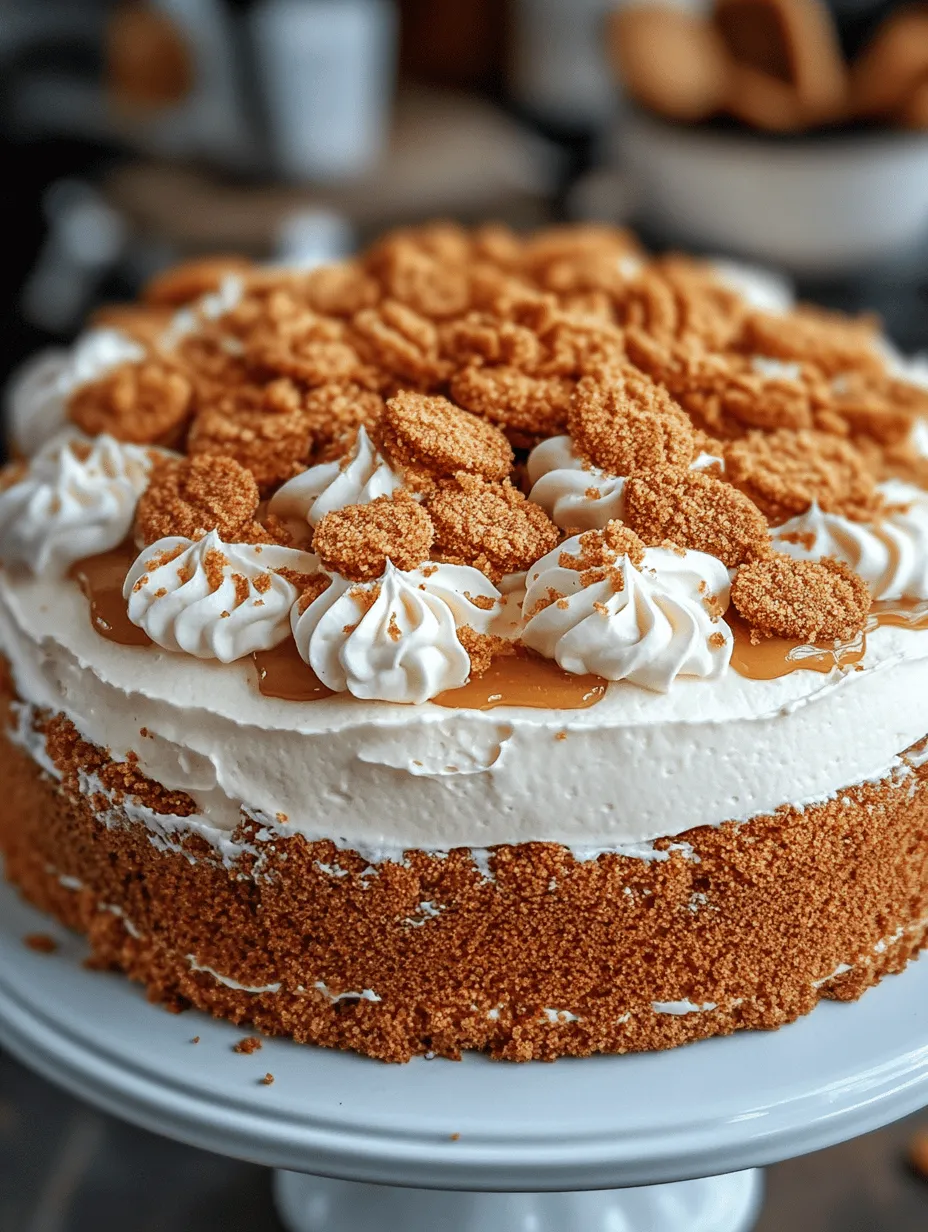
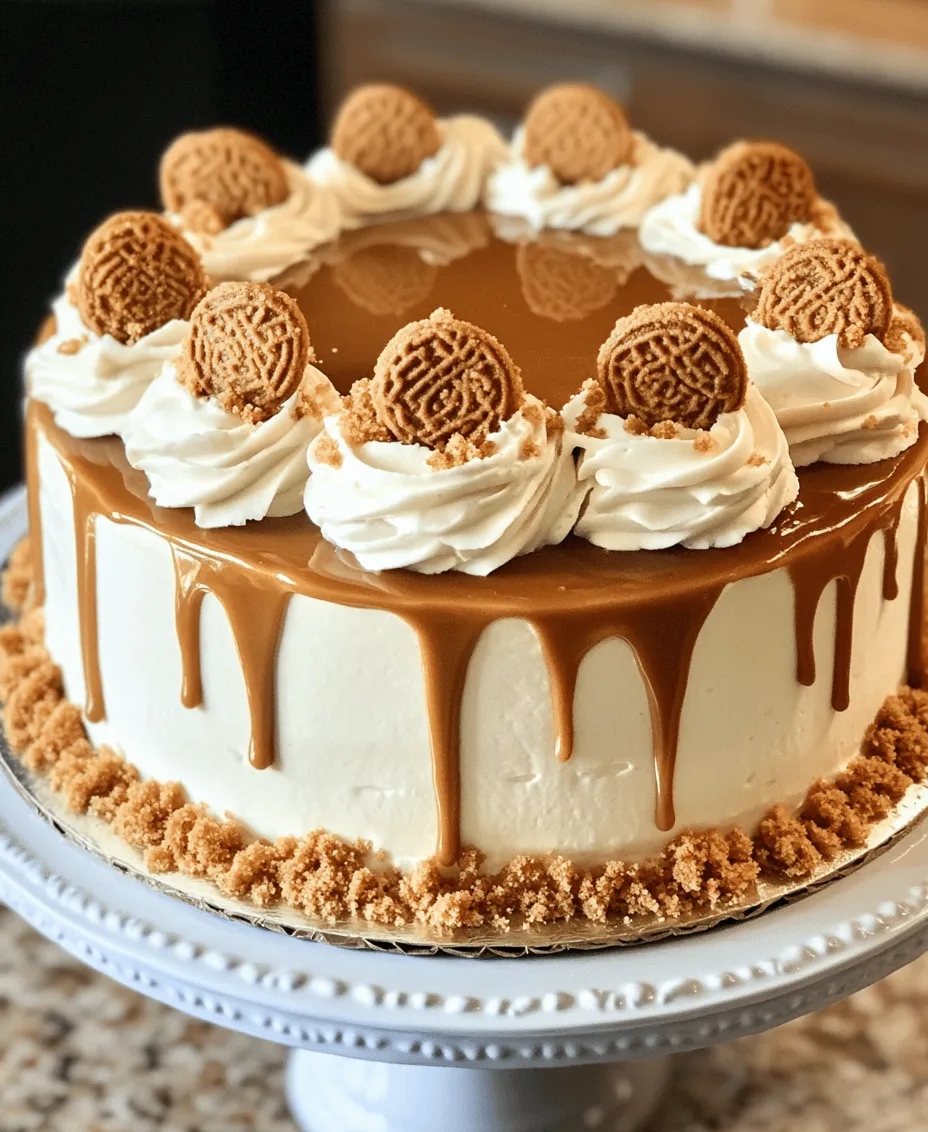
If you’re on the lookout for a dessert that will elevate your baking game, look no further than the Biscoff Bliss Cake. This stunning cake is a decadent indulgence that beautifully marries the rich, caramelized flavor of Biscoff cookies with a moist and fluffy cake base. Perfect for special occasions, gatherings, or even as a delightful treat for yourself, the Biscoff Bliss Cake is sure to impress anyone who takes a bite. With its creamy frosting and the irresistible crunch of crushed Biscoff cookies on top, this dessert promises to become a favorite on any dessert table.
Biscoff cookies have taken the culinary world by storm, beloved for their unique flavor profile that combines hints of cinnamon, caramel, and a touch of spice. Made from natural ingredients, these cookies are not only delicious but also have a nostalgic quality that many people cherish. In this article, we will take a deep dive into the ingredients that make this cake so special, as well as provide step-by-step instructions to ensure you can recreate this culinary masterpiece in your own kitchen. By the end, you will understand why the Biscoff Bliss Cake is the perfect addition to your dessert repertoire.
Understanding the Ingredients
Every great cake starts with quality ingredients, and the Biscoff Bliss Cake is no exception. Each component plays a crucial role in creating a cake that is not only delicious but also has the perfect texture and consistency. Below, we will explore the essential ingredients required to bring this cake to life.
Essential Ingredients for the Cake
1. All-Purpose Flour: This is the backbone of any cake, providing the essential structure and texture. Using all-purpose flour will ensure your cake rises perfectly while still remaining tender and light.
2. Granulated Sugar: Sugar is not just a sweetener; it also contributes to the fluffiness of the cake. The sugar granules create air pockets when creamed with butter, leading to a lighter texture.
3. Unsalted Butter: Butter adds richness and moisture to the cake. For the best results, use unsalted butter to control the saltiness of your cake, allowing the sweet flavors of the Biscoff spread to shine through.
4. Eggs: Eggs are vital for binding the ingredients and providing structure. They also help the cake rise, giving it a fluffy texture.
5. Buttermilk: This ingredient is key to enhancing the tenderness and flavor of the cake. Buttermilk adds moisture while reacting with the baking soda to create a lighter, fluffier cake.
6. Baking Powder and Baking Soda: These leavening agents are essential for helping the cake rise. They create air pockets as the cake bakes, resulting in a fluffy texture.
7. Salt: A pinch of salt balances the sweetness of the cake, enhancing the overall flavor profile.
8. Biscoff Spread: This creamy spread is the star of the show, infusing the cake with its signature flavor. It provides a rich caramel taste with notes of cinnamon and spice.
9. Crushed Biscoff Cookies: Adding crushed cookies to the batter incorporates a delightful crunch and enhances the flavor. The bits of cookie provide texture, making each bite a treat.
Frosting and Garnish Components
To complement the Biscoff flavor, the frosting and garnish components are equally important:
1. Whipped Cream: A light and airy whipped cream frosting is perfect for this cake, providing a creamy texture that contrasts beautifully with the dense cake.
2. Powdered Sugar: This ingredient sweetens the whipped cream, ensuring that the frosting is not only fluffy but also deliciously sweet.
3. Extra Biscoff Spread: A drizzle of Biscoff spread on top of the frosting adds an extra layer of flavor and visual appeal, making the cake truly irresistible.
4. Additional Biscoff Cookies: For garnish, whole Biscoff cookies can be placed on top of the cake. They enhance both the presentation and the flavor, inviting your guests to dig in.
Step-by-Step Preparation of Biscoff Bliss Cake
Prepping Your Baking Environment
Before you begin mixing your cake batter, it’s important to prepare your baking environment. A well-prepped kitchen ensures a smooth baking process and great results.
Preheating the Oven
Start by preheating your oven to 350°F (175°C). This step is crucial as it ensures that the cake bakes evenly. A properly preheated oven will help the leavening agents work effectively, resulting in a fluffy cake.
Greasing and Flourishing the Cake Pan
Next, take your cake pan (a 9-inch round pan works beautifully for this recipe) and grease it generously with unsalted butter or cooking spray. Once greased, dust the pan with a light coating of flour, tapping out the excess. This will prevent the cake from sticking to the sides, ensuring it releases easily after baking.
Mixing the Cake Batter
Once your baking environment is set up, it’s time to dive into the fun part—mixing the cake batter! Follow these steps for a perfectly blended Biscoff Bliss Cake batter.
1. Cream the Butter and Sugar: In a large mixing bowl, combine the softened unsalted butter and granulated sugar. Use an electric mixer on medium speed to cream them together until the mixture is light and fluffy. This should take about 3-4 minutes. Creaming is essential as it incorporates air into the batter, leading to a lighter cake.
2. Add the Eggs: One at a time, add the eggs to the butter-sugar mixture, mixing well after each addition. Scrape down the sides of the bowl to ensure all ingredients are well incorporated. The mixture should be smooth and creamy.
3. Incorporate the Biscoff Spread: Next, add the Biscoff spread to the batter. Blend on low speed until fully combined, allowing the warm, spiced aroma to fill your kitchen.
4. Mix the Dry Ingredients: In a separate bowl, whisk together the all-purpose flour, baking powder, baking soda, and salt. This step ensures that the leavening agents are evenly distributed throughout the batter.
5. Combine Wet and Dry Ingredients: Gradually add the dry ingredient mixture to the wet ingredients, alternating with the buttermilk. Start and end with the dry ingredients, mixing until just combined. Be careful not to overmix, as this can lead to a dense cake.
6. Fold in Crushed Biscoff Cookies: Finally, gently fold in the crushed Biscoff cookies using a spatula. This adds a delightful crunch and enhances the flavor of the cake.
With these steps completed, you have successfully mixed the batter for your Biscoff Bliss Cake. The next part will involve pouring the batter into the prepared cake pan and baking it to perfection.
Stay tuned for the continuation of this recipe, where we will guide you through the baking process, frosting your cake, and adding the perfect finishing touches!
Understanding the Mixing Process
Achieving the perfect cake consistency is an essential step in baking the Biscoff Bliss Cake. Each phase of the mixing process contributes to the cake’s texture and flavor, ensuring that every bite is a delightful experience.
Creaming Butter and Sugar
The first step in creating a light and fluffy cake is the creaming of butter and sugar. Start with room temperature butter, which should be soft but not melted. Place the butter in a mixing bowl and use an electric mixer on medium speed. Gradually add granulated sugar, allowing the mixture to combine thoroughly. The goal here is to incorporate air into the mixture, which will help the cake rise during baking. Creaming should take about 3-5 minutes until the mixture is pale and fluffy. Scrape down the sides of the bowl occasionally to ensure even mixing.
Incorporating Eggs
The next step involves adding eggs to your creamed mixture. It’s crucial to add the eggs one at a time, mixing well after each addition. This technique not only helps to maintain the airiness of the batter but also ensures that each egg is fully incorporated before the next is added. The emulsification process that occurs during this step helps create a stable structure for the cake, leading to a better rise and a moist crumb.
Combining Wet and Dry Ingredients
Once your eggs are mixed in, it’s time to combine your wet and dry ingredients. For this recipe, you’ll have dry ingredients such as flour, baking powder, and a pinch of salt, and wet ingredients that include milk and vanilla extract. Begin by adding a portion of the dry ingredients to the butter-sugar-egg mixture, followed by a portion of the wet ingredients. Alternate between the two, mixing only until just combined. This is key: overmixing can lead to a dense cake, so stop mixing as soon as there are no visible flour streaks.
Folding in Biscoff Spread and Cookies
Finally, it’s time to fold in the Biscoff spread and crushed cookies. This step is critical for maintaining the airiness of your batter. Using a spatula, gently fold in the Biscoff spread until it is evenly distributed throughout the batter. Then, add the crushed Biscoff cookies, folding them in as well. Be careful not to overmix; the goal is to keep as much air in the batter as possible, which will result in a light and fluffy cake.
Baking the Cake
With your batter prepared, it’s time to focus on the baking process. Proper monitoring during baking is essential to ensure your cake bakes evenly and thoroughly.
Baking Time and Testing for Doneness
Preheat your oven to 350°F (175°C) and pour the batter into a greased and floured cake pan. Bake for approximately 25-30 minutes. To check for doneness, insert a toothpick into the center of the cake. If it comes out clean or with a few moist crumbs, your cake is ready. If the toothpick comes out with wet batter, it needs more time in the oven. Keep an eye on the cake towards the end of the baking time, as oven temperatures can vary.
Cooling the Cake
Once baked, remove the cake from the oven and allow it to cool in the pan for about 10 minutes. This cooling period helps the cake to set and makes it easier to remove from the pan. After 10 minutes, carefully turn the cake out onto a wire rack to cool completely. It’s important to let the cake cool thoroughly before frosting, as warm cake can cause the frosting to melt and slide off.
Creating the Whipped Cream Frosting
The Biscoff Bliss Cake deserves a frosting that complements its flavors beautifully. A whipped cream frosting provides a light and airy finish that pairs perfectly with the rich notes of Biscoff.
Whipping the Cream
Using a cold mixing bowl and cold heavy cream, whip the cream on medium-high speed until soft peaks form. This typically takes about 3-4 minutes. Be careful not to overwhip, as this can lead to a grainy texture. You want the whipped cream to be fluffy and light, maintaining its volume.
Incorporating Powdered Sugar
Once your cream is whipped, gradually incorporate powdered sugar. Start with about 1-2 tablespoons, tasting as you go to achieve your desired sweetness. The powdered sugar also helps stabilize the whipped cream, ensuring it holds its shape once applied to the cake. Mix until just combined, and avoid overwhipping to retain the fluffy texture.
Frosting and Decorating the Cake
Now that your cake is cooled and your whipped cream frosting is ready, it’s time to assemble and decorate your Biscoff Bliss Cake.
Spreading the Whipped Cream
Using a spatula, take a generous amount of whipped cream and spread it evenly over the top of the cooled cake. Start from the center and work your way outwards, ensuring smooth and even coverage. For a more textured look, you can use the spatula to create swirls or peaks in the frosting.
Drizzling with Biscoff Spread
To create an appealing drizzle, gently heat some Biscoff spread in the microwave for about 10-15 seconds until it becomes pourable. Use a spoon or a piping bag to drizzle the warmed Biscoff spread over the frosted cake, allowing it to create beautiful patterns that are both visually striking and delicious.
Garnishing with Crushed Cookies
For an attractive presentation, finish off your cake by garnishing it with crushed Biscoff cookies. Simply place the crushed cookies around the edges or sprinkle them on top of the frosting. This not only adds texture but also enhances the flavor profile of the cake, giving your guests a hint of what to expect.
Serving Suggestions
The Biscoff Bliss Cake is versatile and can be enjoyed on various occasions. Here are some ideas for serving it up.
Ideal Occasions for Serving
This cake is perfect for birthday parties, holiday gatherings, or casual get-togethers with friends and family. Its unique flavor and beautiful presentation make it a standout dessert that will impress any crowd.
Pairing Suggestions
To elevate your dessert experience, consider pairing the Biscoff Bliss Cake with a variety of beverages. A cup of coffee or tea complements the flavors beautifully. For a more indulgent experience, serve it alongside a scoop of vanilla ice cream or a dollop of extra whipped cream.
Nutritional Insights
As with any dessert, moderation is key. The Biscoff Bliss Cake contains rich ingredients, including butter, sugar, and Biscoff spread, making it a treat to be enjoyed occasionally. Depending on portion size, this cake can serve as a delightful indulgence. Consider the ingredients and portion sizes if you’re mindful of dietary restrictions, as this cake is not suitable for those avoiding gluten or dairy.
Conclusion: The Joy of Baking Biscoff Bliss Cake
The Biscoff Bliss Cake is more than just a dessert; it is an experience that brings people together. With its combination of flavors and textures, this cake is sure to be a hit among family and friends. Whether you are a seasoned baker or a novice in the kitchen, this recipe provides clear steps to create a delicious cake that will leave everyone asking for seconds.
Embrace the joy of baking and relish the sweet rewards of your efforts with every slice of this delightful treat. The Biscoff Bliss Cake not only satisfies your sweet tooth but also creates lasting memories around the table, making it a must-try recipe for any occasion.
