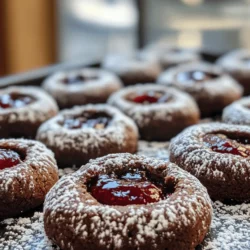
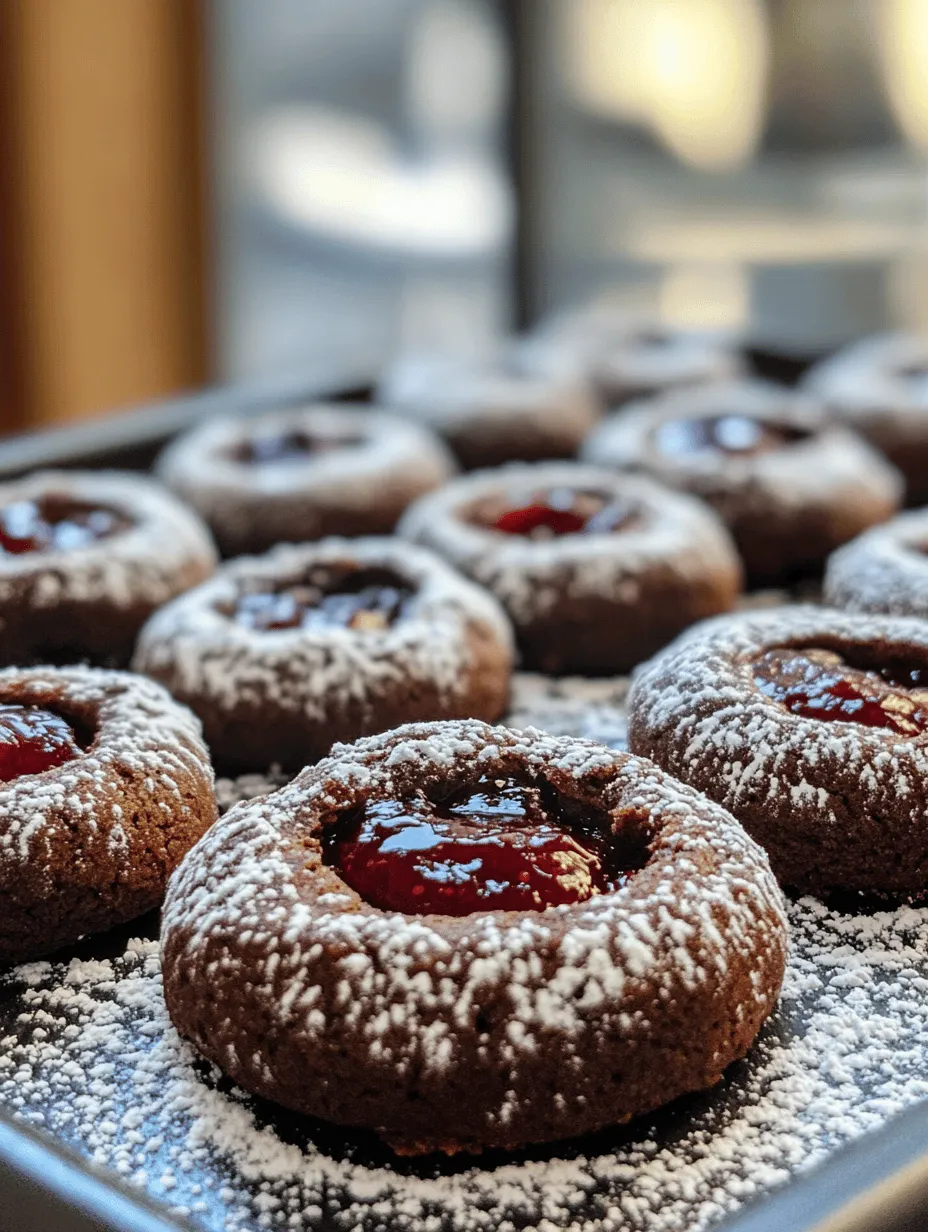
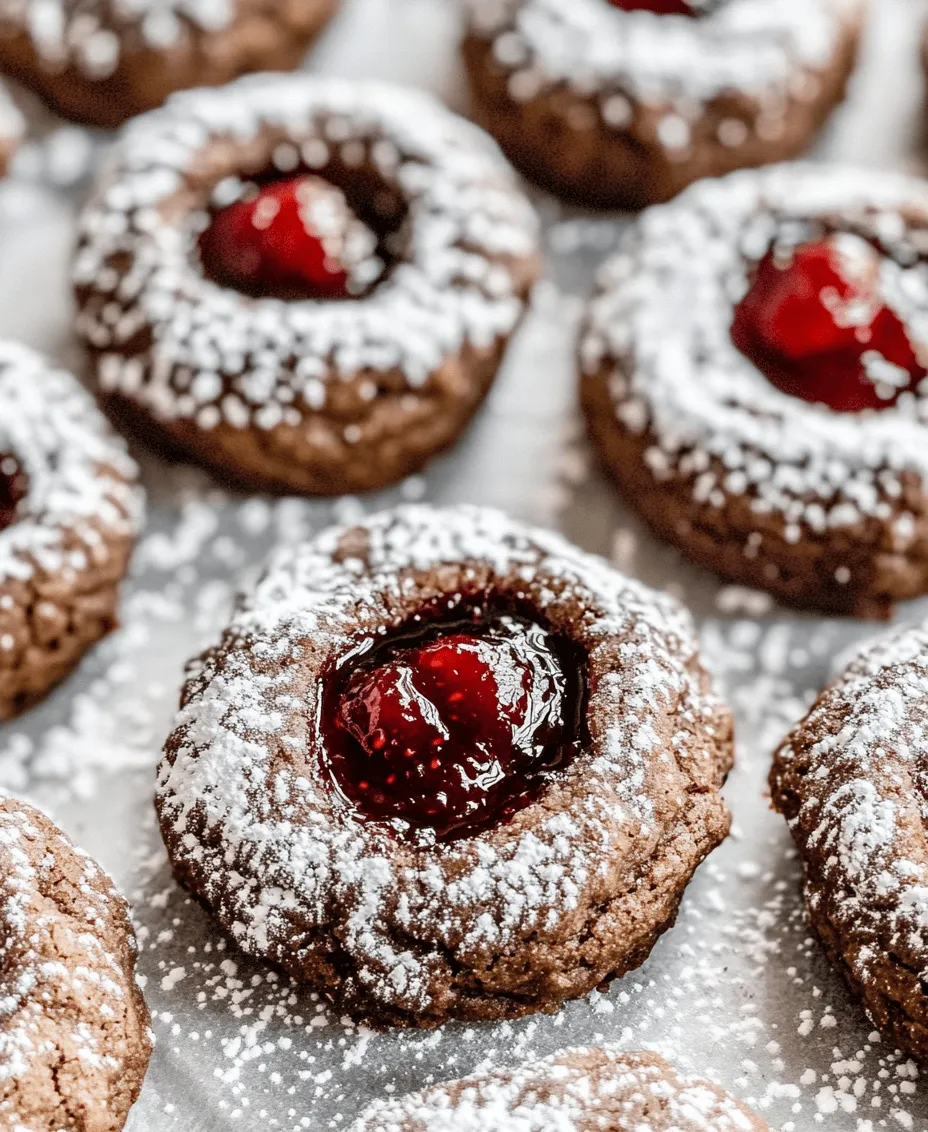
Chocolate Thumbprint Cookies: A Delectable Delight

WANT TO SAVE THIS RECIPE?

Chocolate thumbprint cookies are a decadent treat that beautifully marries the rich and indulgent flavor of chocolate with the delightful crunch of nuts, all enveloped in a soft and buttery cookie. Whether for a festive holiday gathering, a cozy afternoon tea, or simply as a sweet indulgence at home, these cookies are sure to satisfy any sweet tooth. In this article, we will delve into the fascinating origins of thumbprint cookies, the key ingredients that elevate this recipe, and provide a detailed step-by-step guide to crafting these irresistible confections.

The History and Popularity of Thumbprint Cookies

The origins of thumbprint cookies can be traced back to various cultures, each with its unique spin on this delightful treat. The classic thumbprint cookie, often filled with jam or chocolate, is believed to have Scandinavian roots, particularly from Sweden and Denmark. In these regions, cookies resembling thumbprints have been made for generations, often filled with fruit preserves or nuts. The practice of creating an indentation in the dough with one’s thumb is said to symbolize the warmth of home and the joy of sharing baked goods with loved ones.

Over time, thumbprint cookies have transcended their traditional forms, evolving into a variety of flavors and fillings. In the United States, the introduction of chocolate thumbprint cookies has garnered significant popularity. The rich chocolate base, paired with sweet fillings like chocolate ganache or nut butter, provides a delightful twist to the classic recipe. Celebrations and holidays often feature these cookies, making them a staple dessert for occasions such as Christmas, birthdays, and family gatherings.

The cultural significance of thumbprint cookies is evident in their ability to bring people together. Baking and sharing cookies fosters a sense of community, as families and friends gather to create and enjoy these delightful treats. Whether passed down through generations or newly discovered, the love for thumbprint cookies remains strong, making them a cherished dessert in many households.

Understanding the Ingredients

To create the perfect chocolate thumbprint cookies, it’s essential to understand the role of each ingredient in the recipe. Here’s a closer look at the key components that contribute to the cookies’ delicious flavor and texture:

Unsalted Butter

Unsalted butter is preferred in baking for its ability to control the salt content in recipes. It plays a crucial role in creating a tender and flavorful cookie. The butter contributes to the richness and moisture of the dough while allowing the other flavors to shine through. When creamed with sugar, it creates air pockets that help the cookies rise during baking, resulting in a soft and chewy texture.

Granulated Sugar

Sugar is not just a sweetener; it significantly influences the texture and flavor of the cookies. Granulated sugar helps to create a crisp exterior while keeping the interior soft. In this recipe, sugar also aids in the browning of the cookies, adding to their appeal. The combination of granulated sugar with brown sugar can add depth of flavor and moisture, but for this chocolate thumbprint cookie recipe, we will stick with granulated sugar for a classic taste.

Egg Yolks

Egg yolks are essential for creating moist and rich cookies. They add fat and emulsifiers to the dough, contributing to its tenderness. In this recipe, we will use egg yolks instead of whole eggs to ensure the cookies remain soft and chewy. The protein in the yolks also helps bind the ingredients together, providing structure to the cookies.

Flavor Extracts

Flavor extracts, such as vanilla and almond, enhance the taste of the cookies, providing depth and complexity. Vanilla extract is a classic addition that complements the chocolate beautifully, while almond extract adds a subtle nutty flavor that pairs well with the cookies’ texture. Using high-quality extracts can elevate the overall flavor profile of your chocolate thumbprint cookies.

All-Purpose Flour and Cocoa Powder

All-purpose flour serves as the foundation for most baking recipes, providing structure and stability to the cookies. When combined with cocoa powder, it creates a rich chocolate base that is both flavorful and visually appealing. Cocoa powder adds depth of flavor and a beautiful dark color to the cookies, making them irresistible.

Baking Powder and Salt

Baking powder acts as a leavening agent, helping the cookies rise and achieve a soft texture. It creates air bubbles in the dough during baking, resulting in a lighter cookie. Salt, on the other hand, enhances the overall flavor, balancing the sweetness and bringing out the richness of the chocolate. While it may seem counterintuitive, a small amount of salt can elevate the taste of the cookies significantly.

Chocolate Ganache

The filling of chocolate thumbprint cookies can vary, but chocolate ganache is a popular choice. Made from heavy cream and high-quality chocolate, ganache provides a luscious and indulgent filling that melts in your mouth. You can also experiment with different flavors by using flavored chocolate or adding extracts to the ganache.

Nuts

Chopped nuts add a delightful crunch and additional flavor to chocolate thumbprint cookies. Walnuts, pecans, and hazelnuts are popular choices, each bringing its unique taste and texture. The addition of nuts not only enhances the cookie’s flavor but also provides a satisfying contrast to the soft chocolate base.

Step-by-Step Guide to Making Chocolate Thumbprint Cookies

Now that we’ve explored the delicious ingredients that come together to create chocolate thumbprint cookies, let’s dive into the step-by-step guide for making them. Preparing the dough is a crucial step in achieving the perfect cookie, so ensure you have your workspace and equipment ready.

Preparing the Dough

Prepping Your Workspace and Equipment

Before you begin, it’s essential to have a clean and organized workspace. Gather all your ingredients, measuring cups, mixing bowls, and baking sheets. Preheat your oven to 350°F (175°C) to ensure it’s hot and ready for baking once your cookies are prepared. Line your baking sheets with parchment paper to prevent sticking and ensure even baking.

Creaming Butter and Sugar

Start by placing the unsalted butter in a mixing bowl. Using an electric mixer or a sturdy whisk, beat the butter until it becomes creamy and smooth. Gradually add the granulated sugar, continuing to mix until the mixture is light and fluffy. This process is important because it incorporates air into the mixture, giving your cookies a tender texture.

Incorporating Egg Yolks and Extracts

Once the butter and sugar are well combined, add the egg yolks one at a time, mixing well after each addition. This ensures that the yolks are fully incorporated into the dough. Next, add the vanilla and almond extracts, mixing until the flavors are evenly distributed throughout the batter.

Mixing Dry Ingredients

Sifting Flour, Cocoa Powder, Baking Powder, and Salt

In a separate bowl, sift together the all-purpose flour, cocoa powder, baking powder, and salt. Sifting is a crucial step as it helps to aerate the dry ingredients and break up any clumps, resulting in a smoother dough. This process also ensures that the cocoa powder is evenly distributed throughout the flour, preventing any bitter pockets in the final cookies.

Combining Wet and Dry Ingredients

With the dry ingredients sifted, gradually add them to the wet mixture of butter, sugar, and eggs. Mix on low speed until just combined. Be careful not to overmix the dough, as this can lead to tough cookies. The dough should be soft and slightly sticky, perfect for forming into thumbprint shapes.

By following these initial steps, you are well on your way to creating delicious chocolate thumbprint cookies that will impress anyone who takes a bite. Stay tuned for the next part of this article, where we will explore how to shape the cookies, create the thumbprint indentations, and fill them with luscious chocolate ganache.

The origins of thumbprint cookies can be traced back to various cultures, each with its unique spin on this delightful treat. The classic thumbprint cookie, often filled with jam or chocolate, is believed to have Scandinavian roots, particularly from Sweden and Denmark. In these regions, cookies resembling thumbprints have been made for generations, often filled with fruit preserves or nuts. The practice of creating an indentation in the dough with one's thumb is said to symbolize the warmth of home and the joy of sharing baked goods with loved ones.

Shaping and Baking the Cookies

Creating the perfect Chocolate Thumbprint Cookies starts with properly shaping the dough and baking it to achieve that ideal texture. Here’s how to do it:

Rolling Dough into Balls: Tips for Uniform Sizes

To ensure even baking and consistent cookie sizes, it’s essential to roll the dough into uniform balls. Aim for each ball to be about one inch in diameter, which will yield cookies that are not too small nor overly large. Here are some helpful tips:

1. Use a Cookie Scoop: A small cookie scoop or ice cream scoop can help you measure out equal portions of dough. This tool ensures that each cookie is the same size, which leads to uniform baking.

2. Chill the Dough: Before rolling, chill the dough in the refrigerator for about 30 minutes. A chilled dough is easier to handle and less sticky, making it simpler to roll into perfect balls.

3. Flour Your Hands: Lightly dust your hands with flour before rolling the dough. This prevents the dough from sticking to your fingers, allowing for a smoother rolling process.

Creating the Thumbprint Indentation: Techniques for the Perfect Shape

Once you have your dough balls ready, it’s time to create the signature thumbprint. This step is crucial for holding the chocolate filling. Here’s how to achieve that perfect indentation:

1. Use Your Thumb: The traditional method is to gently press your thumb into the center of each dough ball. Make sure not to press too hard; you want a deep enough indentation to hold the filling without piercing through the bottom of the cookie.

2. Use a Spoon for Precision: If you prefer, you can use the back of a small spoon instead of your thumb for a more uniform shape. This method can create a cleaner, more defined indentation.

3. Avoid Overworking: Be gentle when creating the thumbprint. Overworking the dough can cause the cookies to spread too much during baking, losing their shape.

Baking Time and Temperature: What to Watch for to Avoid Overbaking

The baking process is where the cookies transform from dough to delightful treats. Here’s what you need to keep in mind:

1. Preheat Your Oven: Ensure your oven is preheated to 350°F (175°C) before baking. This ensures even cooking from the start.

2. Baking Time: Bake the cookies for about 10-12 minutes. Start checking them at the 10-minute mark. The edges should be firm, while the center may still look slightly soft. Remember, cookies continue to cook on the baking sheet after being removed from the oven.

3. Cooling: Let the cookies cool on the baking sheet for about 5 minutes before transferring them to a wire rack. This allows the cookies to set and prevents breaking.

Filling and Finishing Touches

Now that your cookies are baked to perfection, it’s time to add the chocolate filling and a few finishing touches to make them irresistible.

How to Prepare and Apply Chocolate Ganache or Spread

The filling is where you can truly customize your chocolate thumbprint cookies. Here’s a simple way to prepare a rich chocolate ganache:

1. Ingredients: You’ll need 1 cup of heavy cream and 8 ounces of semisweet chocolate, chopped.

2. Making Ganache: Heat the cream in a small saucepan until it just begins to simmer. Remove from heat, then pour over the chopped chocolate in a bowl. Let it sit for a few minutes, then stir until smooth.

3. Applying the Ganache: Once the ganache has cooled slightly and thickened, use a teaspoon to fill the thumbprints of each cookie. Be generous, but be careful not to overfill, as the ganache may spill over.

Optional Nut Toppings: Suggestions for Flavor Combinations

To enhance the flavor and add a delightful crunch, consider adding nut toppings. Here are some suggestions:

1. Chopped Nuts: After filling the thumbprints with ganache, sprinkle with finely chopped nuts like walnuts, pecans, or hazelnuts for added texture and flavor.

2. Chocolate Chips: For a double chocolate experience, add a few mini chocolate chips on top of the ganache before it sets.

3. Flavored Nuts: Experiment with flavored nuts such as cinnamon-roasted almonds or spicy pecans for an unexpected twist.

Dusting with Powdered Sugar: The Finishing Touch

For a final touch that elevates your cookies, dust them with powdered sugar. This not only adds a beautiful aesthetic but also a hint of sweetness:

1. Sift the Sugar: Use a fine mesh sieve to sift powdered sugar over the cooled cookies. This creates an even, delicate dusting.

2. Serve Immediately: Dusting with powdered sugar should be done just before serving to prevent it from melting into the ganache.

Tips for Perfecting Your Chocolate Thumbprint Cookies

Achieving perfection in your Chocolate Thumbprint Cookies can be enhanced by avoiding common mistakes and experimenting with flavors.

Common Mistakes to Avoid

1. Overmixing Dough: When combining the ingredients, mix just until combined. Overmixing can lead to tough cookies. This is especially important after adding the flour; mix gently to retain a tender texture.

2. Misjudging Baking Time: Every oven is different, so keep an eye on your cookies. Use the “slight jiggle” method: if the center of the cookie jiggles slightly but the edges are set, they are done.

Flavor Variations and Substitutions

1. Experimenting with Different Types of Chocolate Fillings: While semisweet chocolate is traditional, you can try milk chocolate, dark chocolate, or even white chocolate for a different flavor profile.

2. Alternative Extracts and Flavorings: Enhance your cookies by adding a teaspoon of almond extract or orange zest to the dough for added depth and complexity.

Serving and Storing Chocolate Thumbprint Cookies

Presenting your cookies beautifully can elevate the experience, whether for a gathering or a simple treat at home.

Presentation Ideas for Special Occasions

1. Creative Plating Suggestions: Arrange cookies on a decorative platter, perhaps garnished with fresh mint leaves or edible flowers to impress your guests.

2. Pairing Cookies with Beverages: Chocolate thumbprint cookies pair wonderfully with beverages like rich coffee, herbal teas, or a glass of cold milk, enhancing the overall flavor experience.

Best Practices for Storing Cookies

1. How to Keep Cookies Fresh for Longer: Store cookies in an airtight container at room temperature. They will stay fresh for about 5-7 days. Keep them away from direct sunlight and moisture.

2. Freezing Cookies for Future Enjoyment: To extend their life, freeze the cookies in a single layer on a baking sheet until firm. Once frozen, transfer them to a freezer-safe bag or container. They can be stored this way for up to three months. Thaw at room temperature before serving.

Conclusion

Chocolate thumbprint cookies are more than just a delightful treat; they are a versatile dessert that can be adapted to suit various tastes and occasions. With their rich chocolate flavor and soft, buttery texture, these cookies are sure to please anyone who takes a bite. By following this detailed guide, you can create your own batch of chocolate thumbprint cookies that are not only delicious but also visually appealing. Enjoy these sweet creations as a special treat or share them with loved ones to brighten their day.

The origins of thumbprint cookies can be traced back to various cultures, each with its unique spin on this delightful treat. The classic thumbprint cookie, often filled with jam or chocolate, is believed to have Scandinavian roots, particularly from Sweden and Denmark. In these regions, cookies resembling thumbprints have been made for generations, often filled with fruit preserves or nuts. The practice of creating an indentation in the dough with one's thumb is said to symbolize the warmth of home and the joy of sharing baked goods with loved ones.

Chocolate Thumbprint Cookies

Indulge in the rich decadence of chocolate thumbprint cookies! These delightful treats combine a soft, buttery cookie with a luscious chocolate filling and a satisfying nutty crunch. Perfect for any occasion, from holiday gatherings to cozy afternoons, learn how to make these scrumptious cookies at home. Dive into the history, key ingredients, and get step-by-step instructions in our article. Bake a batch and share the love! #Cookies #ChocolateThumbprint #Baking #Dessert #SweetTreats #HomemadeCookies

Ingredients
  

1 cup unsalted butter, softened

1 cup granulated sugar

2 large egg yolks

1 teaspoon vanilla extract

1 teaspoon almond extract (optional)

2 cups all-purpose flour

1/3 cup unsweetened cocoa powder

1 teaspoon baking powder

1/4 teaspoon salt

1 cup chocolate ganache or chocolate spread (for filling)

1/2 cup chopped nuts (like hazelnuts or pecans) (optional)

Powdered sugar (for dusting)

Instructions
 

Preheat your oven to 350°F (175°C) and line a baking sheet with parchment paper.

    In a large mixing bowl, cream together the softened butter and granulated sugar until the mixture is light and fluffy.

      Add the egg yolks one at a time, mixing well after each addition. Stir in the vanilla and almond extracts.

        In a separate bowl, sift together the flour, cocoa powder, baking powder, and salt.

          Gradually add the dry ingredients to the wet mixture, stirring until fully combined. The dough will be soft and slightly sticky.

            Scoop out tablespoon-sized portions of dough and roll them into balls. Place them on the prepared baking sheet, leaving space between each cookie (about 2 inches).

              Using your thumb or the back of a measuring spoon, make an indention in the center of each dough ball.

                Bake the cookies in the preheated oven for 10-12 minutes. They should be set but slightly soft in the center.

                  Remove from the oven and while still warm, gently re-press the indents if needed, then fill each thumbprint with a teaspoon of chocolate ganache or spread.

                    Optional: Sprinkle chopped nuts over the filled chocolate for added texture and flavor.

                      Allow the cookies to cool completely on the baking sheet, then transfer them to a wire rack.

                        Once cooled, dust with powdered sugar before serving.

                          Prep Time: 20 minutes | Total Time: 40 minutes | Servings: 24 cookies

                            WANT TO SAVE THIS RECIPE?

                            Leave a Comment

                            Recipe Rating


                            WANT TO SAVE THIS RECIPE?

                            save it for later