Introduction
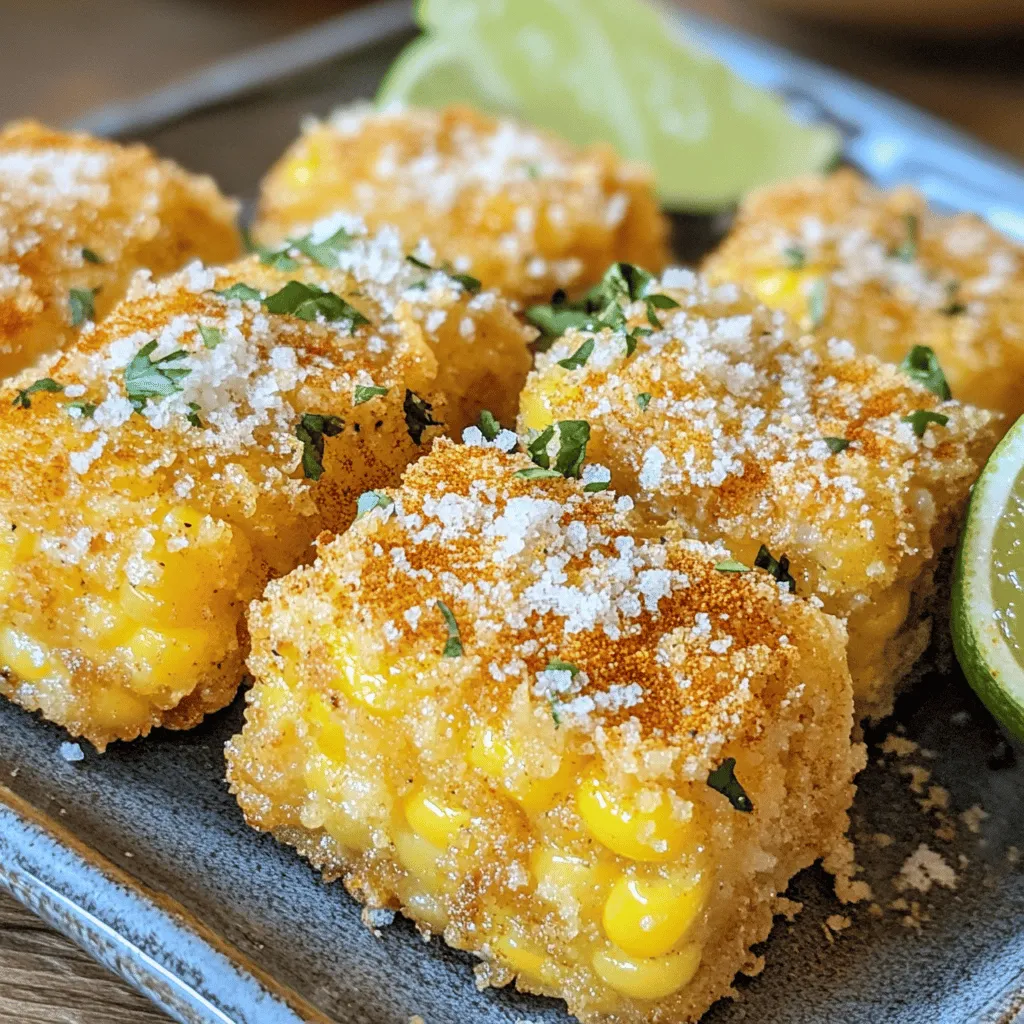
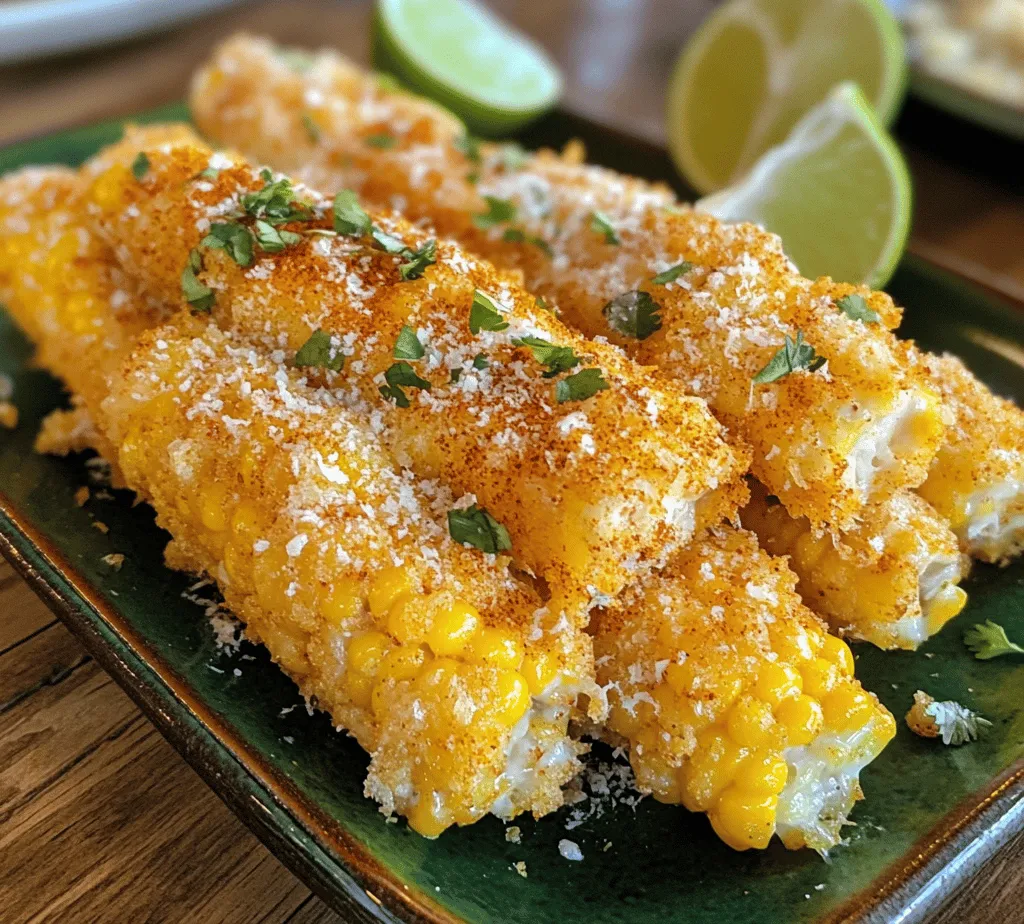
Crispy fried corn on the cob is a delightful dish that brings together the sweet, juicy flavor of fresh corn and the satisfying crunch of a perfectly fried coating. This dish stands out as a versatile option that can be served as a snack, side dish, or even a main attraction at gatherings. Whether you’re enjoying a summer barbecue or simply looking for a way to elevate your dinner table, crispy fried corn on the cob is sure to impress.
The key to achieving that irresistible crunch lies in the quality of your ingredients. Fresh corn is essential—its natural sweetness and juiciness are what make this dish truly special. Additionally, using quality buttermilk not only enhances the flavor but also contributes to that coveted crispy texture. This dish caters to a range of palates, making it a popular choice for family meals, picnics, or even game-day celebrations.
The Allure of Fried Corn on the Cob
Corn has a rich cultural significance across many cuisines around the world. It is a staple ingredient in numerous traditional dishes and is celebrated for its versatility. From Mexican elote to Southern-style corn fritters, corn is cherished by food lovers everywhere. During the summer months, corn on the cob becomes a quintessential side dish at outdoor gatherings, barbecues, and fairs. The sight of freshly grilled or fried corn, often slathered in butter and seasonings, evokes a sense of nostalgia and joy.
Crispy fried corn on the cob, in particular, has gained immense popularity among food enthusiasts for several reasons. The combination of textures—the tender kernels encased in a crispy, golden-brown coating—creates a delightful eating experience. Additionally, the ability to customize the flavors with various spices and toppings makes it an exciting dish to experiment with. Whether you prefer a classic approach or want to add a gourmet twist, crispy fried corn on the cob is adaptable enough to satisfy any craving.
Ingredients Overview
To create the perfect crispy fried corn on the cob, you’ll need a selection of fresh ingredients that work harmoniously together. Here’s a detailed breakdown of each component and its role in the recipe:
– Fresh Corn: The star of the dish, fresh corn is essential for achieving the best flavor and texture. Choose ears of corn that are firm and plump, with bright green husks and moist silk. The sweetness of the corn will shine through in the final dish, making it a standout treat.
– Buttermilk: Soaking the corn in buttermilk not only adds richness but also helps the coating adhere better. Buttermilk is slightly acidic, which tenderizes the corn while infusing it with flavor. For the best results, opt for high-quality buttermilk, as it can elevate the overall taste of your dish.
– All-Purpose Flour: This is the base for the coating, providing structure and crunch. The flour will create a crispy outer layer when fried, locking in the moisture of the corn.
– Cornmeal: Incorporating cornmeal into the coating enhances the corn flavor and adds an extra layer of crunch. It provides a delightful contrast to the softness of the corn kernels.
– Spices: A blend of spices can elevate your fried corn to new heights. Common choices include paprika, garlic powder, onion powder, salt, and pepper. Feel free to experiment with different spice blends to find your perfect flavor combination.
– Oil: The choice of oil is crucial for frying. Use a high smoke point oil, such as vegetable or canola oil, to ensure that your corn fries up crispy without burning. The right oil can make all the difference in achieving that golden-brown exterior.
Optional toppings can take your crispy fried corn on the cob to another level. Consider adding a sprinkle of cotija cheese, a squeeze of lime juice, or a drizzle of spicy mayo or garlic butter. These additions not only enhance the flavor but also provide an appealing presentation.
Step-by-Step Instructions for Perfect Fried Corn
Soaking the Corn
The first step in preparing your crispy fried corn on the cob is soaking the corn in buttermilk. This process is crucial for several reasons. Not only does buttermilk add flavor, but it also helps to tenderize the kernels, making them even juicier. When soaking the corn, aim for at least 30 minutes, but longer is even better—up to several hours if time allows. This prolonged soaking helps the corn absorb the buttermilk, resulting in a more flavorful bite.
To maximize flavor during the soaking process, consider adding a pinch of salt or a dash of hot sauce to the buttermilk. This will infuse the corn with additional flavor, ensuring that every bite is delicious. After soaking, be sure to let the excess buttermilk drip off before proceeding to the next step.
Preparing the Coating
While the corn is soaking, it’s the perfect time to prepare the coating. In a large mixing bowl, combine all-purpose flour, cornmeal, and your chosen spices. The flour and cornmeal work together to create that crispy outer layer, while the spices add depth and flavor.
Here’s a simple breakdown of the dry ingredients to consider:
– 1 cup all-purpose flour
– 1/2 cup cornmeal
– 1 teaspoon paprika (smoked for an added depth)
– 1 teaspoon garlic powder
– 1 teaspoon onion powder
– Salt and pepper to taste
Feel free to adjust the quantities according to your taste preferences. If you enjoy a bit of heat, consider adding cayenne pepper or chili powder to the mix. The beauty of this recipe lies in its versatility—experiment to find the flavor profile that excites your palate.
Heating the Oil
Once the corn has soaked and the coating is prepared, it’s time to heat the oil. The temperature of the oil is critical for achieving the perfect crispiness. Use a heavy-bottomed pot or deep fryer for even heat distribution, and fill it with enough oil to submerge the corn.
Heat the oil to around 350°F (175°C). To test if the oil is ready, drop a small amount of the coating mixture into the oil; if it sizzles and bubbles, you’re good to go. It’s important to maintain this temperature throughout the frying process, as too low of a temperature can lead to greasy corn, while too high can cause the coating to burn before the corn cooks through.
With your ingredients prepped and the oil heated, you’re now ready to move on to the frying process. The next steps will guide you through frying the corn to perfection, ensuring that each ear is crispy, golden, and bursting with flavor.
Safety Tips for Frying at Home
Frying at home can be a delightful experience, but it’s crucial to prioritize safety to avoid accidents. Here are some essential safety tips to keep in mind when frying your crispy fried corn on the cob:
1. Use a Deep Pot: Select a deep frying pot or Dutch oven to prevent hot oil from splattering. A deeper vessel helps contain the oil and minimizes the risk of burns.
2. Monitor Oil Temperature: Use a thermometer to ensure the oil is at the right temperature (around 350°F to 375°F). If the oil is too hot, it can ignite, and if too cool, the corn will absorb excess oil, resulting in a greasy texture.
3. Dry Your Ingredients: Before frying, ensure the corn is completely dry. Excess moisture can cause the oil to splatter, leading to burns or kitchen fires.
4. Use a Long-Handled Tool: When placing corn in the hot oil, use tongs or a slotted spoon to keep your hands at a safe distance from the oil.
5. Have a Lid Nearby: Keep a lid close by to smother any flames that might occur. Never try to pour water on an oil fire; it can make the situation worse.
Coating the Corn
The coating is what gives your fried corn its delightful crunch. Here’s how to achieve the perfect coating:
Ingredients for Coating:
– 1 cup all-purpose flour
– 1 teaspoon paprika
– 1 teaspoon garlic powder
– 1 teaspoon onion powder
– Salt and pepper to taste
– 1 cup buttermilk (or milk)
Technique for Even Coating:
1. Prepare the Coating: In a bowl, whisk together the flour, paprika, garlic powder, onion powder, salt, and pepper. This mixture will provide flavor and texture to your corn.
2. Buttermilk Dip: Submerge each corn cob into the buttermilk, allowing it to soak for a few moments. This step helps the flour mixture adhere to the corn.
3. Coat with Flour: After soaking, remove the corn from the buttermilk and allow the excess to drip off. Then, roll the corn in the flour mixture, ensuring an even coating on all sides. Use your hands to press the flour gently onto the corn to ensure it sticks well.
Common Mistakes to Avoid:
– Skipping the Buttermilk: Don’t skip this step! The buttermilk is crucial for moisture and helps the flour adhere. If you don’t have buttermilk, you can make a substitute using regular milk mixed with a tablespoon of vinegar or lemon juice.
– Uneven Coating: Ensure that you coat the corn evenly. If you see patches without flour, it can lead to uneven frying and a less appealing texture.
Frying the Corn
Now that your corn is coated, it’s time to fry it to perfection.
Optimal Frying Time and Techniques:
1. Heat the Oil: Heat your oil in a deep pot over medium-high heat. Use a thermometer to check that it reaches around 350°F.
2. Frying Process: Carefully lower the coated corn cobs into the hot oil using tongs. Fry them in batches to maintain the oil temperature.
3. Timing: Fry the corn for about 3-5 minutes, turning occasionally. You want the coating to turn a golden brown and the corn to cook through. Keep an eye on the color to avoid burning.
Importance of Not Overcrowding the Pan:
One common mistake is overcrowding the frying pan. When too many corn cobs are added at once, it can lower the oil’s temperature, resulting in soggy, greasy corn. Fry in small batches to ensure even cooking and a crispy texture.
Draining and Serving
After frying, it’s essential to drain your corn properly to remove excess oil.
Best Practices for Draining Excess Oil:
1. Use a Slotted Spoon: When removing the corn from the oil, use a slotted spoon to allow excess oil to drip back into the pot.
2. Paper Towels: Place the fried corn on a plate lined with paper towels. This will help absorb any remaining oil, keeping your corn crispy and less greasy.
Presentation Ideas for Serving:
– Serve in a Rustic Basket: For a charming presentation, serve the corn in a woven basket lined with a colorful napkin. This not only looks appealing but also makes it easy for guests to grab a piece.
– Garnish: Consider garnishing with chopped herbs like parsley or cilantro for a pop of color. You can also serve with lemon wedges for a refreshing squeeze of citrus.
Optional Toppings and Serving Suggestions
Enhancing your crispy fried corn can elevate the dining experience. Here are some creative ideas:
Creative Ideas for Enhancing Flavor:
– Cheese Topping: Sprinkle crumbled feta or grated Parmesan cheese over the hot corn for a savory touch.
– Spicy Kick: Drizzle with hot sauce or sprinkle with chili powder for those who enjoy a bit of heat.
Pairing Fried Corn with Other Dishes:
Fried corn can serve as a delicious side dish to a variety of main courses. Consider pairing it with:
– Grilled Meats: It complements grilled chicken, steak, or shrimp beautifully, adding a crunchy texture to your meal.
– Salads: Serve alongside a fresh salad for a balanced meal, where the fried corn adds a delightful crunch.
Nutritional Information
While crispy fried corn on the cob is a treat, it also offers some nutritional benefits worth noting.
Overview of Nutritional Benefits of Corn:
Corn is a good source of dietary fiber, which aids digestion and helps keep you full. It also contains essential vitamins and minerals, including vitamin B6, thiamine, and folate.
Balancing Indulgence with Health Considerations:
Enjoying fried corn occasionally can fit into a balanced diet. Consider pairing it with more healthful dishes on the plate to create a meal that satisfies cravings while still offering nutritional value.
Potential Modifications for Healthier Versions:
If you want to enjoy this dish with fewer calories, consider these modifications:
– Baking Instead of Frying: For a healthier option, you can bake the coated corn in the oven at 400°F for about 20-25 minutes, turning halfway through. This will give you a crispy texture without the need for frying.
– Alternative Coating: Use whole wheat flour or cornmeal for the coating to increase fiber content.
Conclusion
Crispy fried corn on the cob is a delightful dish that brings joy to any gathering. The combination of crunchy coating and tender corn makes it an irresistible treat. By following the steps outlined in this recipe, you can achieve the perfect crispy fried corn that will impress family and friends alike.
We encourage you to try this recipe at home and experience the deliciousness for yourself. Whether served as a side dish during summer barbecues or as a fun snack, crispy fried corn is sure to be a hit. Enjoy the process of cooking, and share this delightful dish with those you love—it’s an experience worth savoring!


