Introduction
There’s something undeniably comforting about the smell of freshly baked bread wafting through your kitchen. Bread rolls, in particular, hold a special allure — soft, fluffy, and inviting, they have a way of making any meal feel more complete. Among the myriad of bread roll recipes, garlic butter bread rolls stand out as a quintessential favorite. These rolls, with their rich garlic flavor and buttery goodness, serve as the perfect accompaniment to a variety of dishes or can be savored on their own as a delightful snack.
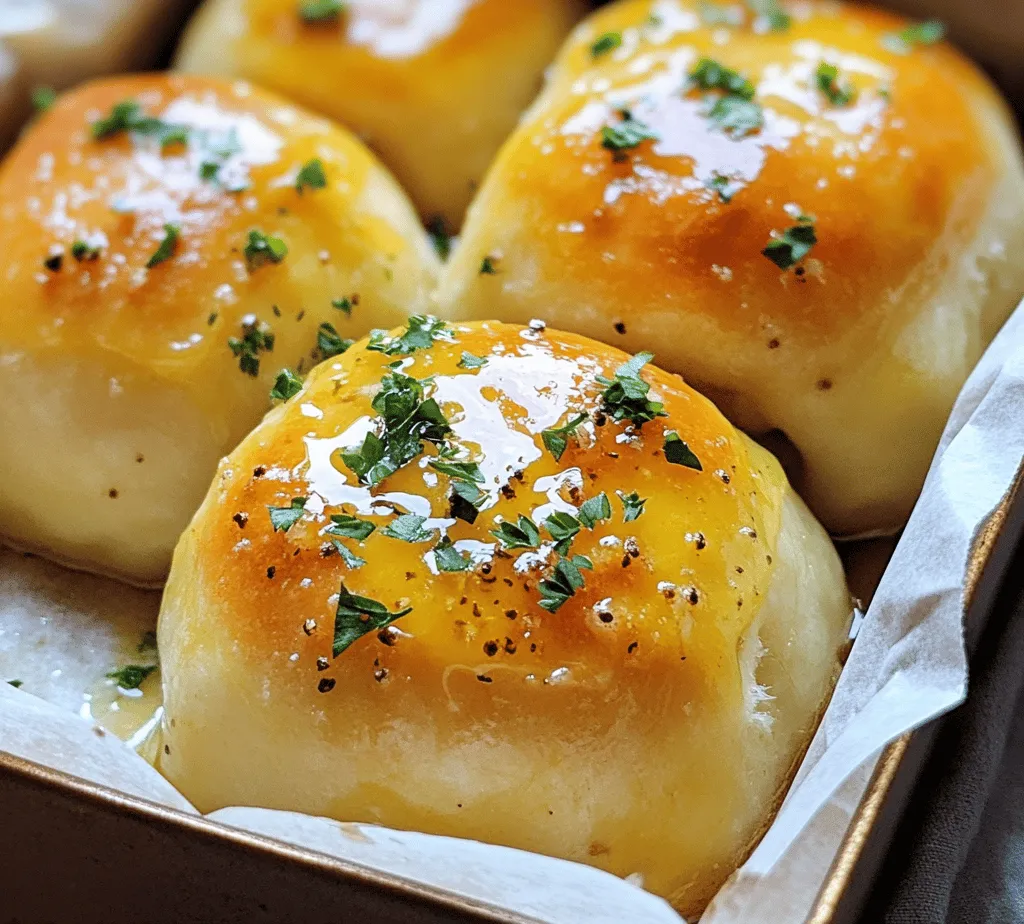
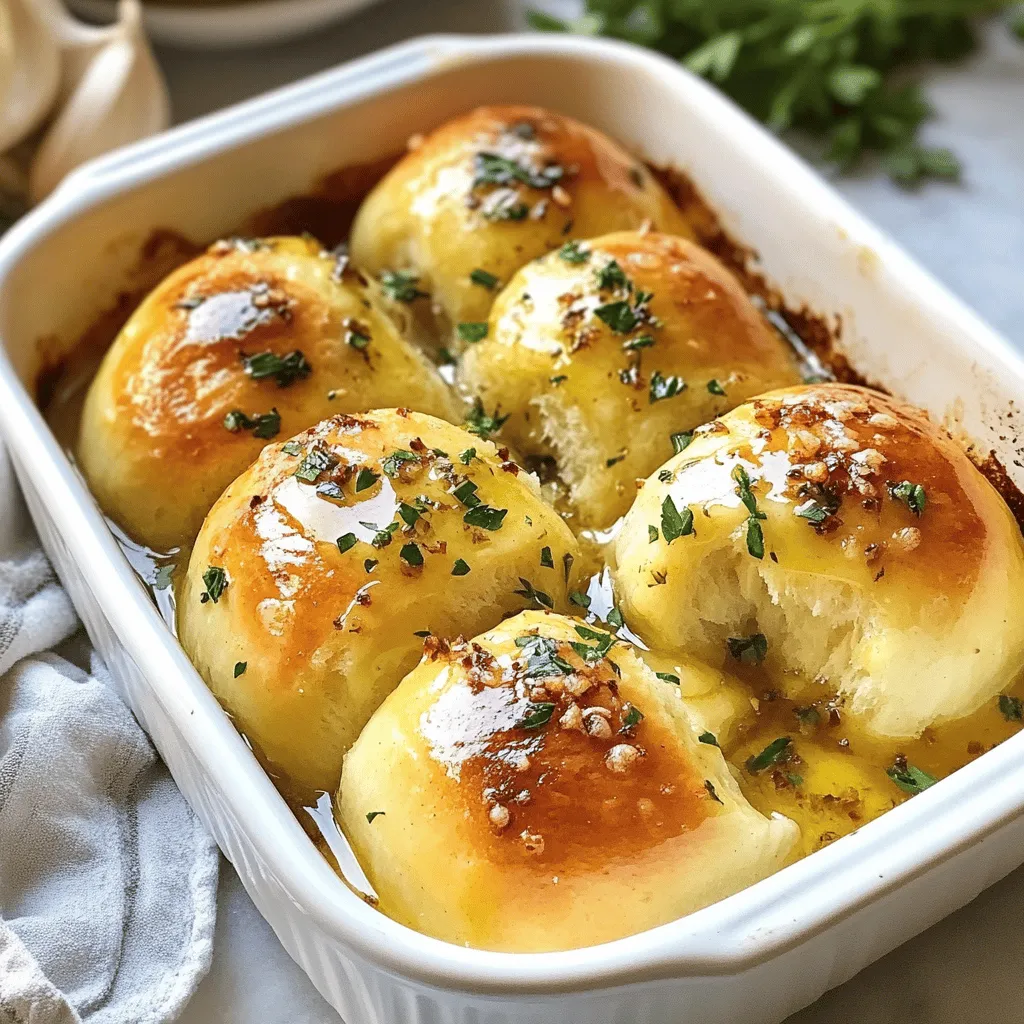
What makes garlic butter bread rolls so appealing is their harmonious blend of flavors and textures. The exterior is golden and slightly crisp, while the inside remains warm, airy, and tender. The addition of garlic and butter elevates the rolls, infusing them with a savory richness that is hard to resist. Whether you are serving them alongside a hearty soup, a fresh salad, or simply enjoying them with a spread of butter, these rolls are sure to impress.
The Appeal of Garlic Butter Bread Rolls
Freshly baked bread has long been a staple in culinary traditions around the world. The simple act of transforming basic ingredients into a warm, comforting loaf is a practice that has been passed down through generations. Bread embodies nourishment, hospitality, and tradition, making it an essential part of many cultures. Garlic butter bread rolls, specifically, celebrate this tradition while introducing a flavor profile that is both bold and inviting.
The sensory experience of enjoying garlic butter rolls cannot be overstated. As they bake, the aroma of garlic permeates the air, creating an atmosphere of warmth and anticipation. When you take your first bite, the buttery richness envelops your taste buds, complemented by the gentle kick of garlic. The texture is equally satisfying; the contrast between the soft interior and the slightly crisp crust provides a delightful mouthfeel that keeps you coming back for more.
One of the greatest advantages of garlic butter bread rolls is their versatility. They can be served at various occasions, from casual family dinners to festive holiday gatherings. Pair them with roasted meats, use them to mop up savory sauces, or simply enjoy them alongside a bowl of soup. Their adaptability makes them a go-to recipe for any bread lover.
Understanding the Ingredients
To create the perfect garlic butter bread rolls, it’s essential to understand the role each ingredient plays in the recipe. Here’s a detailed breakdown of the key components:
All-Purpose Flour
All-purpose flour serves as the foundation of the dough, providing the necessary structure and strength. It contains a moderate amount of protein, which helps develop gluten during kneading. This gluten formation is crucial for achieving the desired texture in bread rolls, allowing them to rise and hold their shape.
Active Dry Yeast
Yeast is a vital ingredient in bread-making, responsible for fermentation and leavening. Active dry yeast works by consuming sugars in the dough and releasing carbon dioxide, which causes the dough to rise. This process not only gives the rolls their fluffy texture but also contributes to their flavor. It’s important to activate the yeast properly to ensure successful rising.
Sugar
Sugar plays a dual role in this recipe. First, it acts as food for the yeast, helping to activate it and kick-start the fermentation process. Additionally, sugar enhances the flavor of the rolls, adding a subtle sweetness that balances the savory garlic.
Salt
Salt is essential in bread-making, as it not only enhances flavor but also controls the fermentation process. It strengthens the gluten structure and helps to regulate the activity of the yeast, ensuring a consistent rise. The right amount of salt will elevate the overall taste of your garlic butter rolls.
Warm Milk
Using warm milk in the dough contributes to a tender crumb and rich flavor. The warmth helps to activate the yeast more effectively, leading to a better rise. Milk also adds moisture and richness to the rolls, making them softer and more enjoyable.
Unsalted Butter
Butter is a key ingredient that adds richness and flavor to the rolls. Unsalted butter allows for better control over the salt content in the recipe. When melted and incorporated into the dough, butter helps to create a moist and tender texture.
Eggs
Eggs act as a binding agent in the dough, helping to hold the ingredients together. They also contribute to the flavor and enhance the texture of the rolls, resulting in a soft and fluffy interior.
Garlic
Garlic is the star of this recipe, providing a bold and aromatic flavor. Fresh garlic can be minced and added directly to the dough, giving a vibrant taste. Alternatively, garlic powder can be used for a more subtle flavor. The choice between fresh and dried garlic will depend on your personal preference and desired intensity of flavor.
Fresh Parsley
Adding fresh parsley not only enhances the flavor of the garlic butter but also adds a pop of color to the rolls. The freshness of the parsley complements the richness of the butter and garlic, creating a balanced flavor profile.
Spices
While garlic and parsley are the primary flavor agents, adding additional spices can elevate the overall flavor experience. Options such as black pepper, Italian seasoning, or even a hint of red pepper flakes can add depth and complexity to the rolls.
Step-by-Step Instructions for Garlic Butter Bread Rolls
Preparing the Dough
Now that you have a clear understanding of the ingredients, it’s time to start preparing the dough for your garlic butter bread rolls. Follow these detailed steps to ensure a successful outcome:
1. Activate the Yeast: Begin by activating your yeast. In a small bowl, combine warm milk (around 110°F/43°C) and sugar. Sprinkle the active dry yeast over the milk and let it sit for about 5-10 minutes, or until it becomes frothy. This indicates that the yeast is alive and ready to work its magic.
2. Mix Dry Ingredients: In a large mixing bowl, combine the all-purpose flour and salt. Whisk them together to evenly distribute the salt throughout the flour.
3. Combine Wet Ingredients: Once the yeast has activated, add melted unsalted butter and eggs to the mixture. Stir gently to combine.
4. Incorporate the Flour: Gradually add the flour mixture to the wet ingredients, stirring until a rough dough begins to form. At this point, you may need to switch to using your hands to bring the dough together.
5. Kneading the Dough: Transfer the dough to a lightly floured surface and knead it for about 8-10 minutes. The goal is to develop the gluten, which will give the rolls their structure. The dough should be smooth and elastic when you’re done. If it’s too sticky, you can sprinkle a little more flour as needed, but be cautious not to overdo it, as too much flour can lead to dry rolls.
6. First Rise: Once kneaded, shape the dough into a ball and place it in a lightly greased bowl. Cover the bowl with a damp cloth or plastic wrap to keep the moisture in. Allow the dough to rise in a warm, draft-free area for about 1-2 hours, or until it has doubled in size. This fermentation step is crucial for developing flavor and texture in your rolls.
Shaping the Rolls
After the dough has risen beautifully, it’s time to shape your rolls:
1. Punch Down the Dough: Once the dough has doubled in size, gently punch it down to release the air. This step helps to redistribute the yeast and create a more uniform texture.
2. Divide the Dough: Transfer the dough onto a lightly floured surface and divide it into equal portions. Depending on your desired size, you can make rolls that are about 2 to 3 ounces each. A kitchen scale can be handy for precise measurements.
3. Shape the Rolls: Take each portion of dough and shape it into a smooth ball by tucking the edges underneath. Place the shaped rolls on a baking sheet lined with parchment paper, allowing some space between each roll for expansion during the second rise.
4. Second Rise: Cover the shaped rolls with a damp cloth and let them rise again for about 30-45 minutes, or until they have increased in size. This step is important for achieving a light and fluffy texture.
Preparing the Garlic Butter
While the rolls are undergoing their second rise, you can prepare the garlic butter that will be brushed over the rolls before baking:
1. Melt the Butter: In a small saucepan, melt some unsalted butter over low heat. Be careful not to let it brown, as you want it to remain a pale golden color.
2. Add Garlic and Parsley: Once the butter is melted, remove it from the heat and add finely minced garlic and chopped fresh parsley. Stir to combine, allowing the flavors to meld together.
3. Seasoning: Optionally, you can add a pinch of salt and any additional spices to enhance the flavor of the garlic butter.
With the dough rising and the garlic butter prepared, you’re well on your way to creating mouthwatering garlic butter bread rolls that will surely delight your family and friends. Stay tuned for the next steps, where we will cover how to bake these delicious rolls to perfection!

Insights into Choosing the Right Garlic and Sautéing Techniques
Garlic is the star ingredient that elevates your garlic butter bread rolls from ordinary to extraordinary. When selecting garlic, look for firm, plump heads with tight skin and no signs of sprouting. Fresh garlic has a robust flavor that can be adjusted based on your preference, from mild to intense. For a subtler taste, use roasted garlic, which offers a creamy, sweet profile.
When sautéing garlic, precision is key. Heat your butter over medium-low heat, adding minced garlic only when the butter is melted. Sauté it gently, stirring constantly, until fragrant—this process should take about 1-2 minutes. Be cautious not to let the garlic brown, as burnt garlic can impart a bitter flavor to your rolls. The objective is to release the aromatic oils without compromising on taste.
Second Rise: Building Flavor and Texture
The second rise is a critical stage in creating fluffy, flavorful bread rolls. After kneading the dough and allowing it to rest until doubled in size, it’s time to shape your rolls. Gently deflate the dough to release excess gas, then divide it into equal portions. Shape each portion into a ball, tucking the edges underneath to create surface tension.
Once shaped, place the rolls on a baking tray lined with parchment paper and cover them with a clean kitchen towel. Allow them to rise again until they’ve puffed up noticeably—this could take about 30 minutes. The second rise not only enhances the flavor through fermentation but also allows for a lighter texture, making each bite airy and delightful.
Signs That the Dough Is Ready for Baking
You’ll know your dough is ready for baking when it has nearly doubled in size and springs back slightly when poked with a finger. If the indentation remains, the dough may have over-proofed. Additionally, the rolls should appear puffy and soft. A well-risen dough will yield light, airy rolls, while an under-risen dough may result in denser bread.
Baking Process
The baking process is where the magic happens. Preheat your oven to 375°F (190°C). This temperature is ideal for baking bread rolls, allowing them to cook through without burning. An oven thermometer can be useful to ensure accurate temperatures, as even slight variations can affect the final product.
Before placing the rolls in the oven, brush them generously with the prepared garlic butter. This step is crucial as it enhances the flavor and provides a beautiful golden crust. After about 15-20 minutes of baking, the rolls should turn a lovely golden brown.
Importance of Brushing with Garlic Butter Before and After Baking
Brushing your rolls with garlic butter before baking helps infuse flavor deep into the rolls, creating a savory crust that is hard to resist. After removing the rolls from the oven, brush them again with melted garlic butter to enhance the aroma and taste further. This double application ensures that the garlic flavor penetrates the rolls while providing a glossy finish that’s visually appealing.
Finishing Touch
Once baked, let your garlic butter bread rolls cool slightly on a wire rack. Proper cooling is essential as it allows steam to escape, preventing the rolls from becoming soggy. Serve them warm or at room temperature, and enjoy the irresistible aroma that fills your kitchen.
The Science Behind Bread Making
Understanding the science of bread-making can significantly improve your baking skills. Yeast fermentation plays a crucial role in leavening the dough. When yeast consumes sugars, it produces carbon dioxide and alcohol, which create air pockets in the dough, resulting in fluffy rolls.
Gluten Development and Its Importance in Bread Texture
Gluten, a protein found in wheat, is essential for providing structure to bread. When you knead the dough, gluten strands form, creating a network that traps air bubbles produced by the yeast. This development is crucial for achieving the desired texture. A well-kneaded dough will be elastic and smooth, while under-kneaded dough may result in dense rolls.
How Temperature and Humidity Affect Dough Behavior
Temperature and humidity are critical factors in bread-making. Warm temperatures speed up yeast activity, leading to quicker rises, while cooler environments slow fermentation. High humidity can make dough sticky, while dry conditions might dry it out. Adjusting your environment appropriately will help you achieve consistent results.
Serving Suggestions and Pairings
Garlic butter bread rolls are versatile and can enhance any meal. They make a perfect side dish for soups, such as a hearty tomato basil or a creamy potato leek. Pair them with fresh salads to add a comforting element to your meal.
These rolls are also ideal for entertaining. Serve them warm with a selection of dips or spreads, such as a creamy spinach dip or a zesty bruschetta topping. For a more indulgent experience, pair your rolls with rich cheeses like brie or cheddar, or accompany them with a glass of your favorite wine. A crisp white wine or a light red can complement the flavors beautifully.
Variations and Customizations
While the basic garlic butter bread rolls are delightful, there’s plenty of room for customization. Adding cheese to your dough can create a deliciously cheesy flavor. Consider incorporating shredded mozzarella or cheddar for a savory twist.
For a fresh twist, mix in herbs like rosemary or thyme with the garlic butter. These herbs not only enhance flavor but also provide a beautiful visual appeal.
If you’re feeling adventurous, experiment with sweet variations. Adding a sprinkle of cinnamon or incorporating chocolate chips can transform these rolls into a delectable dessert. For those with dietary restrictions, gluten-free and vegan adaptations are also possible. Substitute all-purpose flour with a gluten-free blend and use plant-based butter for the garlic butter.
Troubleshooting Common Issues
Baking bread can sometimes lead to challenges. If your dough is too sticky, add a little more flour, but be cautious not to overdo it, as this can lead to dry rolls. Conversely, if it’s too dry, a splash of water or milk can help achieve the right consistency.
If your rolls aren’t rising properly, it may be due to inactive yeast. Ensure your yeast is fresh and check that your water temperature is warm enough without being too hot, as high temperatures can kill the yeast.
Overbaking can lead to dry rolls, while underbaking may result in doughy centers. Keep an eye on the color and texture of your rolls as they bake, and use a toothpick to check for doneness.
Conclusion
Making homemade garlic butter bread rolls is a deeply satisfying experience that fills your kitchen with warmth and invites loved ones to gather around the table. The joy of sharing freshly baked rolls, still warm from the oven, is unparalleled.
Don’t hesitate to experiment with the recipe—whether through flavor variations or tweaks to the method, each attempt presents an opportunity for culinary discovery. Embrace the process, and enjoy the delightful results of your efforts. After all, the best part of homemade food lies not only in its deliciousness but also in the memories created around it.


