Introduction
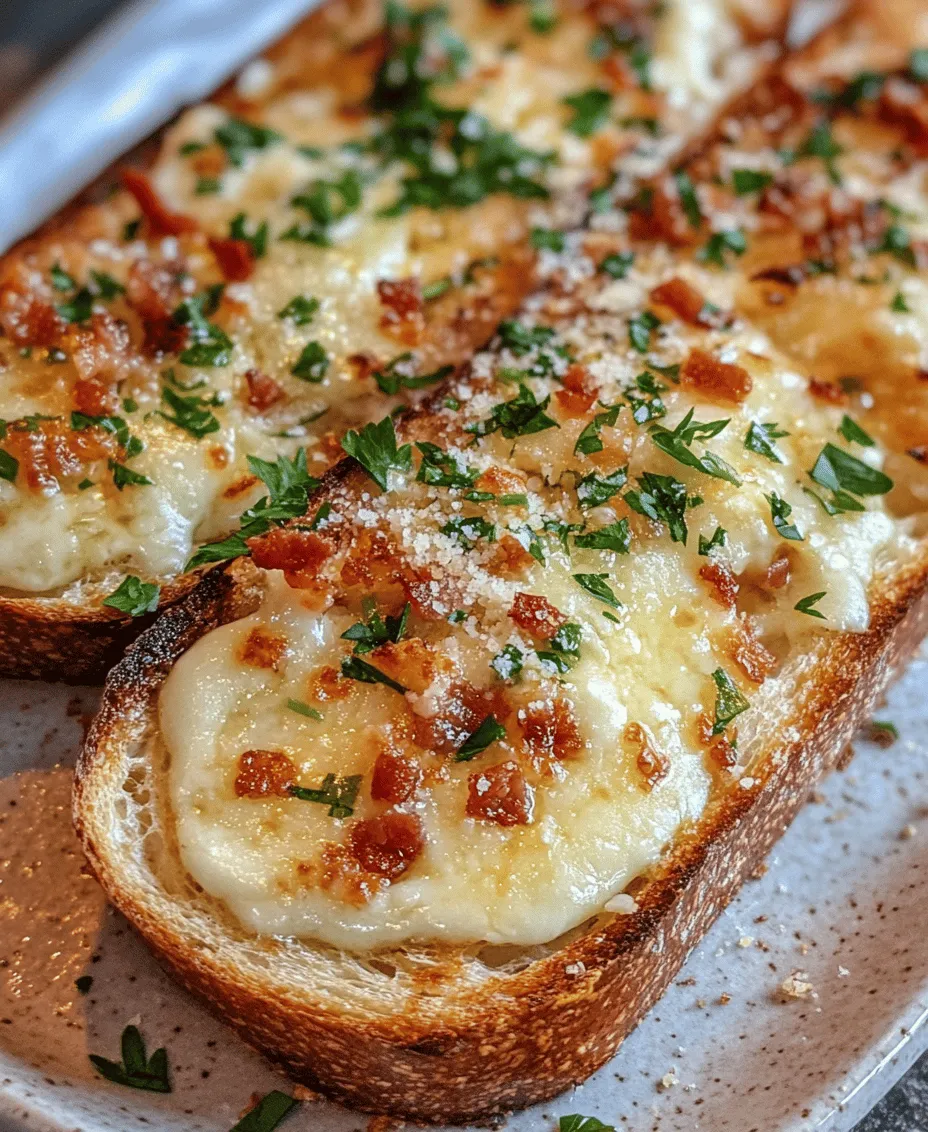
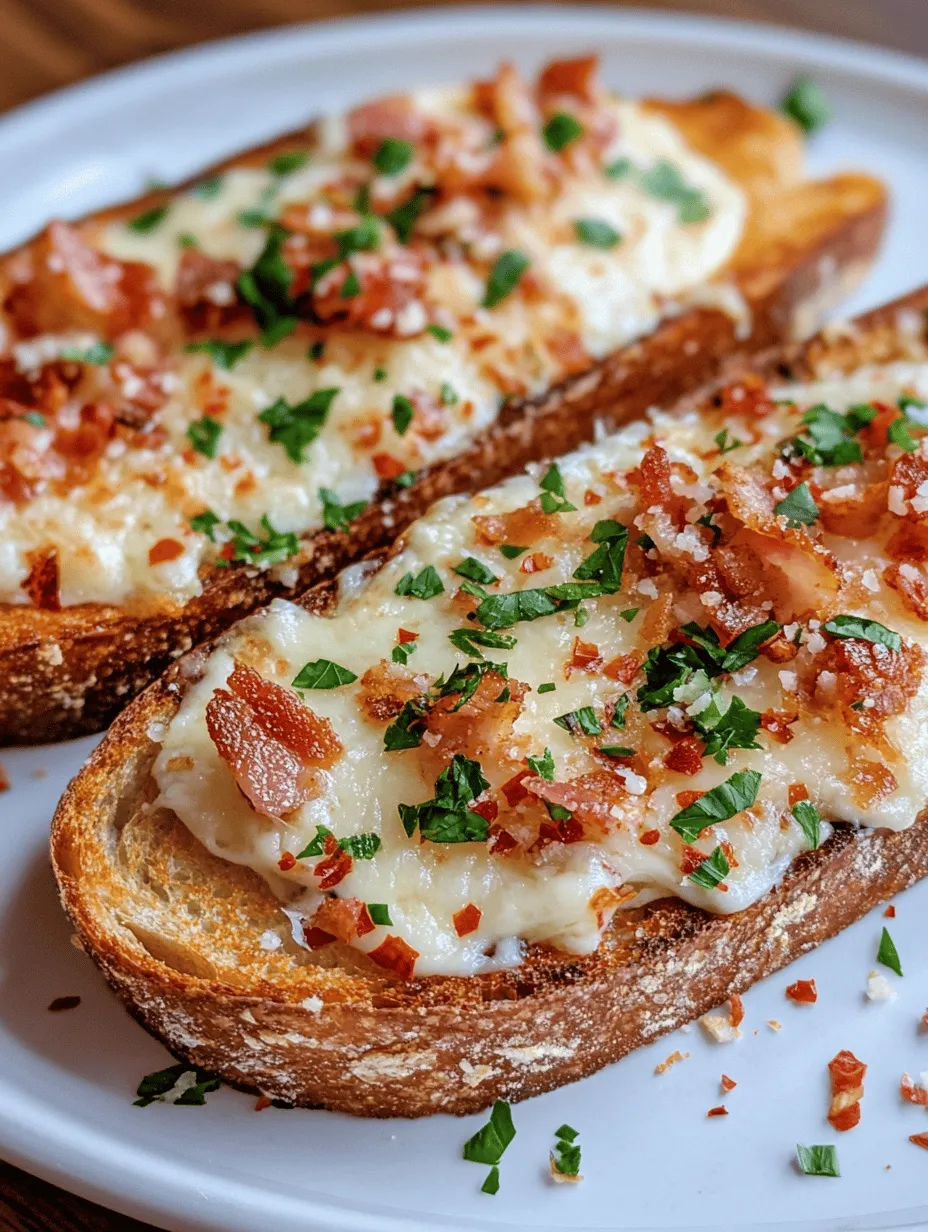
If you’re on the hunt for a delectable comfort food that will elevate your appetizer game or serve as a mouthwatering snack, look no further than Cheesy Bacon Garlic Toast. This dish combines the rich, savory flavors of crispy bacon, gooey melted cheese, and aromatic garlic, all layered on top of perfectly toasted bread. Whether you’re hosting a gathering, enjoying a cozy night in, or looking for a quick bite, this recipe has you covered.
What truly sets Cheesy Bacon Garlic Toast apart is its incredible versatility. It can be served as a starter before a hearty meal, enjoyed as a quick afternoon snack, or even paired with a fresh salad for a delightful light dinner. The best part? This recipe is straightforward and quick to prepare, making it an excellent choice for cooks of all skill levels. With just a handful of ingredients and minimal prep time, you can whip up this crowd-pleaser in no time.
Understanding the Ingredients
To create the perfect Cheesy Bacon Garlic Toast, it’s essential to understand the role of each ingredient in this flavorful dish. Let’s dive into the key components that make this recipe truly irresistible.
Sourdough Bread
Sourdough bread serves as the foundation of this dish, and its unique texture and flavor profile are what make it an excellent choice. The crusty exterior provides a satisfying crunch, while the soft, chewy interior absorbs the garlic butter mixture beautifully. The slightly tangy flavor of sourdough complements the richness of the cheese and bacon, creating a balanced taste that keeps you coming back for more.
Mozzarella Cheese
Mozzarella cheese is the star of the show when it comes to the cheesy aspect of this toast. Known for its excellent melting properties, mozzarella adds a creamy texture that envelopes the other ingredients. As it melts in the oven, it becomes gooey and stretchy, making each bite indulgent. Additionally, its mild flavor allows the other components, such as garlic and bacon, to shine through without overpowering the dish.
Bacon
Bacon adds a smoky, salty flavor that is hard to resist. When cooked to perfection, it becomes crispy, providing a delightful crunch that contrasts with the soft texture of the bread and cheese. The savory essence of bacon enhances the overall dish, making it even more satisfying. Whether you choose thick-cut or standard bacon, this ingredient will undoubtedly elevate your Cheesy Bacon Garlic Toast.
Garlic
Garlic is a key player in this recipe, contributing its aromatic qualities and distinct flavor. When combined with butter, garlic infuses the toast with a rich, savory essence that tantalizes the taste buds. Furthermore, garlic is celebrated for its numerous health benefits, including boosting the immune system and promoting heart health. Its pungent aroma while baking is sure to make your kitchen smell inviting.
Butter and Olive Oil
The combination of butter and olive oil serves as the base for the garlic mixture. Butter adds a rich, creamy texture, while olive oil provides a healthy fat source that helps to enhance flavors. This mixture creates a luscious garlic butter that is easily spreadable and ensures that the toast becomes perfectly golden and crispy in the oven.
Red Pepper Flakes
For those who enjoy a little heat, red pepper flakes are an optional addition that can spice things up. A sprinkle of these flakes will add a subtle kick to your Cheesy Bacon Garlic Toast, creating a delightful contrast to the creamy cheese and savory bacon. Adjust the amount to suit your personal preference, and feel free to skip this ingredient if you prefer a milder flavor.
Parmesan Cheese
Adding grated Parmesan cheese to the mix introduces an additional layer of depth to the flavor profile. Its nutty, salty characteristics complement the mozzarella and bacon, enhancing the overall richness of the dish. Parmesan cheese also crisps up beautifully in the oven, contributing to a golden-brown topping that is both visually appealing and delicious.
Fresh Parsley
Lastly, fresh parsley serves as both a garnish and a flavor enhancer. Chopped parsley adds a pop of color to the finished dish, making it visually striking. Its fresh, slightly peppery taste brightens the flavors of the toast, making each bite refreshing. Additionally, parsley is packed with vitamins and antioxidants, making it a nutritious addition to your meal.
Preparation Steps
Now that we’ve explored the key ingredients that come together to create Cheesy Bacon Garlic Toast, let’s walk through the preparation steps to ensure your dish turns out perfectly.
Step 1: Preheating the Oven
Before you begin assembling your toast, it’s crucial to preheat your oven to 400°F (200°C). Preheating ensures that your garlic toast will bake evenly and achieve that ideal crispy texture. It also helps the cheese melt perfectly, allowing it to become bubbly and golden without overcooking the bread.
Step 2: Making Garlic Butter
The next step is to prepare the garlic butter mixture that will spread generously on your bread. In a medium bowl, combine softened butter with a drizzle of olive oil. Add minced garlic to the mixture—fresh garlic cloves minced finely will provide the best flavor. If you like a little heat, don’t forget to add a pinch of red pepper flakes at this stage. Use a fork to mix everything together until smooth and well combined. This garlic butter will not only flavor the bread but also keep it moist during baking.
Step 3: Preparing the Bread
Once your garlic butter is ready, it’s time to prepare the sourdough bread. Slice the bread into thick slices, approximately 1 inch in thickness, to ensure a hearty base for your toppings. Using a butter knife, spread the garlic butter mixture evenly over each piece of bread. Make sure to cover the entire surface for the best flavor and texture.
After applying the garlic butter, it’s time to layer on the toppings. Sprinkle a generous amount of shredded mozzarella cheese over each slice, ensuring even coverage. Then, add the crispy bacon pieces, distributing them evenly for a perfect balance of flavors. Finally, top with grated Parmesan cheese to enhance the taste further.
With your ingredients layered on the bread, your Cheesy Bacon Garlic Toast is almost ready to be baked. Place the prepared slices on a baking sheet lined with parchment paper for easy cleanup. Once the oven has reached the desired temperature, it’s time to bake!
By understanding the ingredients and following these preparation steps, you’re well on your way to creating a delicious dish that will impress family and friends. Stay tuned for the next part of this article, where we’ll delve into the baking process and some helpful tips to ensure your Cheesy Bacon Garlic Toast turns out perfectly every time.

Layering Cheese and Bacon
Achieving the perfect melt and flavor distribution in your Cheesy Bacon Garlic Toast begins with how you layer your ingredients. Start by spreading a generous amount of garlic butter on each slice of bread. This not only adds flavor but also creates a barrier that prevents the bread from becoming too soggy during baking.
Next, sprinkle a thin layer of cheese on top of the buttered bread. Opt for a mix of cheeses like mozzarella and cheddar for that gooey texture and sharp flavor. Mozzarella melts beautifully, while cheddar adds a tangy richness. For the bacon, use cooked and crumbled strips evenly distributed over the cheese. This ensures that every bite has a perfect balance of cheesy goodness and savory bacon crunch.
To finish, add another layer of cheese on top of the bacon. This top layer will create a golden crust that seals in the flavors and provides a satisfying bite. For the best melt, consider placing the cheese under the broiler for the last few minutes of baking—this will give you a bubbly, golden finish that’s hard to resist.
Final Touches with Parmesan
After you’ve layered your toast with cheese and bacon, a sprinkle of grated Parmesan cheese is the final touch that elevates the dish. Parmesan cheese has a nutty flavor that complements the richness of the other ingredients, adding depth to each bite. Its ability to brown beautifully in the oven creates an appealing contrast to the softer cheeses underneath.
Sprinkle Parmesan generously over the top layer of cheese just before baking. As it melts and browns, it will form a delicious crust that adds both texture and flavor. This finishing touch transforms your Cheesy Bacon Garlic Toast from simply good to utterly irresistible.
Baking: Ideal Time and Visual Cues for Doneness
Baking your Cheesy Bacon Garlic Toast to perfection requires attention to time and visual cues. Preheat your oven to 375°F (190°C) and bake the toast for about 15-20 minutes. However, the exact time can vary depending on your oven and the thickness of your bread.
As your toast bakes, keep an eye on it. You want to look for a few key indicators: the cheese should be bubbly and golden brown, while the edges of the bread should be crisp and slightly toasted. If you find that the top is browning too quickly but the cheese isn’t fully melted, consider covering it loosely with aluminum foil to prevent burning, allowing the cheese to catch up.
Baking Techniques for Perfect Toast
When it comes to baking techniques, understanding your oven settings can significantly affect your results. Conventional ovens bake with heat from the top and bottom, which is ideal for evenly cooking your toast. However, if you have a convection oven, the fan circulates hot air, leading to quicker cooking times and potentially crispier edges. In this case, reduce the baking time by about 5 minutes to avoid overcooking.
Regardless of your oven type, it’s important to monitor the toast closely. Ovens can vary in efficiency, so familiarizing yourself with how yours behaves can help you adjust baking times accordingly. If you find that your toast often burns or takes longer to cook, make notes and adapt your process for future batches.
Serving Suggestions
Cheesy Bacon Garlic Toast is a versatile dish that pairs well with a variety of dips and sides. For a refreshing contrast, consider serving it with a simple green salad dressed in a light vinaigrette. The acidity of the dressing will balance the richness of the toast beautifully.
Dips can also enhance your dining experience. A creamy ranch dressing, spicy sriracha mayo, or even a tangy garlic aioli would make excellent accompaniments. If you’re looking to add some zest, a homemade salsa or pico de gallo can provide a fresh burst of flavor.
When it comes to beverages, consider serving your toast with a crisp white wine, such as Sauvignon Blanc, which can cut through the richness of the cheese and bacon. For a non-alcoholic option, a sparkling water with a slice of lemon or lime can refresh the palate.
Presentation plays a crucial role in how your toast is perceived. Serve your Cheesy Bacon Garlic Toast on a wooden cutting board or a stylish platter, garnished with fresh herbs like parsley or chives for a pop of color. A light drizzle of balsamic glaze or a sprinkle of chili flakes can also add visual appeal and an extra layer of flavor.
Nutritional Aspects
While Cheesy Bacon Garlic Toast is undeniably indulgent, it does offer some nutritional benefits. Cheese is a good source of calcium and protein, while bacon provides essential fats and can be part of a balanced diet when consumed in moderation. The garlic used in the butter not only enhances flavor but also offers health benefits, including potential anti-inflammatory properties.
However, it’s important to be mindful of portion sizes. This dish is rich, so a serving of one or two slices can fit well within a broader diet. Pairing it with lighter sides, as mentioned earlier, can create a more balanced meal.
Variations and Substitutions
For those with dietary restrictions or preferences, there are plenty of variations and substitutions to consider. For a gluten-free option, simply use gluten-free bread, which has become widely available and can work just as well. If you’re looking to make this recipe vegan, swap the regular cheese for a plant-based alternative and use vegan butter for the garlic spread.
Experimenting with different types of cheese can also yield delicious results. Try adding pepper jack for some heat, or goat cheese for a tangy twist. You can also incorporate vegetables like sautéed mushrooms, spinach, or roasted red peppers for added flavor and nutrition.
Conclusion
Making and savoring Cheesy Bacon Garlic Toast is not only a delightful culinary experience but also an opportunity to express creativity in the kitchen. With its irresistible blend of flavors and textures, this toast can be enjoyed as a snack, appetizer, or even a main dish.
We encourage you to try the recipe and let your imagination run wild—add your favorite ingredients, experiment with different cheeses, or discover new dips that complement the dish. The versatility of Cheesy Bacon Garlic Toast makes it suitable for various dining occasions, from casual family meals to gatherings with friends.
In the end, this cheesy, savory delight promises to satisfy your cravings while allowing you to put your personal touch on a beloved classic. Whether you follow the original recipe or make it your own, you’re sure to enjoy every delicious bite.


