Introduction
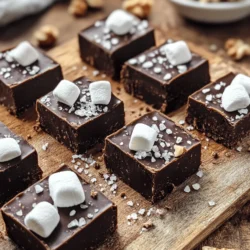
Chocolate lovers everywhere can agree on one thing: there’s something uniquely satisfying about a rich, velvety piece of dark chocolate fudge. This indulgent treat is not just a dessert; it’s an experience that melds the intense flavor of dark chocolate with a creamy, melt-in-your-mouth texture. Fudge, in all its forms, has long been a favorite for those with a sweet tooth, offering a balance of simplicity and decadence that few desserts can match.
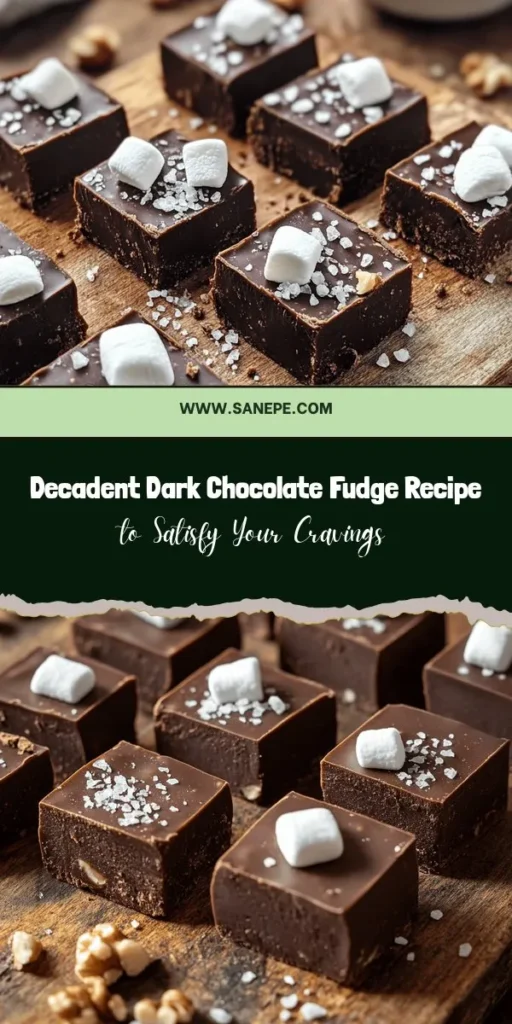
In this article, we will dive into the world of decadent dark chocolate fudge, a recipe that is both easy to prepare and deeply rewarding. With its rich flavors and the option for customization—be it with crunchy nuts or fluffy marshmallows—this fudge is sure to impress anyone lucky enough to receive a piece. Whether you’re looking to satisfy a craving or impress guests at a gathering, this fudge will not disappoint.
The Allure of Dark Chocolate
Dark chocolate has gained a reputation not only as a delicious treat but also as a healthier alternative to its milk chocolate counterpart. With a cocoa content of 70% or more, dark chocolate offers a robust flavor profile that can elevate any dessert. It’s rich in antioxidants, which are known to combat oxidative stress, and it may even contribute to improved heart health when consumed in moderation.
The complexity of dark chocolate allows it to harmonize beautifully with other ingredients, making it a perfect choice for fudge. Its bitterness balances the sweetness from the fudge base, resulting in a decadent dessert that feels indulgent without being overwhelmingly sweet. The deep, rich flavor of dark chocolate creates a sophisticated experience that can transform a simple treat into a gourmet delight.
The Perfect Fudge: A Brief History
Fudge has a storied history that dates back to the late 19th century in the United States. While the exact origins are somewhat murky, it is believed that fudge was discovered accidentally when a batch of caramel failed to set properly. Instead of discarding the mixture, someone decided to try it, and thus, fudge was born. Over time, it became a beloved confection that could be made in various flavors and textures, from creamy to chewy.
Different cultures have put their unique spin on fudge, with recipes evolving to include a variety of ingredients. Some traditional recipes incorporate nuts, while others may feature different types of chocolate or even spices. With the rise of gourmet food trends, dark chocolate fudge has gained popularity, celebrated for its rich flavor and the luxury it brings to the table.
Ingredients Breakdown
To create the perfect decadent dark chocolate fudge, it’s crucial to use high-quality ingredients. Here’s a breakdown of what you’ll need:
Dark Chocolate Chips
The star of this recipe is undoubtedly the dark chocolate chips. When selecting dark chocolate for your fudge, aim for chips that contain at least 70% cocoa. The higher cocoa content means more intense chocolate flavor and a richer, more complex finish. Quality dark chocolate chips will melt beautifully, ensuring a smooth and luscious texture for your fudge. Brands that use ethically sourced cocoa will not only enhance your fudge’s flavor but also contribute to sustainable practices in the chocolate industry.
Sweetened Condensed Milk
Sweetened condensed milk is a key ingredient that contributes to the creaminess and sweetness of the fudge. Unlike evaporated milk, which contains no added sugar, sweetened condensed milk is thick and syrupy, providing a luscious base that helps bind the ingredients together. The milk’s sweetness balances the bitterness of the dark chocolate, creating a harmonious blend that is both rich and satisfying.
Unsalted Butter
Using unsalted butter is essential for this recipe, as it allows for better control over the final flavor of your fudge. Unsalted butter provides a creamy richness without the added saltiness that can overpower the chocolate. It also plays a crucial role in the texture, helping to create a smooth and velvety finish that is characteristic of high-quality fudge.
Vanilla Extract and Sea Salt
Vanilla extract enhances the overall flavor of your fudge, offering a warm, comforting note that complements the richness of the dark chocolate. A splash of vanilla adds depth, elevating the taste experience. On the other hand, a pinch of sea salt plays a critical role in balancing sweetness and highlighting the complex flavors of the chocolate. Salt can make all the difference, transforming your fudge from merely sweet to a sophisticated treat.
Optional Ingredients: Nuts and Marshmallows
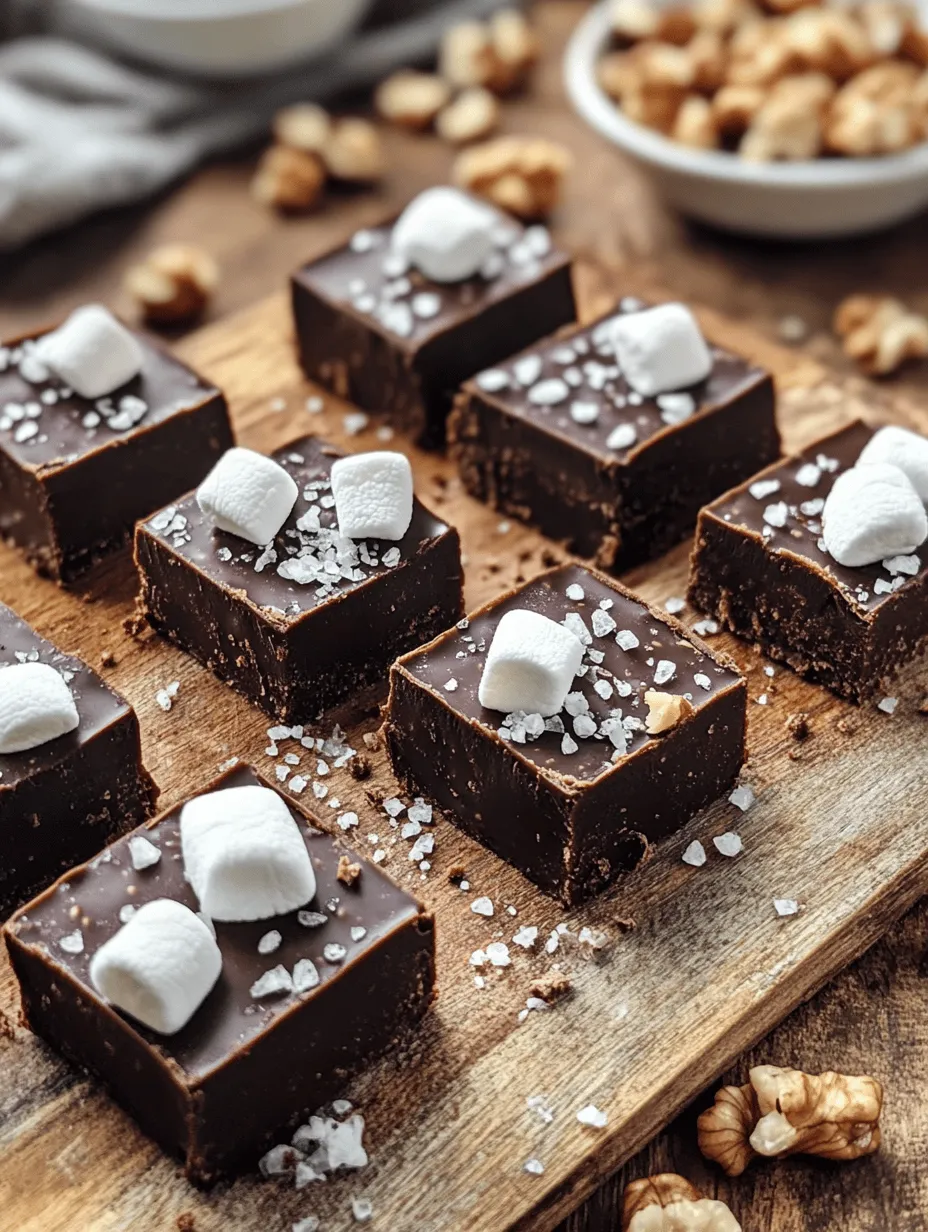
For those looking to add a touch of personalization to their fudge, consider incorporating optional ingredients like nuts and marshmallows. Chopped walnuts or pecans can provide a delightful crunch, adding texture and depth to each bite. Their earthy flavors complement the chocolate, making for a more nuanced experience.
Alternatively, mini marshmallows can introduce a chewy, sweet element that contrasts beautifully against the rich fudge. Whether you choose to include one or both of these optional ingredients, they will enhance the overall experience of your decadent dark chocolate fudge.
Step-by-Step Instructions
Now that we’ve covered the essential ingredients and their significance, let’s dive into the step-by-step instructions on how to prepare this decadent dark chocolate fudge. Preparing fudge is straightforward, but attention to detail will ensure you achieve the perfect texture and flavor.
1. Gather Your Ingredients: Before you start, ensure all your ingredients are measured and ready to go. This will streamline the process and help you avoid any last-minute scrambling.
2. Melt the Chocolate: In a medium-sized saucepan, combine your dark chocolate chips and unsalted butter. Use a low heat setting to melt the chocolate and butter together, stirring constantly to prevent burning. You can also use a double boiler method if you prefer a gentler melting technique. The goal is to achieve a smooth, glossy mixture.
3. Add Sweetened Condensed Milk: Once the chocolate and butter are fully melted and combined, remove the saucepan from the heat. Gradually stir in the sweetened condensed milk, ensuring it is fully incorporated into the chocolate mixture. This step is crucial for achieving the desired creaminess.
4. Incorporate Vanilla and Salt: Add the vanilla extract and a pinch of sea salt to the mixture, stirring until fully blended. Taste the mixture to see if it needs a touch more salt, as this can vary depending on personal preference.
5. Customize with Nuts or Marshmallows: If you’re opting to include nuts or mini marshmallows, fold them into the chocolate mixture at this point. Ensure they are evenly distributed throughout the fudge for a consistent texture and flavor.
6. Pour and Set: Line an 8×8-inch square baking dish with parchment paper for easy removal. Pour the fudge mixture into the prepared dish, spreading it evenly with a spatula. For an added touch, sprinkle some extra chopped nuts or a few sea salt flakes on top for visual appeal.
7. Chill: Place the baking dish in the refrigerator and allow the fudge to chill for at least 2 hours, or until fully set. The longer it chills, the firmer the fudge will become, so feel free to leave it overnight if you can resist the temptation!
8. Cut and Serve: Once the fudge has set, remove it from the baking dish using the parchment paper. Cut it into squares or rectangles, depending on your preference, and serve. This fudge can be stored in an airtight container in the refrigerator for up to two weeks—if it lasts that long!
The process may seem simple, but the end result is a luxurious treat that is sure to impress. Whether enjoyed as an after-dinner indulgence or gifted to friends and family, this decadent dark chocolate fudge is a crowd-pleaser that embodies the essence of homemade love.
Stay tuned for the next part of this article, where we will explore tips for achieving the best results and answer some common questions about fudge-making.

Preparation of the Baking Pan
To ensure your Decadent Dark Chocolate Fudge comes out easily from the pan without any sticky residue, proper preparation of the baking pan is crucial. Start by selecting an 8×8-inch or 9×9-inch square baking pan, depending on how thick you want your fudge to be.
1. Cut Your Parchment Paper: Take a piece of parchment paper and cut it so that it is long enough to cover the bottom of the pan with some overhanging edges. Aim for at least an inch or two of overhang on each side. This will allow you to lift the fudge out of the pan easily once it’s set.
2. Grease the Pan: Lightly grease the bottom and sides of the baking pan with a small amount of butter or cooking spray. This step helps the parchment adhere to the pan and makes removal even easier.
3. Line the Pan: Place the cut parchment paper into the pan, pressing it down to conform to the corners and edges. Make sure the sides are also covered, and use the overhanging edges to facilitate easy removal later.
By following these steps, you’ll ensure a clean release of your fudge, resulting in beautiful squares perfect for serving.
Melting the Chocolate Mixture
Now it’s time to create that rich, creamy chocolate base for your fudge. Melting chocolate can be tricky, but with the right technique, you’ll achieve a smooth consistency without burning the chocolate.
1. Combine Ingredients: In a medium saucepan, combine the chocolate chips, sweetened condensed milk, and butter. Make sure to use high-quality chocolate chips for the best flavor.
2. Low Heat: Place the saucepan on the stove over low heat. It is vital to keep the heat low to prevent the chocolate from seizing or burning. Stir the mixture gently but continuously as it melts. This will help distribute the heat evenly and prevent any hot spots that could cause scorching.
3. Achieving the Right Consistency: Continue to cook and stir until the chocolate is completely melted and the mixture is smooth and glossy. If you notice any signs of overheating, such as the chocolate thickening or becoming grainy, remove the pan from the heat immediately and continue stirring until smooth.
This careful melting process is key to ensuring your fudge has a luxurious texture and rich flavor.
Incorporating Flavors
Once your chocolate mixture is melted and smooth, it’s time to enhance the flavors. Adding vanilla extract and sea salt after removing the mixture from heat is essential for balancing the sweetness and elevating the overall taste of the fudge.
1. Remove from Heat: Carefully take the saucepan off the heat.
2. Add Vanilla Extract: Stir in the vanilla extract. This ingredient adds a warm, aromatic note that complements the richness of the chocolate.
3. Incorporate Sea Salt: Next, add a sprinkle of sea salt. The salt will not only enhance the sweetness but also bring out the chocolate flavor, creating a well-rounded taste experience.
Mix these ingredients thoroughly until they are fully incorporated, ensuring every bite of fudge is packed with flavor.
Adding Optional Ingredients
For those who enjoy a bit of variety, incorporating optional ingredients can elevate your fudge even further. Nuts, marshmallows, or even dried fruit can add unique textures and flavors.
1. Choose Your Add-ins: Decide whether you want to include nuts (such as walnuts, pecans, or almonds) or mini marshmallows. You can also consider dried fruits like cranberries or cherries for a chewy contrast.
2. Fold Them In: Once the vanilla and salt are mixed in, gently fold in your chosen optional ingredients. Be careful not to overmix, as you want the nuts and marshmallows to be evenly distributed without breaking them down.
3. Texture and Flavor Enhancement: These additions not only enhance the taste but also add a delightful crunch or chewiness, making each bite more interesting.
Pouring and Setting the Fudge
With your chocolate mixture prepared and flavors enhanced, it’s time to pour it into the prepared baking pan.
1. Transfer the Mixture: Carefully pour the melted chocolate fudge mixture into the lined baking pan. Use a spatula to scrape the sides of the saucepan and ensure all the chocolate goes into the pan.
2. Smooth it Out: Use the spatula to spread the fudge evenly across the pan, smoothing the top. This step ensures that the fudge will set uniformly and look appealing when cut.
3. Cooling Process: Allow the fudge to cool at room temperature for about 30 minutes. This initial cooling helps it set slightly before refrigerating.
4. Refrigerate: After it has cooled, place the pan in the refrigerator for at least 2 hours, or until the fudge is completely set. The refrigeration helps solidify the fudge and intensifies its flavors.
Cutting and Serving
Once your fudge is set and ready to serve, it’s important to cut it properly to maintain an appealing presentation.
1. Remove from the Pan: Use the overhanging parchment paper to lift the fudge out of the pan gently. Place it on a cutting board.
2. Cut with Precision: Using a sharp knife, cut the fudge into squares. To achieve clean edges, you can warm the knife slightly in hot water and dry it before cutting. This technique helps prevent the fudge from sticking to the knife.
3. Serving Suggestions: Serve the fudge at room temperature for the best taste and texture. It pairs beautifully with a glass of cold milk, a scoop of vanilla ice cream, or even a strong cup of coffee. You can also garnish the fudge with a sprinkle of sea salt or additional nuts for an extra touch.
Nutritional Information
Understanding the nutritional content of your Decadent Dark Chocolate Fudge can help you enjoy it mindfully. Here’s an overview based on a standard serving size of approximately one square (about 1 inch):
– Calories: Approximately 120-150 calories
– Total Fat: 8-10 grams (depending on the butter and chocolate used)
– Sugars: 10-12 grams
– Protein: 1-2 grams
Keep in mind that portion sizes can significantly affect your overall caloric and nutritional intake. If you’re serving larger squares, be sure to adjust the nutritional estimates accordingly.
The Versatility of Fudge
One of the best aspects of a fudge recipe is its versatility. You can easily customize this Decadent Dark Chocolate Fudge to suit your taste preferences or dietary needs.
1. Different Nuts: Experiment with various nuts, such as hazelnuts, macadamia nuts, or peanuts, for a unique flavor profile.
2. Flavored Extracts: Besides vanilla extract, consider using almond, peppermint, or even orange extract to infuse the fudge with different flavors.
3. Additional Mix-ins: Try folding in other ingredients like dried fruits, coconut flakes, or even different types of chocolate (such as white chocolate or milk chocolate) for added sweetness.
These modifications can make each batch of fudge a new and exciting treat.
Storing Your Fudge
To keep your fudge fresh and delicious, proper storage is essential.
1. Room Temperature Storage: If you plan to consume the fudge within a week, you can store it at room temperature. Place the fudge in an airtight container lined with parchment paper to prevent sticking.
2. Refrigeration: For longer storage, keep the fudge in the refrigerator. This will help maintain its texture and prevent it from melting or becoming too soft. Ensure it’s in an airtight container to prevent it from absorbing any odors from the fridge.
3. Freezing: For even longer storage, you can freeze the fudge. Wrap individual squares tightly in plastic wrap and place them in a freezer-safe container. This method can keep the fudge fresh for up to three months. When you’re ready to enjoy, simply thaw at room temperature before serving.
Conclusion
Making Decadent Dark Chocolate Fudge at home is a straightforward process that results in a rich and indulgent treat. The combination of smooth chocolate, sweetened condensed milk, and buttery goodness creates a dessert that is sure to please any chocolate lover.
Not only is this fudge simple to prepare, but it also offers endless possibilities for customization. Whether you stick to the classic recipe or explore variations with nuts, extracts, and other mix-ins, the joy of indulging in a homemade fudge is undeniable.
We encourage you to try this recipe, experiment with different flavors, and enjoy the satisfaction of creating your very own fudge masterpiece. Celebrate the art of homemade treats and share them with family and friends for a delightful experience that is sure to impress.