Introduction
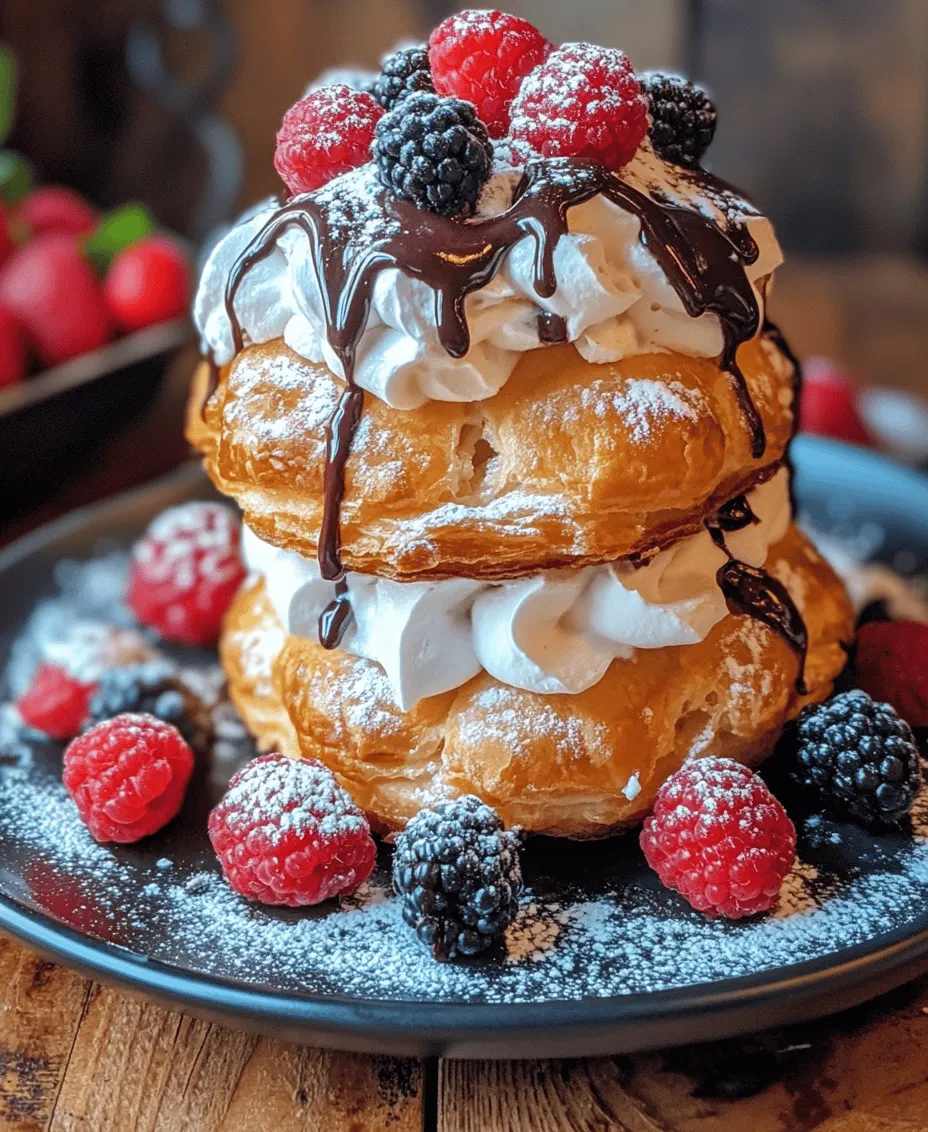
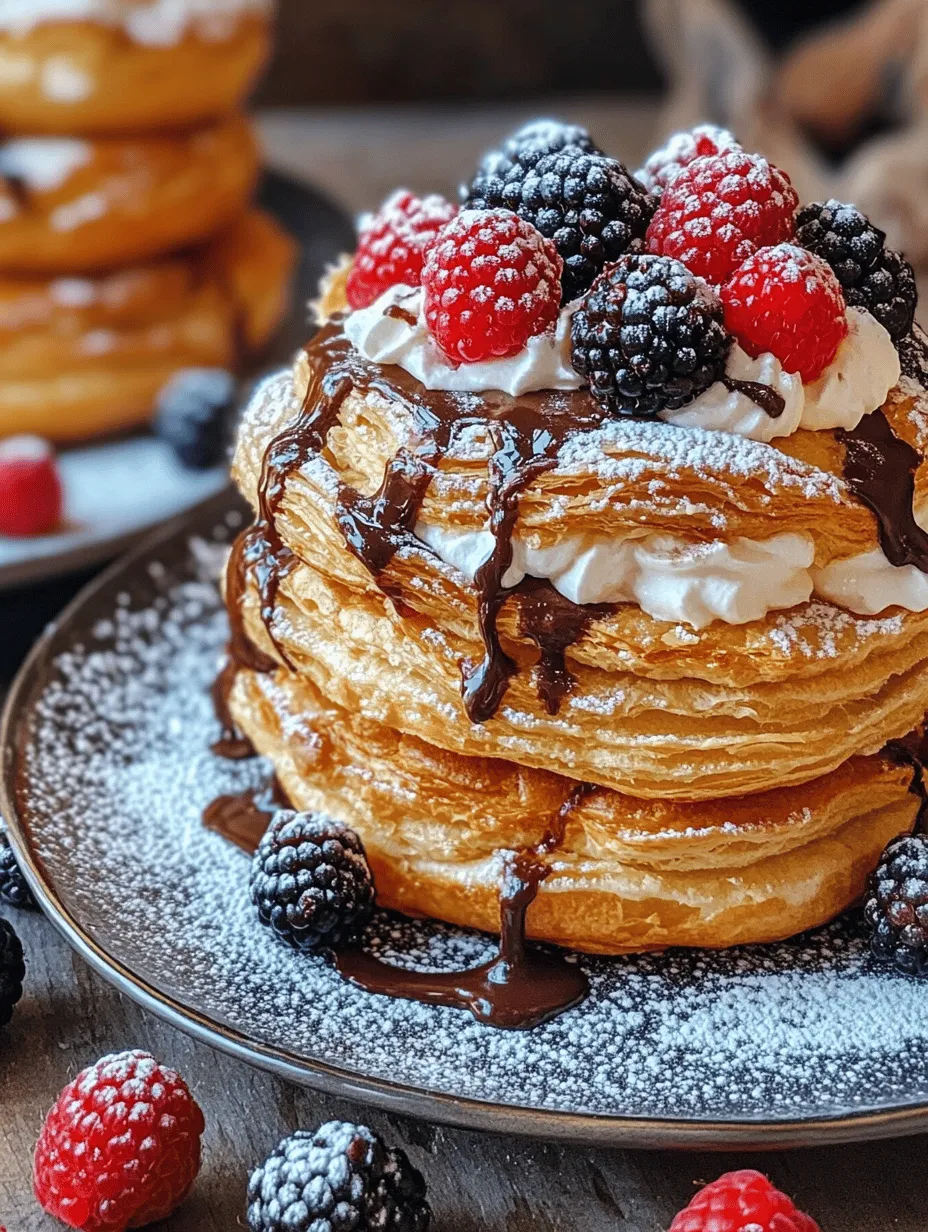
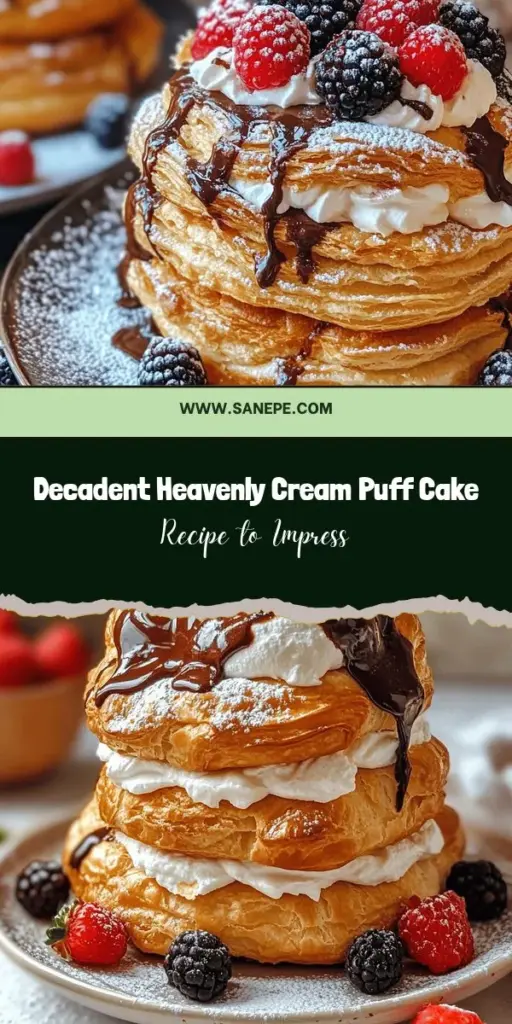
The Heavenly Cream Puff Cake is a delightful dessert that marries the ethereal lightness of choux pastry with a luscious cream filling and a decadent chocolate ganache. This cake isn’t just a treat for the taste buds; it’s a feast for the eyes as well, showcasing layers of airy puffs elegantly stacked and drizzled with rich chocolate. The combination of textures and flavors makes it a popular choice for celebrations and special occasions, leaving a lasting impression on anyone fortunate enough to indulge.
Cream puffs, also known as “profiteroles” in French cuisine, have a rich history that dates back centuries. Originating in France during the Renaissance, they have traveled across borders and cultures, becoming a beloved dessert in many parts of the world. In Italy, they are known as “bignè,” while in Japan, they are often filled with custard or sweetened cream, reflecting local tastes and preferences. The versatility of cream puffs is part of what makes them so appealing; they can be filled with a wide array of creams, custards, or even savory fillings.
In this article, we will explore the intricate process of creating a Heavenly Cream Puff Cake, focusing on the enchanting blend of airy choux pastry, rich cream filling, and luxurious chocolate ganache. Whether you are a seasoned baker or a novice looking to impress, this recipe offers a step-by-step guide to crafting this exquisite dessert.
Understanding Choux Pastry
Choux pastry, or pâte à choux, is a unique dough that is essential for creating light, airy pastries such as cream puffs, éclairs, and beignets. Unlike traditional pastry doughs that rely on fats and sugar to achieve flakiness, choux pastry is made by cooking flour with water and fat, then incorporating eggs to create a batter. When baked, the moisture in the dough turns to steam, causing the pastry to puff up and form a hollow center.
The characteristics of choux pastry are what make it so special. It should be light and airy, with a crisp outer shell that gives way to a soft interior. Achieving the perfect texture is crucial for creating a successful cream puff. The right balance of ingredients and technique will yield a pastry that is both satisfying to bite into and conducive to holding a generous amount of filling.
To ensure that your choux pastry turns out perfectly, consider these tips:
1. Measure Ingredients Accurately: Baking is a science, and precise measurements are essential. Use a kitchen scale for the most accurate results.
2. Cook the Dough Properly: When combining the butter, water, and flour, cook the mixture until it forms a cohesive ball that pulls away from the sides of the pan. This step is crucial for developing the right structure.
3. Incorporate Eggs Gradually: Add the eggs one at a time, mixing thoroughly after each addition. The batter should be smooth and glossy, with a consistency that allows it to hold its shape when piped.
4. Test for the Right Consistency: The choux pastry should be thick enough to hold its shape but not so stiff that it won’t puff up. A good test is to draw a figure-eight with the batter; it should hold its shape without breaking.
5. Proper Baking Temperature: Baking at the right temperature is vital for achieving a good rise. Make sure to preheat your oven adequately and avoid opening the door during the first 20 minutes of baking.
Ingredients Breakdown
Choux Pastry Ingredients
To create the heavenly choux pastry for our cream puff cake, we will need the following ingredients:
– Water: The primary role of water in choux pastry is to create steam during baking. This steam is what causes the pastry to puff up, creating the light texture characteristic of cream puffs.
– Unsalted Butter: Butter not only adds flavor but also contributes to the pastry’s flakiness and richness. Using unsalted butter allows for better control over the salt content in your recipe.
– All-Purpose Flour: This ingredient provides structure to the dough. It is essential for the pastry to achieve the right density and hold its shape during baking.
– Salt: Adding a pinch of salt enhances the overall flavor of the pastry, balancing the sweetness of the cream filling.
– Eggs: Eggs are the secret to achieving rise and richness in choux pastry. They provide moisture and fat, and when baked, they create steam that further contributes to the puffing action.
Cream Filling Ingredients
For the luxurious filling, we will use:
– Heavy Whipping Cream: This is the star of the filling. Heavy cream is essential for creating a light and airy texture that complements the crisp choux pastry. When whipped, it becomes fluffy and stable, perfect for filling our cream puffs.
– Powdered Sugar: This ingredient sweetens the cream without adding graininess. It dissolves easily in the whipped cream, resulting in a smooth and creamy filling.
– Vanilla Extract: A splash of vanilla extract adds depth of flavor, enhancing the overall taste of the cream filling.
Toppings
To finish off our Heavenly Cream Puff Cake, we will consider the following toppings:
– Chocolate Ganache: A rich chocolate ganache elevates the dessert, adding a glossy finish and an indulgent flavor. You can choose to make your own ganache or opt for store-bought to save time.
– Fresh Berries: Adding fresh berries not only brings a burst of color to the cake but also offers a refreshing contrast to the sweetness of the cream and chocolate.
– Additional Powdered Sugar: A light dusting of powdered sugar on top enhances the visual appeal and adds a touch of sweetness.
Step-by-Step Instructions to Create Heavenly Cream Puff Cake
Preheat the Oven
Before diving into the preparation of the choux pastry, it is crucial to preheat your oven to 425°F (220°C). The temperature is vital for the initial rise of the choux pastry, ensuring that the steam created during baking is trapped inside the pastry, leading to a perfect puff. Preheating also ensures that the oven environment is stable, allowing for even baking.
Making the Choux Pastry
Now that the oven is preheating, let’s start making the choux pastry. Follow these steps closely to create the perfect base for your Heavenly Cream Puff Cake:
1. Combine Water and Butter: In a medium saucepan, add the water and unsalted butter. Place the saucepan over medium heat and bring it to a gentle boil, allowing the butter to melt completely.
2. Add Flour and Salt: Once the mixture is boiling, remove the saucepan from the heat. Add the all-purpose flour and salt all at once, stirring vigorously with a wooden spoon until the mixture forms a smooth ball. It should pull away from the sides of the pan, indicating it has cooked sufficiently.
3. Cool the Mixture: Allow the dough to cool for about 5 minutes. This will help prevent the eggs from cooking when they are added.
4. Incorporate Eggs: After the dough has cooled slightly, add the eggs one at a time, mixing well after each addition. Use a hand mixer or stand mixer fitted with a paddle attachment for best results. The consistency should be smooth and glossy, allowing the batter to form a thick ribbon when dropped from a spoon.
5. Pipe the Pastry: Transfer the choux pastry into a piping bag fitted with a large round tip. Line a baking sheet with parchment paper. Pipe small mounds of dough, about 1.5 inches apart, onto the prepared baking sheet. You can also use a spoon to drop the batter if you don’t have a piping bag.
6. Bake the Pastry: Place the baking sheet in the preheated oven and bake for 20-25 minutes, or until the pastries are golden brown and puffed up. Avoid opening the oven door during the first 20 minutes to ensure they rise properly.
7. Cool the Pastry: Once baked, remove the pastries from the oven and allow them to cool on a wire rack. Make a small slit in the side of each puff to allow steam to escape, preventing them from becoming soggy.
With the choux pastry prepared and cooled, you will be ready to fill them with the creamy filling and assemble your Heavenly Cream Puff Cake. Stay tuned for the next part of this recipe, where we will dive into creating the delicious cream filling and assembling the cake!

Detailed Steps for Making Heavenly Cream Puff Cake
Boiling the Water and Butter
To begin crafting your Heavenly Cream Puff Cake, start by boiling the water and butter together in a medium saucepan. Use 1 cup of water and ½ cup of unsalted butter. Bring the mixture to a rolling boil over medium heat. It’s essential that the butter completely melts and combines with the water before proceeding to the next step. Once it reaches a boil, remove the saucepan from heat.
Forming the Dough
Next, you will add 1 cup of all-purpose flour to the hot mixture all at once. Stir vigorously with a wooden spoon or spatula until the dough pulls away from the sides of the pan and forms a cohesive ball. This process is crucial as it helps to develop the structure of the dough. The steam created from the boiling water and butter will help the pastries rise when baked. Once the dough forms, allow it to cool slightly—just until it’s warm to the touch—before adding the eggs.
Mixing and Incorporating Eggs for Smoothness
Incorporating eggs into the dough is a critical step for achieving that light and airy texture typical of cream puffs. Begin by adding 4 large eggs, one at a time. After adding each egg, mix thoroughly until the egg is completely absorbed into the dough before adding the next. This step is vital for ensuring a smooth and silky batter. The mixture should become glossy and slightly thicker as you add the eggs. If you find it challenging to incorporate the eggs, you can use a hand mixer on low speed for a minute or two to help combine everything smoothly.
Piping the Pastry
Techniques for Piping Uniform Circles
Once your dough is ready, it’s time to pipe it onto your baking sheets. Line two baking sheets with parchment paper to prevent sticking. Transfer the dough into a piping bag fitted with a large round tip (about 1/2 inch in diameter). To create uniform circles, hold the piping bag vertically above the baking sheet and apply steady pressure while moving your hand in a circular motion. Release pressure and lift straight up to form a peak. Aim for circles about 2 inches wide, spacing them 2 inches apart to allow for expansion during baking.
Importance of Spacing for Even Baking
Proper spacing is crucial for even baking. If the pastries are too close together, they may merge during baking, leading to uneven shapes. Additionally, leaving sufficient space allows hot air to circulate around each puff, ensuring they bake thoroughly and rise properly.
Baking Process
Key Indicators for Doneness
Preheat your oven to 400°F (200°C) and bake the cream puffs for about 20-25 minutes, or until they are golden brown and puffed up. Keep an eye on them during the last few minutes of baking; they should be well-risen and have a crisp outer shell. Avoid opening the oven door while baking, as this can cause the pastries to deflate.
Techniques for Cooling Down the Pastries Correctly
Once baked, remove the cream puffs from the oven and immediately pierce the bottom of each puff with a toothpick or knife to allow steam to escape. This step prevents the insides from becoming soggy. Transfer them to a wire rack to cool completely. Cooling thoroughly is essential before filling them with cream to maintain the structural integrity of the pastries.
Preparing the Cream Filling
Step-by-Step Instructions on Whipping Cream
While the pastries cool, prepare the cream filling. In a mixing bowl, combine 1 cup of heavy whipping cream with 1/4 cup of powdered sugar and 1 teaspoon of pure vanilla extract. Using an electric mixer, whip the cream on medium speed until soft peaks form. This should take about 3-5 minutes. Be careful not to overwhip the cream, as it can turn grainy and butter-like.
Importance of Adding Powdered Sugar and Vanilla Gradually
Adding the powdered sugar and vanilla gradually is crucial because it allows for an even distribution of sweetness and flavor without overwhelming the cream’s texture. If you add them all at once, it may take longer to incorporate and can lead to lumps in your filling.
Assembling the Cake
Instructions for Cutting and Filling the Cream Puffs
Once your cream puffs have cooled completely, it’s time to fill them. Using a sharp knife, cut a small slit in the side or bottom of each cream puff. This opening should be just large enough to insert a piping tip. Using a piping bag fitted with a small round tip, fill each puff with the whipped cream until you see it bulging slightly. Be gentle to avoid tearing the delicate pastry shell.
Techniques for Presenting the Cake Attractively
To assemble your Heavenly Cream Puff Cake, stack the filled cream puffs in a circular or pyramid shape on a serving platter. This presentation not only looks impressive but also makes it easy for guests to serve themselves. Consider placing a larger puff at the top for an added touch of elegance.
Drizzling and Garnishing
How to Apply Chocolate Ganache for an Elegant Finish
For an elegant finish, prepare a chocolate ganache by heating 1 cup of heavy cream until just simmering and pouring it over 8 ounces of semi-sweet chocolate, chopped into small pieces. Let it sit for a few minutes, then stir until smooth. Allow the ganache to cool slightly before drizzling it over the assembled cream puff cake. A fork or a squeeze bottle can be used for precise drizzling, creating beautiful patterns that enhance the cake’s appearance.
Creative Ideas for Garnishing with Fresh Berries and Powdered Sugar
For an added touch, garnish the cake with fresh berries like strawberries or raspberries, which pair beautifully with the cream and chocolate. A light dusting of powdered sugar over the top adds a lovely finish. You can also consider using mint leaves for a pop of color and freshness.
Serving Suggestions
Best Practices for Serving the Heavenly Cream Puff Cake
When serving your Heavenly Cream Puff Cake, slice through the layers carefully to maintain the delicate structure. Each slice should reveal the creamy filling and the elegant presentation. This dessert is perfect for special occasions, gatherings, or simply a delightful treat at home.
Storage Tips to Maintain Freshness
To maintain the freshness of your cream puff cake, store it in the refrigerator, covered loosely with plastic wrap or foil. It’s best enjoyed within 1-2 days of assembly, as the pastry may begin to soften over time. If you need to prepare in advance, consider making the cream puffs and filling separately, then assemble them just before serving.
The Joy of Making Cream Puff Cake
Baking has a unique way of bringing people together, and making a Heavenly Cream Puff Cake is no exception. The process of creating this beautiful dessert offers a sense of accomplishment that is both fulfilling and enjoyable. Whether you are baking for a loved one or hosting a gathering, the smiles and compliments that follow your efforts are truly rewarding.
This recipe also allows for personalization—experiment with different fillings such as custard, flavored whipped cream, or even fruit preserves. Toppings can be adapted to suit your preferences; consider using caramel or colorful sprinkles to add a festive touch. The possibilities are endless, making each creation unique to you.
Conclusion
In summary, creating a Heavenly Cream Puff Cake from scratch is a delightful experience that combines artistry and culinary skills. From the fragrant aroma of baked pastries to the rich, smooth cream filling, every step is a joy to behold. This classic dessert not only pleases the palate but also provides a satisfying sense of achievement when shared with family and friends.
As you embark on your baking journey, I encourage you to try this recipe and allow it to inspire you. The Heavenly Cream Puff Cake is more than just a dessert; it’s a way to express love and creativity in your kitchen. Enjoy the process, share your creations, and let the joy of baking fill your home.


