Introduction
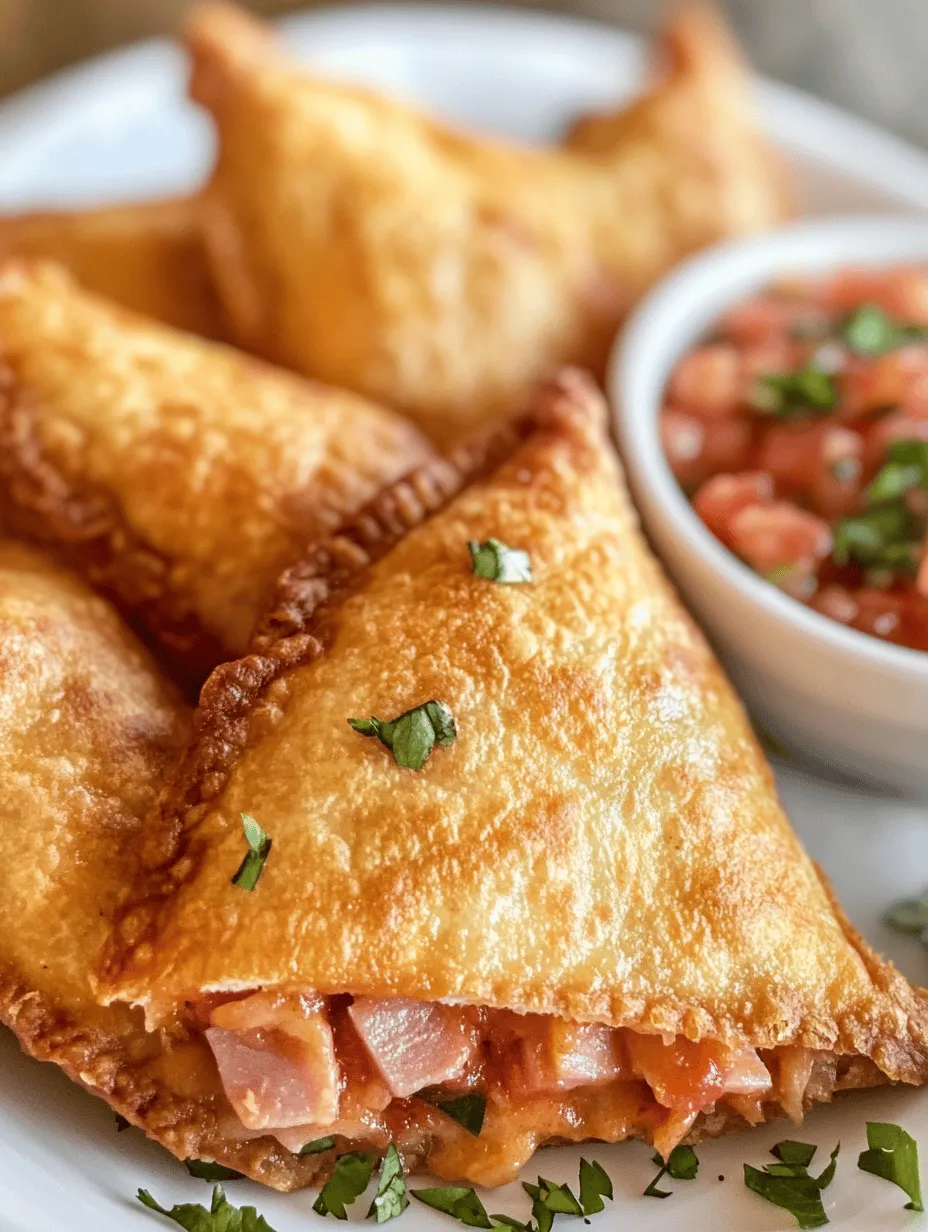
In the fast-paced world we live in, quick and satisfying meal options are a necessity. Tortilla pockets have gained immense popularity as a go-to choice for busy individuals and families alike. They embody the perfect blend of convenience and taste, making them ideal for lunch, dinner, or even a snack on the go. Among the myriad of fillings one can choose, the combination of toasted ham and cheese stands out as a classic favorite. The savory flavor of ham paired with the gooey richness of melted cheese creates a mouthwatering experience that is hard to resist.
This toasted ham and cheese tortilla pocket recipe is not only simple to prepare but also incredibly versatile. You can customize it to suit your taste preferences or dietary needs, whether you’re looking for a hearty meal or a light snack. Let’s delve into the ingredients that make this dish not just delicious but also nutritious, and explore how to prepare these delightful pockets with ease.
Understanding the Ingredients
Overview of Key Ingredients and Their Roles in the Recipe
To create the perfect toasted ham and cheese tortilla pockets, you need a selection of key ingredients, each playing a crucial role in the overall flavor and texture of the dish. Let’s take a closer look at what you’ll need:
Flour Tortillas: Best Types for Making Pockets and Alternatives
Flour tortillas serve as the foundation for these tasty pockets. They provide a soft, pliable base that holds the filling while toasting beautifully. When selecting tortillas, opt for medium-sized ones (about 8-10 inches in diameter) for easy handling.
Best Types of Flour Tortillas:
– Regular Flour Tortillas: Soft and versatile, these are the most common type and work perfectly for this recipe.
– Whole Wheat Tortillas: A healthier alternative, whole wheat tortillas add a nutty flavor and extra fiber.
– Gluten-Free Tortillas: For those with gluten sensitivities, there are many brands available that offer gluten-free options made from rice or corn.
Sliced Ham: Discussing Different Types of Ham and Their Flavor Profiles
The star of this recipe is undoubtedly the sliced ham. It adds a savory depth to the pockets, complementing the cheese beautifully. When it comes to choosing ham, you have several options, each contributing its unique flavor profile.
Types of Ham:
– Honey Ham: Sweet and slightly smoky, honey ham elevates the flavor of the pockets.
– Smoked Ham: Infused with a rich, smoky essence, this type of ham adds a robust taste.
– Black Forest Ham: With its mild flavor and slightly sweet undertones, this German-style ham is a delicious choice.
– Spicy Ham: If you crave a kick, spicy varieties can add a zesty element to your tortilla pockets.
Cheddar Cheese: Various Cheese Options and Their Impact on Taste and Texture
Cheddar cheese is the classic choice for this recipe, known for its sharp, creamy flavor that melts beautifully. However, you can experiment with different types of cheese to achieve distinct flavors and textures.
Cheese Options:
– Sharp Cheddar: Provides a bold taste and melts well.
– Monterey Jack: Creamy and mild, it adds a smooth texture.
– Swiss Cheese: With its nutty flavor and holes, Swiss cheese offers a unique twist.
– Pepper Jack: For those who enjoy a bit of heat, pepper jack cheese infuses a spicy kick.
Cream Cheese and Dijon Mustard: Exploring Their Contribution to Creaminess and Zest
To bring the pockets together, we’ll incorporate cream cheese and a touch of Dijon mustard. Cream cheese adds a rich, creamy texture, making each bite indulgent. Meanwhile, Dijon mustard introduces a delightful tang that elevates the overall flavor profile.
The Benefits:
– Cream Cheese: Softens as it melts, creating a luscious filling.
– Dijon Mustard: Adds a hint of zest, balancing the richness of the cheese and ham.
Fresh Spinach: Nutritional Benefits and Optional Use
For a boost of nutrition and a pop of color, consider adding fresh spinach. This leafy green is packed with vitamins and minerals, making your tortilla pockets healthier. Plus, it adds a subtle earthiness that complements the other ingredients.
Nutritional Benefits of Spinach:
– Rich in vitamins A, C, and K.
– Contains iron and calcium.
– Provides dietary fiber.
Butter vs. Olive Oil: Pros and Cons for Grilling
When it comes to grilling your tortilla pockets, the choice of fat can influence the flavor and texture. Both butter and olive oil can be used, each offering unique benefits.
Butter:
– Pros: Adds a rich, creamy flavor and helps achieve a golden-brown crust.
– Cons: Has a lower smoke point, which can lead to burning if not monitored closely.
Olive Oil:
– Pros: Offers a heart-healthy option with a higher smoke point, making it less likely to burn.
– Cons: May impart a more pronounced flavor that could overpower the other ingredients.
Choosing between butter and olive oil depends on your flavor preference and cooking method, but both will yield delicious results.
Preparation Steps for the Perfect Tortilla Pockets
Now that we’ve covered the essential ingredients, let’s dive into the preparation steps to create these mouthwatering toasted ham and cheese tortilla pockets.
Preparing the Cream Cheese Filling
The first step in making your tortilla pockets is preparing the cream cheese filling. This mixture will serve as the glue that holds all the delicious ingredients together, providing a creamy texture that enhances the overall experience.
1. Soften the Cream Cheese
To achieve a smooth and spreadable filling, it’s crucial to soften the cream cheese before mixing. You can do this by leaving it at room temperature for about 30 minutes or quickly softening it in the microwave. If using the microwave, heat it in 10-second intervals, ensuring not to melt it completely.
2. Mix the Ingredients
Once the cream cheese is softened, transfer it to a mixing bowl. Add a dollop of Dijon mustard, and mix thoroughly until well combined. The goal is to create a smooth mixture that is easy to spread. If you want to add some extra flavor, consider incorporating a pinch of garlic powder, onion powder, or even some chopped herbs.
Assembling the Tortilla Pockets
With the filling ready, it’s time to assemble your tortilla pockets. Follow these step-by-step instructions to ensure a well-balanced and evenly distributed filling.
Step 1: Lay Out the Tortilla
Start with a clean, flat surface and place a flour tortilla on it. Ensure it’s large enough to hold the filling without overflowing.
Step 2: Spread the Cream Cheese Mixture
Using a spatula or the back of a spoon, spread a generous layer of the cream cheese mixture over half of the tortilla, leaving about a half-inch border around the edges. This will help prevent the filling from spilling out when you fold the tortilla.
Step 3: Layer the Ham and Cheese
Next, layer slices of ham over the cream cheese, ensuring even coverage. Follow with a generous sprinkle of shredded cheddar cheese (or your cheese of choice). If you’re adding fresh spinach, now is the time to place a few leaves on top of the cheese, adding both nutrition and color.
Step 4: Fold the Tortilla
Now it’s time to create your pocket. Carefully fold the tortilla over the filling, creating a half-moon shape. Make sure to press down gently to seal the edges. For added security, you can use a bit of the cream cheese mixture to help stick the edges together.
Folding Techniques
The folding technique is vital to ensuring your pockets are secure and won’t spill during grilling. Here’s how to achieve a perfect seal:
1. Press to Seal
Once the tortilla is folded, gently press the edges together to ensure they stick. You can also use a fork to crimp the edges, creating a decorative pattern while also sealing the pocket.
2. Optional: Brush with Butter or Oil
Before grilling, consider brushing the outside of the pocket with melted butter or olive oil. This will help achieve that golden-brown crust you desire, adding flavor and texture.
With your tortilla pockets assembled and ready to go, you’re just a few steps away from enjoying this delicious meal. In the next section, we’ll explore how to grill these pockets to perfection, ensuring they’re crispy on the outside and warm and gooey on the inside. Stay tuned for the next part of this delectable journey!

Toasted Ham & Cheese Tortilla Pockets
Toasting Your Tortilla Pockets
To achieve the ultimate toasted ham and cheese tortilla pockets, the toasting process is crucial. Here are some important considerations to ensure your pockets are perfectly crispy, golden-brown, and oozing with melted cheese.
Importance of Using a Non-Stick Skillet
A non-stick skillet is a game-changer when it comes to toasting your tortilla pockets. It prevents the tortillas from sticking, allowing for easy flipping and minimal cleanup. Non-stick surfaces also help to ensure that you achieve an even toast without burning the tortillas, which can be a common issue if you’re using regular cookware.
Recommended Cookware for Even Cooking
While a non-stick skillet is ideal, consider using cast-iron or stainless-steel cookware as well. Cast-iron skillets retain heat exceptionally well, providing an even cooking surface that can give your tortilla pockets a perfect golden crust. If you choose to use stainless steel, ensure that you adequately preheat the skillet and use a bit of oil or butter to create a non-stick effect.
Tips for Achieving the Perfect Toast
1. Temperature Control: Medium heat is your best friend. It allows the tortilla to toast evenly without burning. If you notice the tortilla browning too quickly, lower the heat to ensure the cheese has enough time to melt.
2. Timing: Toast each side for about 2-3 minutes. Keep an eye on the color; the goal is a beautifully golden-brown exterior.
3. Checking for Ideal Cheese Melt: To check if the cheese is melting without burning the tortilla, gently lift one corner of the pocket with a spatula. If the cheese is visibly gooey and stretching, it’s time to flip. If it’s still firm, give it another minute.
Alternative Cooking Methods
If you’re looking to switch things up, there are alternative methods to toast your tortilla pockets:
– Grilling: Preheat your grill and place the assembled tortilla pockets directly on the grill grates. Grill for about 3-4 minutes on each side, or until the tortillas are crisp and the cheese is melted.
– Baking: Preheat your oven to 375°F (190°C). Place the tortilla pockets on a baking sheet lined with parchment paper. Bake for about 10-12 minutes, flipping halfway through, until crispy and golden.
– Air Frying: For a healthier twist, air fry your tortilla pockets. Set your air fryer to 375°F (190°C) and cook for about 8-10 minutes, flipping halfway through for even crispiness.
Serving Suggestions
Presentation plays a vital role in enhancing the dining experience. Here are some ideas to make your toasted ham and cheese tortilla pockets even more appealing.
Presentation Ideas for an Appealing Serving
When serving your tortilla pockets, consider cutting them into halves or quarters. This makes them easier to handle for guests and allows the gooey cheese to spill out, showcasing the delicious filling. Arrange the pockets on a platter with a colorful garnish, such as fresh herbs or sliced avocado, to elevate the visual appeal.
Pairing Options
To complement the rich flavors of your tortilla pockets, consider serving them with a variety of dips and sides:
– Dips: Salsa, guacamole, or a zesty hot sauce can add a refreshing kick. Creamy ranch or sour cream also pairs well, balancing the savory flavors.
– Side Dishes: Enhance your meal with fresh salads or a light soup. A simple mixed greens salad dressed with vinaigrette adds a refreshing contrast, while a creamy tomato soup provides a comforting side.
Nutritional Information
Understanding the nutritional profile of your toasted ham and cheese tortilla pockets can help you enjoy them guilt-free. Below is a breakdown of the average nutritional values per serving:
– Calories: Approximately 300-350 calories
– Protein: 15-20 grams
– Fat: 15-20 grams
– Carbohydrates: 30-35 grams
Discussion on Nutritional Benefits of the Ingredients Used
The main ingredients in this recipe offer various nutritional benefits. Tortillas made from whole grains provide fiber, which aids digestion. Ham is a good source of protein and essential vitamins, while cheese adds calcium and fat, which can help keep you satiated.
For those looking for alternatives, consider the following variations:
– Vegetarian: Substitute ham with grilled vegetables, mushrooms, or beans to create a filling vegetarian option.
– Gluten-Free: Use gluten-free tortillas to accommodate dietary restrictions without sacrificing flavor.
Conclusion
Toasted ham and cheese tortilla pockets are a delightful and easy-to-make dish that brings warmth and comfort to any meal. The simplicity of the recipe allows for countless variations, encouraging you to experiment with different fillings and flavors. Whether you choose to add spicy jalapeños, fresh spinach, or even a drizzle of pesto, the possibilities are endless.
Sharing these homemade tortilla pockets with family and friends is a joy that transcends the kitchen. They are perfect for casual gatherings, parties, or even a quick weeknight dinner. So gather your ingredients, fire up the skillet, and enjoy the satisfaction of creating a simple yet delicious meal that everyone will love.