Introduction
If you’ve ever found yourself torn between the rich, decadent indulgence of brownies and the comforting chewiness of cookies, you’re in for a treat. Enter Browkies—a delightful hybrid dessert that combines the best of both worlds. Browkies take the fudgy essence of brownies and the soft texture of cookies, merging them into one sensational treat that’s perfect for any occasion. Whether you’re hosting a gathering, celebrating a birthday, or simply satisfying a sweet tooth, these Browkies are a must-try dessert that will leave everyone coming back for more.
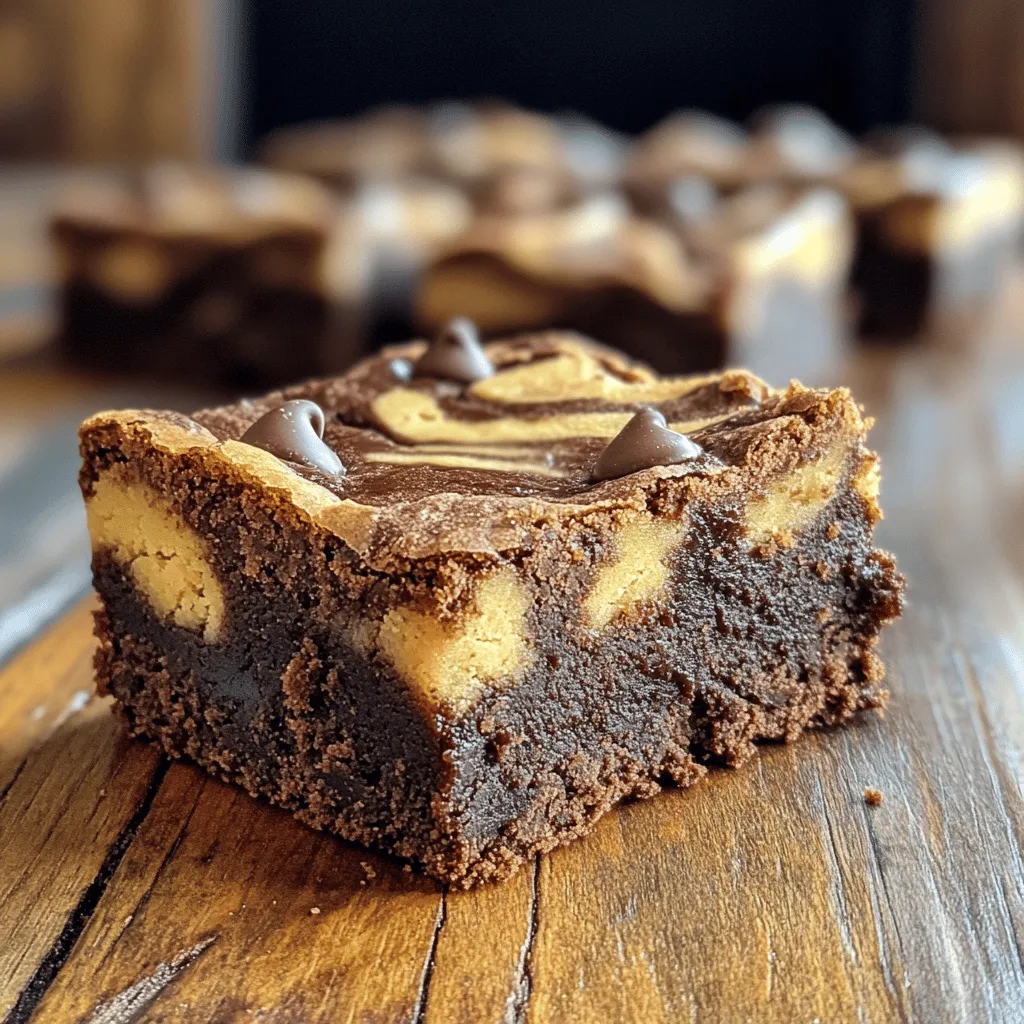
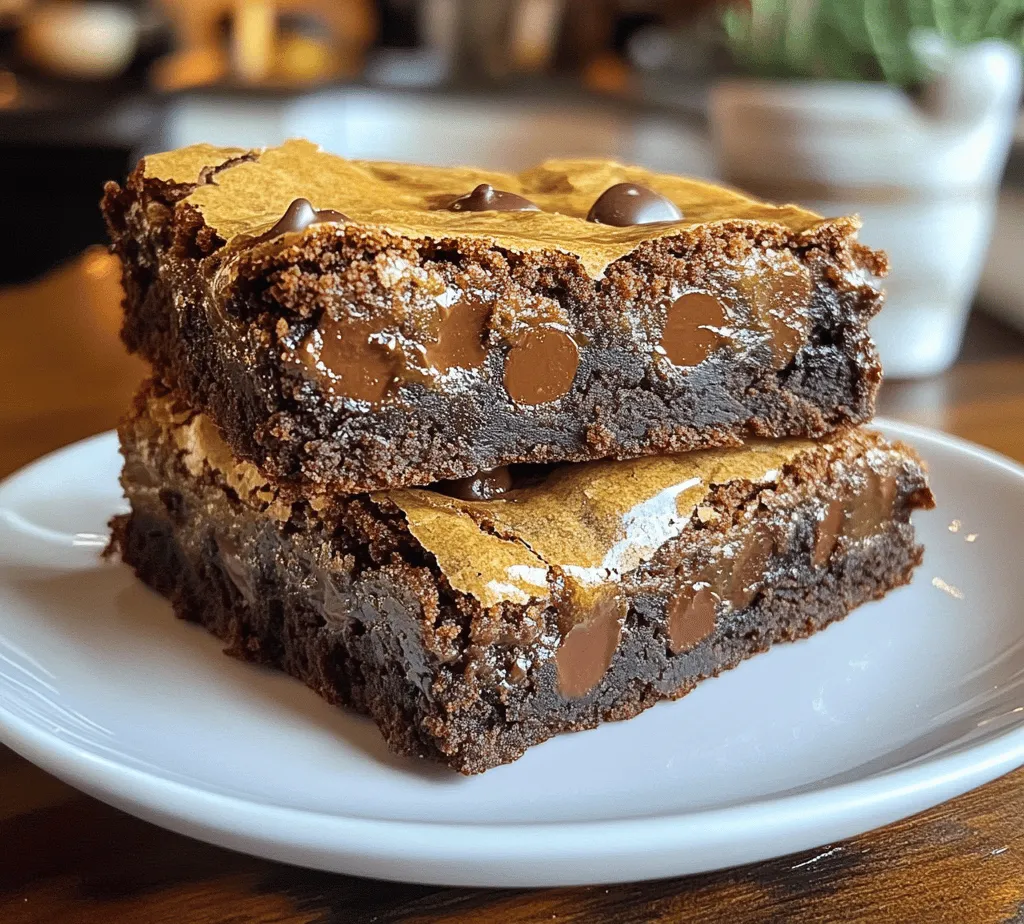
What makes these Browkies truly irresistible is their perfect balance of fudgy and chewy textures. The brownie layer boasts a dense, rich chocolate flavor, while the cookie layer adds a delightful chewiness that contrasts beautifully with the brownie base. Together, they create a symphony of flavors and textures that is not just delicious but also visually appealing. Imagine pulling a warm Browkie out of the oven, the gooey chocolate chips gleaming and the aroma wafting through your kitchen. It’s a dessert experience that is sure to impress.
Understanding the Browkie Concept
Browkies, as the name suggests, are a clever amalgamation of brownies and cookies. The concept is simple yet brilliant—why settle for one dessert when you can enjoy two at the same time? The origin of Browkies can be traced back to the innovative spirit of home bakers and professional pastry chefs who sought to create unique desserts that cater to diverse palates. In recent years, Browkies have gained immense popularity in modern baking culture, becoming a favorite among dessert enthusiasts and food bloggers alike.
Unlike traditional brownies, which are usually dense and fudgy, or cookies, which can vary in texture from chewy to crispy, Browkies offer a harmonious blend of both. This unique combination allows for endless variations, enabling bakers to experiment with flavors, mix-ins, and toppings. Whether you prefer a classic chocolate chip cookie topping or a more adventurous swirl of peanut butter, the Browkie concept provides a versatile canvas for your culinary creativity.
Ingredients Breakdown
To create the best fudgy chewy Browkies, it’s essential to understand the role that each ingredient plays in both the brownie and cookie layers. Let’s dive into the ingredients that make these Browkies stand out.
Brownie Layer Ingredients
1. Unsalted Butter: The foundation of any great brownie, butter adds richness and depth of flavor. It also contributes to the fudgy texture that Browkies are known for.
2. Granulated Sugar: This ingredient sweetens the brownie base and aids in achieving that desirable crackly top.
3. Brown Sugar: Adding brown sugar not only enhances sweetness but also introduces moisture and a hint of caramel flavor, essential for a chewy texture.
4. Cocoa Powder: Unsweetened cocoa powder is crucial for imparting the deep chocolate flavor that makes these Browkies so irresistible. It also affects the texture, making it fudgier.
5. Eggs: Eggs provide structure and stability to the brownie layer. They also contribute to the overall richness.
6. All-Purpose Flour: The right amount of flour balances the fudginess and ensures the Browkies don’t turn out too dense.
7. Chocolate Chips: Adding semi-sweet or dark chocolate chips not only enhances the chocolate flavor but also adds a delightful gooey texture when melted.
Cookie Layer Ingredients
1. All-Purpose Flour: Similar to the brownie layer, flour is essential for structure but should be measured carefully to maintain the cookie’s soft texture.
2. Granulated Sugar: This sugar helps create a crisp exterior while keeping the inside chewy.
3. Brown Sugar: Again, the addition of brown sugar enhances moisture and provides a rich flavor profile.
4. Unsalted Butter: Room temperature butter is necessary for creaming with sugars, which will create air pockets that lead to a soft and chewy cookie layer.
5. Egg: Just like in the brownie layer, eggs are important for binding and adding moisture.
6. Vanilla Extract: A splash of vanilla extract enhances the flavor of the cookie layer, making it more aromatic and delicious.
7. Baking Soda and Salt: These ingredients are vital for leavening and balancing flavors, ensuring your Browkies rise perfectly without overpowering sweetness.
Ingredient Substitutions
For those with dietary restrictions or preferences, there are plenty of substitutions you can make to customize your Browkies. If you’re looking for a dairy-free option, you can replace unsalted butter with coconut oil or a dairy-free butter alternative. For a gluten-free version, simply swap out the all-purpose flour with a gluten-free flour blend or almond flour. Additionally, you can use coconut sugar or maple syrup in place of granulated sugars for a healthier twist.
Step-by-Step Instructions for Making Browkies
Now that you’ve gathered all the necessary ingredients, it’s time to get baking! Follow these detailed steps to create the best fudgy chewy Browkies.
Preheating the Oven
Before you start mixing your ingredients, it’s crucial to preheat your oven to 350°F (175°C). Preheating ensures that your Browkies bake evenly and helps achieve that perfect texture. If you skip this step, you risk ending up with unevenly cooked treats.
Making the Brownie Layer
1. Melt the Butter: In a medium saucepan over low heat, melt the unsalted butter. Once melted, remove it from the heat and let it cool slightly.
2. Mix the Sugars: In a large mixing bowl, combine the granulated sugar and brown sugar with the melted butter. Whisk until the mixture is smooth and glossy.
3. Incorporate Eggs: Add in the eggs, one at a time, whisking well after each addition. This step is vital for incorporating air and ensuring a light texture.
4. Add Cocoa Powder: Sift in the unsweetened cocoa powder, mixing until fully incorporated. This step will prevent any lumps and ensure a smooth brownie base.
5. Fold in Flour: Gently fold in the all-purpose flour until just combined. Be careful not to over-mix, as this can lead to tough Browkies.
6. Chocolate Chips: Finally, fold in the chocolate chips, making sure they are evenly distributed throughout the brownie batter.
Making the Cookie Layer
1. Cream the Butter and Sugars: In a separate mixing bowl, cream together the room temperature unsalted butter with granulated sugar and brown sugar until light and fluffy. This should take about 2-3 minutes.
2. Add the Egg and Vanilla: Mix in the egg and vanilla extract until well combined.
3. Combine Dry Ingredients: In a separate bowl, whisk together the all-purpose flour, baking soda, and salt. Gradually add this mixture to the wet ingredients, mixing until combined.
4. Final Touch: Be sure not to over-mix the cookie batter; it should be thick and slightly sticky. You can add additional chocolate chips or nuts at this point if desired.
With both layers prepared, you’re now ready to assemble your Browkies and bake them to perfection. Stay tuned for the next steps, where we’ll discuss how to layer these decadent treats and the final baking instructions.
Tips for Creaming Butter and Sugars to Achieve a Light and Fluffy Texture
To kick off your Browkies recipe, one of the most crucial steps is creaming the butter and sugars. This process incorporates air into the mixture, resulting in a light and fluffy texture that will elevate your Browkies. Start with room temperature butter, as it’s easier to cream. If your butter is too cold, it will not aerate properly, leading to dense Browkies.
Using a stand mixer fitted with a paddle attachment or a hand mixer, beat the butter and sugars together at medium speed until the mixture is pale and fluffy, which typically takes about 2-3 minutes. You want to ensure that the sugars dissolve well into the butter; this is where the magic happens. If you notice any granules of sugar, continue mixing until they’re fully incorporated. This step is essential for achieving that desirable texture in your Browkies.
Importance of Not Overmixing the Dough
Once you’ve added the dry ingredients to your creamed butter and sugars, proceed with caution. Overmixing can lead to gluten development, resulting in tough Browkies instead of the chewy, fudgy consistency you’re after. Mix just until the flour is incorporated, and you see no more dry streaks. It’s perfectly fine if the dough looks a bit lumpy; this will contribute to the delightful texture of your Browkies.
Assembling the Browkies
Now that your dough is ready, it’s time to assemble your Browkies. Start by dividing the brownie batter and cookie dough into equal portions. Use a large spoon or cookie scoop for even distribution. Layer the brownie batter first into your greased baking pan, smoothing it out with a spatula to create an even base.
Next, scoop the cookie dough on top of the brownie layer. Instead of spreading it out completely, dollop the cookie dough in various spots over the brownie batter. This method allows for better marbling and creates those iconic swirls of chocolatey goodness that Browkies are known for.
Techniques for Achieving the Perfect Marbled Look
For that breathtaking marbled effect, use a knife or a skewer to gently swirl the two batters together. Be careful not to over-swirl, as you want distinct layers to form. A few elegant swirls will create a beautiful pattern without completely blending the two mixtures. The key is to create a balance—too much mixing will lose the definition of the brownie and cookie layers.
Tips for Layering to Ensure Proper Baking
To ensure your Browkies bake evenly, it’s important to layer the brownie and cookie dough in a way that promotes even heat distribution. Consider using a 9×13-inch baking pan for optimal results. When layering, make sure the brownie batter covers the bottom completely and is spread evenly. The cookie dough should be in dollops rather than spread out, as this allows it to bake through properly without burning.
Baking the Browkies
Preheat your oven to 350°F (175°C) before assembling your Browkies. Once your Browkies are layered in the pan, place them in the oven and bake for about 25-30 minutes. The baking time may vary based on your oven and the pan you use. If you’re using a glass baking dish, you may need to extend the baking time slightly.
Indicators of Doneness
When checking for doneness, look for a couple of telltale signs. The edges should appear set and slightly pulling away from the sides of the pan, while the center should still be slightly soft. A toothpick inserted into the center should come out with a few moist crumbs attached, but not wet batter. Remember, Browkies continue to cook after removing them from the oven due to residual heat, so it’s better to underbake slightly than overbake.
Importance of Cooling Time for Texture
After baking, allow your Browkies to cool in the pan for at least 10-15 minutes before slicing. This cooling period is essential as it helps the Browkies set and develop a chewy texture. If you slice them too early, they may crumble or fall apart. For the best results, consider transferring them to a wire rack to cool completely before cutting into squares.
Tips for Perfecting Your Browkies
Common Mistakes to Avoid When Baking Browkies
1. Overmixing the Dough: As previously mentioned, overmixing can ruin the texture. Mix just until combined.
2. Using Cold Ingredients: Ensure your butter and eggs are at room temperature to promote proper mixing and aeration.
3. Not Measuring Ingredients Accurately: Use a kitchen scale or proper measuring cups to ensure ingredient accuracy.
4. Skipping the Cooling Step: Patience is key! Allow your Browkies to cool adequately for the best texture.
How to Adjust Baking Time for Different Pan Sizes
If you opt for a smaller or larger pan, you will need to adjust the baking time accordingly. A smaller pan will require a shorter baking time, while a larger pan may require additional time. As a general rule, check for doneness 5-10 minutes earlier or later than the suggested time for a 9×13-inch pan.
Recommended Tools and Equipment for Ease of Preparation
– Stand Mixer or Hand Mixer: Essential for creaming butter and sugars.
– Rubber Spatula: Perfect for folding dough and scraping down the sides of your mixing bowl.
– 9×13-inch Baking Pan: Ideal for achieving the right thickness of Browkies.
– Parchment Paper: Line your baking pan for easy removal and cleanup.
– Wire Rack: Useful for cooling your Browkies evenly.
Serving Suggestions and Pairings
Browkies are delicious on their own, but they can be elevated even further with the right accompaniments. Here are some serving suggestions:
– With Ice Cream: A scoop of vanilla or chocolate ice cream on top of a warm Browkie is a classic indulgence. The melting ice cream contrasts beautifully with the fudgy texture of the Browkies.
– Whipped Cream: A dollop of freshly whipped cream can add a lightness that balances out the richness of the Browkies.
– Drizzle of Chocolate Sauce: For chocolate lovers, a warm drizzle of chocolate sauce or caramel can enhance the experience.
Beverage Pairings
To complement the rich flavors of your Browkies, consider serving them with:
– Coffee: The bitterness of coffee pairs perfectly with the sweetness of Browkies.
– Milk: A classic choice, the creaminess of milk balances the richness.
– Dessert Wine: A sweet dessert wine can enhance the overall flavor experience.
Storing and Reheating Browkies
To maintain the freshness and texture of your Browkies, proper storage is essential:
– Best Practices for Storing Browkies: Store cooled Browkies in an airtight container at room temperature for up to five days. If you want to keep them for a longer period, consider freezing them.
– Instructions for Reheating: To enjoy your Browkies warm, simply microwave them for about 10-15 seconds or place them in a preheated oven at 350°F (175°C) for 5-10 minutes. This will restore their fudgy texture and make them taste freshly baked.
Conclusion
The unique characteristics of Browkies—an irresistible blend of fudgy brownies and chewy cookies—make them a delightful treat for any occasion. With the perfect balance of rich chocolate and cookie dough, they are sure to please family and friends alike. We encourage you to try making this delicious recipe at home, whether for a special gathering or simply as a sweet indulgence.
Baking is not just about following a recipe; it’s about the joy of creating something delicious to share. Each time you whip up a batch of Browkies, you’re not only treating yourself but also spreading happiness to those around you. So gather your ingredients, roll up your sleeves, and enjoy the delightful experience of baking and sharing homemade desserts.
