Peachy Vanilla Bean Dream Ice Cream Recipe

WANT TO SAVE THIS RECIPE?

Introduction

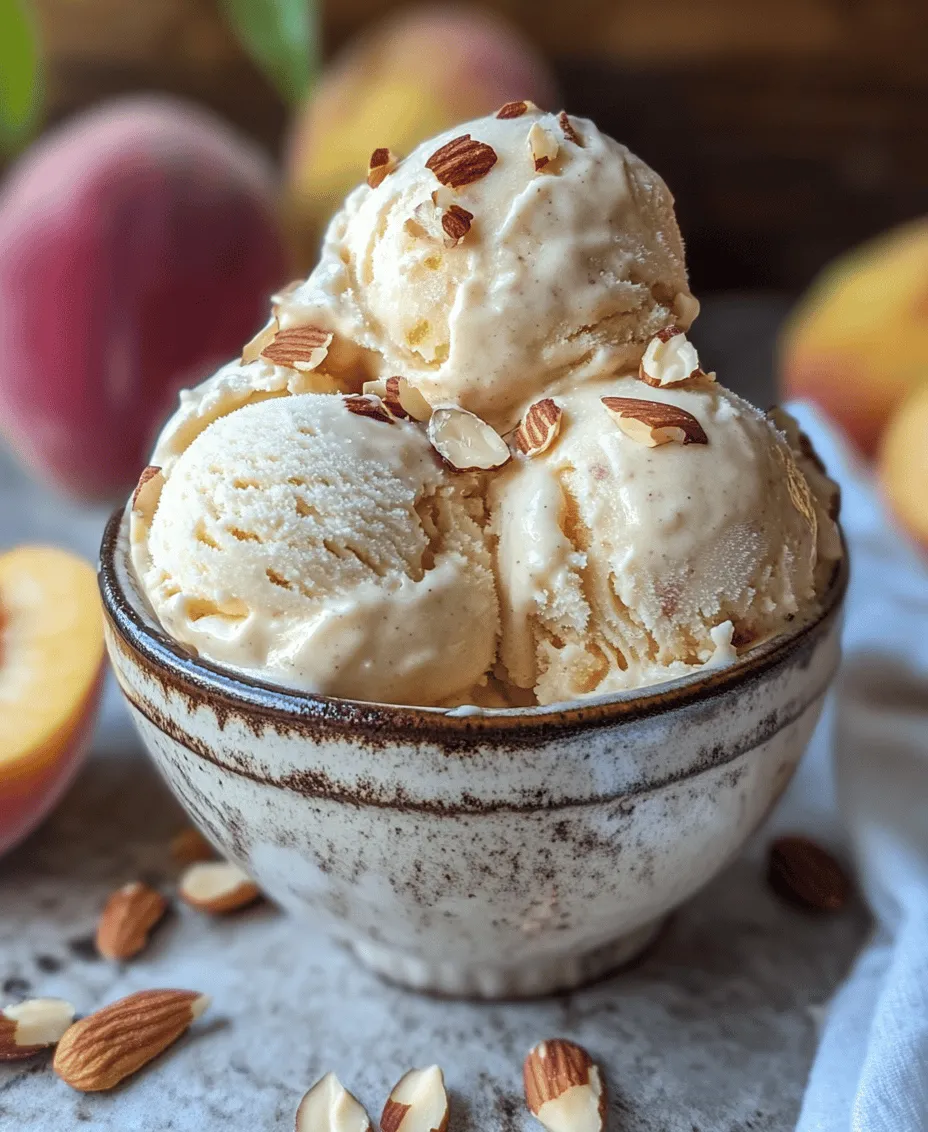
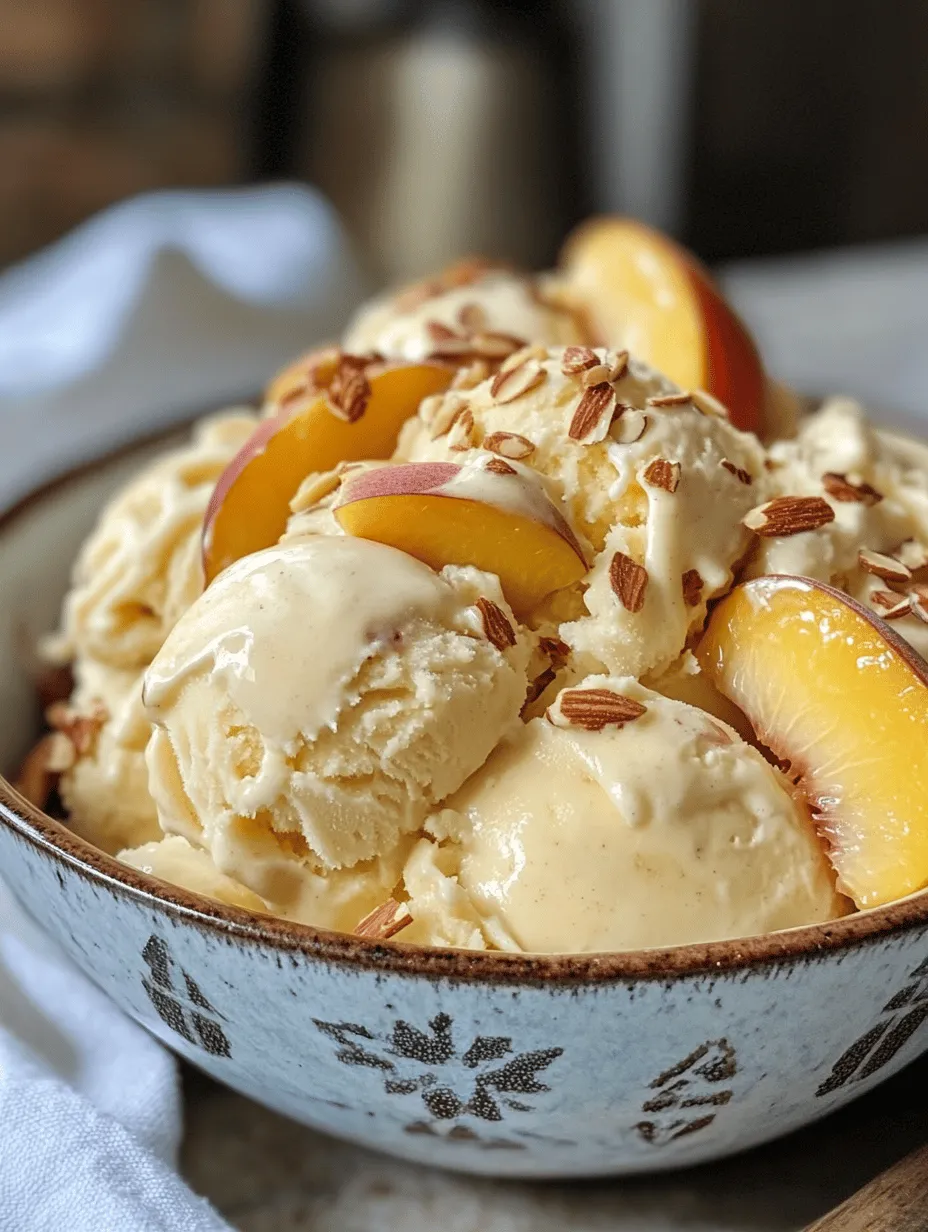
As the sun shines brighter and the temperatures rise, nothing beckons the spirit of summer quite like a scoop of homemade ice cream. The joy of crafting your own frozen treat not only allows you to experiment with flavors but also brings a sense of nostalgia and satisfaction that store-bought varieties often fail to deliver. Among the myriad of flavors available, the Peachy Vanilla Bean Dream Ice Cream stands out as a delightful celebration of summer’s bounty. This recipe captures the essence of ripe, juicy peaches harmoniously blended with the aromatic richness of vanilla bean, creating a flavor experience that is both refreshing and indulgent.

Imagine the bliss of biting into a creamy scoop of ice cream that bursts with the sweet, sun-kissed essence of fresh peaches. Each spoonful is a reminder of lazy summer afternoons spent basking in the warmth, where the lush sweetness of peaches takes center stage. The addition of vanilla bean elevates this ice cream from ordinary to extraordinary, imparting its unique fragrance that enhances the overall flavor profile.

Making ice cream from scratch may seem daunting, but it is surprisingly simple and rewarding. With just a handful of quality ingredients and a little patience, you can create a delectable dessert that rivals any gourmet ice cream shop. In this article, we will walk you through the process of making Peachy Vanilla Bean Dream Ice Cream, from understanding the ingredients to preparing this delightful treat. So, gather your ripe peaches, and let’s dive into the joy of homemade ice cream!

Understanding the Ingredients

To create the perfect Peachy Vanilla Bean Dream Ice Cream, it’s essential to understand the role each ingredient plays in the final product. Here’s a breakdown of the key components:

Fresh Peaches

At the heart of this recipe are the fresh peaches. Selecting ripe, juicy peaches is crucial for achieving the best flavor and texture. Ripe peaches are sweet, fragrant, and have a slightly soft texture, which makes them perfect for blending into ice cream. When choosing peaches, look for those that yield slightly to pressure and have a vibrant color. Fresh peaches not only contribute sweetness but also provide a natural creaminess that enhances the overall mouthfeel of the ice cream.

Granulated Sugar

Granulated sugar is a fundamental ingredient in ice cream-making. It not only sweetens the mixture but also helps to balance the natural acidity of the peaches. The sugar dissolves during the mixing process, ensuring an even distribution of sweetness throughout the ice cream. Additionally, sugar lowers the freezing point of the mixture, which is essential for achieving a smooth, scoopable texture.

Lemon Juice

While peaches are naturally sweet, a hint of acidity can significantly enhance their flavor. This is where lemon juice comes into play. A small amount of lemon juice helps to brighten the peach flavor and balances the sweetness brought by the sugar. It also adds a refreshing zing that makes each bite of ice cream more complex and enjoyable.

Heavy Cream and Whole Milk

The creaminess and richness of the ice cream come from a combination of heavy cream and whole milk. Heavy cream contributes a luxurious texture and a high fat content, which is essential for creating that smooth, velvety mouthfeel we all crave in ice cream. Whole milk adds additional creaminess while maintaining a lighter texture. Together, they create the perfect base for our Peachy Vanilla Bean Dream Ice Cream.

Vanilla Bean vs. Vanilla Extract

Vanilla is a key flavor in this recipe, and you have the option to use either vanilla bean or vanilla extract. Vanilla bean offers a more intense and complex flavor, with those recognizable little specks of black seeds adding both visual appeal and a burst of flavor. On the other hand, vanilla extract is a convenient alternative that still imparts a lovely vanilla essence. If you choose to go with vanilla extract, opt for a high-quality product for the best flavor outcome.

Salt

Though it may seem counterintuitive, adding a pinch of salt to your ice cream mixture enhances the sweetness and balances the flavors. Salt acts as a flavor enhancer, bringing out the natural notes in the peaches and vanilla. It’s a small but mighty ingredient that can make a significant difference in the final taste of your ice cream.

Almond Extract

While optional, almond extract can add an interesting depth to the flavor profile of your ice cream. Its nutty notes complement the sweetness of the peaches beautifully, creating a sophisticated taste that elevates the overall experience. If you’re a fan of almond flavor, consider incorporating it into your mixture for an extra layer of complexity.

Nuts for Topping

To add a delightful crunch and a contrasting flavor, consider topping your Peachy Vanilla Bean Dream Ice Cream with toasted nuts. Almonds or pecans work particularly well, providing a nutty richness that pairs wonderfully with the creamy texture of the ice cream. Toasting the nuts enhances their flavor, so be sure to take the time to prepare them properly before sprinkling them on top of your finished dessert.

Preparation Steps for Peachy Vanilla Bean Dream Ice Cream

Now that we’ve covered the ingredients, let’s dive into the step-by-step process for making your Peachy Vanilla Bean Dream Ice Cream.

Step 1: Combining Peaches with Sugar and Lemon Juice

To start, wash and slice your ripe peaches, removing the pits. Place the sliced peaches in a mixing bowl and sprinkle them with granulated sugar and a drizzle of fresh lemon juice. The sugar will draw out the natural juices from the peaches, creating a sweet syrup that will enhance the flavor and texture of the fruit. Allow this mixture to sit for about 30 minutes. During this time, the peaches will soften and infuse their sweetness into the syrup, making them even more flavorful.

Step 2: Mixing Cream, Milk, and Flavorings

In a separate bowl, combine heavy cream, whole milk, the vanilla bean (split and scraped), a pinch of salt, and almond extract (if using). Whisk the ingredients together until well combined, ensuring that the sugar dissolves completely. This step is essential as it creates the creamy base for your ice cream. If you’re using vanilla extract instead of the bean, add it to this mixture as well.

Step 3: Pureeing and Folding the Peach Mixture

Once the peaches have macerated, it’s time to puree them. Using a blender or food processor, blend the peaches until smooth, leaving some small chunks for added texture if desired. If you prefer a chunkier ice cream, you can reserve some peach slices to fold in later. After pureeing, gently fold the peach mixture into the cream and milk base, stirring until fully incorporated. This step blends the luscious peach flavor with the creamy base, creating a harmonious mixture that is ready for the next phase.

Step 4: Chilling the Mixture

For the best results, it’s crucial to chill your ice cream mixture before churning. Pour the combined mixture into a container and cover it with a lid or plastic wrap. Place it in the refrigerator for at least 2 hours or overnight if possible. Chilling the mixture ensures that it is cold enough to churn effectively, resulting in a smoother texture.

Step 5: Churning the Ice Cream

Once the mixture is thoroughly chilled, it’s time to churn! Pour the chilled mixture into your ice cream maker and churn according to the manufacturer’s instructions. The churning process incorporates air into the ice cream, making it light and fluffy. Typically, this will take about 20 to 30 minutes. Keep an eye on the consistency; you want it to be thick and creamy but not completely frozen yet.

Step 6: Freezing the Ice Cream

After churning, your ice cream will be soft-serve consistency. For a firmer texture, transfer the ice cream into an airtight container and place it in the freezer for at least 4 hours, or until it reaches your desired firmness. Freezing allows the flavors to meld and enhances the overall texture, ensuring it is scoopable and ready to serve.

By following these steps, you’ll be well on your way to enjoying your very own Peachy Vanilla Bean Dream Ice Cream, a delightful treat that embodies the essence of summer. The combination of fresh peaches and aromatic vanilla will surely delight your taste buds, making this homemade ice cream a must-try for any ice cream lover. Stay tuned for the next part, where we will explore some tips for achieving the best results and answer common questions about making this heavenly dessert.
As the sun shines brighter and the temperatures rise, nothing beckons the spirit of summer quite like a scoop of homemade ice cream. The joy of crafting your own frozen treat not only allows you to experiment with flavors but also brings a sense of nostalgia and satisfaction that store-bought varieties often fail to deliver. Among the myriad of flavors available, the <strong>Peachy Vanilla Bean Dream Ice Cream</strong> stands out as a delightful celebration of summer’s bounty. This recipe captures the essence of ripe, juicy peaches harmoniously blended with the aromatic richness of vanilla bean, creating a flavor experience that is both refreshing and indulgent.” /></p>
</p>
<h3>Serving Suggestions and Pairings</h3>
</p>
<p>When it comes to serving your Peachy Vanilla Bean Dream Ice Cream, the presentation and accompanying flavors can elevate the experience significantly. Here are some essential tips to ensure that each scoop is a delightful indulgence.</p>
</p>
<h4>Serving Temperature</h4>
</p>
<p>The texture of ice cream can greatly affect its taste. For the best flavor and mouthfeel, allow your ice cream to soften slightly before serving. This typically means letting it sit at room temperature for about 5 to 10 minutes. This brief time allows the ice cream to become creamy and easier to scoop while enhancing the flavors. The subtle vanilla notes and the sweetness of the peaches will shine through when served at the ideal temperature.</p>
</p>
<h4>Topping Ideas</h4>
</p>
<p>While your Peachy Vanilla Bean Dream Ice Cream is delicious on its own, toppings can introduce a new dimension of flavor and texture. Here are some creative topping ideas to consider:</p>
</p>
<p>– <strong>Fresh Fruit</strong>: Top your ice cream with slices of fresh peaches, strawberries, or raspberries for a refreshing contrast. The natural acidity of the berries complements the creamy sweetness of the ice cream nicely.</p>
<p>– <strong>Chocolate Sauce</strong>: A drizzle of rich chocolate sauce can bring a decadent touch to your dessert. The combination of vanilla, peach, and chocolate creates a harmonious blend of flavors.</p>
<p>– <strong>Caramel Sauce</strong>: A salted caramel drizzle can add an unexpected twist, enhancing the sweetness of the ice cream with a touch of savory.</p>
<p>– <strong>Granola or Crushed Cookies</strong>: For added crunch, sprinkle some granola or crushed cookies on top. This adds texture and makes for an enjoyable eating experience.</p>
<p>– <strong>Whipped Cream</strong>: A dollop of freshly whipped cream adds a lightness that pairs beautifully with the creamy ice cream.</p>
</p>
<h4>Pairing Beverages</h4>
</p>
<p>To complement your Peachy Vanilla Bean Dream Ice Cream, consider serving it with refreshing beverages:</p>
</p>
<p>– <strong>Iced Tea</strong>: A glass of sweetened iced tea, perhaps flavored with lemon or peach, can enhance the fruity notes of the ice cream.</p>
<p>– <strong>Sparkling Lemonade</strong>: The bubbly nature of sparkling lemonade provides a refreshing palate cleanser between bites, making it the perfect accompaniment on a hot day.</p>
<p>– <strong>Fruit-Infused Water</strong>: For a lighter option, serve your ice cream with a glass of fruit-infused water. The subtle flavors will not overpower the ice cream while keeping you hydrated.</p>
</p>
<h3>The Benefits of Making Ice Cream at Home</h3>
</p>
<p>Making ice cream at home is not just a delightful experience; it also comes with numerous advantages that make it worthwhile.</p>
</p>
<h4>Control Over Ingredients</h4>
</p>
<p>One of the most significant benefits of homemade ice cream is the ability to control what goes into it. By using fresh, natural ingredients, you can avoid preservatives and artificial flavors commonly found in store-bought varieties. This means you can enjoy a treat that is not only delicious but also healthier. You can select ripe peaches, organic dairy, and real vanilla beans, ensuring that your ice cream is made with the best ingredients possible.</p>
</p>
<h4>Customization</h4>
</p>
<p>Homemade ice cream allows for an incredible level of customization. If you have dietary restrictions or specific flavor preferences, you can easily adapt the recipe. For instance, if you’re dairy-free, you could substitute the cream and milk with coconut milk or almond milk. If you prefer a sweeter or less sweet version, you can adjust the sugar content to your liking. The possibilities are endless, allowing you to create an ice cream that perfectly suits your palate.</p>
</p>
<h4>Cost-effective</h4>
</p>
<p>While the initial investment in an ice cream maker may seem high, making ice cream at home is often much more economical than purchasing premium ice creams at the store. The cost of fresh ingredients, especially when using seasonal fruits, typically results in a more affordable treat. Additionally, you can produce larger batches of ice cream at a fraction of the cost, making it a budget-friendly option that doesn’t compromise on quality or flavor.</p>
</p>
<h3>Storing Your Homemade Ice Cream</h3>
</p>
<p>Proper storage is essential to maintain the quality and flavor of your homemade Peachy Vanilla Bean Dream Ice Cream. Here’s how to do it right:</p>
</p>
<h4>Container Choices</h4>
</p>
<p>When it comes to storing ice cream, the container you choose can impact its texture. Opt for an airtight container made of glass or plastic that is designed for freezing. Glass containers are excellent for maintaining temperature, while high-quality plastic containers can be easier to handle. Make sure the container is deep enough to hold your ice cream and has a tightly sealed lid to prevent air from entering.</p>
</p>
<h4>Avoiding Ice Crystals</h4>
</p>
<p>One of the most common issues with homemade ice cream is the formation of ice crystals, which can lead to a grainy texture. To minimize this, consider the following techniques:</p>
</p>
<p>– <strong>Covering the Surface</strong>: After making your ice cream, press a piece of parchment paper directly onto the surface of the ice cream before sealing the container. This step helps to minimize air exposure and reduces the chances of ice crystal formation.</p>
<p>– <strong>Keep it Cold</strong>: Store your ice cream in the coldest part of the freezer. Avoid leaving it out at room temperature for extended periods, as this can cause it to melt and then refreeze, leading to undesirable textures.</p>
<p>– <strong>Stirring Occasionally</strong>: If you’re not planning to consume the ice cream within a few days, consider stirring it every few hours during the first few hours of freezing. This practice helps to break up any crystals that may begin to form.</p>
</p>
<h3>Using Seasonal Fruits in Ice Cream Recipes</h3>
</p>
<p>The beauty of making ice cream at home is the ability to experiment with various fruits, especially seasonal ones. While peaches shine in this recipe, don’t hesitate to explore other fruity options.</p>
</p>
<h4>Other Fruit Combinations</h4>
</p>
<p>In addition to peaches, consider using:</p>
</p>
<p>– <strong>Berries</strong>: Strawberries, blueberries, or blackberries can be blended into the ice cream base for a vibrant, fruity flavor. Their natural acidity can balance the creaminess of the ice cream.</p>
<p>– <strong>Mangoes</strong>: Creamy mangoes add a tropical flair, making for a luscious, fruity ice cream that pairs beautifully with vanilla.</p>
<p>– <strong>Stone Fruits</strong>: Other stone fruits like apricots or nectarines can be used similarly to peaches, adding unique flavors and textures to your ice cream.</p>
</p>
<h4>Flavor Pairing Ideas</h4>
</p>
<p>Different fruits can create exciting combinations with base flavors. Here are some pairing ideas to inspire your next homemade ice cream adventure:</p>
</p>
<p>– <strong>Vanilla with Berries</strong>: The classic combination of vanilla and mixed berries offers a delightful contrast between sweet and tart flavors.</p>
<p>– <strong>Chocolate with Bananas</strong>: For a richer treat, try mixing chocolate ice cream with banana slices for a creamy, indulgent dessert.</p>
<p>– <strong>Nut Flavors with Stone Fruits</strong>: Almond or hazelnut flavors pair excellently with peaches and nectarines, adding a nutty richness to the ice cream.</p>
</p>
<h3>Conclusion</h3>
</p>
<p>Creating your Peachy Vanilla Bean Dream Ice Cream at home is a rewarding experience that combines the joy of cooking with the delight of enjoying a homemade treat. The harmony of fresh peaches, creamy vanilla, and your choice of toppings creates a dessert that is both indulgent and refreshing. By controlling the ingredients, customizing the flavors, and experimenting with seasonal fruits, you can craft a unique ice cream experience perfect for any occasion.</p>
</p>
<p>So, gather your ingredients, embrace the art of ice cream-making, and take pleasure in each scoop. Whether enjoyed on a hot summer day or as a sweet treat after dinner, your homemade Peachy Vanilla Bean Dream Ice Cream can create lasting memories for you and your loved ones with every delightful bite.</p>
</div>

As the sun shines brighter and the temperatures rise, nothing beckons the spirit of summer quite like a scoop of homemade ice cream. The joy of crafting your own frozen treat not only allows you to experiment with flavors but also brings a sense of nostalgia and satisfaction that store-bought varieties often fail to deliver. Among the myriad of flavors available, the Peachy Vanilla Bean Dream Ice Cream stands out as a delightful celebration of summer's bounty. This recipe captures the essence of ripe, juicy peaches harmoniously blended with the aromatic richness of vanilla bean, creating a flavor experience that is both refreshing and indulgent.

Peachy Vanilla Bean Dream Ice Cream Recipe – Creamy, Fruity, and Irresistible

Dive into summer with this delightful Peachy Vanilla Bean Dream Ice Cream recipe! Made with fresh, juicy peaches and aromatic vanilla bean, this homemade treat is simple to create and full of vibrant flavor. Perfect for sunny days, it brings nostalgia and satisfaction that store-bought ice creams can’t match. Try it with toppings like fresh fruit or nuts for a delicious twist. Enjoy the joy of making and indulging in your own creamy creation! #IceCream #HomemadeDessert #SummerTreats #PeachIceCream #VanillaBean #DessertLovers #FoodieFun

Ingredients
  

2 cups ripe peaches, peeled and diced

1 cup granulated sugar, divided

1 tablespoon lemon juice

1 ½ cups heavy cream

1 cup whole milk

1 vanilla bean, split and seeds scraped (or 1 tablespoon vanilla extract)

¼ teaspoon salt

1 teaspoon almond extract (optional)

½ cup chopped toasted almonds or pecans (for topping, optional)

Instructions
 

In a medium bowl, gently combine the diced peaches, ½ cup of granulated sugar, and lemon juice. Allow the mixture to sit for about 15-20 minutes until the peaches release their juices.

    Meanwhile, in a large mixing bowl, whisk together the heavy cream, whole milk, remaining ½ cup of sugar, vanilla bean seeds (and the pod, if using), salt, and almond extract until the sugar is fully dissolved.

      Once the peaches have released their juices, purée half of the peach mixture in a blender or food processor until smooth. Leave the other half in chunks. Fold the peach purée and the chunky peaches into the cream mixture, combining well.

        Cover the mixture and refrigerate it for at least 2 hours, or until chilled.

          Pour the mixture into your ice cream maker and churn according to the manufacturer's instructions until it reaches a soft-serve consistency, usually about 20-25 minutes.

            Transfer the ice cream to an airtight container, pressing plastic wrap directly against the surface to prevent ice crystals. Freeze for an additional 4 hours or until firm.

              Before serving, let the ice cream sit at room temperature for about 5-10 minutes to soften slightly. Scoop out servings and top with toasted almonds or pecans if desired.

                Prep Time: 30 mins | Total Time: 6 hours 30 mins (including chilling and freezing) | Servings: 6-8

                  WANT TO SAVE THIS RECIPE?

                  Leave a Comment

                  Recipe Rating