Introduction
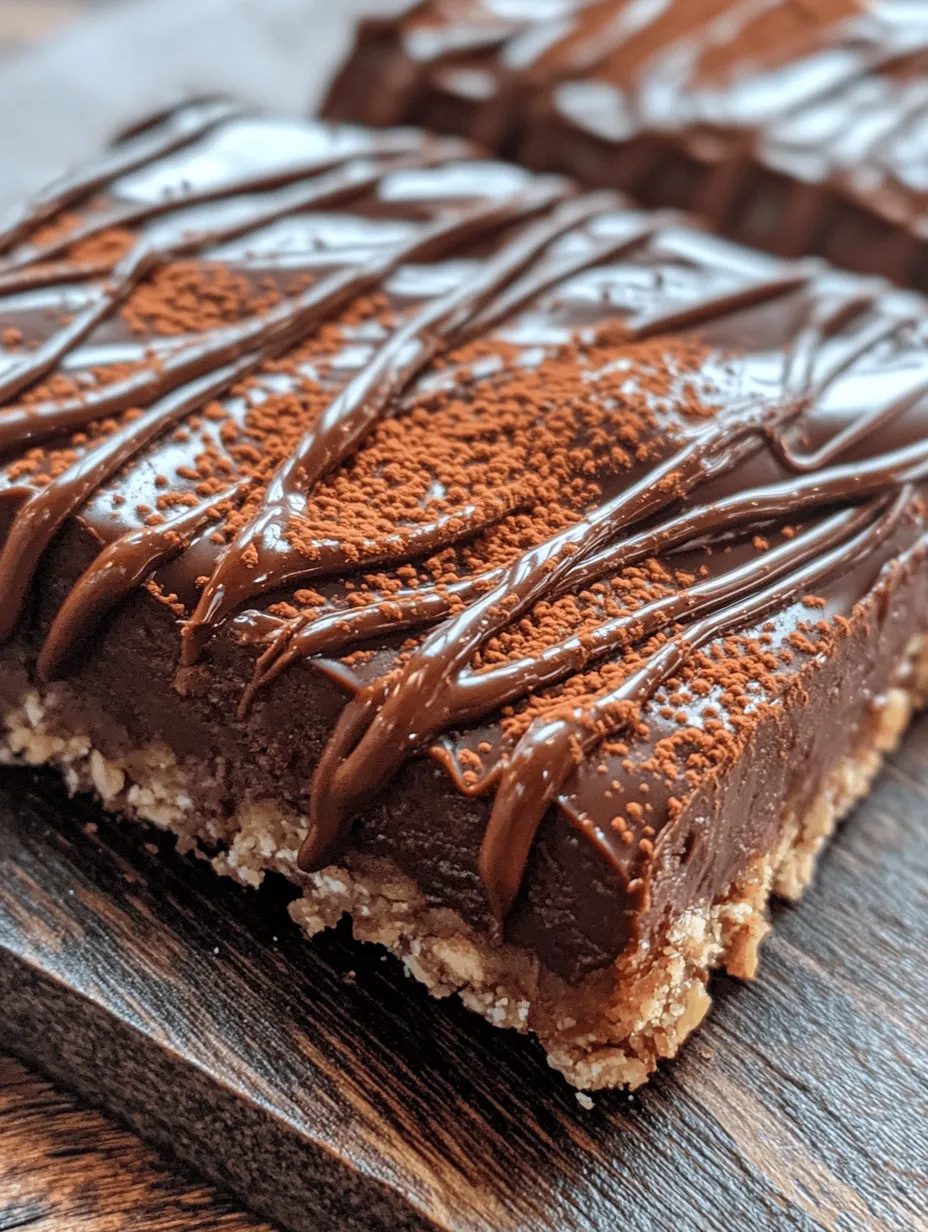
In recent years, no-bake desserts have surged in popularity among home cooks and dessert enthusiasts alike. The ease of preparation, minimal cooking time, and delectable results make them a go-to choice for quick treats. One flavor combination that has stood the test of time is chocolate and peanut butter—a pairing that tantalizes taste buds and satisfies cravings for something sweet and indulgent. Enter the No Bake Chocolate Peanut Butter Bars: an exquisite treat that combines these beloved flavors into a quick and satisfying dessert perfect for any occasion.
These bars are not only a delightful indulgence but also a flexible recipe that can adapt to various dietary preferences. Whether you are looking for a quick snack to enjoy with your afternoon coffee, a dessert to impress guests at a gathering, or a nutritious yet sweet treat for your kids, these No Bake Chocolate Peanut Butter Bars are sure to please. With just a handful of ingredients, you can whip up a batch in no time, making them an ideal solution for busy lifestyles.
Understanding the Ingredients
To create the perfect No Bake Chocolate Peanut Butter Bars, it’s essential to understand the key ingredients that contribute to their flavor and texture. Each component plays a vital role in making these bars delicious and satisfying.
Graham Cracker Crumbs
Graham cracker crumbs serve as the foundation for these bars, providing a delightful crunch and subtle sweetness. The texture they contribute is crucial, as it forms the sturdy base that holds everything together. The slight honey flavor of the graham crackers complements the richness of the chocolate and the creaminess of the peanut butter, creating a balanced base that enhances the entire dessert.
Rolled Oats
In addition to graham cracker crumbs, rolled oats are a crucial ingredient in these bars. They add a chewy texture, making each bite more satisfying. Beyond their textural contribution, oats come with an array of health benefits. They are a great source of fiber, which can help keep you feeling fuller for longer, making these bars a more nutritious snack option. Opt for whole rolled oats for the best flavor and texture, as they retain more of their nutrients compared to instant oats.
Cocoa Powder
Cocoa powder is the secret weapon that elevates the flavor profile of these bars. It adds a rich chocolate taste without the extra sugar and fat that comes with using melted chocolate. The cocoa powder harmonizes beautifully with the sweetness of the peanut butter and the crunch of the graham crackers, ensuring that each bite is a chocolate-lover’s dream. Plus, it provides an antioxidant boost, making these bars just a bit healthier.
Peanut Butter Variations
When it comes to peanut butter, the choice between creamy and crunchy can significantly impact the texture of the bars. Creamy peanut butter offers a smooth consistency that blends seamlessly with the other ingredients, resulting in a uniform bar. On the other hand, crunchy peanut butter adds delightful texture and bites of peanut, enhancing the overall experience. Depending on your preference, both varieties work wonderfully, so feel free to experiment to find your favorite.
Natural Sweeteners
Sweetness is key in desserts, and for these bars, you have the option of using natural sweeteners like honey or maple syrup. Honey provides a floral sweetness and a touch of stickiness that helps bind the ingredients together, while maple syrup offers a distinct flavor profile with a hint of caramel. Both sweeteners are healthier alternatives to refined sugars, and they each bring their unique taste to the finished product. Choose the one that appeals to your palate, or test out a blend for added complexity.
Vanilla Extract
Vanilla extract is a classic ingredient in desserts that serves to enhance the overall flavor profile. Just a splash can elevate the taste of your No Bake Chocolate Peanut Butter Bars, making them feel more indulgent. It rounds out the sweetness and complements the richness of the peanut butter and chocolate. Always opt for pure vanilla extract for the best flavor; imitation varieties can leave a synthetic aftertaste that detracts from your bars.
The Role of Salt
While it may seem counterintuitive to add salt to a sweet treat, a pinch of salt is crucial in any dessert recipe. Salt helps to balance the sweetness and enhances the flavors of the other ingredients. It can elevate the chocolate and peanut butter flavors, making them more pronounced and complex. Be cautious, though—a little goes a long way, so stick to the recommended amount for optimal results.
Chocolate Chips and Optional Coconut Oil
For the topping, chocolate chips are a must—they provide a luscious finish that makes these bars irresistible. You can choose semi-sweet, dark, or even dairy-free chocolate chips based on your dietary preferences and sweetness level. Additionally, adding a touch of coconut oil can help the chocolate set nicely, giving it a glossy finish that is visually appealing. The coconut oil also imparts a subtle flavor that complements the other ingredients beautifully.
Step-by-Step Instructions for Preparation
Now that you have a clear understanding of the ingredients, it’s time to dive into the step-by-step process of preparing these No Bake Chocolate Peanut Butter Bars. Following these instructions carefully will ensure that your bars turn out perfectly every time.
Preparation Tips
Before you begin, it’s essential to prepare your workspace and gather all your ingredients. Having everything at hand will streamline the process and ensure you don’t miss any steps. Measure your ingredients accurately, as precise measurements are crucial in baking (even in no-bake recipes).
Step 1: Combine the Dry Ingredients
In a large mixing bowl, start by combining the graham cracker crumbs, rolled oats, cocoa powder, and a pinch of salt. Mix them thoroughly to ensure the dry ingredients are well-distributed. This step is important as it will contribute to the overall texture and flavor of the bars.
Step 2: Add the Peanut Butter and Sweetener
Next, add your choice of peanut butter and the natural sweetener (honey or maple syrup) to the dry mixture. Using a spatula or a wooden spoon, mix everything together until the dry ingredients are fully coated with the peanut butter and sweetener. The mixture should start to come together into a thick, sticky dough-like consistency.
Step 3: Incorporate Vanilla Extract
Once the mixture is well combined, add a splash of vanilla extract. This will enhance the flavors and make the bars taste even more delicious. Continue mixing until the vanilla is fully incorporated, and you achieve a uniform texture.
Step 4: Press the Mixture into a Pan
Line an 8×8-inch baking pan with parchment paper, allowing some overhang to make removing the bars easier later. Transfer the mixture into the prepared pan and use your hands or a flat spatula to press it down evenly. Be firm during this process to ensure the mixture holds together well once it sets.
Step 5: Melt the Chocolate Topping
In a microwave-safe bowl, combine the chocolate chips and optional coconut oil. Microwave in short bursts, stirring in between, until the chocolate is completely melted and smooth. Be careful not to overheat the chocolate, as it can seize.
Step 6: Pour the Chocolate Over the Bars
Once the chocolate is melted, pour it evenly over the pressed mixture in the pan. Use a spatula to spread it out, ensuring an even layer. The glossy chocolate topping will not only enhance the flavor but also provide a beautiful finish to your bars.
Chilling and Setting the Bars
Now that your No Bake Chocolate Peanut Butter Bars are assembled, it’s time to let them chill. This step is crucial for no-bake recipes as it allows the flavors to meld and the texture to set properly.
Why Chilling is Necessary
Chilling helps the bars firm up, making them easier to cut and eat. As the bars cool in the refrigerator, the fat from the peanut butter and the chocolate solidifies, creating a deliciously chewy and rich texture that is simply irresistible.
The Science Behind Setting Process
The setting process occurs as the chocolate cools down and hardens, while the peanut butter mixture binds together from the cooling effect. This transformation is essential for the bars to maintain their shape and provide the perfect bite. Aim to chill the bars for at least 1 to 2 hours, or until they are firm enough to cut into squares.
With these initial steps and foundational knowledge about the ingredients, you’re well on your way to creating delightful No Bake Chocolate Peanut Butter Bars. This treat is not just simple to make; it also delivers a satisfying blend of flavors and textures that will leave you wanting more. Stay tuned for the next section, where we will explore additional tips and variations to elevate your Bars even further!
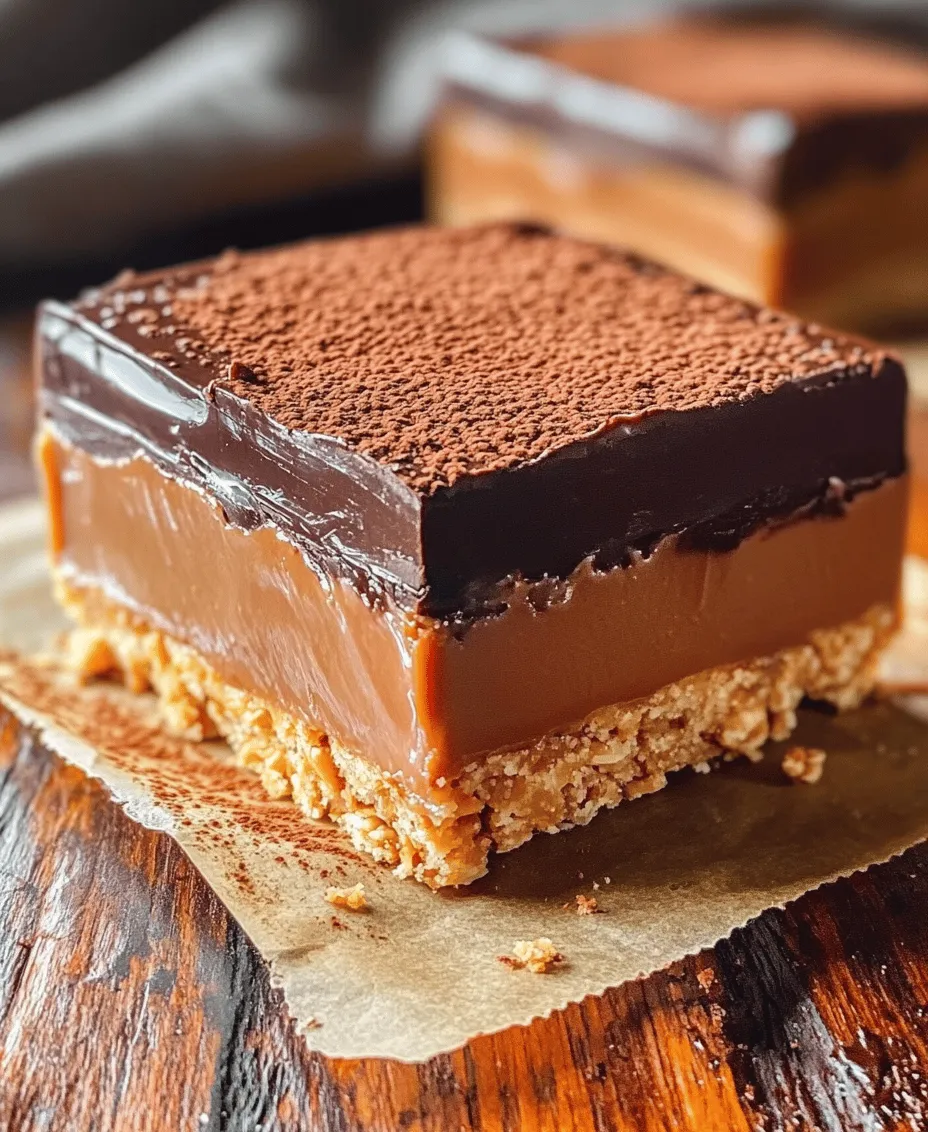
Recommended Chilling Time and Its Impact on the Final Product
After assembling your No Bake Chocolate Peanut Butter Bars, an essential step lies in chilling the mixture. The recommended chilling time is a minimum of 2 hours, though allowing them to set overnight yields the best results. This time is crucial as it allows the bars to firm up properly, ensuring they hold their shape when cut and served. The chilling process helps the ingredients meld together, enhancing the flavors and creating a delightful texture that is both chewy and rich.
When you skip or shorten this chilling period, you risk ending up with bars that are too soft and difficult to cut. They may crumble or fall apart, leading to a less appealing presentation. On the other hand, bars that have been chilled adequately will be easy to slice into neat squares or rectangles, making them perfect for serving at gatherings or as a quick snack at home.
Serving Suggestions and Presentation Ideas
The way you serve your No Bake Chocolate Peanut Butter Bars can greatly enhance the overall experience. Here are some creative ideas for cutting, garnishing, and pairing these delectable treats:
Creative Ways to Cut and Serve the Bars
1. Classic Squares: Cut the bars into uniform squares for a traditional presentation. This is ideal for casual gatherings or lunchboxes.
2. Rectangular Bars: For a more elongated look, slice the bars into rectangles. This shape is great for serving at parties where guests can grab and go.
3. Mini Bites: For a delightful twist, cut the bars into small bite-sized pieces. These are perfect for dessert tables or as a sweet addition to a platter of snacks.
Ideas for Garnishing the Bars
1. Drizzled Chocolate: Melt some extra chocolate and drizzle it over the top of the bars before serving for an elegant touch.
2. Peanut Crust: Sprinkle crushed peanuts or a dusting of cocoa powder over the bars for added texture and flavor.
3. Fresh Fruits: Serve the bars alongside fresh strawberries or banana slices for a refreshing contrast.
Pairing Suggestions
1. Beverages: These bars pair wonderfully with a glass of almond milk or a rich cup of coffee. For a lighter option, try pairing them with herbal tea.
2. Other Desserts: Consider serving your bars with a scoop of vanilla ice cream or a dollop of whipped cream for a decadent dessert experience.
Nutritional Information
Understanding the nutritional profile of your No Bake Chocolate Peanut Butter Bars can help you appreciate their health benefits. Here’s a breakdown of nutrients per serving (based on an 8-square recipe):
– Calories: Approximately 200 calories
– Protein: 6 grams (from peanut butter)
– Carbohydrates: 20 grams
– Dietary Fiber: 3 grams (from oats)
– Fat: 12 grams (primarily healthy fats from peanut butter)
Health Benefits of the Bars
1. Protein: The peanut butter provides a good source of protein, making these bars a satisfying snack that can help curb hunger.
2. Fiber: Oats contribute dietary fiber, which is beneficial for digestive health and helps maintain a feeling of fullness.
Dietary Considerations
For those with dietary restrictions, the No Bake Chocolate Peanut Butter Bars can be easily adapted:
– Gluten-Free: Use gluten-free oats to ensure these bars are safe for those with gluten intolerance.
– Vegan Adaptations: Substitute honey with maple syrup or agave nectar to make the bars vegan-friendly. Additionally, ensure that the chocolate used is dairy-free.
Storage Tips
To maintain the freshness and quality of your No Bake Chocolate Peanut Butter Bars, follow these storage tips:
1. Refrigeration: Store the bars in an airtight container in the refrigerator. They can last up to a week when properly stored.
2. Freezing: For longer storage, you can freeze the bars. Wrap them individually in plastic wrap and place them in a freezer-safe container. They will keep well for up to 3 months.
3. Thawing: When ready to eat, simply remove the bars from the freezer and let them thaw in the refrigerator for a few hours or at room temperature for about 30 minutes.
Exploring Variations and Customizations
The versatility of No Bake Chocolate Peanut Butter Bars allows for numerous variations and customizations to cater to different tastes and dietary needs:
Ingredient Substitutions
1. Nut Allergies: For those with nut allergies, substitute peanut butter with sunflower seed butter or tahini to maintain the creamy texture.
2. Sweetness Adjustments: Adjust the level of sweetness by varying the amount of sweetener used. Consider using stevia or another sugar substitute for a lower-calorie option.
Flavor Variations
1. Coconut: Add shredded coconut to the mixture for a tropical flair.
2. Nuts and Seeds: Incorporate chopped nuts or seeds for added crunch and nutrition.
3. Dried Fruits: Mix in dried fruits like cranberries or raisins for a chewy texture and a hint of natural sweetness.
Chocolate Options
Experiment with different types of chocolate for the topping:
– Dark Chocolate: For a richer flavor, use dark chocolate. It pairs well with the sweetness of peanut butter.
– White Chocolate: For a sweeter, creamier experience, consider using white chocolate as a topping.
Common Mistakes to Avoid
While making No Bake Chocolate Peanut Butter Bars, a few common mistakes can lead to unsatisfactory results. Here are some tips to avoid them:
1. Improper Mixing: Ensure that all ingredients are mixed thoroughly. If the mixture is too crumbly or dry, add a bit more peanut butter or sweetener to bind it together.
2. Inadequate Pressing: When pressing the mixture into the pan, make sure to pack it down firmly. This will help the bars hold their shape once chilled.
3. Melting Chocolate: To avoid burning the chocolate, use a double boiler or melt it in short intervals in the microwave, stirring in between. This ensures even melting without scorching.
Conclusion
Making No Bake Chocolate Peanut Butter Bars is a delightful and rewarding experience that results in a delicious treat perfect for any occasion. With their rich flavor and satisfying texture, these bars are an excellent option for a quick dessert or snack. Their versatility allows for various ingredient substitutions and flavor variations, making them appealing to a wide range of dietary preferences.
Whether you choose to serve them at a gathering, enjoy them as a post-workout snack, or simply indulge in their decadence at home, these bars are sure to please. We encourage you to try this recipe and enjoy the process of creating a sweet treat that is both delightful and nourishing. With the right techniques and a bit of creativity, your No Bake Chocolate Peanut Butter Bars will become a favorite in your recipe repertoire.
