Introduction
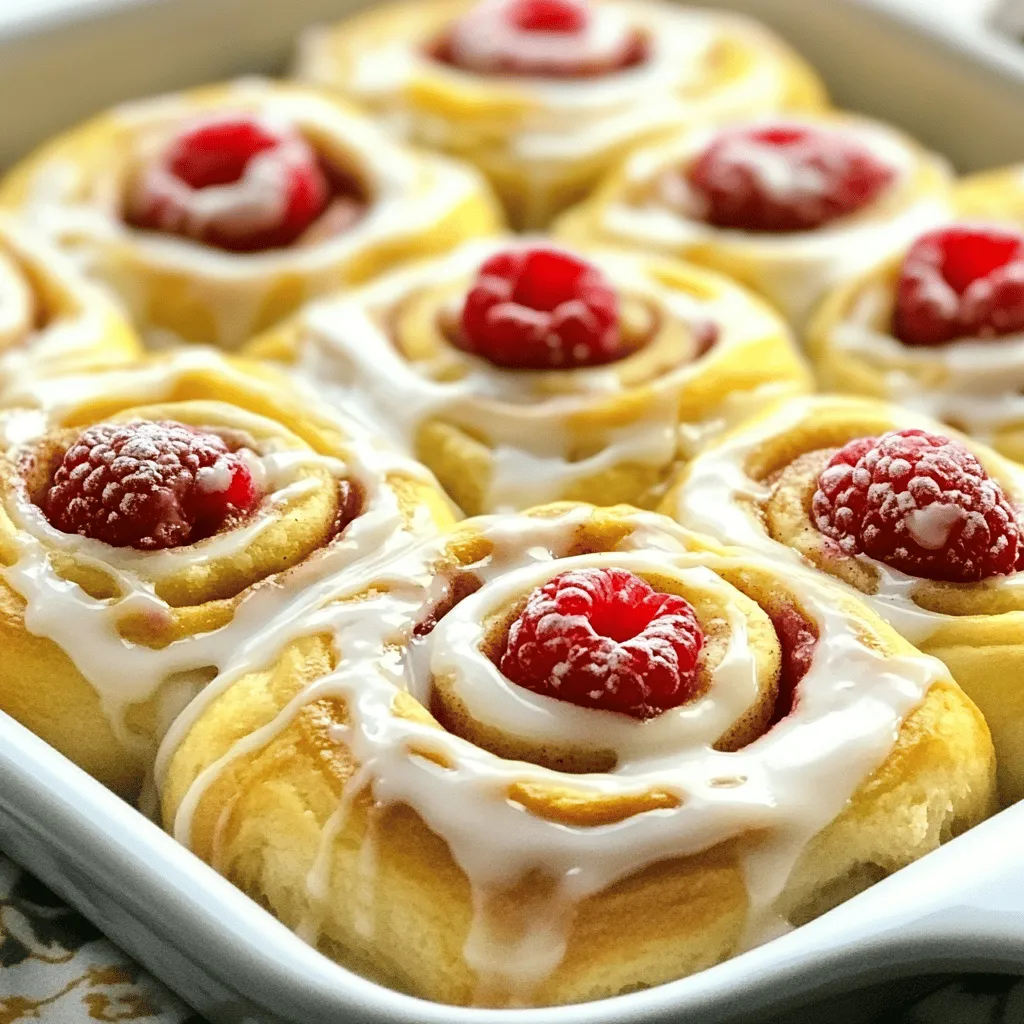
Cinnamon rolls are a beloved treat that evokes feelings of warmth and nostalgia. Their soft, pillowy texture and aromatic spices create a comforting indulgence that can brighten any morning. These delightful pastries, often associated with cozy brunches and family gatherings, have a universal appeal that transcends cultures. However, what if we could take this classic recipe and give it a modern twist? Enter the raspberry cinnamon rolls with lemon glaze—a delightful fusion that combines the rich, cinnamon-laden goodness of traditional rolls with the tart and refreshing burst of fresh raspberries, topped off with a zesty lemon glaze that adds a perfect finishing touch.
Homemade treats hold a special place in our hearts. They not only fill our kitchens with enticing aromas but also provide an opportunity to connect with loved ones over shared experiences. Baking these raspberry cinnamon rolls from scratch is not just about creating a delicious dessert; it’s about the joy of making something with your own hands, the thrill of watching dough rise, and the satisfaction of enjoying a warm, freshly baked pastry. Whether you’re treating yourself or impressing guests, these rolls are sure to bring comfort and happiness to any occasion.
Understanding the Ingredients
To create the perfect raspberry cinnamon rolls with lemon glaze, it’s essential to understand the role of each ingredient in the recipe. Let’s break down the key components that come together to create this delightful treat.
Active Dry Yeast
At the heart of any good cinnamon roll is the dough, which relies on the power of yeast to rise. Active dry yeast is a crucial ingredient in this recipe; it’s responsible for fermentation, which creates the airy texture we associate with fresh rolls. When activated correctly, yeast converts sugars into carbon dioxide, causing the dough to expand. This is what gives cinnamon rolls their fluffy, tender structure.
Warm Milk
Warm milk plays a dual role in this recipe. Not only does it help to activate the yeast, ensuring that it becomes lively and effective, but it also enhances the texture of the dough. The warmth of the milk provides an ideal environment for the yeast to thrive, while the fats and proteins in the milk contribute to a richer flavor and softer crumb in the finished rolls.
Sugar
Sugar is more than just a sweetener in this recipe; it balances flavors and aids in browning during baking. A touch of sweetness complements the tartness of the raspberries and the warmth of the cinnamon, creating a harmonious blend of tastes. Additionally, sugar helps to retain moisture in the dough, resulting in a soft, tender roll.
All-Purpose Flour
All-purpose flour is the backbone of the cinnamon roll dough. It provides structure and stability, allowing the rolls to rise properly while still maintaining a soft texture. The gluten proteins in flour develop during kneading, which gives the dough its elasticity and strength, essential for holding the filling and achieving that signature swirl.
Fresh Raspberries
The star of our unique twist is undoubtedly the fresh raspberries. Their vibrant color and tangy flavor contrast beautifully with the sweet cinnamon filling. The juiciness of the berries adds moisture to the rolls, creating a delightful burst of flavor with each bite. Using fresh raspberries ensures that you capture the essence of summer, even during colder months.
Lemon Glaze
Finally, the lemon glaze is the crowning glory of these cinnamon rolls. This zesty topping elevates the dish, providing a bright and refreshing finish that cuts through the sweetness of the rolls. The tartness of the lemon complements the richness of the dough and the sweetness of the filling, creating a well-rounded flavor profile that is simply irresistible.
Preparing the Dough: The Foundation of Cinnamon Rolls
Once we’ve gathered all the necessary ingredients, it’s time to dive into the first steps of creating our delicious raspberry cinnamon rolls. The process of preparing the dough is fundamental to achieving the perfect roll.
Activating the Yeast with Warm Milk
To start, we need to activate the active dry yeast. Begin by gently warming the milk until it’s warm to the touch but not boiling—around 110°F is ideal. Pour the warm milk into a mixing bowl and stir in a tablespoon of sugar. Then, sprinkle the yeast over the top of the milk. Allow this mixture to sit for about 5–10 minutes until it becomes frothy. This bubbling indicates that the yeast is alive and ready to work its magic in our dough.
Combining Dry and Wet Ingredients
Once your yeast is activated, it’s time to combine the dry and wet ingredients. In a separate large mixing bowl, combine the all-purpose flour and remaining sugar. Make a well in the center of the flour mixture, and pour in the activated yeast mixture along with any remaining warm milk.
Using a wooden spoon or a spatula, stir together the ingredients until they form a shaggy dough. At this stage, it may seem a bit sticky and uneven, but that’s perfectly normal!
Kneading for Elasticity and Smooth Texture
Next, it’s time to knead the dough. Flour your work surface lightly and turn the dough out onto it. Knead the dough by folding it over itself and pushing it down with the heel of your hand. Rotate the dough a quarter turn and repeat. Continue kneading for about 8–10 minutes until the dough is smooth, elastic, and springs back when lightly pressed. This step is crucial, as proper kneading develops the gluten structure, which is essential for achieving fluffy rolls.
Letting the Dough Rise Effectively
After kneading, form the dough into a ball and place it in a lightly greased bowl, turning it so that all sides are coated in oil. Cover the bowl with a clean kitchen towel or plastic wrap, and set it in a warm, draft-free area to rise. Ideally, you want the dough to double in size, which typically takes about 1–2 hours. To create a warm environment, you can place the bowl in an oven that’s been preheated to 200°F for a few minutes and then turned off, or simply leave it near a sunny window.
Creating the Filling: A Sweet and Spicy Mixture
While the dough is rising, we can prepare the filling that will give our cinnamon rolls their signature flavor. This sweet and spicy mixture is what makes each bite so delightful.
Cinnamon-Sugar Mixture
To create the filling, start by mixing together granulated sugar and ground cinnamon in a small bowl. The ratio can be adjusted according to your taste, but a common guideline is to use about 3 tablespoons of sugar for every tablespoon of cinnamon. This mixture will be spread over the dough once it is rolled out, creating that classic cinnamon flavor that everyone loves.
The Role of Fresh Raspberries
Now, let’s not forget the fresh raspberries. Once your dough has risen and you are ready to roll it out, gently wash the raspberries and pat them dry with a paper towel. It’s important to handle them carefully, as they can be quite delicate. The raspberries will be distributed evenly over the cinnamon-sugar mixture, adding a burst of flavor that will complement the sweetness of the rolls beautifully.
Techniques for Spreading the Filling Evenly
When it comes to assembling the rolls, you want to ensure that both the cinnamon-sugar mixture and the raspberries are evenly spread across the rolled-out dough. After rolling the dough into a rectangle, sprinkle the cinnamon-sugar mixture evenly over the surface, followed by a layer of raspberries.
Using your fingertips, gently press the mixture into the dough to help it stick, ensuring every bite is filled with flavor. This step is crucial for achieving a deliciously sweet and tangy filling that will surprise and delight everyone who tries these raspberry cinnamon rolls.
Stay tuned for the next part of this recipe, where we will delve into the final steps of rolling, slicing, baking, and glazing these delightful treats.
Rolling and Cutting the Dough: Forming the Rolls
Once your dough has risen beautifully, it’s time to roll it out into the perfect rectangle. Start by lightly flouring your work surface to prevent the dough from sticking. Gently place the dough on the floured surface and use a rolling pin to stretch it into a rectangular shape, approximately 12×18 inches. Aim for a thickness of about 1/4 inch. This size is crucial as it allows for enough filling and ensures a generous amount of rolls.
After rolling out the dough, it’s time to add your raspberry filling. Spread the mixture evenly across the dough, leaving about an inch of space along the edges. Now comes the critical step: rolling the dough tightly into a log. Starting from one of the long edges, carefully lift the dough and begin rolling it toward the opposite edge, making sure to keep it as tight as possible without tearing. A tight roll is essential for uniformity and texture, as it helps the rolls maintain their shape during baking and creates those delightful layers.
Once you have formed the log, use a sharp knife or a bench scraper to cut the dough into even pieces. Aim for about 1.5-inch thick slices. For a cleaner cut, you can use a serrated knife, which prevents squashing the dough. Arrange the cut rolls in a greased baking dish, ensuring they are close but not touching. This spacing allows them to rise and expand while baking, creating that perfect cinnamon roll pull-apart texture.
The Second Rise: Ensuring Fluffiness
The second rise is a pivotal step in achieving those light and fluffy raspberry cinnamon rolls. This process allows the yeast to develop flavor and creates a fluffy texture. After you have placed the cut rolls in the baking dish, cover them with a clean kitchen towel or plastic wrap. This prevents the rolls from drying out as they rise.
Find a warm, draft-free spot in your kitchen to let the rolls rise for about 30 to 45 minutes. A turned-off oven with the light on is a great option, as it provides a cozy environment for the dough to expand. You’ll know they’re ready when the rolls have puffed up significantly and are touching each other, creating a lovely, cohesive mass.
Baking the Rolls: Achieving the Perfect Golden Brown
Preheating your oven to 375°F (190°C) is crucial for baking your raspberry cinnamon rolls to perfection. A properly preheated oven ensures even cooking and helps the rolls achieve that beautiful golden-brown color. Once your oven is ready, place the baking dish inside and bake for 20 to 25 minutes.
Keep an eye on the rolls as they bake. The signs of doneness include a golden-brown top and a fragrant aroma wafting through your kitchen. You can also gently press the top of a roll; if it springs back, it’s ready. If you’re unsure, use a toothpick inserted in the center of a roll; it should come out clean or with just a few crumbs attached.
Once baked, remove the rolls from the oven and allow them to cool in the pan for about 10 minutes. This cooling period is essential as it helps retain moisture and flavor, ensuring you have soft and delicious rolls.
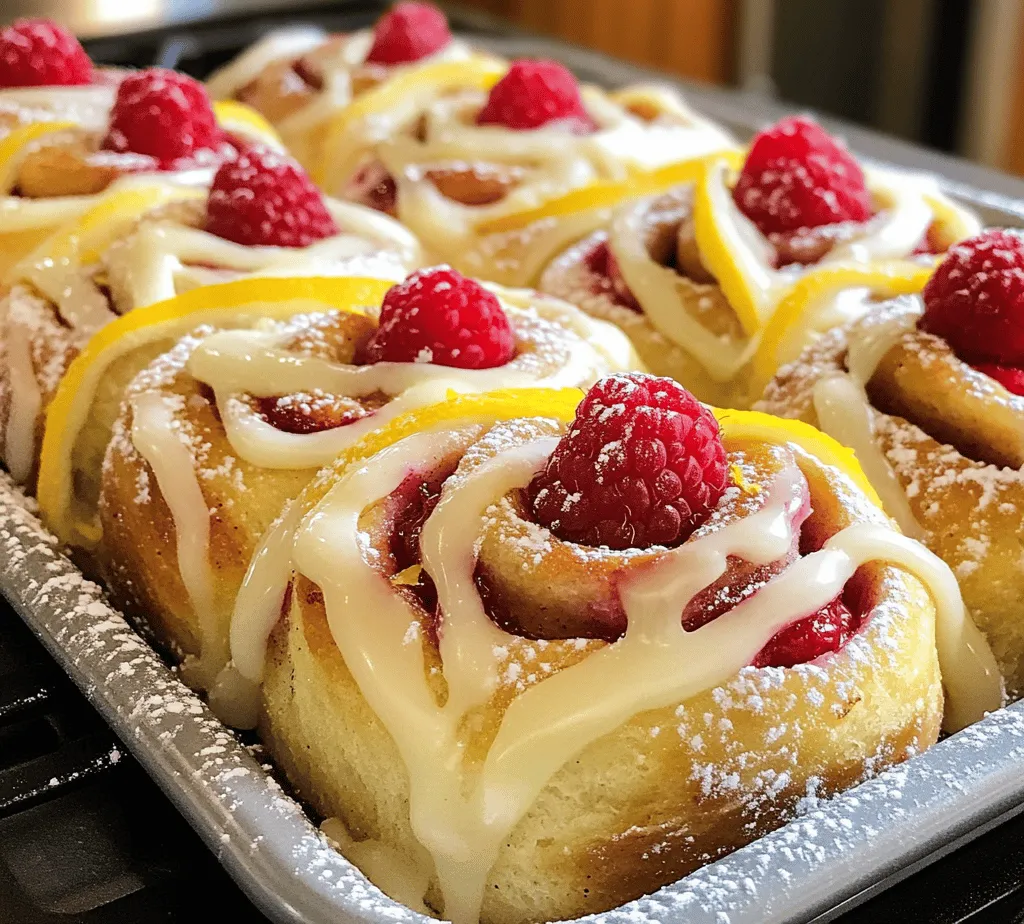
Making the Lemon Glaze: The Zesty Finish
While the cinnamon rolls are cooling, you can prepare the lemon glaze that will add a refreshing zing to your sweet rolls. Start by gathering your ingredients: powdered sugar, fresh lemon juice, and a pinch of salt. In a mixing bowl, combine about 1 cup of powdered sugar with 2 to 3 tablespoons of freshly squeezed lemon juice. Whisk the mixture until it’s smooth and free of lumps.
If the glaze seems too thick for your liking, gradually add more lemon juice, one teaspoon at a time, until you reach your desired consistency. The glaze should be pourable but not too runny, allowing it to cling to the rolls for that perfect finish. The bright flavor of the lemon will complement the sweet raspberries beautifully, enhancing the overall taste experience.
Glazing the Rolls: Adding the Final Touch
Once the rolls have cooled slightly, it’s time to drizzle the lemon glaze over the top. For best results, use a spoon or a small whisk to drizzle the glaze evenly over the rolls. You can also transfer the glaze to a piping bag or a squeeze bottle for more control, allowing you to create beautiful patterns.
The warm cinnamon rolls will absorb some of the glaze, creating a delightful combination of flavors. The glaze not only enhances the taste but also adds an appealing shine, making your rolls irresistible.
Serving Suggestions: Enjoying Your Raspberry Cinnamon Rolls
To truly enjoy your raspberry cinnamon rolls, serve them warm. They’re best enjoyed fresh out of the oven but can also be reheated briefly in the microwave if you have leftovers. Consider pairing them with a hot cup of coffee, tea, or even a glass of freshly squeezed orange juice for a delightful breakfast or brunch experience.
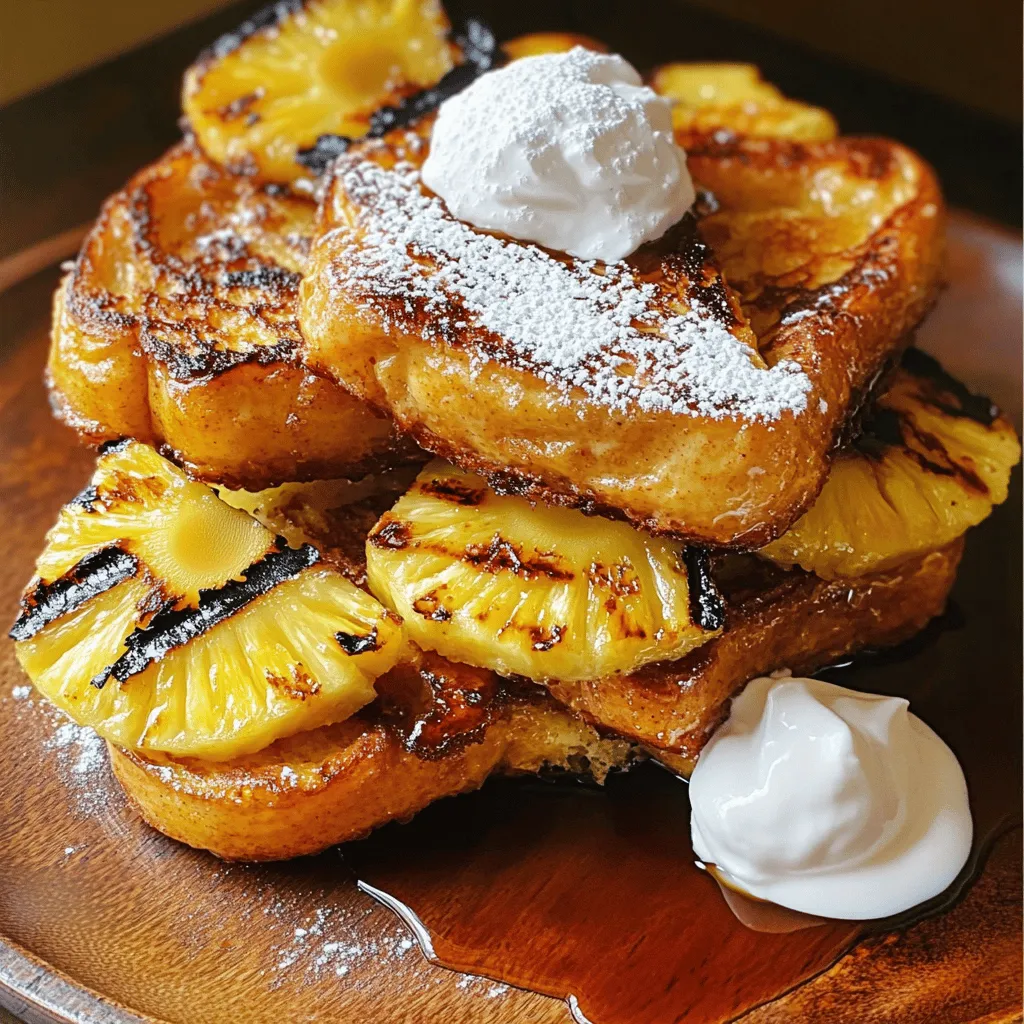
For added indulgence, consider offering toppings such as whipped cream, additional fresh raspberries, or even a dollop of vanilla ice cream. The combination of warm rolls and cold ice cream creates a delicious contrast that is sure to impress your family and friends.
Conclusion
Making raspberry cinnamon rolls with lemon glaze is not just about baking; it’s an experience filled with delightful aromas and flavors that will fill your kitchen with warmth. The process from rolling the dough to glazing the rolls creates a sense of accomplishment and joy, ensuring that each bite is a treat to savor.
With the perfect balance of tart raspberries and zesty lemon glaze, these cinnamon rolls are sure to become a favorite in your household. So gather your ingredients, roll up your sleeves, and enjoy the satisfaction of creating these delicious homemade treats. Share your raspberry cinnamon rolls with family and friends, and watch as everyone enjoys the fruits of your labor—delicious, fluffy, and irresistibly sweet cinnamon rolls that are sure to create lasting memories.