Introduction
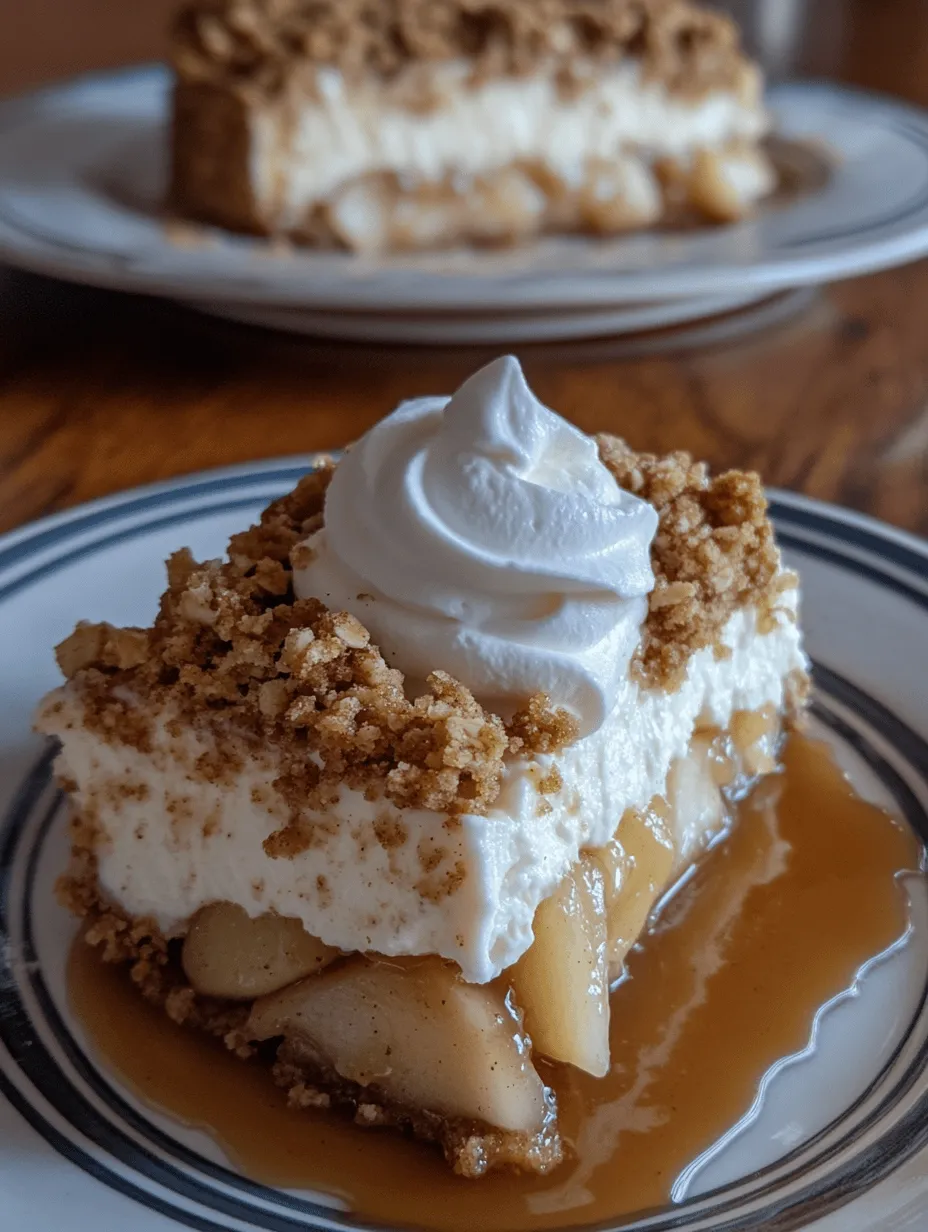
In the world of desserts, few combinations evoke as much warmth and nostalgia as that of apple crumble and cheesecake. Each of these classic treats has its own devoted fan base, and the idea of merging them into one indulgent dessert is nothing short of genius. The Heavenly Apple Crumble Cheesecake is a perfect testament to this culinary innovation, bringing together the creamy richness of cheesecake with the comforting, homey flavors of apple crumble.
As the leaves change and the scent of cinnamon fills the air, this dessert emerges as a favorite, particularly during the fall and festive seasons when apples are at their peak. Whether served at Thanksgiving dinner or as a cozy treat on a chilly evening, the Heavenly Apple Crumble Cheesecake captures the essence of autumn in every bite. The combination of sweet, tender apples nestled in a creamy cheesecake filling, topped with a warm, buttery crumble, makes for an unforgettable dessert that is sure to impress family and friends.
The Allure of Apple Crumble Cheesecake
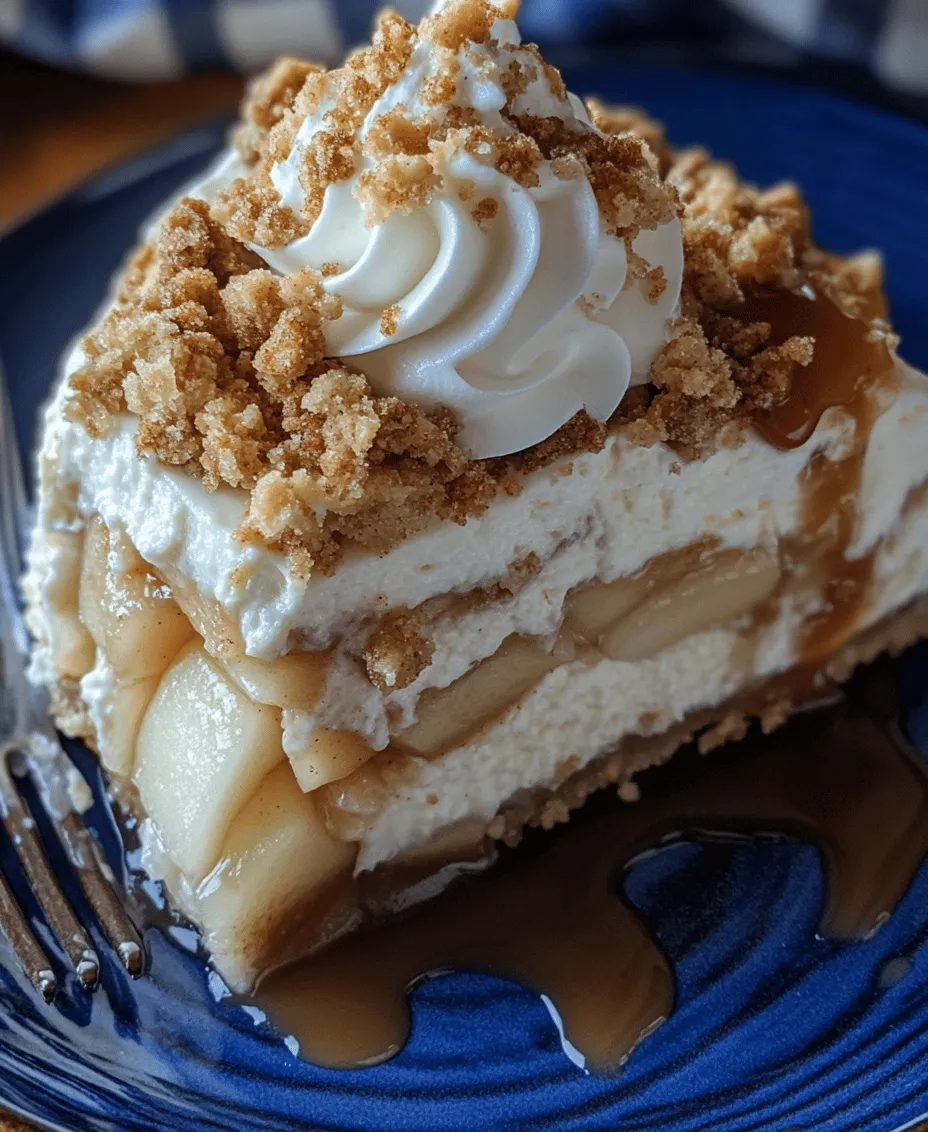
What sets the Heavenly Apple Crumble Cheesecake apart is the delightful interplay of textures and flavors. The creaminess of the cheesecake contrasts beautifully with the crumbly topping and the tender, spiced apple filling. Each forkful offers a symphony of tastes, where the rich, velvety cheesecake melds with the sweet and slightly tart apple mixture, all topped off with a crunchy crumble that adds a satisfying crunch.
This dessert is incredibly versatile, making it suitable for various occasions. Whether you’re hosting a family gathering, a cozy holiday celebration, or simply treating yourself to a slice of comfort, the Heavenly Apple Crumble Cheesecake fits right in. Its stunning presentation and delightful flavor profile ensure that it will be a showstopper at any event. Additionally, it is easily adaptable; you can experiment with different types of apples or adjust the spices to suit your taste.
Ingredients Breakdown
To create the Heavenly Apple Crumble Cheesecake, you will need a selection of high-quality ingredients that work in harmony to produce a dessert that is both delicious and visually appealing. Here’s a breakdown of the essential components:
Crust Ingredients
1. Graham Cracker Crumbs: The foundation of the cheesecake, graham cracker crumbs provide a sweet and slightly nutty flavor, along with a crunchy texture.
2. Unsalted Butter: Melted butter binds the crumbs together and adds richness to the crust.
3. Granulated Sugar: A small amount of sugar enhances the sweetness of the crust without overpowering the other flavors.
Cheesecake Filling Components
1. Cream Cheese: The star of the cheesecake filling, cream cheese delivers a rich and creamy texture that is essential for a classic cheesecake.
2. Sour Cream: Adding sour cream lends a tangy flavor and creaminess, balancing the sweetness of the other ingredients.
3. Eggs: Eggs serve as a binding agent, helping to set the cheesecake and create a smooth texture.
4. Vanilla Extract: Pure vanilla extract adds depth of flavor, enhancing the overall taste of the cheesecake.
5. Ground Cinnamon: A touch of cinnamon infuses warmth and complements the apple filling beautifully.
Apple Filling Ingredients
1. Apples: The star of the apple filling, choose a mix of sweet and tart apples for a balanced flavor. Varieties like Granny Smith and Honeycrisp work wonderfully together.
2. Sugar: Sugar sweetens the apples, helping to create a luscious filling.
3. Cinnamon: Ground cinnamon enhances the apple flavor and adds warmth to the filling.
4. Lemon Juice: A splash of lemon juice brightens the flavors and helps to prevent the apples from browning.
5. Butter: Butter adds richness to the apple filling and helps in the cooking process.
Crumble Topping Essentials
1. All-Purpose Flour: Flour is the base of the crumble topping, creating the structure.
2. Oats: Rolled oats provide a hearty texture and chewiness to the crumble.
3. Brown Sugar: Brown sugar adds moisture and a hint of caramel flavor to the crumble.
4. Butter: Similar to the crust, butter is crucial for achieving a rich, crumbly texture.
5. Cinnamon: A sprinkle of cinnamon in the topping ties all the flavors together.
Step-by-Step Instructions
Creating the Heavenly Apple Crumble Cheesecake involves several steps, each crucial to achieving the perfect balance of flavors and textures. Follow this comprehensive guide to prepare this delightful dessert.
Preparing the Crust
1. Preheat the Oven: Begin by preheating your oven to 350°F (175°C). This ensures that the crust bakes evenly.
2. Mix the Ingredients: In a medium mixing bowl, combine the graham cracker crumbs, melted unsalted butter, and granulated sugar. Stir until the mixture resembles wet sand.
3. Press into Pan: Firmly press the mixture into the bottom of a 9-inch springform pan to create an even layer. Use the back of a measuring cup or your fingers to ensure it’s tightly packed.
4. Bake the Crust: Place the crust in the preheated oven and bake for about 10 minutes, or until it is lightly golden. Allow it to cool while you prepare the filling.
Making the Apple Filling
1. Prepare the Apples: Peel, core, and slice the apples into thin, even pieces. This helps them cook evenly and blend seamlessly into the filling.
2. Cook the Apples: In a large skillet over medium heat, melt a tablespoon of butter. Add the sliced apples, sugar, ground cinnamon, and lemon juice. Stir gently to coat the apples and cook for about 5-7 minutes, or until the apples are slightly softened but still hold their shape. Remove from heat and set aside to cool.
Preparing the Cheesecake Filling
1. Soften the Cream Cheese: Ensure your cream cheese is at room temperature to avoid lumps. This step is important for a smooth cheesecake filling.
2. Mix Ingredients: In a large mixing bowl, beat the softened cream cheese with an electric mixer until smooth and creamy. Add in the sour cream, eggs, vanilla extract, and ground cinnamon. Mix until well combined, making sure to scrape down the sides of the bowl to incorporate all ingredients fully.
Assembling the Cheesecake
1. Layer the Cheesecake: Pour half of the cheesecake filling over the cooled crust and spread it evenly. Then, spoon the cooked apple filling on top, ensuring an even layer.
2. Add Remaining Cheesecake Filling: Pour the remaining cheesecake mixture over the apple filling, smoothing it out gently to create a uniform surface.
3. Prepare the Crumble Topping: In a separate bowl, combine the all-purpose flour, rolled oats, brown sugar, melted butter, and cinnamon. Use your fingers or a fork to mix until crumbly.
Baking the Cheesecake
1. Top with Crumble: Generously sprinkle the crumble topping over the cheesecake.
2. Bake: Carefully place the springform pan in the oven and bake for 45-55 minutes, or until the center is set but still slightly jiggly. The edges should look firm and slightly puffed.
3. Cool: Once baked, turn off the oven and crack the door open, allowing the cheesecake to cool slowly for about an hour. This helps prevent cracking. Afterward, transfer it to the refrigerator to chill for at least 4 hours, or preferably overnight, before serving.
This step-by-step guide sets you on the path to creating a Heavenly Apple Crumble Cheesecake that will leave everyone asking for seconds. The combination of flavors and textures makes this a must-try recipe for any dessert lover.
Cooling and Serving
Once your Heavenly Apple Crumble Cheesecake is baked to perfection, allowing it to cool properly is crucial for flavor development and texture. After removing the cheesecake from the oven, let it cool at room temperature for about an hour. Once it reaches room temperature, cover it with plastic wrap or aluminum foil and place it in the refrigerator. It’s essential to let the cheesecake chill for at least four hours, but overnight is even better. This cooling period allows the flavors to meld beautifully, resulting in a richer taste and a firmer texture that makes slicing easier.
When it’s time to serve, remove the cheesecake from the refrigerator and let it sit for about 15 minutes to slightly soften. This step makes for easier cutting and enhances the cheesecake’s creamy consistency. Use a sharp knife to slice through the cheesecake, wiping the blade with a damp cloth between cuts to ensure clean edges. For an elegant presentation, serve each slice on a chilled plate, and consider adding a sprinkle of cinnamon on top for a touch of warmth.
Tips for Perfecting Your Cheesecake
Creating the perfect Heavenly Apple Crumble Cheesecake involves attention to detail and a few tried-and-true techniques. Here are some essential tips to help you achieve the best results:
1. Use Quality Ingredients: The quality of your cream cheese, vanilla extract, and apples can significantly impact the final flavor of your cheesecake. Opt for full-fat cream cheese for a rich and creamy texture, and use fresh, firm apples for the filling to avoid a mushy consistency.
2. Avoid Cracks: Cracks in the cheesecake surface are a common issue, but they can be prevented with a few simple strategies. First, ensure that your cream cheese is at room temperature before mixing to avoid lumps. Additionally, avoid overmixing the batter, as incorporating too much air can lead to cracks during baking. Lastly, bake the cheesecake in a water bath (bain-marie) to maintain a steady temperature and humidity level around the cake.
3. Dietary Alternatives: If you or your guests have dietary restrictions, there are several alternatives you can incorporate into this recipe. For a gluten-free version, substitute the graham cracker crust with a gluten-free cookie or almond flour crust. Additionally, consider using dairy-free cream cheese and coconut milk for a vegan-friendly option.
Flavor Variations and Customizations
One of the best aspects of the Heavenly Apple Crumble Cheesecake is its versatility. Here are some ideas for personalizing the recipe to suit different tastes or dietary needs:
1. Fruit Substitutes: While the recipe features apples, feel free to experiment with other fruits. Pears offer a similar texture and sweetness, while berries like raspberries, blueberries, or strawberries can provide a burst of tartness that complements the creamy cheesecake.
2. Spices and Flavorings: Enhance the flavor profile by incorporating spices such as nutmeg, ginger, or cardamom into the apple filling or crumble topping. A splash of lemon juice can also brighten up the flavors and add a refreshing zing.
3. Nuts and Chocolate: For those who enjoy additional texture, consider adding chopped nuts such as pecans or walnuts to the crumble topping for a delightful crunch. For a chocolate twist, fold in chocolate chips into the cheesecake batter or drizzle melted chocolate over the finished cheesecake before serving.
The Perfect Pairings
To elevate your Heavenly Apple Crumble Cheesecake experience, consider these delectable accompaniments:
1. Beverage Suggestions: Pairing your cheesecake with the right beverage can enhance its flavors. A steaming cup of coffee or espresso complements the creamy richness of the cheesecake beautifully. For a seasonal touch, serve it with spiced cider or a warm chai latte, which brings out the warm spices in the dessert.
2. Garnishes: Presentation is key when serving desserts, so consider garnishing your cheesecake with a dollop of freshly whipped cream or a drizzle of caramel sauce. A sprinkle of cinnamon or a dusting of powdered sugar can add a beautiful finishing touch and enhance the visual appeal.
Storing and Freezing Instructions
If you find yourself with leftovers (which is often the case with such a delightful dessert), proper storage is essential to maintain the cheesecake’s taste and texture:
1. Refrigerator Storage: Store leftover cheesecake in the refrigerator for up to five days. Ensure it is covered tightly with plastic wrap or stored in an airtight container to prevent it from absorbing any odors.
2. Freezing Instructions: For longer storage, freezing is an excellent option. To freeze, allow the cheesecake to cool completely and cut it into individual slices. Wrap each slice tightly in plastic wrap and then place them in a freezer-safe container or zip-top bag. The cheesecake can be frozen for up to three months.
When you’re ready to enjoy a slice, remove it from the freezer and let it thaw in the refrigerator for several hours or overnight to retain its creamy texture. Avoid thawing at room temperature, as this can lead to a soggy crust.
Conclusion
The Heavenly Apple Crumble Cheesecake is a culinary masterpiece that marries the rich creaminess of cheesecake with the comforting flavors of apple crumble, making it a delightful treat for any occasion. Whether you’re celebrating a holiday, hosting a dinner party, or simply indulging in a sweet moment at home, this cheesecake will surely impress and satisfy.
With its customizable elements, you can personalize it to fit various tastes and dietary needs, ensuring that everyone can partake in the joy of this decadent dessert. From the first bite to the last, it creates lasting memories with family and friends.
So, roll up your sleeves, gather your ingredients, and embark on the delicious journey of making this Heavenly Apple Crumble Cheesecake. Your taste buds will thank you, and your loved ones will cherish the time spent sharing this exquisite creation. Enjoy the process and the delectable results!
