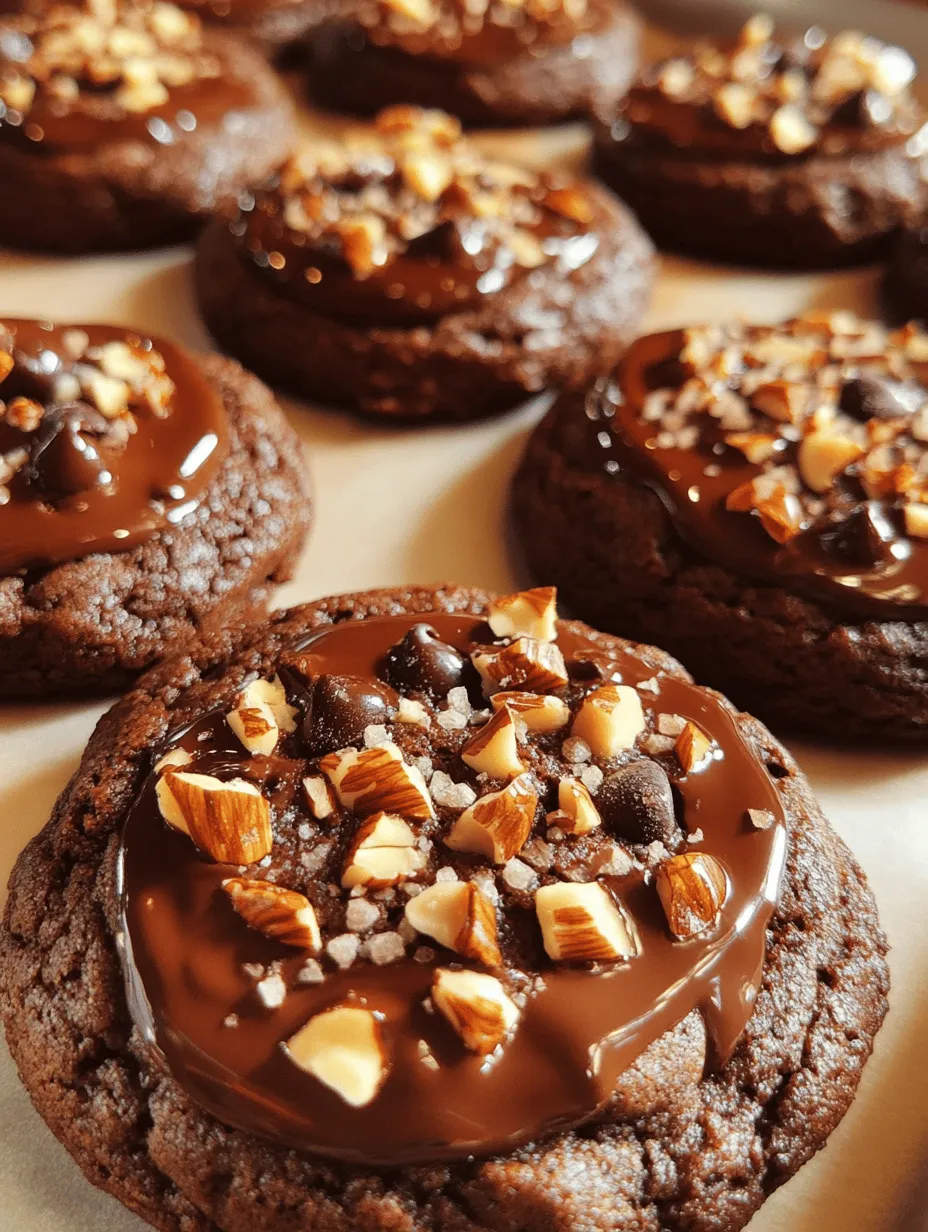
Introduction
There’s something universally captivating about chocolate cookies. Whether you’re a lifelong chocolate lover or someone who occasionally indulges in sweet treats, a warm, chewy chocolate cookie can evoke feelings of comfort and joy. The rich aroma of freshly baked cookies wafting through the kitchen is enough to spark nostalgia and create cravings that are hard to resist. As we dive into the world of cookie baking, it’s essential to appreciate the intricate balance of texture and flavor that makes a chocolate cookie truly exceptional.
When it comes to cookies, the texture can make or break the experience. Many home bakers strive for that perfect chewy bite, which maintains a gooey center while being slightly crisp on the edges. Achieving this ideal consistency requires an understanding of the ingredients and the role each one plays in the cookie’s overall structure and taste. Today, we’re excited to share a delightful chewy chocolate cookie recipe that’s perfect for any occasion—be it a cozy night in, a gathering with friends, or simply a treat for yourself.
This chewy chocolate cookie recipe combines rich chocolate flavor with a satisfying texture that’s sure to please palates of all ages. So, gather your ingredients, preheat your oven, and let’s embark on this delicious baking adventure together!
Understanding the Ingredients
To create the perfect chewy chocolate cookies, it’s vital to understand the role each ingredient plays. Here’s a breakdown of what you’ll need:
Butter
Starting with unsalted butter, this ingredient is crucial for achieving the desired texture in your cookies. Butter provides richness and moisture, which contribute to the chewiness of the final product. By using unsalted butter, you have better control over the salt content in the recipe, allowing the sweet and chocolate flavors to shine through without being overpowered.
Sugars
The combination of brown sugar and granulated sugar is what elevates these cookies to the next level. Brown sugar contains molasses, which not only adds moisture but also enhances the chewiness of the cookies. In contrast, granulated sugar helps create a slight crisp on the edges. Together, they produce a balanced sweetness that complements the rich chocolate flavor, ensuring every bite is delightful.
Eggs
Eggs are another key ingredient in this chewy chocolate cookie recipe. They serve multiple purposes: binding the ingredients together, adding moisture, and contributing to the overall structure of the cookie. The proteins in eggs help create stability, while the fat in the yolk adds richness. For the best results, use large eggs at room temperature to ensure even mixing and optimal texture.
Vanilla Extract
No chocolate cookie is complete without the warm, inviting flavor of vanilla extract. This ingredient enhances the overall flavor profile, adding depth and complexity to the cookies. A splash of high-quality vanilla extract can transform an ordinary cookie recipe into an extraordinary treat. Opt for pure vanilla extract whenever possible, as it provides a more robust flavor compared to imitation vanilla.
Flour and Cocoa Powder
Flour and cocoa powder form the foundation of your cookie dough, contributing to the structure and rich chocolate taste. All-purpose flour is typically used for cookie recipes, providing the necessary gluten structure. Cocoa powder, preferably unsweetened, adds an intense chocolate flavor that makes these cookies irresistible. For an even richer chocolate experience, consider using Dutch-processed cocoa powder, which has a smoother, more mellow flavor.
Baking Soda and Salt
Baking soda is the leavening agent that helps your cookies rise slightly while still maintaining a chewy texture. It reacts with the acidic components in the dough, creating bubbles that give the cookies a bit of lift. Salt, though seemingly small in quantity, is essential for enhancing the overall flavor. It balances the sweetness and brings out the richness of the chocolate, ensuring that every bite is satisfying.
Chocolate Chips
The star ingredient in this chewy chocolate cookie recipe is, of course, chocolate chips. Whether you prefer semi-sweet, dark, or milk chocolate, the choice is yours. Chocolate chips melt beautifully during baking, creating gooey pockets of chocolate that make each cookie a true indulgence. Don’t shy away from using high-quality chocolate chips, as they can significantly impact the flavor of your cookies.
Walnuts (Optional)
While not essential, adding walnuts to your chewy chocolate cookies can introduce a delightful texture and nutty flavor. These crunchy bits complement the soft, chewy cookie and add an extra layer of complexity. If you’re a fan of nuts, consider folding in chopped walnuts for a delicious twist. However, if you prefer pure chocolate bliss, feel free to leave them out.
Equipment and Tools Needed
Before you dive into the steps of creating these chewy chocolate cookies, it’s important to have the right equipment on hand. Here’s a list of essential kitchen tools that will make your baking experience smooth and enjoyable:
– Mixing Bowls: A set of mixing bowls in various sizes is crucial for combining ingredients. Opt for glass or stainless steel bowls that are easy to clean and won’t retain odors.
– Electric Mixer: While you can mix by hand, an electric mixer will save you time and effort, ensuring that your butter and sugars are creamed to perfection for a light and airy cookie dough.
– Rubber Spatula: This versatile tool is perfect for scraping down the sides of mixing bowls and gently folding in ingredients, like chocolate chips or nuts.
– Cookie Scoop: A cookie scoop ensures uniformity in size, which is important for even baking. This tool also makes portioning the dough effortless.
– Quality Baking Sheets: Invest in sturdy, non-stick baking sheets for even heat distribution. Using parchment paper on the baking sheets will also prevent sticking and make cleanup easier.
– Cooling Rack: Once your cookies are out of the oven, transferring them to a cooling rack allows them to cool evenly, preventing them from becoming soggy.
Armed with these tools and a clear understanding of your ingredients, you’re well on your way to baking the best chewy chocolate cookies imaginable.
Step-By-Step Instructions for Chewy Chocolate Cookies
Once you’ve gathered all your ingredients and equipment, it’s time to dive into the baking process. Below are detailed step-by-step instructions to guide you through making these delectable chewy chocolate cookies from scratch.
1. Preheat Your Oven: Start by preheating your oven to 350°F (175°C). This ensures that your cookies bake evenly and achieve the desired texture.
2. Prepare Baking Sheets: Line your baking sheets with parchment paper. This will not only prevent sticking but also make cleanup a breeze.
3. Cream the Butter and Sugars: In a large mixing bowl, combine the unsalted butter, brown sugar, and granulated sugar. Using an electric mixer, beat the mixture on medium speed until it becomes light and fluffy. This process usually takes about 2-3 minutes. The fluffiness is essential for achieving the right texture in your cookies.
4. Add the Eggs and Vanilla: Next, add the eggs, one at a time, mixing well after each addition. Then, pour in the vanilla extract and continue to mix until everything is well combined.
5. Combine Dry Ingredients: In a separate bowl, whisk together the all-purpose flour, unsweetened cocoa powder, baking soda, and salt. This step helps ensure that the leavening agent and cocoa powder are evenly distributed throughout the dough.
6. Gradually Add Dry Ingredients: Slowly add the dry ingredient mixture to the wet ingredients, mixing on low speed until just combined. Be careful not to overmix, as this can lead to tough cookies.
7. Fold in Chocolate Chips: Using a rubber spatula, gently fold in the chocolate chips (and walnuts, if using) until they are evenly incorporated into the dough.
8. Scoop the Dough: Using your cookie scoop, portion out the dough onto the prepared baking sheets, leaving about 2 inches of space between each cookie to allow for spreading.
9. Bake: Place the baking sheets in the preheated oven and bake for 10-12 minutes, or until the edges are set and the centers look slightly underbaked. The cookies will continue to firm up as they cool.
10. Cooling: Once baked, remove the cookies from the oven and let them cool on the baking sheets for about 5 minutes before transferring them to a wire rack to cool completely.
By following these steps, you’ll be well on your way to enjoying a batch of perfectly chewy chocolate cookies that are sure to impress family and friends. As we delve further into the process in the next part, we’ll cover tips for achieving the best results and answer some common questions about baking chewy chocolate cookies. Stay tuned!
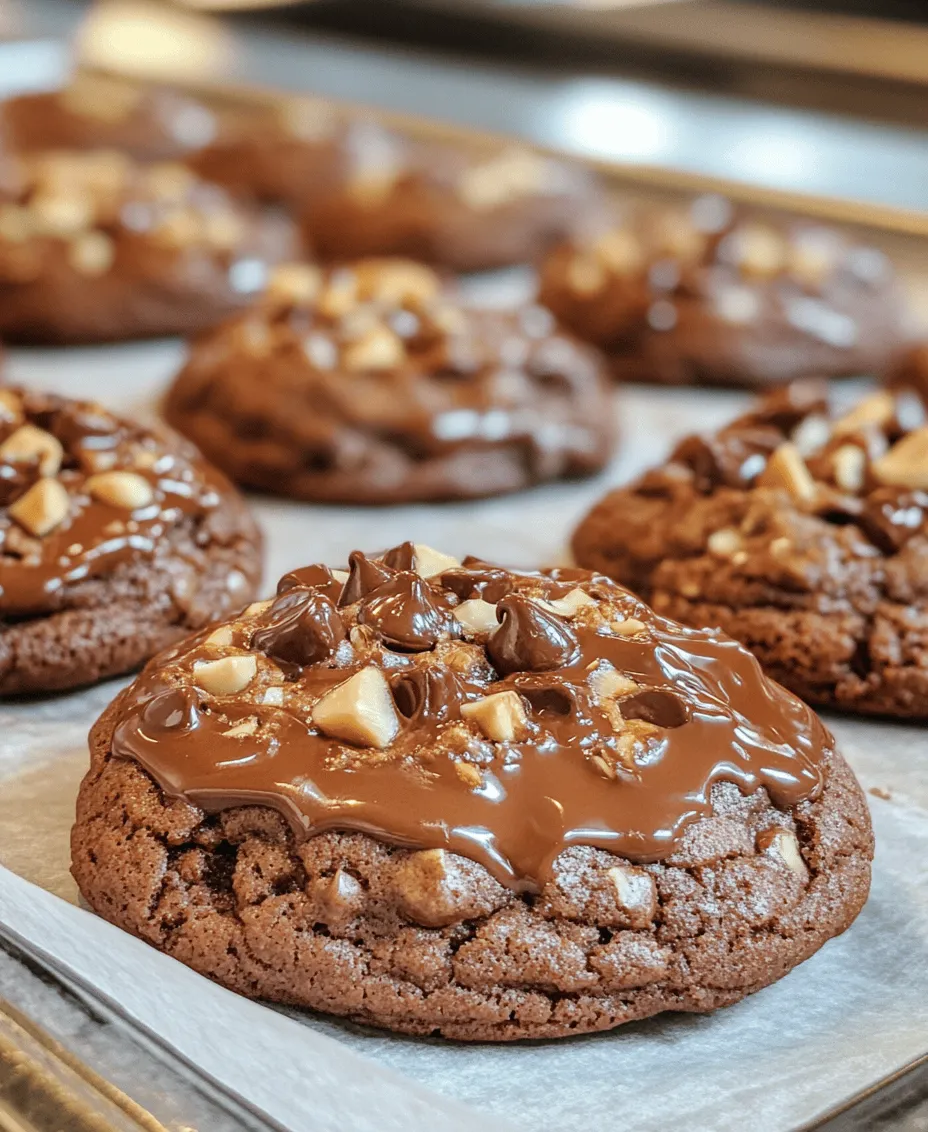
Preparation
Before diving into the dough of your chewy chocolate cookies, it’s essential to prepare your kitchen properly. Preheating the oven to 350°F (175°C) is a crucial step that ensures your cookies bake evenly. While the oven is heating, prepare your baking sheet by lining it with parchment paper. This not only prevents the cookies from sticking but also promotes even browning. If you prefer, you can use a silicone baking mat for a reusable solution. These steps lay the foundation for cookie success, allowing you to focus on mixing and baking without distractions.
Mixing the Wet Ingredients
The creaming method is a fundamental technique in cookie baking that helps achieve a light and chewy texture. Begin by placing your softened unsalted butter into a large mixing bowl. Using an electric mixer on medium speed, cream the butter until it becomes light and fluffy, which typically takes about 2-3 minutes. This process incorporates air into the butter, creating a tender crumb.
Next, gradually add the granulated sugar and brown sugar to the creamed butter. Continue mixing for another 2 minutes until the mixture is well combined and creamy. The sugars not only sweeten your cookies but also contribute to their chewy texture through moisture retention. Once the sugars are fully integrated, add in one large egg and a teaspoon of pure vanilla extract. Mix until everything is just combined. Avoid overmixing at this stage; the goal is to maintain the airiness you’ve created while ensuring a uniform texture.
Incorporating Dry Ingredients
Now it’s time to add the dry ingredients, which include all-purpose flour, baking soda, and a pinch of salt. To avoid over-mixing, which can lead to tough cookies, start by whisking the dry ingredients together in a separate bowl. This ensures even distribution of the leavening agent and salt throughout the flour.
Gently add the dry ingredients to the wet mixture in two or three additions, mixing on low speed until just combined. It’s okay if there are a few flour streaks left; you can finish mixing by hand. This careful incorporation is key to achieving that desired chewy texture. Overworking the dough can develop gluten, resulting in cookies that are more cake-like than chewy.
Folding in Add-ins
Once your dough is prepared, it’s time to fold in the star ingredients: chocolate chips and any nuts you choose to include. Using a spatula, carefully fold in one cup of semi-sweet chocolate chips, ensuring they are evenly distributed throughout the dough. If you’re opting for nuts such as walnuts or pecans, add about half a cup, ensuring they are chopped into smaller pieces for better distribution. The goal is to maintain the integrity of the dough while ensuring every bite is packed with chocolatey goodness.
Shaping the Cookies
When shaping your cookies, aim for uniformity to guarantee even baking. Use a cookie scoop or tablespoon to portion out the dough, rolling each scoop into a ball about 1.5 inches in diameter. Place the dough balls on your prepared baking sheet, leaving about 2 inches of space between each cookie. This spacing allows the cookies to spread without merging into one another, ensuring they maintain their shape and chewy texture.
Baking
As your cookies bake, it’s important to keep an eye on them to achieve the perfect chewy texture. Bake the cookies in your preheated oven for approximately 10-12 minutes. The cookies should look slightly underbaked in the center; they will continue to cook on the baking sheet after being removed from the oven. Look for a golden-brown edge, while the center remains soft and slightly puffed. This visual cue is crucial for ensuring your cookies maintain that delightful chewiness.
Cooling Process
Once your cookies are done baking, remove them from the oven and allow them to cool on the baking sheet for about 5 minutes. This cooling period is essential, as it allows the cookies to set and firm up. After 5 minutes, gently transfer the cookies to a wire rack to cool completely. This step prevents the bottoms from becoming soggy and ensures that they retain their chewy texture.
Flavor Variations and Customizations
One of the joys of baking chewy chocolate cookies is the opportunity for customization. Here are several variations you can experiment with to make this recipe your own:
– Experimenting with Different Chocolates: While semi-sweet chocolate chips are classic, consider using dark chocolate, milk chocolate, or even white chocolate chips for a unique twist. Each type of chocolate brings its own flavor profile, allowing for a range of sweetness and richness.
– Nut Alternatives: If you prefer a different texture or flavor, try incorporating other nuts or seeds. Almonds, hazelnuts, or even sunflower seeds can add a delightful crunch and nutty flavor to your cookies.
– Add-ins for Extra Flavor: For those looking to elevate their cookies further, consider adding coconut flakes, dried fruits like cranberries or cherries, or even a dash of spices like cinnamon or nutmeg. These additions can introduce new dimensions of flavor that complement the chocolate beautifully.
– Gluten-Free Option: If you need a gluten-free alternative, substitute the all-purpose flour with a 1:1 gluten-free flour blend. Ensure that the blend contains xanthan gum, which acts as a binding agent, mimicking the texture of traditional flour.
Storage and Shelf Life
To maintain the freshness of your chewy chocolate cookies, store them in an airtight container at room temperature. They will stay fresh for about a week, but they are best enjoyed within the first few days. If you want to extend their shelf life, consider freezing them. Place the cookies in a single layer in a freezer-safe container or bag, separating layers with parchment paper to prevent sticking. They can be stored in the freezer for up to three months.
If you prefer to freeze cookie dough for future baking, scoop and shape the dough into balls, then freeze them on a baking sheet. Once the dough balls are solid, transfer them to a zip-top bag for easy access. When you’re ready to bake, simply add a couple of extra minutes to the baking time if you’re baking them straight from the freezer.
For those who enjoy a warm cookie, reheating is simple. Preheat your oven to 300°F (150°C) and place the cookies on a baking sheet for about 5-10 minutes. This gentle reheating will restore their chewy texture while keeping them deliciously gooey in the center.
Conclusion
The joy of baking chewy chocolate cookies goes beyond the simple act of mixing ingredients; it encompasses the satisfaction of creating something delicious from scratch. Each batch invites creativity, allowing you to experiment with different flavors and textures while sharing the outcome with friends and family.
Encouraging you to customize this recipe and share it within your community can create lasting memories, whether it’s a family gathering or a casual get-together with friends. Reflect on the warmth of homemade treats and the happiness they bring—not just in flavor, but in the connections forged through the art of baking. With each cookie, you’re not just satisfying a sweet tooth; you’re crafting moments to savor and share. So roll up your sleeves, gather your ingredients, and embark on your baking adventure today!
