Introduction
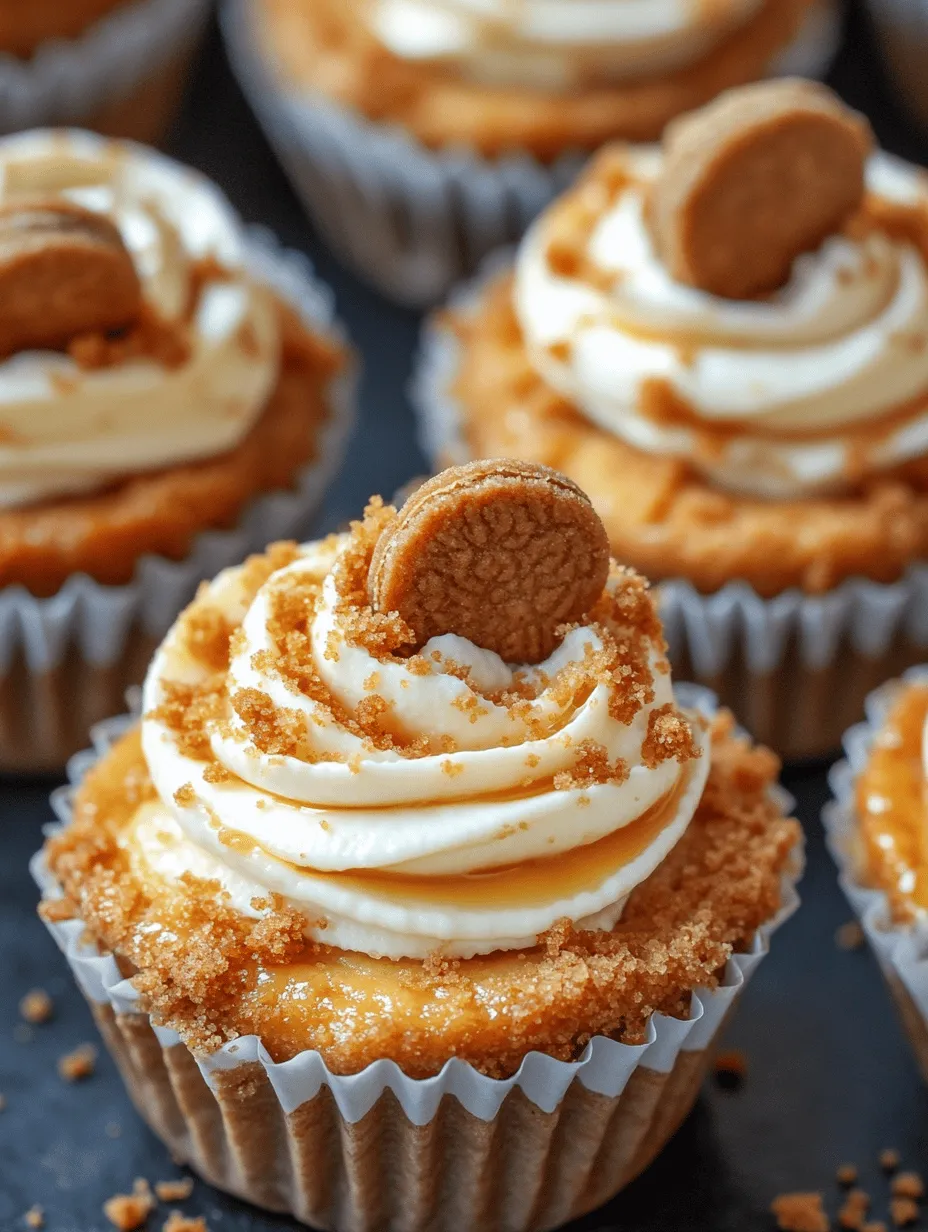
Cheesecakes have long held a special place in the hearts (and stomachs) of dessert lovers worldwide. Their creamy texture, rich flavors, and versatile nature make them a favorite for any occasion, whether it’s a festive celebration, a cozy family dinner, or a casual get-together with friends. From classic New York-style cheesecakes to innovative twists incorporating seasonal fruits, the cheesecake can adapt to fit nearly any palate or theme. Among the many variations, Biscoff Mini Cheesecakes stand out as a uniquely indulgent treat that combines the beloved flavor of Biscoff cookies with the smooth richness of cheesecake.
Originating in Belgium, Biscoff cookies are characterized by their spiced, caramelized flavor and crunchy texture. Made with simple ingredients such as flour, sugar, and a blend of spices, these cookies have garnered a loyal following across the globe. The Biscoff spread, a creamy and decadent spread made from crushed Biscoff cookies, has also gained popularity, elevating desserts and snacks alike. This recipe for Biscoff Mini Cheesecakes takes advantage of these delicious treats, resulting in a dessert that is both visually appealing and bursting with flavor.
Perfect for special occasions like birthdays, holidays, or even a cozy night in, these mini cheesecakes are sure to impress. Their individual servings make them easy to share, and their delightful combination of flavors will leave your guests asking for seconds. Whether you’re a seasoned baker or a novice in the kitchen, this recipe is designed to be approachable while delivering stunning results.
Understanding the Ingredients
To create the perfect Biscoff Mini Cheesecakes, it’s essential to understand the role of each ingredient in the recipe. Let’s take a closer look at the key components that contribute to the flavor and texture of these delightful treats.
Biscoff Cookies
The star of this recipe is undoubtedly the Biscoff cookie. Their unique flavor profile, which combines hints of cinnamon, nutmeg, and caramel, adds a distinct taste that complements the creamy cheesecake filling beautifully. When crushed, Biscoff cookies become the ideal base for the crust, offering a delightful crunch and a burst of flavor in every bite.
These cookies are not just a delicious treat; they also provide a subtle sweetness that works well to balance the richness of the cheesecake. If you’re unable to find Biscoff cookies, alternatives such as speculoos cookies or ginger snaps can provide a similar flavor and texture.
Cream Cheese
High-quality cream cheese is the backbone of any cheesecake. Its smooth, creamy texture is what gives cheesecakes their signature richness. When selecting cream cheese for your Biscoff Mini Cheesecakes, opt for full-fat varieties for the best results. This ensures a velvety filling that sets beautifully and has a luscious mouthfeel.
Sugar
Granulated sugar is added to sweeten the filling, providing the perfect contrast to the slightly salty notes of the Biscoff cookies. The amount of sugar can be adjusted to taste, but it is essential for achieving the ideal balance of flavors.
Eggs
Eggs are crucial for the structure of the cheesecake. They help bind the ingredients together and provide stability to the filling. It’s essential to add the eggs gradually to avoid overmixing, which can result in a dense texture.
Biscoff Spread
Incorporating Biscoff spread into the cheesecake mixture adds another layer of flavor. This creamy spread enhances the cookie flavor, creating a harmonious blend that elevates the overall taste. It also contributes to the delightful marbling effect in the filling, making these mini cheesecakes visually appealing.
Salt
A pinch of salt may seem insignificant, but it plays an important role in enhancing the overall flavor of the cheesecake. It balances the sweetness and brings out the rich flavors of the cream cheese and Biscoff spread.
Dietary Alternatives
For those with dietary restrictions or preferences, there are alternative ingredients that can be used without sacrificing flavor. For a gluten-free version, simply substitute Biscoff cookies with gluten-free cookies or a gluten-free graham cracker alternative. If you’re looking for a vegan option, consider using a plant-based cream cheese, a flaxseed or chia seed mixture as a binding agent, and coconut cream instead of eggs.
These substitutions allow everyone to enjoy the deliciousness of Biscoff Mini Cheesecakes, making them an inclusive dessert option for gatherings.
Step-by-Step Instructions for Biscoff Mini Cheesecakes
Now that we have a good understanding of our ingredients, let’s dive into the step-by-step instructions for crafting these delectable Biscoff Mini Cheesecakes.
Preparing the Crust
1. Preheat the Oven: Before you begin, it’s crucial to preheat your oven to 325°F (160°C). Preheating ensures that the cheesecakes bake evenly, which is essential for achieving the perfect texture.
2. Crush the Biscoff Cookies: Take about 15-18 Biscoff cookies and place them in a food processor. Pulse until they are finely crushed, resembling sand. If you don’t have a food processor, you can also place the cookies in a ziplock bag and crush them with a rolling pin.
3. Mix with Butter: In a mixing bowl, combine the crushed Biscoff cookies with melted butter (about 4 tablespoons). Stir until the mixture is well combined and resembles wet sand. The butter helps bind the crumbs together, giving the crust its structure.
4. Form the Crust: Line a muffin tin with paper liners. Evenly distribute the Biscoff cookie mixture into each liner, pressing down firmly with the back of a measuring cup or your fingers to create a compact crust. This step is important for ensuring that the crust holds together after baking.
5. Bake the Crust: Place the muffin tin in the preheated oven and bake for about 8-10 minutes, or until the crust is slightly golden and firm. Allow the crusts to cool while you prepare the filling.
Crafting the Cheesecake Filling
1. Mix the Cream Cheese: In a large mixing bowl, beat 16 ounces of softened cream cheese with a hand mixer or stand mixer until smooth and creamy. This step is crucial for achieving a lump-free filling.
2. Add Sugar: Gradually add ½ cup of granulated sugar to the cream cheese while continuing to mix. Beat until the mixture is well combined and fluffy.
3. Incorporate Eggs: Add 2 large eggs to the cream cheese mixture, one at a time, mixing on low speed until just combined. Be careful not to overmix, as this can lead to a dense cheesecake.
4. Fold in Biscoff Spread: Gently fold in ½ cup of Biscoff spread. Use a spatula to mix until the spread is evenly incorporated but still leaves visible swirls in the batter, creating a marbled effect.
5. Add Salt: Finally, add a pinch of salt to the mixture, which will enhance the flavors and balance the sweetness.
Filling the Crusts
1. Pour the Filling: Once your filling is ready, carefully spoon it over the cooled Biscoff cookie crusts, filling each liner about ¾ full. This allows room for the cheesecakes to rise slightly during baking.
2. Bake the Cheesecakes: Return the muffin tin to the preheated oven and bake for 15-20 minutes, or until the edges are set but the center is still slightly jiggly. This is key to achieving a creamy texture.
3. Cool and Chill: Remove the mini cheesecakes from the oven and let them cool in the muffin tin for about 10-15 minutes. Then transfer them to the refrigerator and chill for at least 4 hours, or overnight for the best results.
This process sets the stage for your Biscoff Mini Cheesecakes, making them a delightful treat that’s as enjoyable to make as it is to eat. Stay tuned for the next part of the article, where we will explore tips for achieving the best results with your cheesecakes and answer some common questions related to this recipe.
Filling the Crusts and Baking Process
Now that your Biscoff cookie crusts are ready, it’s time to fill them with the creamy cheesecake mixture. Begin by ensuring that your filling is well mixed and free of lumps. This will help achieve a smooth texture in your mini cheesecakes.
1. Evenly Distributing the Filling: Using a spoon or a small ice cream scoop, portion the cheesecake filling into each mini crust. Aim for about ¾ full, as the filling will expand slightly while baking. To ensure an even distribution, you can gently tap the muffin pan on your countertop after filling to help settle the mixture. This step also reduces the chances of air bubbles forming.
2. Preventing Overflow: To prevent the filling from spilling over during baking, it’s crucial not to overfill the crusts. If you find that you’ve filled them too high, gently scrape off the excess filling with a spatula before placing them in the oven.
Baking Time and Checking for Doneness
Preheat your oven to 325°F (160°C). Place the filled muffin pan in the oven and bake for approximately 18-20 minutes. The cheesecakes are done when the edges are set, but the centers still have a slight jiggle.
To check for doneness:
– Visual Check: Look for a slight puffing around the edges and a firm center. The filling should not be liquid.
– Toothpick Test: Insert a toothpick into the center of one cheesecake. If it comes out clean or with a few moist crumbs, they are ready for cooling.
Cooling and Chilling the Cheesecakes
Once baked, it’s essential to cool the cheesecakes gradually to prevent cracking.
1. Gradual Cooling: Turn off the oven, crack the door open, and let the cheesecakes sit inside for about 10-15 minutes. This gradual temperature change allows the cheesecakes to set without shocking them with a sudden temperature drop.
2. Chilling Timeframe: After they have cooled in the oven, transfer the mini cheesecakes to a wire rack to cool at room temperature for another 30 minutes. Once cooled, cover them with plastic wrap and refrigerate for at least 4 hours, but for best results, chill them overnight.
The overnight refrigeration not only enhances the flavors but also helps the cheesecakes set properly, making them easier to remove from the muffin pan.
Serving Suggestions and Presentation
When it’s time to serve your Biscoff Mini Cheesecakes, presentation is key to impressing your guests.
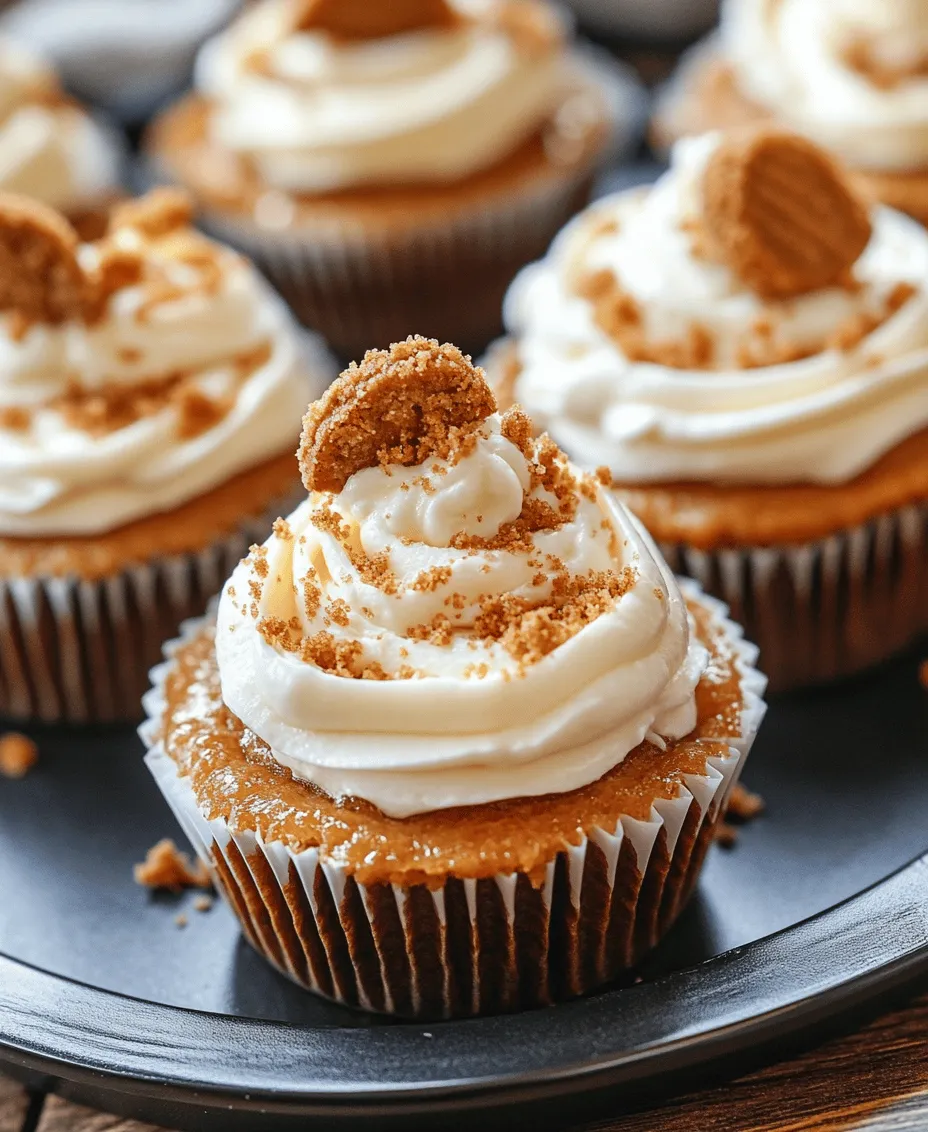
1. Garnishing Ideas: Top each mini cheesecake with a dollop of whipped cream and a drizzle of melted Biscoff spread for an indulgent touch. You can also sprinkle crushed Biscoff cookies on top for added texture and flavor.
2. Pairing with Beverages: These mini cheesecakes pair wonderfully with coffee or tea. A rich espresso complements the sweetness of the cheesecake, while a light herbal tea can balance the flavors. For a festive touch, consider serving them with a glass of dessert wine or a spiced chai latte.
3. Creative Serving Ideas: For parties or holidays, arrange the mini cheesecakes on a tiered serving platter for a visually appealing presentation. You can also create a dessert bar where guests can choose from various toppings, such as chocolate shavings, fresh berries, or caramel sauce.
Nutritional Information
When indulging in desserts like Biscoff Mini Cheesecakes, it’s important to be mindful of nutritional content. Each mini cheesecake contains approximately 200 calories, with key nutrients as follows:
– Fat: 12g
– Carbohydrates: 22g
– Protein: 3g
While these treats are undeniably rich and delicious, moderation is key. Enjoying a mini cheesecake as an occasional dessert can satisfy your sweet tooth without overindulging.
Storage Tips
To keep your Biscoff Mini Cheesecakes fresh:
1. Storing Leftovers: Place any leftover cheesecakes in an airtight container. They can be stored in the refrigerator for up to 5 days.
2. Maintaining Freshness: If you want to preserve their flavor and texture for a longer period, consider freezing them. Wrap each cheesecake individually in plastic wrap and then place them in a freezer-safe bag. They can be frozen for up to 2 months. To thaw, simply transfer them to the fridge overnight before serving.
Conclusion
Making Biscoff Mini Cheesecakes at home is not only simple but also incredibly rewarding. The combination of creamy cheesecake and the distinct flavor of Biscoff cookies creates a dessert that is sure to impress family and friends alike.
Don’t hesitate to experiment with different flavors and toppings to make this recipe your own. Whether you choose to add fruit, chocolate, or even a different type of cookie for the crust, the possibilities are endless.
Ultimately, the joy of creating desserts like these lies in the satisfaction of sharing your culinary creations with loved ones. Enjoy the process and the delicious results that follow!
