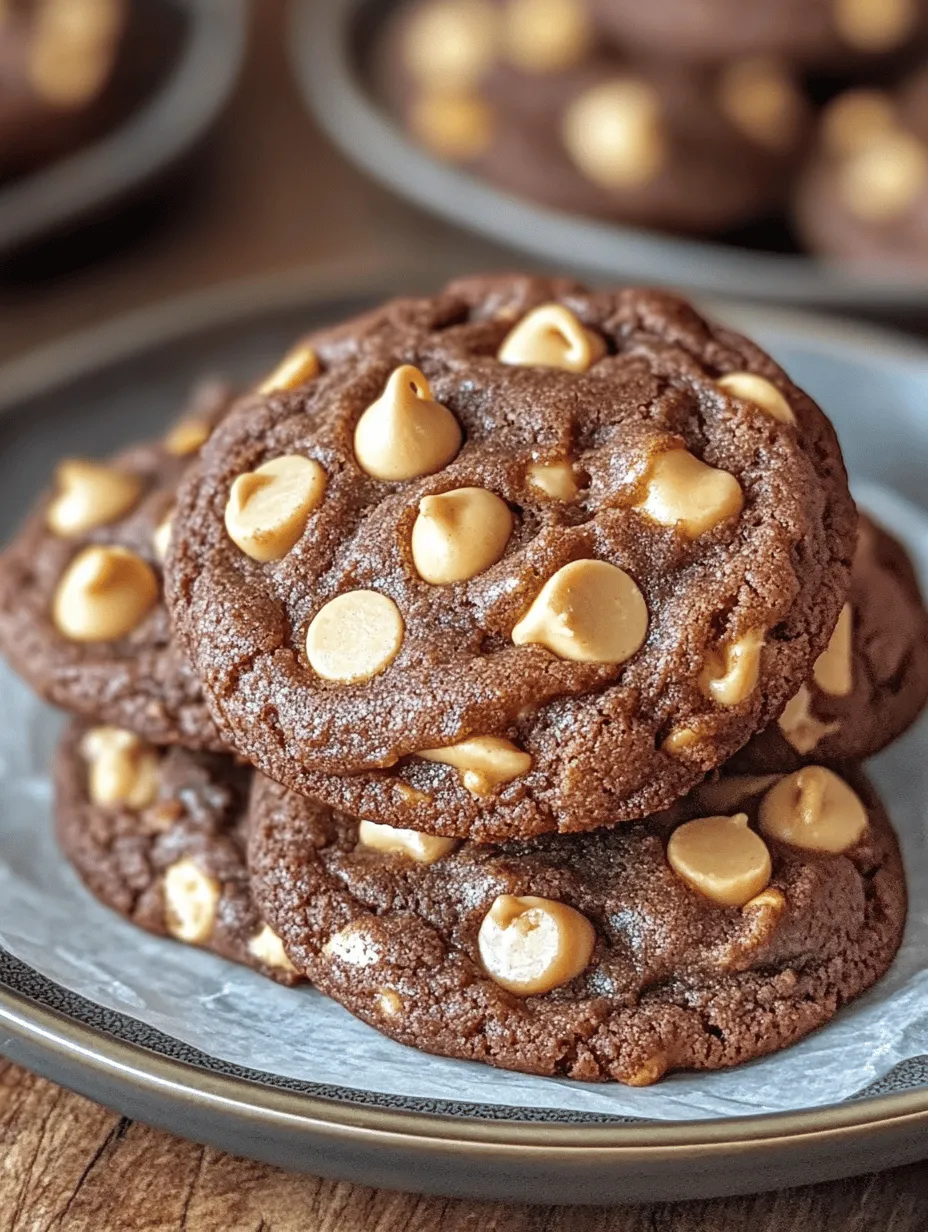
Cookies have long been a beloved staple in the realm of desserts, delighting taste buds across generations. Their versatility and the endless combinations of flavors and textures make them a go-to choice for anyone with a sweet tooth. Whether enjoyed as a simple snack, a special treat for gatherings, or a comforting dessert, cookies resonate with many. Among the myriad of cookie recipes available, the combination of chocolate and peanut butter stands out as a particularly cherished flavor pairing. This dynamic duo not only brings together the rich creaminess of peanut butter with the indulgent sweetness of chocolate, but it also creates a delightful texture that leaves cookie lovers craving more.
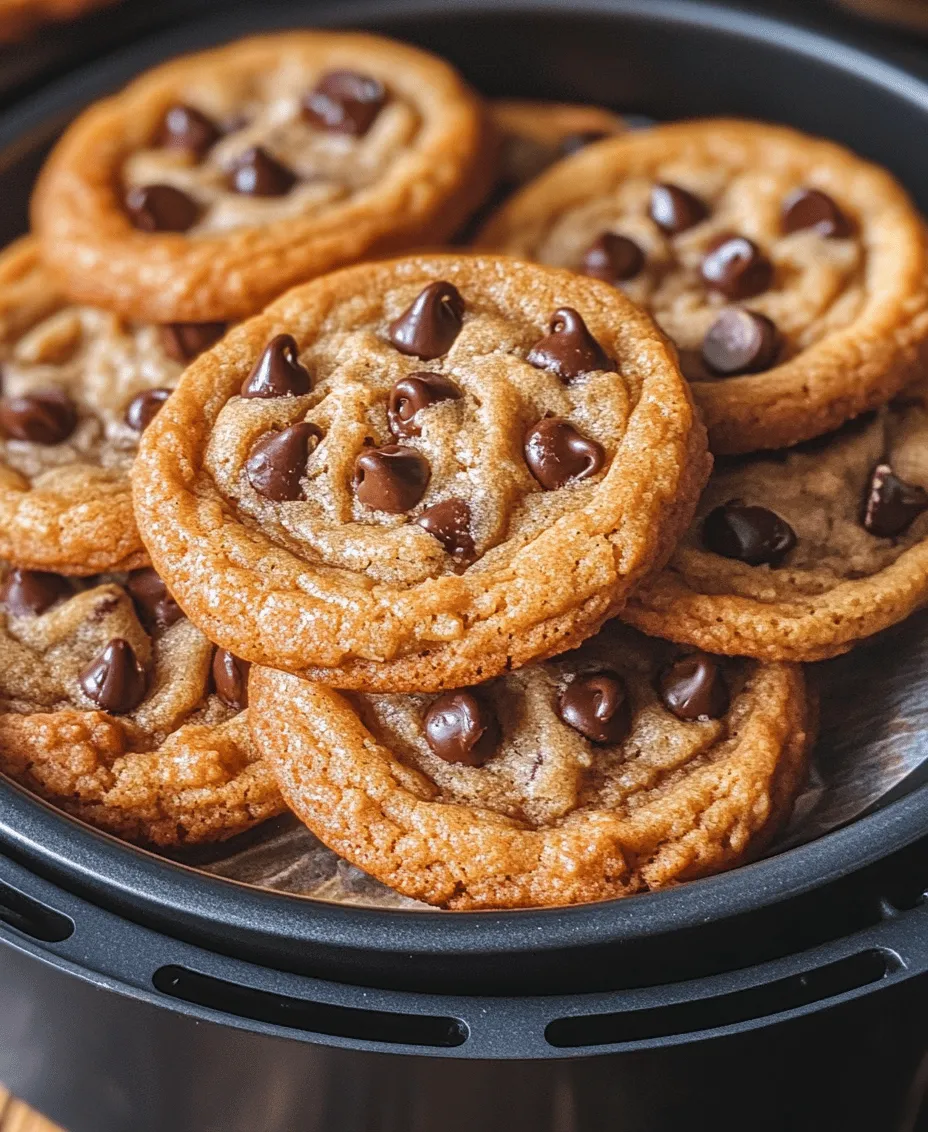
In recent years, the air fryer has emerged as a revolutionary kitchen appliance, transforming the way we approach cooking and baking. Known for its ability to produce crispy, golden results with significantly less oil than traditional frying methods, the air fryer has also made its mark in the baking world. With the air fryer, cookie-making becomes easier and healthier, allowing you to whip up your favorite treats in a fraction of the time. Imagine biting into a warm, gooey chocolate peanut butter cookie, freshly made in your air fryer, with that signature crisp outer layer and a soft, chewy center. Sounds tempting, right?
This article aims to provide you with a comprehensive guide to making Air Fryer Chocolate Peanut Butter Cookies, ensuring you can replicate this delicious recipe in the comfort of your own kitchen. From understanding the key ingredients to step-by-step instructions, we’ll cover everything you need to know to create these mouthwatering cookies that are sure to impress family and friends.
Understanding the Ingredients
Before diving into the recipe, it’s essential to understand the key ingredients that come together to create these delectable cookies. Each component plays a vital role in contributing to the overall flavor and texture, ensuring the perfect balance of richness and sweetness.
Peanut Butter: The Star Ingredient
Peanut butter is undoubtedly the star ingredient in this recipe. Its creamy texture and nutty flavor serve as the foundation for the cookies, providing both taste and moisture. When selecting peanut butter, you have a choice between regular and natural varieties.
Natural peanut butter, made from ground peanuts and a small amount of salt, is often the healthier option. It contains no added sugars or hydrogenated oils, making it a wholesome choice for baking. On the other hand, conventional peanut butter may have added sugars and stabilizers, providing a sweeter taste and smoother consistency, which can also work well in cookies. Ultimately, the choice between natural and conventional peanut butter comes down to personal preference, but opting for natural peanut butter can enhance the cookie’s flavor profile without the extra sweetness.
Sugars: Balancing Sweetness
Sugar is crucial in cookie recipes, and in this case, we will use both granulated sugar and brown sugar. Granulated sugar provides a clean sweetness and contributes to the crispiness of the cookie’s edges, while brown sugar, with its molasses content, adds moisture and a rich, caramel-like flavor.
The combination of these sugars not only creates a well-balanced sweetness but also impacts the cookie’s texture. Cookies made with brown sugar tend to be softer and chewier, while those made predominantly with granulated sugar are more crisp. This recipe leverages the strengths of both types of sugar to achieve that perfect blend of textures.
Egg: Binding and Moisture
Eggs are a staple in cookie recipes due to their ability to bind ingredients together and add moisture. In our Air Fryer Chocolate Peanut Butter Cookies, the egg plays a vital role in achieving the desired texture and consistency. As the cookies bake, the egg helps them rise and maintain their shape, creating a chewy interior surrounded by a slightly crispy exterior.
If you’re looking for an egg substitute, options like flaxseed meal or applesauce can be considered, but keep in mind that this may alter the texture and flavor of the final product.
Flour and Leavening Agents
All-purpose flour is the backbone of cookie dough, providing structure and stability. It absorbs moisture from the wet ingredients, allowing the cookies to hold their shape during baking. For this recipe, it’s essential to measure the flour accurately to ensure the right cookie consistency.
Baking soda is the leavening agent that helps the cookies rise slightly and achieve a lighter texture. It reacts with the acidic components in the brown sugar and peanut butter, creating carbon dioxide bubbles that contribute to the cookie’s lift.
Salt: Enhancing Flavor
Salt might seem like a minor ingredient, but it plays a significant role in balancing sweetness and enhancing overall flavor. A pinch of salt in cookie recipes cuts through the sweetness and brings out the rich flavors of chocolate and peanut butter. It’s a small but mighty component that shouldn’t be overlooked, as it elevates the taste of your cookies to new heights.
Chocolate Chips: The Perfect Finish
No chocolate peanut butter cookie would be complete without chocolate chips. The addition of chocolate chips adds pockets of melty goodness in each bite, creating a delightful contrast with the nutty peanut butter flavor. You can choose from various types of chocolate chips, such as semi-sweet, dark, or even milk chocolate, depending on your preference.
Semi-sweet chocolate chips are a classic choice, providing a balanced sweetness that pairs perfectly with the richness of the peanut butter. Dark chocolate chips offer a bolder flavor, while milk chocolate chips bring a creamier sweetness. Feel free to mix and match or even add chopped chocolate bars for an extra indulgent treat.
Step-by-Step Guide to Making Air Fryer Chocolate Peanut Butter Cookies
Now that we’ve covered the essential ingredients, let’s dive into the step-by-step process of making Air Fryer Chocolate Peanut Butter Cookies. By following these instructions, you’ll be well on your way to creating a batch of delectable cookies that are both satisfying and delightful.
Mixing the Wet Ingredients
To start making your cookies, gather all of your wet ingredients, including the creamy peanut butter, granulated sugar, brown sugar, egg, and vanilla extract. In a large mixing bowl, combine the peanut butter, granulated sugar, and brown sugar. Using a hand mixer or a sturdy spatula, mix these ingredients together until they are well incorporated and smooth. The goal is to achieve a creamy consistency where the sugars and peanut butter blend seamlessly.
Once the peanut butter and sugars are combined, add the egg and vanilla extract to the mixture. Continue to mix until the egg is fully integrated, and the mixture becomes light and fluffy. This process is crucial, as it helps to aerate the batter, resulting in a lighter texture in the final cookies. If you find the mixture is too thick, you can add a splash of milk to achieve your desired consistency.
Preparing the Dry Ingredients
In a separate bowl, it’s time to prepare the dry ingredients. Measure out the all-purpose flour, baking soda, and salt. Whisk them together to ensure even distribution. Sifting the flour is a good practice, as it helps to eliminate lumps and aerate the flour, leading to a lighter cookie. If you don’t have a sifter, simply whisking the ingredients together will suffice.
The baking soda is essential for the leavening process, so make sure it’s evenly incorporated. Once the dry ingredients are well mixed, you can gradually add them to the wet mixture.
Combining Wet and Dry Mixtures
Now comes the fun part—combining the wet and dry ingredients. Gradually add the dry mixture to the wet mixture, stirring gently with a spatula or wooden spoon. Be careful not to overmix, as this can lead to tough cookies. Mix until just combined; it’s perfectly fine if there are a few small lumps remaining.
Once the dough is formed, fold in the chocolate chips, ensuring they are evenly distributed throughout the cookie dough. The chocolate chips will melt slightly during the cooking process, creating those delightful pockets of chocolate in each cookie.
With the dough prepared, you’re just steps away from baking these delicious Air Fryer Chocolate Peanut Butter Cookies. As you get ready to cook, consider preheating your air fryer to ensure even baking and a perfect texture.
Stay tuned for the next part of this article, where we’ll explore the baking process, tips for achieving the best results, and answers to some common questions about air frying cookies.
Merging Both Mixtures
Once you’ve prepared both the dry and wet mixtures for your Air Fryer Chocolate Peanut Butter Cookies, it’s time to combine them for a deliciously rich cookie dough. Begin by gradually adding the dry ingredients to the wet mixture. This method helps to prevent lumps and ensures that your cookies have a consistent texture throughout. Using a sturdy spatula or a wooden spoon, gently fold the dry ingredients into the wet mixture until just combined. Be cautious not to overmix, as this can lead to tougher cookies.
The dough consistency should be thick yet pliable, similar to traditional cookie dough. You’ll know it’s ready when you can form it into a ball without it crumbling apart. If your dough seems too dry, you can add a splash of milk or a bit more peanut butter to achieve the desired consistency. Conversely, if the mixture is too wet, you can sprinkle in a little more flour until it reaches the right texture.
Shaping the Cookies
Now that your dough is perfectly mixed, it’s time to shape your cookies. Start by using a cookie scoop or two tablespoons to portion out the dough. Roll each portion into a ball using your hands to create a smooth surface. This not only ensures uniform size but also helps the cookies cook evenly.
To flatten the cookies, place each ball on a piece of parchment paper or directly in the air fryer basket. Use the back of a fork or your fingers to gently press down each ball into a disc shape. Aim for about ½ inch thick to ensure even cooking. This step is crucial, as a thicker dough may not cook through properly, resulting in a gooey center.
Preheating the Air Fryer
Preheating your air fryer is an essential step for achieving optimal baking results. Just like you would preheat a traditional oven, preheating your air fryer helps to create a consistent cooking environment. For these cookies, set your air fryer to 320°F (160°C) and allow it to preheat for about 5 minutes. This ensures that the cookies begin to cook as soon as they go in, promoting a lovely golden-brown finish while keeping the insides soft and chewy.
Air Frying the Cookies
Once your air fryer is preheated, it’s time to air fry the cookies. Place the shaped cookies into the basket, ensuring there is enough space between each cookie to allow air to circulate. Depending on the size of your air fryer, you may need to cook the cookies in batches. Aim for about 3-4 cookies per batch, leaving at least an inch of space between them.
Cook the cookies for about 8-10 minutes. However, since air fryers can vary in temperature and efficiency, it’s essential to keep an eye on them. Look for signs that the cookies are done: the edges should be firm and slightly golden, while the center may look a bit soft and undercooked. Remember, cookies continue to cook after being removed from the heat due to residual heat, also known as carryover cooking.
Cooling the Cookies
Once the cookies are done, carefully remove them from the air fryer and place them on a wire rack to cool. This cooling method is vital for achieving the perfect texture. If you leave the cookies in the air fryer basket, they may become too soft as they continue to steam in their own heat. Cooling them on a wire rack allows air to flow around the cookies, resulting in a chewy center and crisp edges.
Understanding carryover cooking is also essential. While the cookies may look slightly underbaked when you first take them out, they will firm up as they cool. This balance ensures your cookies are soft and chewy without being doughy.
Nutritional Breakdown
Now that you have your delicious Air Fryer Chocolate Peanut Butter Cookies ready, it’s time to take a closer look at their nutritional content. Each cookie contains approximately 120 calories, 7 grams of fat, 10 grams of carbohydrates, and 2 grams of protein. These values can vary slightly based on the specific ingredients you use, such as the type of peanut butter or chocolate chips.
One of the health benefits of peanut butter is that it’s a good source of protein and healthy fats. When consumed in moderation, it can be part of a balanced diet. Additionally, using natural peanut butter without added sugars or hydrogenated oils can enhance the health profile of your cookies.
Serving Ideas
These Air Fryer Chocolate Peanut Butter Cookies are incredibly versatile when it comes to serving suggestions. Pair them with a glass of cold milk for a classic combination that never goes out of style. Alternatively, consider serving them alongside a hot cup of coffee or tea for a delightful afternoon treat.
For gatherings or special occasions, you can create an impressive dessert table by pairing these cookies with ice cream or whipped cream, serving them warm for an indulgent sundae. Consider adding a drizzle of chocolate or caramel sauce on top to elevate the presentation and flavor.
Proper Storage Techniques
To maintain the freshness of your cookies, proper storage techniques are essential. Allow the cookies to cool completely before placing them in an airtight container. This will help prevent moisture buildup, which can lead to soggy cookies. Keep them at room temperature for up to a week for optimal taste and texture.
If you want to store them for a more extended period, consider freezing your cookies. To do this, place the cooled cookies in a single layer on a baking sheet and freeze until firm. Once frozen, transfer them to a freezer-safe bag or container, separating layers with parchment paper to prevent sticking. Frozen cookies can last for up to three months, making them a convenient treat for later.
Shelf Life Expectations
The shelf life of your Air Fryer Chocolate Peanut Butter Cookies will depend on how you store them. At room temperature, they can last up to a week in an airtight container. If you keep them in the refrigerator, they may last an additional couple of days due to the cooler environment, but they might lose some of their freshness.
In the freezer, these cookies can last up to three months without losing their flavor or texture. When you’re ready to enjoy them, simply remove the desired number of cookies from the freezer and let them thaw at room temperature. For an extra treat, you can pop them in the air fryer for a minute or two to warm them up before serving.
Conclusion
Making Air Fryer Chocolate Peanut Butter Cookies is not only a delightful experience but also an opportunity to explore the convenience and efficiency of air frying. With their perfect balance of chewy and crispy textures, these cookies are sure to impress your family and friends. Don’t hesitate to experiment with variations, such as adding chopped nuts, different types of chocolate chips, or even a sprinkle of sea salt on top for an added flavor dimension.
These homemade cookies represent the joy of baking with a modern twist, showcasing how the air fryer can simplify the process without sacrificing taste. So gather your ingredients, follow the steps, and enjoy the satisfaction of creating delicious cookies right in your kitchen.
