Introduction
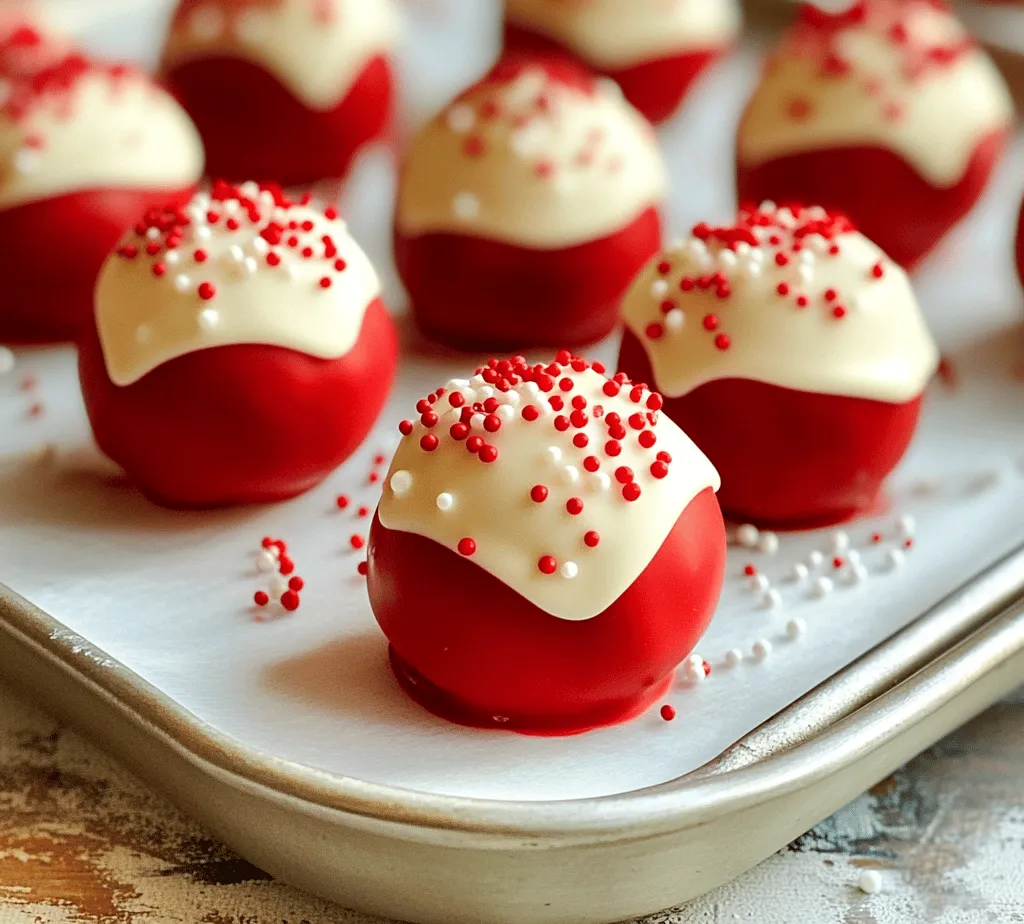
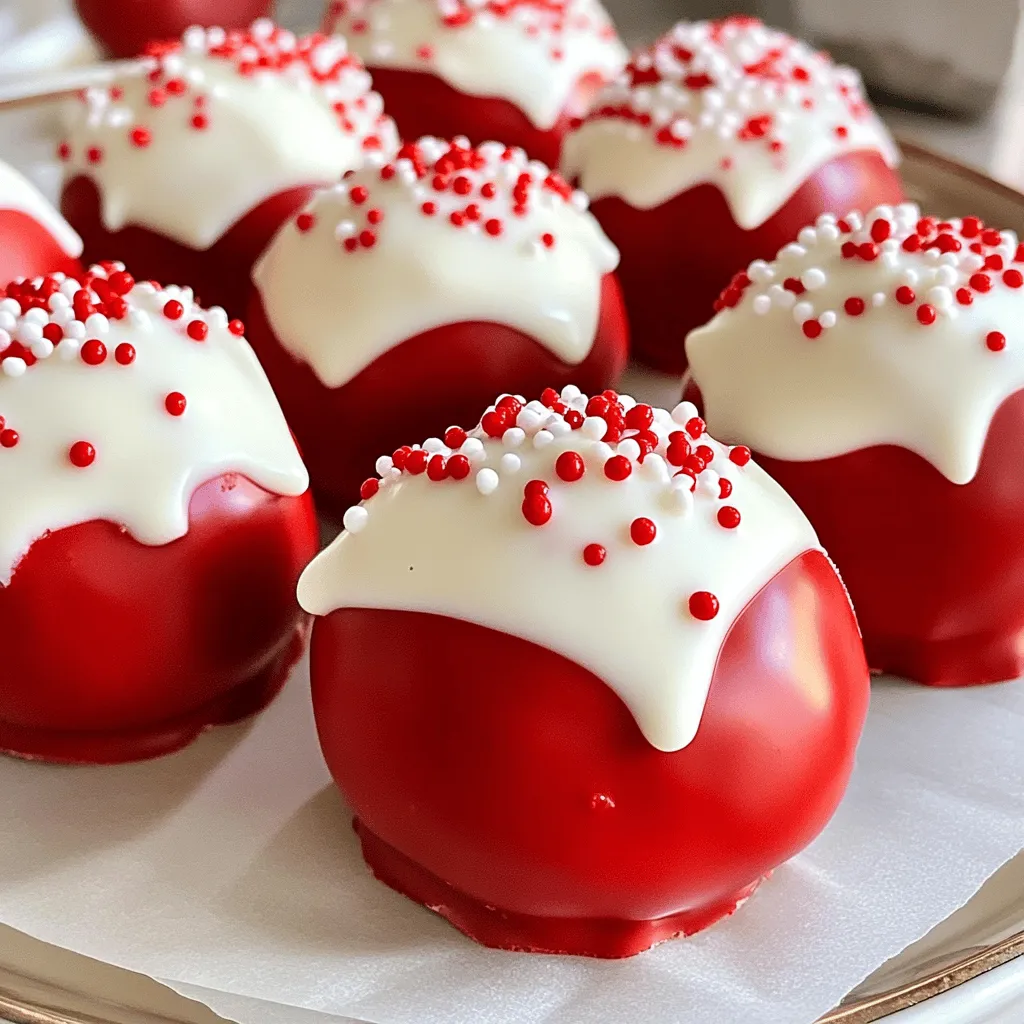
Red velvet desserts have taken the culinary world by storm, captivating taste buds with their unique flavor profile that perfectly balances sweetness with a subtle hint of cocoa. The rich crimson hue not only makes these desserts visually stunning but also adds to their allure. Among the many delightful variations of red velvet creations, red velvet cake balls stand out as a fun, bite-sized treat that’s perfect for any occasion. Whether you’re hosting a birthday party, a holiday gathering, or simply indulging in a sweet craving, these cake balls are sure to impress.
What makes red velvet cake balls truly special is their ease of preparation. With the help of a boxed red velvet cake mix and creamy frosting, you can whip up these delectable morsels in no time. This recipe is designed to make the process enjoyable and straightforward, allowing you to focus on savoring the delightful treats rather than getting bogged down in complex baking techniques.
The Allure of Red Velvet Cake
The origins of red velvet cake are as rich as its flavor. Believed to have originated in the early 20th century, this dessert has evolved from its humble beginnings to become a staple in American baking culture. Legend has it that the cake was created at the Waldorf-Astoria Hotel in New York City, where it gained fame for its striking color and luxurious texture. As the years passed, the recipe spread across the nation, leading to countless variations and interpretations, cementing its place in dessert history.
What truly sets red velvet cake apart is its complex flavor and texture. The cake is rich and moist, featuring a velvety crumb that melts in your mouth. This delightful texture is achieved through a combination of buttermilk, vegetable oil, and a touch of cocoa powder, which not only adds flavor but also contributes to the cake’s signature softness. Topping it off is the tangy cream cheese frosting, which perfectly complements the sweetness of the cake, creating a harmonious balance that leaves you wanting more.
Red velvet cake balls have become increasingly popular for various celebrations. They are a favorite at birthdays, where their vibrant color adds a festive touch, and during the holidays, when they can be beautifully decorated to match seasonal themes. Additionally, these cake balls make for an excellent dessert option for weddings, baby showers, or any gathering where you want to impress your guests with a delightful treat that is both elegant and easy to serve.
Ingredients Overview
Creating perfect red velvet cake balls starts with selecting the right ingredients. Here’s a detailed breakdown of each component:
– Red Velvet Cake Mix: The convenience of a boxed cake mix cannot be overstated, especially for those who may not have extensive baking experience. The cake mix provides the rich flavor and distinctive color necessary for red velvet cake, ensuring that you achieve consistent results every time.
– Cream Cheese Frosting: Frosting is the key to bringing your cake balls together. You can either opt for store-bought cream cheese frosting, which saves time, or make your own from scratch for a personalized touch. Homemade frosting often allows for greater control over the flavor and sweetness.
– White Chocolate or Candy Melts: These ingredients are used for coating the cake balls, providing a sweet, creamy exterior that complements the rich flavor within. The melting properties of white chocolate or candy melts make them ideal for dipping, giving your cake balls a smooth and appealing finish.
– Vegetable Oil: This ingredient plays a crucial role in ensuring that your cake balls remain moist and tender. It helps to bind the cake mixture, contributing to the overall texture of the final product.
– Sprinkles: While sprinkles are optional, they add a delightful aesthetic appeal to your cake balls, making them more festive and fun. You can customize the sprinkles to match the occasion, whether it be red and green for Christmas or pastels for a spring celebration.
– Optional Ingredient – Vanilla Extract: If you choose to make your own frosting, adding a splash of vanilla extract can enhance the overall flavor profile, providing a warm and inviting taste that complements the cream cheese.
Step-by-Step Instructions to Create Red Velvet Cake Balls
Preparing the Cake
To start your journey in creating these delicious red velvet cake balls, you’ll first need to prepare the cake. Begin by following the instructions provided on the boxed red velvet cake mix. Typically, this will involve mixing the cake mix with eggs, water, and vegetable oil. It’s crucial to adhere to the package instructions meticulously, as this will ensure the best possible results and a moist cake.
Once you have prepared the batter, pour it into a greased baking pan and bake according to the specified time. To achieve the perfect texture, it’s essential to check for doneness by inserting a toothpick into the center of the cake; it should come out clean or with a few crumbs attached. After baking, allow the cake to cool in the pan for a few minutes before transferring it to a wire rack to cool completely. Cooling the cake properly is vital, as this will help you achieve the ideal crumb texture needed for crumbling.
Crumbling the Cake
Once the cake has completely cooled, it’s time to crumble it into fine pieces. This step is critical, as achieving a fine crumb consistency will help your cake balls hold together. To crumble the cake, you can use your hands or a fork. Gently break the cake apart into small pieces, ensuring there are no large chunks left behind.
The moisture content in the crumbled cake is also essential for the success of your cake balls. If the cake is too dry, your cake balls may not hold together when rolled. Conversely, if there’s too much moisture, they may become too sticky. Aim for a texture that is moist enough to hold together but not overly wet.
Mixing in the Frosting
Now that you have your crumbled cake ready, it’s time to incorporate the cream cheese frosting. Begin by adding a small amount of frosting to the crumbled cake—start with about half a cup and mix it in gently. Use your hands or a spatula to combine the frosting with the cake crumbs. The goal is to achieve a mixture that is cohesive and easily moldable.
As you mix, keep an eye on the texture. If the mixture feels too dry and crumbly, you can add more frosting, a tablespoon at a time, until you reach the desired consistency. It’s essential not to overmix, as this could lead to a dense cake ball rather than a light and airy one.
Once you have reached the perfect texture, it’s time to start rolling your cake balls. The mixture should hold together well, allowing you to form small balls with your hands. Aim for about one-inch diameter balls, ensuring they are uniform in size for even coating and presentation.
—
In this first part of the article, we have explored the delightful world of red velvet cake balls, their enchanting history, and the essential ingredients that bring them to life. We also delved into the initial steps of preparing the cake, crumbling it, and mixing in the frosting to create a cohesive mixture. In the next section, we will cover the final steps for coating and decorating your red velvet cake balls, ensuring they are as visually appealing as they are delicious. Stay tuned for the continuation of this indulgent recipe!

Signs of a Well-Mixed Cake and Frosting Combination
When preparing your red velvet cake balls, it’s essential to ensure that the cake and frosting are mixed thoroughly. A well-mixed combination will have a consistent texture, where the cake crumbs and frosting are seamlessly integrated. Here are a few signs to look for:
1. Moisture Level: The mixture should be moist but not overly wet. If it feels too dry, add a small amount of frosting; if too wet, incorporate more cake crumbs.
2. Texture: You should be able to easily form the mixture into balls without it crumbling apart. It should hold together well, resembling a soft dough.
3. Uniform Color: A uniform deep red color throughout the mixture indicates that the frosting is evenly distributed.
Forming the Balls
Now that your cake and frosting combination is well-mixed, it’s time to form the cake balls. Here’s how to achieve perfectly shaped red velvet cake balls:
1. Scoop and Roll: Using a small cookie scoop or your hands, take about one tablespoon of the mixture and roll it into a smooth ball. It’s helpful to work with slightly damp hands to prevent sticking and ensure a smooth surface.
2. Size Consistency: Aim for uniformity in size to ensure even coating and consistent presentation. A small cookie scoop typically yields the perfect size.
3. Chilling: Once you’ve formed all the balls, place them on a baking sheet lined with parchment paper. Chill them in the refrigerator for at least 30 minutes. This step helps set the shape and makes them easier to coat later.
Techniques for Rolling the Perfect Cake Balls
Achieving the perfect cake ball requires a few techniques:
– Gentle Pressure: Roll the mixture gently yet firmly between your palms. Avoid pressing too hard, as this can cause the balls to become dense.
– Smooth Finish: Ensure that there are no cracks in the surface of the cake balls. If you notice any, simply roll them a bit more to smooth them out.
– Freezing Option: If you’re preparing ahead of time, you can freeze the formed cake balls instead of chilling them. Just ensure they are well-wrapped in plastic wrap or stored in an airtight container to prevent freezer burn.
Storage Tips for Uncoated Cake Balls Before Dipping
If you aren’t ready to dip your cake balls immediately, proper storage is crucial:
– Refrigeration: Uncoated cake balls can be stored in the refrigerator for up to 3 days before coating. Ensure they are in an airtight container to maintain their moisture.
– Freezing: If you plan to store them for a longer period, freeze them for up to 2 months. Lay them flat on a baking sheet until frozen solid, then transfer them to a freezer-safe container.
Melting the Chocolate
Melting chocolate may seem straightforward, but there are best practices to follow for a smooth coating:
1. Choose the Right Chocolate: For coating, high-quality white chocolate or candy melts work best. Avoid chocolate chips, as they contain stabilizers that can prevent them from melting smoothly.
2. Double Boiler Method: Use a double boiler or a heat-safe bowl set over simmering water. Stir the chocolate frequently to prevent it from seizing or burning.
3. Microwave Method: Alternatively, you can melt chocolate in the microwave. Heat in 30-second intervals, stirring between each interval until fully melted.
4. Avoid Seizing: Make sure no moisture gets into the chocolate while melting, as this can cause it to seize.
Importance of Adding Vegetable Oil for Smooth Coating
Adding vegetable oil to melted chocolate is an essential step to achieve a smooth consistency:
– Consistency: Incorporate about 1 teaspoon of vegetable oil per cup of chocolate. This helps the chocolate flow better and creates a glossy finish.
– Fluidity: The oil also helps the chocolate coat the cake balls more evenly, reducing the chance of clumping.
Coating the Cake Balls
Once your chocolate is melted and smooth, it’s time to coat your cake balls:
1. Dipping Technique: Use a fork or a dipping tool to lower the chilled cake ball into the melted chocolate. Ensure it’s fully submerged, then gently lift it out, allowing excess chocolate to drip off.
2. Avoid Clumping: To avoid clumping, work quickly and maintain the temperature of the chocolate. If it starts to thicken, reheat it gently.
3. Smooth Finish: Tap the fork gently against the side of the bowl to help remove excess chocolate and create a smooth coating.
Decorating
Decorating your cake balls is where you can get creative:
– Sprinkles and Toppings: While the chocolate coating is still wet, sprinkle with colored sprinkles, crushed nuts, or edible glitter to add a fun touch.
– Chocolate Drizzle: For an added flair, melt some contrasting chocolate (like dark or milk) and drizzle it over the coated cake balls using a fork or piping bag.
– Timing: It’s essential to decorate while the chocolate is still wet, as this helps the toppings adhere better.
Setting the Coating
Once coated, allow the chocolate to set properly:
1. Setting Time: Place the coated cake balls back on the parchment-lined baking sheet and let them sit at room temperature until the chocolate hardens. This usually takes about 30 minutes.
2. Refrigeration: If you want to speed up the process, place them in the refrigerator for a few minutes, but ensure they are not left too long, or the chocolate may develop condensation.
Storage Instructions for Finished Cake Balls
To keep your red velvet cake balls fresh and delicious:
– Refrigeration: Store finished cake balls in an airtight container in the refrigerator for up to one week. This helps maintain their moisture and flavor.
– Freezing: If you want to enjoy them later, freeze the cake balls in a single layer on a baking sheet, then transfer them to a freezer-safe container once solid. They can last up to 3 months in the freezer.
Serving Suggestions
Red velvet cake balls can be served in various delightful ways:
1. Presentation: Arrange them on a decorative platter for an eye-catching display. Consider using cupcake liners for individual servings.
2. Occasions: These cake balls are perfect for parties, holidays, or as a sweet treat for gatherings. They make delightful gifts or dessert table additions.
3. Beverage Pairings: Pair your cake balls with a warm cup of coffee, a comforting tea, or a cold glass of milk. The richness of the cake balls complements these beverages beautifully.
Storage Information
To maintain the freshness of your cake balls, consider these best practices:
– Refrigeration: They will stay fresh in the fridge for about a week. Ensure they are stored in an airtight container to prevent them from drying out.
– Freezing: For longer storage, freezing is an excellent option. When properly stored, they can remain good for up to 3 months. Just remember to thaw them in the refrigerator before serving.
Conclusion
Red velvet cake balls are a delightful dessert that brings joy to any occasion. The process of making them from scratch allows for creativity and personalization, making it an enjoyable activity for bakers of all skill levels. Whether you stick to the classic recipe or experiment with variations, these cake balls are sure to impress.
Baking is not just about the final product; it’s about the connections and community fostered by sharing delicious treats. So gather your friends and family, and enjoy the process of creating and indulging in these delightful red velvet cake balls.

