Introduction
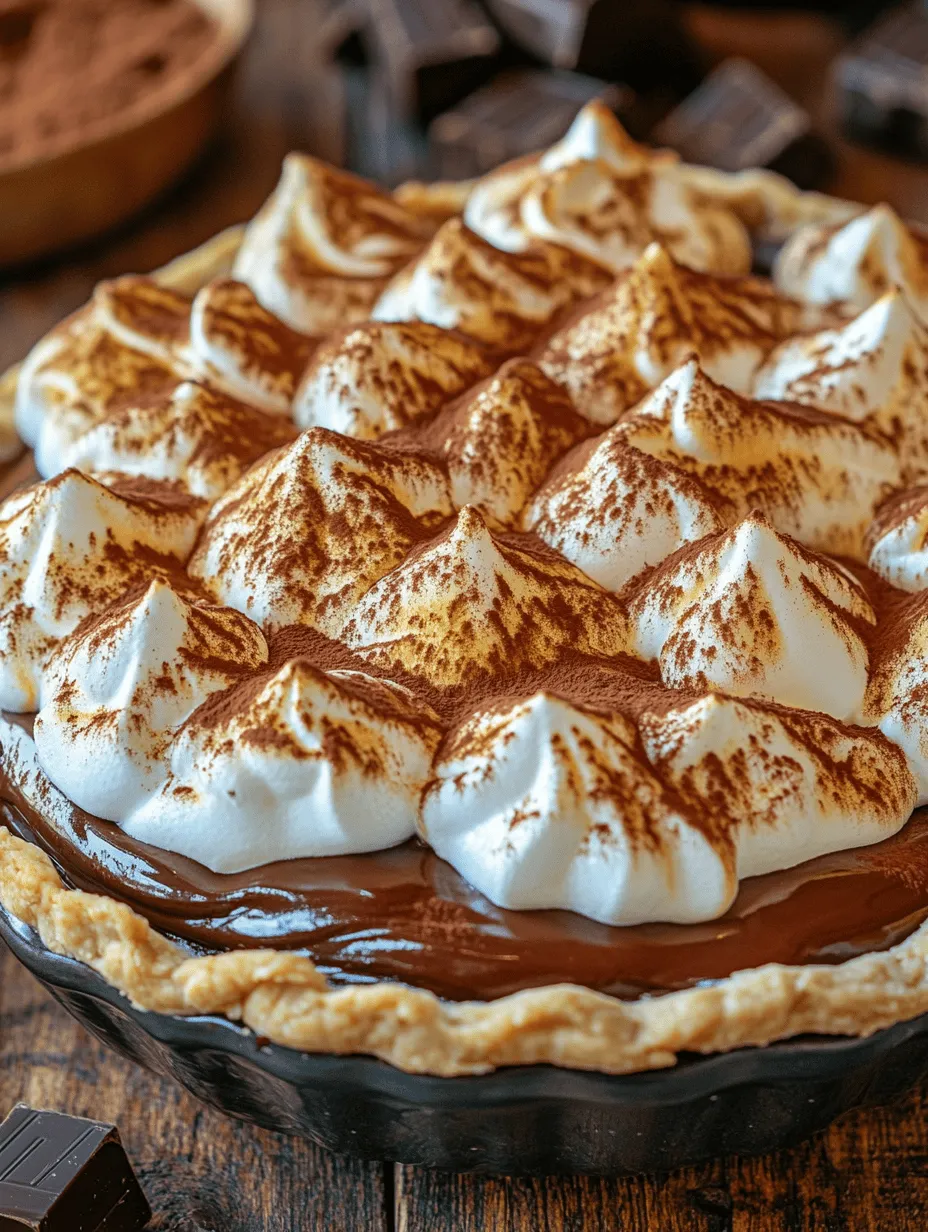
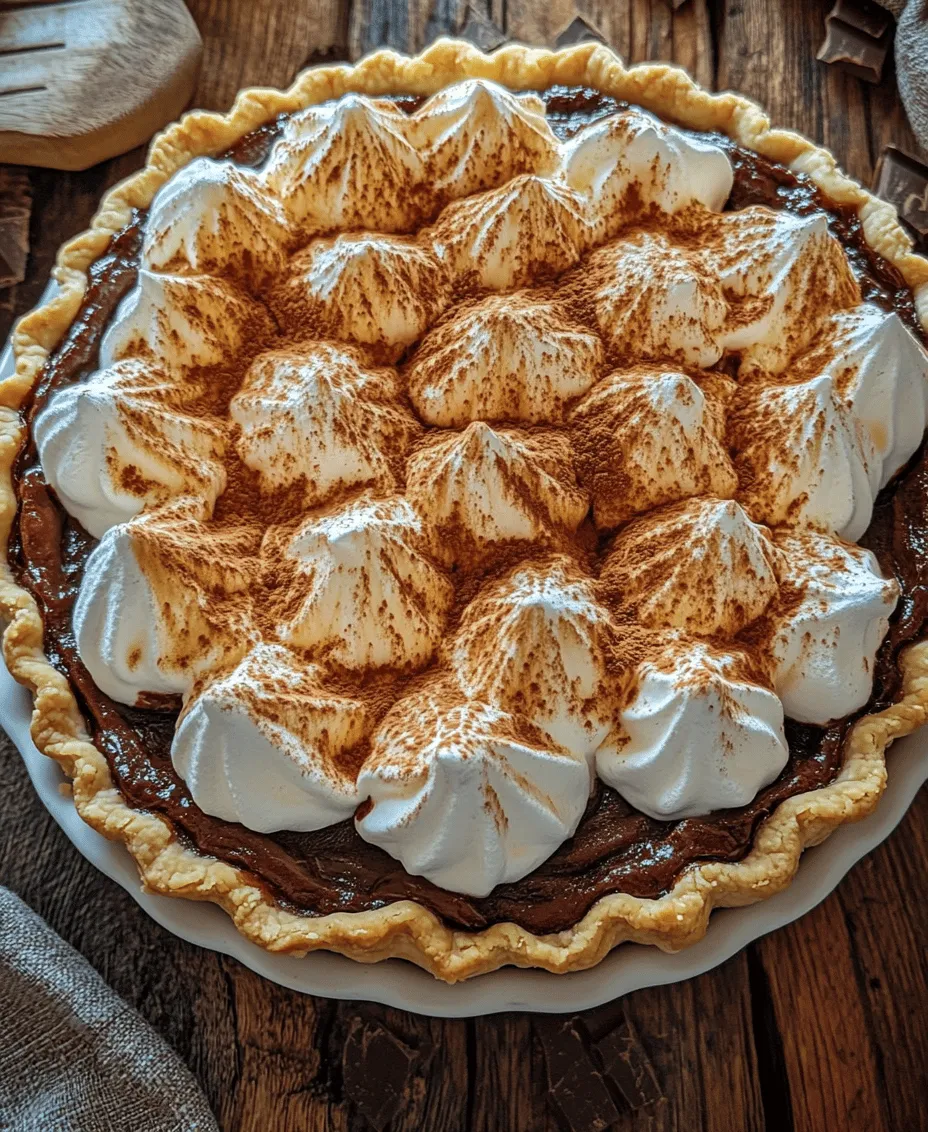
Indulge your sweet tooth with a slice of classic chocolate pie topped with golden meringue. This beloved dessert combines a rich, velvety chocolate filling with a light and airy meringue, creating a delightful contrast in flavors and textures. The chocolate filling is a luscious blend of deep cocoa notes and creamy smoothness, while the meringue crown adds a sweet, fluffy touch that elevates the dish to new heights.
Whether you’re celebrating a special occasion or simply treating yourself to a well-deserved dessert, this recipe provides a step-by-step guide to making a chocolate pie that will impress your family and friends. With its perfect balance of sweet and savory, this classic chocolate pie has stood the test of time, becoming a staple in many households.
As we take you through the making of this dessert, you’ll learn not only how to prepare it but also the secrets behind each component that makes this pie so irresistibly delicious. So, let’s dive into the components of this classic treat!
Understanding the Components of Chocolate Pie
To truly appreciate the magic of a classic chocolate pie, it’s essential to understand its individual components. Each layer plays a critical role in contributing to the overall flavor and texture of the pie, making it a harmonious delight with every bite.
The Chocolate Filling: A Decadent Base
The heart of any chocolate pie is undoubtedly the chocolate filling. This decadent base is what gives the pie its rich flavor and creamy texture.
Ingredient Breakdown: Essential Components of the Filling
1. Sugar: The primary sweetener that balances the bitterness of cocoa.
2. Cocoa Powder: The star ingredient that provides the chocolate flavor.
3. Cornstarch: A thickening agent that helps create a smooth, custard-like consistency.
4. Milk: The base liquid that binds all ingredients together, contributing to the creaminess.
5. Egg Yolks: These add richness and help to stabilize the filling.
The Role of Each Ingredient
– Sugar not only sweetens the filling but also enhances the overall flavor profile. It helps to cut through the richness of the chocolate, creating a balanced taste that’s essential for a satisfying dessert.
– Cocoa Powder is crucial for delivering that deep chocolate flavor. The quality of cocoa powder can make a significant difference, so opting for a high-quality, unsweetened cocoa will yield the best results.
– Cornstarch is important for achieving the right texture. It thickens the filling as it cooks, providing that luxurious mouthfeel that chocolate lovers crave.
– Milk serves as the foundation of the filling. Whole milk is recommended for its creaminess, but you can use alternatives like almond or soy milk for a dairy-free version.
– Egg Yolks contribute to the filling’s richness and help to bind the ingredients together as they cook, ensuring a smooth consistency.
Techniques for Achieving the Perfect Chocolate Filling
To create the perfect chocolate filling, several techniques come into play:
1. Whisking: Whisking the ingredients together thoroughly is essential for preventing lumps and ensuring a smooth filling. Use a whisk to blend the dry ingredients before adding the liquid.
2. Tempering: When incorporating the egg yolks, it’s important to temper them by gradually adding hot chocolate mixture to the yolks. This prevents the eggs from scrambling and ensures a silky filling.
3. Thickening: Cook the filling over medium heat, stirring constantly until it thickens. This step is crucial for achieving the desired custard-like consistency.
The Pie Crust: Flaky and Buttery
A great pie is only as good as its crust. The pie crust is the foundation for the pie, and achieving the perfect flaky and buttery crust is essential for a well-balanced dessert.
Importance of a Good Pie Crust
The pie crust not only holds the filling but also provides a contrasting texture that complements the creamy chocolate. A flaky, buttery crust adds a layer of richness, enhancing the overall experience of eating the pie.
Ingredients Overview
A classic pie crust is made from a few simple ingredients:
1. Flour: The base ingredient that gives structure to the crust.
2. Salt: Enhances the flavor and balances the sweetness of the filling.
3. Butter: Provides flavor and tenderness to the crust.
4. Ice Water: Helps bind the dough without melting the butter prematurely.
Step-by-Step Guide to Making the Pie Crust
1. Mixing: In a large mixing bowl, combine the flour and salt. Cut in the cold butter using a pastry cutter or your fingers until the mixture resembles coarse crumbs.
2. Rolling: Gradually add ice water, one tablespoon at a time, mixing until the dough comes together. Avoid overworking the dough to keep it flaky. Roll the dough out on a floured surface to fit your pie pan.
3. Baking Techniques: Place the rolled-out dough into the pie pan and trim the edges. Prick the bottom with a fork to prevent bubbling and allow steam to escape. Pre-bake the crust until lightly golden for optimal results.
Tips for Preventing a Soggy Bottom
A common issue with pie crust is a soggy bottom. To combat this, follow these tips:
– Pricking the Crust: This allows steam to escape, preventing the crust from becoming soggy.
– Pre-baking: Baking the crust before adding the filling helps to set it, keeping it crisp and flaky.
– Using a Baking Stone: If you have one, placing your pie on a preheated baking stone can help maintain an even temperature and prevent sogginess.
Meringue: The Sweet Cloud Topping
The crowning glory of a classic chocolate pie is the meringue. This sweet cloud-like topping elevates the dessert, providing a beautiful contrast to the rich chocolate filling.
What is Meringue?
Meringue is a mixture of whipped egg whites and sugar, often used as a topping for pies and pastries. It can be baked to create a crisp exterior while remaining soft and chewy inside.
Ingredients Explained
1. Egg Whites: The main component that provides structure and volume when whipped.
2. Cream of Tartar: A stabilizer that helps the egg whites maintain their shape and achieve maximum volume.
3. Sugar: Sweetens the meringue and contributes to its stability when whipped.
4. Vanilla Extract: Adds flavor, enhancing the overall taste of the meringue.
The process of making meringue is both an art and a science, requiring careful attention to detail to achieve the perfect texture. The whipped egg whites should be glossy and form stiff peaks for the best results.
With a rich chocolate filling, a flaky crust, and a sweet meringue topping, this classic chocolate pie promises to be a showstopper at any gathering. Each component harmonizes beautifully, creating a dessert that is not only visually appealing but also deeply satisfying to eat. In the next part, we will delve into the detailed instructions for preparing this timeless dessert and share tips for achieving the best results. Stay tuned as we guide you through this culinary adventure!
Achieving the Perfect Meringue: Soft Peaks vs. Stiff Peaks
When it comes to creating a perfect meringue for your classic chocolate pie, understanding the difference between soft peaks and stiff peaks is crucial. Soft peaks are formed when the egg whites are beaten until they hold a peak that gently bends over when the whisk is lifted. This consistency is ideal for folding into batters or when a lighter texture is desired. On the other hand, stiff peaks are achieved when the egg whites are beaten until they stand straight up without bending, creating a firmer texture. For your chocolate pie, you want to aim for stiff peaks to ensure that the meringue holds its shape on top of the filling.
Techniques to Prevent Weeping: Sealing the Edges and Baking Tips
One common issue encountered with meringue is weeping, which occurs when moisture collects beneath the meringue layer, creating a soggy appearance. To prevent this, it’s essential to seal the edges of the meringue to the crust. This creates a barrier that minimizes moisture transfer. Use a spatula to spread the meringue all the way to the crust’s edges, ensuring there are no gaps.
Additionally, here are some baking tips to further enhance your meringue’s stability:
– Bake at the Right Temperature: Start with a preheated oven at 350°F (175°C) and then reduce the temperature after the meringue is set. This approach helps to dry the meringue without over-baking it.
– Avoid Humidity: Meringue can be sensitive to moisture in the air. If possible, choose a dry day to make your pie, or consider using a dehydrator if humidity is unavoidable.
– Add Cornstarch: Incorporating a tablespoon of cornstarch into your meringue can help stabilize it, making it less prone to weeping.
Assembling Your Chocolate Pie
Layering the Components: Pouring the Filling and Spreading the Meringue
Now that you have prepared your chocolate filling and meringue, it’s time to assemble your pie. Begin by pouring the luscious chocolate filling into the pre-baked pie crust, spreading it evenly with a spatula. The filling should be warm but manageable; this allows the meringue to adhere better and prevents it from sliding off.
Next, take your meringue and dollop it on top of the chocolate filling. Using a spatula or a spoon, carefully spread the meringue over the filling, making sure to touch the edges of the crust. This step is crucial as it seals the pie and prevents the meringue from shrinking during baking.
Importance of Sealing the Edges: Avoiding Shrinkage During Baking
As mentioned earlier, sealing the edges of the meringue is vital. Not only does it prevent weeping, but it also helps maintain the volume of the meringue while it bakes. If the edges are not sealed properly, the meringue can pull away from the filling as it bakes, leading to an unsightly appearance. Ensure that the meringue is spread all the way to the crust, creating a tight seal.
Baking to Perfection: Monitoring the Meringue for the Perfect Golden Color
Once your pie is assembled, place it in the preheated oven. Bake it for about 10-15 minutes, or until the meringue turns a beautiful golden brown. Keep a close eye on it to avoid over-baking, as meringue can go from perfectly golden to burnt very quickly. If your oven has hot spots, you might want to rotate the pie halfway through the baking time to ensure even cooking.
Cooling and Serving Your Chocolate Pie
Cooling Time: Why It’s Essential for Setting the Filling
After baking, it’s essential to allow your chocolate pie to cool completely at room temperature. This step is crucial because it allows the chocolate filling to set properly. If you slice into the pie while it’s still warm, the filling may ooze out, ruining the presentation. Ideally, let it cool for at least two hours before slicing.
Slicing Techniques: Getting Perfect Pieces Without Ruining the Aesthetics
To achieve clean slices of your chocolate pie, use a sharp knife dipped in hot water to cut through the meringue and filling. Wipe the knife between slices to ensure that the meringue remains pristine and the chocolate filling doesn’t smear. This technique will help maintain the aesthetics of your pie, making each piece look just as inviting as the last.
Presentation Ideas: Serving Suggestions for Elegance
Presentation is key when serving your classic chocolate pie. Here are some elegant serving suggestions:
– Garnish: Sprinkle some cocoa powder or grated chocolate over the top of the meringue for an extra touch of sophistication.
– Whipped Cream: Serve with a dollop of freshly whipped cream on the side or on top for added richness.
– Fresh Berries: Add a small handful of fresh raspberries or strawberries around the pie for a pop of color and a touch of acidity that complements the rich chocolate flavor.
Nutritional Information
Overview of Nutritional Content: Calories, Fats, and Sugar Per Serving
Understanding the nutritional content of your classic chocolate pie can help you enjoy it even more. A typical slice of chocolate pie (1/8 of the pie) contains approximately:
– Calories: 320
– Total Fat: 20g
– Saturated Fat: 8g
– Cholesterol: 60mg
– Sodium: 150mg
– Total Carbohydrates: 35g
– Dietary Fiber: 2g
– Sugars: 18g
– Protein: 4g
Considerations for Dietary Restrictions: Suggestions for Alternatives
For those with dietary restrictions, you can make a few adjustments to the recipe:
– Gluten-Free: Use a gluten-free pie crust or make a crust using almond flour or crushed gluten-free cookies.
– Dairy-Free: Substitute regular milk with almond milk or coconut milk in the chocolate filling.
– Lower Sugar: Use sugar substitutes like erythritol or stevia in moderation to reduce the overall sugar content.
The History of Chocolate Pie
Origin of the Recipe: A Brief Look at How Chocolate Pie Became a Classic
The origins of chocolate pie can be traced back to the 19th century, with various interpretations emerging across different cultures. The classic combination of chocolate and meringue became popular in American households, often featured in church potlucks and family gatherings. Its rich, comforting flavors evoke nostalgia, making it a cherished dessert across generations.
Variations Across Cultures: Different Takes on Chocolate Pie Around the World
Chocolate pie has several variations worldwide. In France, the tart au chocolat features a rich chocolate ganache in a flaky crust, while in Brazil, the torta de chocolate combines a chocolate filling with a creamy topping. Each culture adds its unique twist, yet the essence of chocolate pie remains a beloved dessert that transcends borders.
Conclusion
Classic chocolate pie with golden meringue is more than just a dessert; it’s a nostalgic treat that brings joy to every occasion. With its rich chocolate filling and fluffy meringue topping, this pie is sure to become a staple in your baking repertoire. Embrace the art of pie-making and savor the delightful flavors that come together in this timeless recipe. Whether you’re serving it at a family gathering or enjoying a quiet evening at home, this delightful dessert is bound to impress and satisfy any chocolate lover’s cravings.


